How to Make a Boston Fern Grow Fuller?
Boston ferns are beautiful houseplants, but they can look a little sparse if they don’t get the right care. The good news is that with some simple adjustments to light, water, and humidity, you can help your fern grow thick and lush.
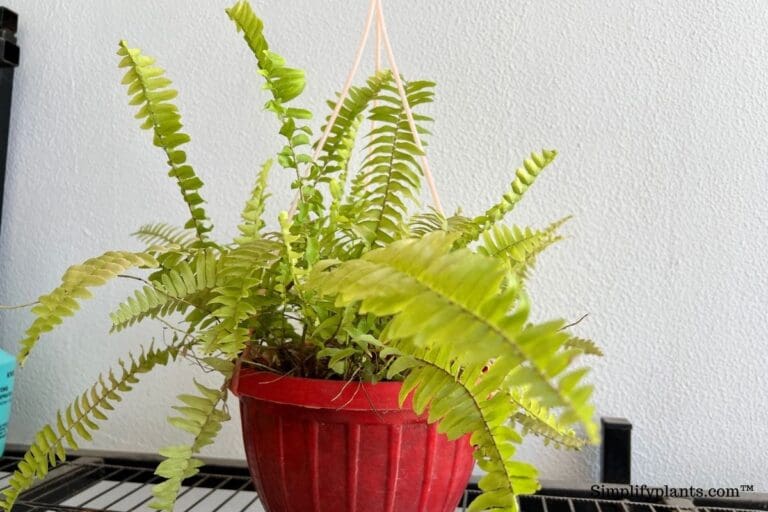
To make a Boston fern grow fuller, you need to focus on providing bright indirect light, keeping humidity levels high, watering consistently, and trimming the plant to encourage new growth.
I’ve learned that Boston ferns respond really well when you give them the right environment and a little regular attention. This article walks through the key steps that make the biggest difference in how full and healthy your fern looks.
From choosing the right spot in your home to knowing when to fertilize, these tips will help you turn a thin, sad-looking fern into one that’s overflowing with fronds.

Please note: Simplify Plants is reader-supported. As an Amazon Associate, I earn from qualifying purchases made by our readers with no extra cost added to you all! Some links in the post are affiliate links and I get a commission from purchases made through links in the post.
1) Provide bright, indirect light near an east-facing window
I always put my Boston ferns near an east-facing window because they get gentle morning sun without the harsh afternoon rays.
This spot gives them enough light to grow thick and full without burning their delicate fronds.
Direct sunlight will scorch the leaves and turn them brown.
If you only have a south or west window, I recommend placing the fern a few feet back from the glass or using a sheer curtain to filter the light.
Quick Tip: If the fronds start looking pale or yellowish, your fern needs more light.
North-facing windows work too, but growth might be slower. I’ve noticed my ferns stay compact in those spots rather than getting bushy.
Watch for leggy growth or sparse fronds. That’s your plant telling you it’s not getting enough brightness. Move it closer to the window if this happens, but keep it out of direct sun.
2) Maintain consistent humidity around 50–70%
Boston ferns come from humid forests, so dry air makes their fronds turn brown and crispy. I always aim to keep the air around mine between 50–70% humidity.
If you live somewhere dry or run the heat in winter, you’ll need to add moisture to the air.

I like to mist my fern a few times a week with room-temperature water. You can also set the pot on a tray filled with pebbles and water—just make sure the bottom of the pot sits above the waterline.
The evaporating water adds humidity right where the plant needs it.
Quick Tip: Group your fern with other plants to create a mini humid zone, or run a small humidifier nearby during dry months.
If the leaf tips start browning even though you’re watering properly, low humidity is usually the culprit. I check by feeling the fronds—they should feel soft and slightly cool, not papery.
In desert climates or during winter heating season, you might need to mist daily or invest in that humidifier.
3) Water when top 1 inch of soil is dry, using room-temperature water
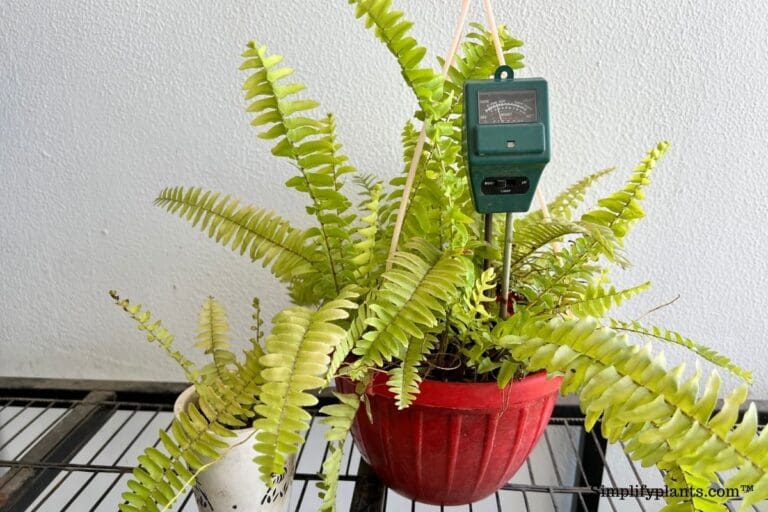
I check the soil before watering by sticking my finger about an inch down into the pot. If it feels dry at that depth, it’s time to water. If it still feels damp, I wait another day or two.
Boston ferns like consistent moisture but hate sitting in soggy soil. When the top inch dries out, I water thoroughly until water drains from the bottom of the pot. This encourages healthy root growth throughout the container.
Cold water can shock the roots, so I use room-temperature water instead. I fill my watering can and let it sit for about 30 minutes before watering. This also lets chlorine evaporate if you have treated tap water.

Quick Tip: In summer or dry indoor air, you might need to water every 2-3 days. In winter, once a week is often enough.
The fronds will turn brown and crispy if the soil gets too dry. On the flip side, yellowing fronds often mean you’re watering too much. Finding that sweet spot takes a little practice, but the finger test makes it pretty simple.
4) Use a well-draining, peat-based potting mix with perlite
I always make sure my Boston ferns sit in a mix that drains water quickly but still holds some moisture.
Peat-based potting soil works great because it keeps the roots from sitting in soggy conditions that lead to rot.
I add perlite to the mix because those little white bits create air pockets in the soil.
This helps water flow through and gives the roots room to breathe. Without it, the soil can get too dense and compact over time.
Quick Tip: Mix about one part perlite to three parts peat-based potting soil for the best results.
When I repot my ferns, I check that water drains out of the bottom holes within a few seconds.
If it pools on top or drains too slowly, I know the mix is too heavy. The goal is soil that feels slightly damp an hour after watering, not wet or bone-dry.
5) Repot every 12–18 months into a slightly larger pot
Boston ferns grow fast and their roots fill up their pots pretty quick. When roots start poking out of drainage holes or circling around the inside, it’s time to move up.
I repot mine every year or so in spring when growth picks up. Pick a pot that’s only 1-2 inches bigger than the old one. Going too big can lead to soggy soil that sits wet too long.
Quick Tip: Gently loosen the root ball with your fingers before placing it in the new pot—this helps roots spread into fresh soil.
Use a light potting mix that drains well. Regular potting soil works fine if you mix in some perlite or peat moss.
Water it thoroughly after repotting and keep it out of direct sun for a few days while it settles in.
If your fern stops putting out new fronds or the soil dries out faster than usual, those are signs it might be root-bound.
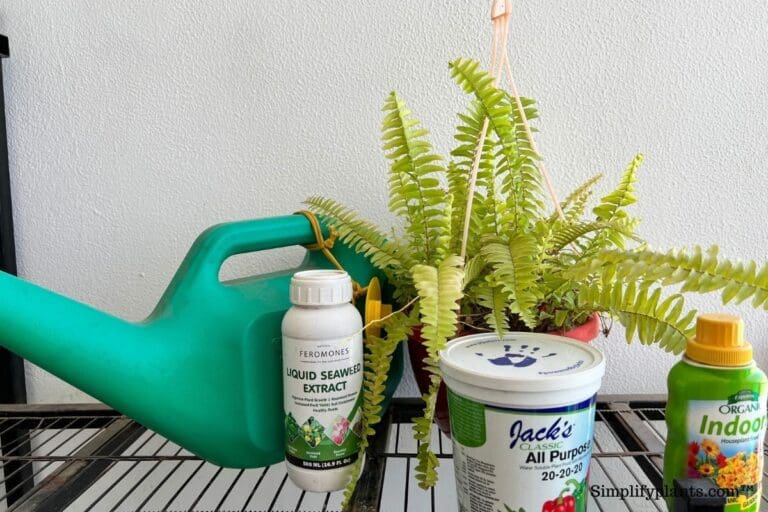
6) Fertilize with a balanced liquid fertilizer (e.g., 20-20-20) every 4–6 weeks in spring/summer
I feed my Boston fern with a balanced liquid fertilizer during the growing season to keep it full and lush. A 20-20-20 formula works great because it gives equal amounts of nitrogen, phosphorus, and potassium.
I mix the fertilizer at half strength and apply it every four to six weeks from spring through summer. This is when my fern grows the most and needs extra nutrients.

Quick Tip: Always water your fern before fertilizing to protect the roots from burning.
I skip fertilizing in fall and winter when growth slows down. My fern doesn’t need as much food during those months, and too much fertilizer can build up in the soil and damage the roots.
If I notice brown tips or yellowing fronds even with fertilizer, I cut back to once every six weeks. Sometimes less is more with these plants.
7) Trim dead fronds and pinch new growth tips to encourage fullness
I always grab my clean scissors when I spot brown or yellow fronds on my Boston fern. Dead growth just steals energy from the healthy parts, so I cut them off at the base where they meet the soil.
It feels weird at first, but pinching back new growth actually makes the plant bushier. When I see fresh green tips forming, I gently pinch off the very end with my fingers. This tells the fern to branch out instead of growing tall and leggy.
Quick Tip: I do light trimming every few weeks during spring and summer when my fern is actively growing.
The pinching part works best on those soft, light green tips before they fully unfurl. Once a frond hardens off, it won’t branch the same way. I avoid heavy pruning in winter since growth slows down and the plant needs time to rest.
8) Mist fronds daily or use a pebble tray to boost humidity
Boston ferns come from humid forests, so dry air makes their fronds turn brown and crispy. I like to mist mine every morning with room-temperature water. It takes about 30 seconds and keeps the leaves looking fresh.
If you don’t want to mist every day, a pebble tray works great. Fill a shallow tray with pebbles and add water until it reaches just below the top of the stones. Set your fern on top so the pot sits above the water line, not in it.
As the water evaporates, it creates a humid pocket around the plant. I refill my tray once or twice a week depending on how warm my house is.
Quick Tip: Don’t mist late in the day since wet fronds overnight can invite fungal problems.
In winter, when indoor heating dries out the air, your fern will appreciate both misting and a pebble tray. You can also group plants together to create a more humid microclimate. Just watch for any fronds that stay wet too long or feel soggy.
9) Place in a location with stable temperatures between 65–75°F (18–24°C)
I always keep my Boston fern in a spot where the temperature stays steady. These plants hate sudden changes in heat or cold.
The ideal range is 65–75°F during the day. At night, a slight drop is fine, but I avoid placing mine near heating vents, air conditioners, or drafty windows. Cold blasts or hot air can stress the fern and cause it to drop leaves.

Quick Tip: If you notice brown fronds appearing suddenly, check if the temperature around your fern has been jumping around.
In winter, I move mine away from cold windowsills. In summer, I keep it out of direct afternoon sun that might overheat the room. A stable environment helps the plant focus on growing thick, healthy fronds instead of trying to survive temperature swings.
10) Treat pests promptly: use insecticidal soap for scale and mealybugs
I check my Boston fern regularly because pests love to hide in those dense fronds. Scale insects look like tiny brown bumps stuck to the stems, while mealybugs appear as white cottony clusters.
When I spot either pest, I grab insecticidal soap right away. The soap works by breaking down the protective coating on soft-bodied insects. I spray all the fronds thoroughly, making sure to hit the undersides where pests hide.
I repeat the treatment every 5-7 days for about three weeks. One application never gets all the eggs, so multiple treatments are necessary.
Quick Tip: Isolate your fern from other plants as soon as you notice pests to prevent spreading.
If I catch the problem early, my fern bounces back quickly and keeps growing full and lush. Left untreated, these pests drain nutrients and leave sticky residue that attracts mold.
Understanding Fern Growth Patterns
Boston ferns grow from a central crown and spread outward through underground stems called rhizomes, while their appearance shifts based on light, humidity, and temperature conditions.
How Ferns Naturally Expand Through Rhizomes and Frond Development
Boston ferns don’t grow like regular houseplants. They produce new fronds from a central crown at the base of the plant. These fronds unfurl from tight coils called fiddleheads.
Underground, the fern sends out rhizomes. These are horizontal stems that creep through the soil and create new growth points. Each rhizome can sprout its own set of fronds, which is how the plant gets wider over time.
The crown stays at soil level and acts like the plant’s control center. New growth always starts here or from the rhizomes connected to it. If I want a fuller fern, I need healthy rhizomes spreading through the pot.
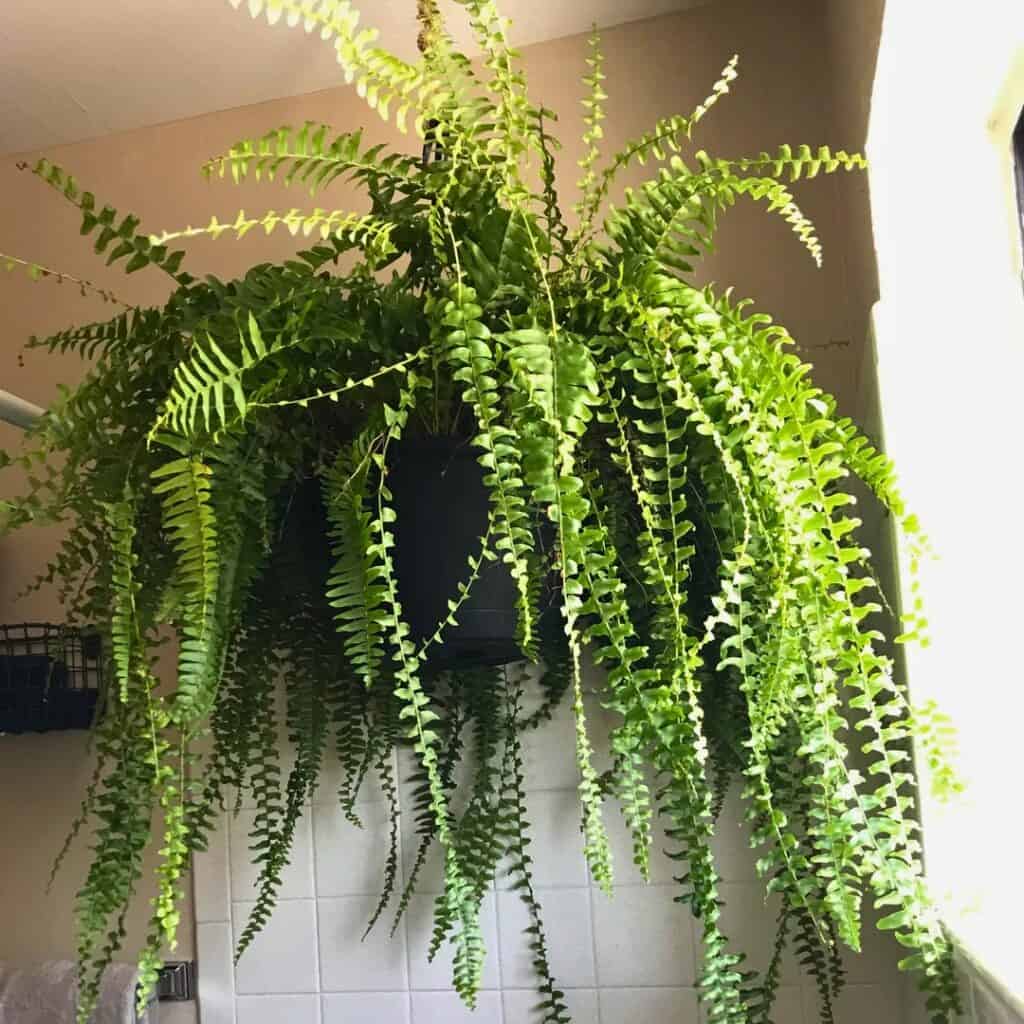
Fronds grow in a circular pattern around the crown. Older fronds sit on the outside while new ones push up from the middle. This is why Boston ferns naturally form that classic fountain shape.
Quick Tip: Check the center of your fern regularly—if you see tight curls forming, that means new fronds are on their way.
Environmental Factors That Influence Appearance and Growth Density
Light directly affects how many fronds my Boston fern produces. Bright, indirect light gives me the most growth. Too much direct sun burns the fronds and slows everything down.
Humidity makes a huge difference in frond health. Boston ferns come from tropical areas where moisture sits in the air. When humidity drops below 50%, the fronds turn brown at the tips and stop growing as full.
Temperature swings stress the plant. I keep mine between 60-75°F for best results. Anything below 55°F or above 80°F causes the fern to slow down or drop fronds.
Watering consistency matters too. The soil should stay lightly moist but never soggy. When I let it dry out completely, the plant drops older fronds to conserve energy. If the top inch feels dry, it’s time to water.
Quick Tip: In winter, growth naturally slows—don’t panic if your fern takes a break when daylight hours drop.
Common Mistakes Impacting Fern Fullness
Most Boston ferns struggle because of watering problems or poor light placement. These two issues stop fronds from growing thick and full.

Overwatering or Underwatering: Finding the Balance Your Fern Actually Needs
I’ve killed more Boston ferns with my watering can than I care to admit. Too much water and the roots rot. Too little and the fronds turn brown and crispy.
Boston ferns need consistent moisture without sitting in water. I check the top inch of soil with my finger every few days. If it feels dry, I water until it drains from the bottom. If it’s still damp, I wait.
Quick Tip: Stick your finger knuckle-deep into the soil—if it feels like a wrung-out sponge, you’re in the sweet spot.
Yellow fronds usually mean overwatering. The pot feels heavy and the soil smells musty. Brown, crunchy tips mean underwatering. The fronds feel papery and brittle when you touch them.
I use pots with drainage holes. Always. Standing water kills roots fast, and dead roots can’t support full growth.
In summer, my fern needs water almost daily. In winter, maybe twice a week. The plant tells me what it needs if I pay attention.
Incorrect Lighting Choices: Why Your Fern Sits in the Wrong Spot
Boston ferns hate direct sun. I learned this when mine got bleached white patches after sitting in a south-facing window for a week.
These plants grow under tree canopies in nature. They need bright, indirect light. I keep mine about six feet from an east-facing window or right next to a north-facing one.
Quick Tip: If the fronds look pale or washed out, move your fern away from the window.
Too little light creates sparse, leggy growth. The fronds stretch toward the light source and grow thin. I’ve seen ferns in dark corners produce maybe three sad fronds all year.
Bathrooms with frosted windows work great. So do spots near bright rooms but not in the direct beam. If you only have sunny windows, I hang a sheer curtain to filter the light.
Frequently Asked Questions
Boston ferns need bright indirect light, steady moisture, and regular pruning to fill out properly. The right pot size, soil mix, and fertilizer timing all play a role in producing more fronds.
What light conditions help a Boston fern become bushier indoors?
I place my Boston fern near an east-facing window where it gets bright, indirect light in the morning. Direct sun burns the fronds and makes them look sparse and crispy. North-facing windows work too, but growth slows down a bit.
If your fern sits too far from a window, it stretches toward the light and grows leggy instead of full. You’ll notice fewer fronds and a thinner shape overall.
Quick Tip: Rotate your fern every week so all sides get equal light and grow evenly.
How often should I water and mist a Boston fern to encourage fuller growth?
I water my fern when the top inch of soil feels dry to the touch. I use room-temperature water because cold water shocks the roots and slows growth. The soil should stay slightly damp but never soggy.
Misting helps keep humidity between 50 and 70 percent, which is what Boston ferns need to produce healthy fronds. I mist mine every morning or set it on a pebble tray filled with water. Dry air makes fronds turn brown at the tips and fall off.
Quick Tip: If your home is dry in winter, run a humidifier near your fern to prevent crispy edges.
What type of soil and pot size best support a thicker, healthier Boston fern?
I use a peat-based potting mix with perlite mixed in for drainage. This combo holds moisture without turning into mud. Heavy soil suffocates the roots and leads to yellowing fronds.
Start with a pot that’s one size larger than the root ball. Too much extra space traps water and causes root rot. I repot every 12 to 18 months into a slightly larger pot as the roots fill up the current one.
Make sure the pot has drainage holes at the bottom. Water needs somewhere to go, or the roots sit in standing water and rot.
Quick Tip: A pot that’s 1 to 2 inches wider than the root ball is perfect for healthy growth.
When and how should I prune a Boston fern to make it look more full?
I prune my fern in early spring before the growing season kicks in. I snip off any brown, damaged, or leggy fronds at the base using clean scissors. This tells the plant to push out fresh growth instead of wasting energy on dead leaves.
Pruning also thins out crowded areas so air and light reach the center of the plant. Better airflow means fewer disease problems and more room for new fronds to unfurl.
Don’t be shy about cutting back up to one-third of the plant if it looks scraggly. Mine always bounces back fuller than before.
Quick Tip: Wipe your scissors with rubbing alcohol before cutting to avoid spreading disease.
Can I propagate a Boston fern to create a fuller plant, and what method works best?
I propagate my Boston fern by division, which is the easiest method. I take the fern out of its pot and gently pull the root ball apart into two or three sections. Each section needs roots and fronds attached.
I plant each division in its own pot with fresh peat-based soil and water it well. After a few weeks, each section starts growing new fronds. You can also plant the divisions back into the original pot for a thicker look.
Division works best in spring when the fern is actively growing. Doing it in fall or winter stresses the plant out.
Quick Tip: Keep newly divided ferns in bright indirect light and mist them daily until they settle in.
What fertilizer schedule helps a Boston fern produce more fronds without stressing it?
I fertilize my fern every two weeks during spring and summer with a balanced liquid fertilizer diluted to half strength. Full-strength fertilizer burns the roots and causes brown tips. In fall and winter, I cut back to once a month because growth slows down.
Feeding regularly gives the fern the nutrients it needs to push out more fronds. I stick to a balanced formula like 10-10-10 or 20-20-20. Skipping fertilizer for months leads to pale, weak fronds that don’t fill out the plant.
Always water the soil before you add fertilizer. Feeding a dry plant damages the roots.
Quick Tip: If frond tips turn brown even with regular watering, you might be over-fertilizing.
Note: Some images in the articles are sourced from Reddit and Other Platforms For Reference Purpose.