How To Care For Boston Fern (Ultimate Care Guide)
Boston Ferns are famous traditional houseplants who need proper care to live long. Learning to care for Boston Ferns is easy, yet it should be specific. Today, we will discuss the care Boston ferns need to remain healthy.
Boston ferns should be kept at a spot with bright, indirect sunlight, a warm temperature around 60-75°F, and humidity above 50%. Water the Boston ferns every 2-3 days, plant them in well-drained loamy soil with 6.0-6.5 pH levels, and fertilize in the summers with water-soluble fertilizers.
There are many things to know about caring for a Boston fern. If you have recently started growing these ferns, this is the right place to know everything about this traditional houseplant.
Besides, I will also share some problems the fern may face and some easy solutions.

Please note: Simplify Plants is reader-supported. As an Amazon Associate, I earn from qualifying purchases made by our readers with no extra cost added to you all! Some links in the post are affiliate links and I get a commission from purchases made through links in the post.
Boston Ferns: An overview
Boston ferns are classic houseplants famous for their lush green fronds.
People grow them because of their glory and adaptability.
Boston ferns belong to the family of the Dryopteridaceae family.
Their botanical name is Nephrolepis exaltata.
They were discovered in 1895, growing in the middle of 200 ferns in Boston by a florist.
Their green foliage is sword-shaped and contains small leaflets that grow straight.
The curve only when fronds grow larger.
Boston ferns are tropical houseplants native to the humid forests of northern South America, Mexico, Florida, and the West Indies.
They can grow up to 7 feet tall.
As a houseplant, Boston ferns can grow around 1-3 feet tall and 2-3 feet wide.
There are more than 200 varieties of Boston fern available in the world.
Some of them are:
- Compacta: It is a short and compact fern. Fluffy Duffy is a dense fern plant with feathery fronds showing off and boasting its fine texture.
- Rita’s Gold: It is another compact fern, but they have a pale light green or yellow colored fronds.
- Florida Ruffle: It is a medium-sized fern having ruffle, feathery fronds.
- Golden Boston: The fronds of this fern are yellowish-green.
Are Boston ferns easy to grow?
Boston ferns are quite easy to grow because they are less demanding.
It will be a great choice for beginners too.
This houseplant will be very easy to care for once you get acquainted with the care tips.
No matter how easy they are to care for, you should still know the ideal growing conditions and provide them with their requirements to keep them healthy for a long time.
Are Boston ferns indoor or outdoor plants?

Though Boston ferns are generally grown as indoor plants, they can also be grown outdoors if given the proper requirement rightly.
Their requirements match the indoor environment, especially regarding sunlight and temperature.
That is why they are mostly grown as a houseplant.
But that doesn’t mean they cannot be cultivated outdoors.
Boston ferns will survive outdoors in a partially sunny area and should be watered daily.
The ferns might get attacked by slugs if grown outside.
Adding a layer of a rough substrate can keep the pests at bay.
Suppose you live in the colder zones.
It is better to grow them as houseplants because of Boston ferns like warm and humid temperatures.
Boston ferns are native to zones 10-12.
If you live in such warmer zones, you can grow them inside. But if not, grow them as houseplants.
Boston fern care guide
Boston ferns can survive in various environmental conditions.
Still, you should follow certain care tips if you want them to flourish long-term.
If you are a beginner at growing Boston ferns and want to know every basic need, this guide is all you need.
So, let’s dive into the care tips.
Boston fern container type

A plastic or glazed terra cotta container is suitable for Boston ferns.
These pots can retain moisture for some time and won’t let the soil dry out.
The container must have drainage holes.
Otherwise, the plant will suffer overwatering issues.
The size of the container should neither be too big nor too small.
A big container requires lots of soil which takes forever to dry after watering.
On the other hand, a small container will quickly make the plant suffer root-bound.
Besides, it can suffocate the roots, and such roots will fail to transfer the moisture and nutrients to the other parts of the plant.
It should be equivalent to the plant size and 1 inch bigger than the root ball.
Select a size 1-2 inches bigger than the old one for repotting.
Also read: What Kind Of Pot Is Best For a Boston Fern? (Size, Material & More)
Boston fern light requirements

Boston fern needs 2-3 hours of bright indirect sunlight.
If the light intensity is low, you can let them have a few more hours of light.
The south and west-facing windows give the maximum amount of sunlight.
The sunlight is at its peak in the summers, and these directions will get high-intensity sunlight.
In the winters, however, the light intensity will lessen.
East-facing and north-facing windows receive mild and soft sunlight.
Keep your Boston fern in the north or east-facing window during the summers.
You can shift them to the south or west-facing window in the winters if the intensity is too low.
You can also let them have at least one hour of direct sunlight if the light intensity is too low.
If you don’t have an east-facing window, keep them in front of the south or west-facing window.
Make sure the plant stays 5-6 feet back, or the windows have sheer curtains or window films to filter the light.
You can use artificial lights if the sunlight from the windows is not enough.
Keep the light on for 4-6 hours and then switch it off.
You should neither expose them to direct sunlight nor deprive them of light.
Both will cause serious issues.
Also read: What Kind Of Lighting Does A Boston Fern Need?
Boston fern water requirements
Boston ferns grow in moist jungle soil in their native land.
Depending on this information, you should maintain an evenly moist soil for them.
Water the ferns every 2-3 days in their growing months, i.e., spring and summer.
Boston ferns slow down their growth in the winters.
In that case, they will take time to absorb the moisture.
So, reduce the watering frequency in the colder months.
Since they require moist soil, you cannot stop watering in winter.
Water the ferns every 1-2 weeks.
There could be chances of underwatering or overwatering.
The best thing to prevent this is to check the soil’s moisture level before watering to understand the water demands better.
Before you opt for the next watering, the soil should remain 1-2 inches dry at the top and 2-3 inches moist at the bottom.
You can use a moisture meter to understand this.
Only then will the plant be ready to take the water.
Whenever you water, do it deeply because the moisture must reach the roots.
Always water them in the early morning.
Also read: How To Water Boston Fern? (How Often, How Much & More)
Boston fern soil requirements

Boston ferns need well-drained loamy soil that drains the excess water.
At the same time, the soil should also retain moisture for some time because Boston ferns enjoy slightly moist soil.
The retention quality also helps in holding the nutrients.
The soil must have a good balance between drainage and retention.
The soil has to be nutrient-rich so that the plant can receive all the necessary nutrition they require for healthy and optimal growth.
The soil must be well-aerated.
It prevents the roots from suffocation, improves oxygen, and helps dry the soil a little faster, thus preventing overwatering and fungal infections.
The soil must have an ideal pH level ranging between 6.0 and 6.5.
A wrong pH level will deteriorate the plant’s health and prevent the plant from taking the nutrients properly.
Some ideal soil mixes are:
- 1 part peat, 1 part perlite, 1 part potting soil, and 1 part sand
- 1 part coco coir, 1 part orchid bark, 1 part perlite, and 1 part soil
- 1 part loamy potting soil, 1 part sand, 1 part fir bark, 1 charcoal, and 1 part vermiculite
Also read: What Kind Of Soil For Boston Fern? (Ideal Soil Mix+How To Make)
Boston fern fertilizer requirement

Boston ferns are slow growers, but they need high nitrogen and phosphorus to develop fronds.
Lack of proper nutrition will make the plant weak and cease the progress of the fronds.
An ideal fertilizer for Boston fern should have an NPK value of 20-10-20.
Though there are many fertilizers, the best one is liquid fertilizers.
Dilute them with water to make the strength half the recommended amount.
As Boston ferns are slow-growing plants, you don’t have to fertilize them too much.
Fertilizing only during the growing season is sufficient to fulfill their nutrition demand.
Apply fertilizer every 4-6 weeks.
Don’t fertilize during the winters as Boston ferns go dormant.
Water them deeply with distilled water once a month to flush off the excess salt build-ups.
You can use organic fertilizers like eggshells, coffee grounds, banana peels, Epsom salt, baking soda, household ammonia, etc.
Also read: Should I Fertilize My Boston Fern? (Ideal Fertilizer+When & How Much)
Boston fern temperature tolerance

Boston ferns require temperatures ranging between 60 and 75°F.
They will tolerate night temperatures up to 65°F and day temperatures around 75-80°F.
Ferns should be protected from cold if the temperature dips around 46°F.
Since they are tropical plants and cannot tolerate cold, the night temperature around them shouldn’t drop below 55°F.
Boston ferns need to be safeguarded from heated temperatures as well. Temperature above 90-95°F will kill the ferns.
In this situation, shift your ferns away from the windows and keep them in a slightly cool room (not an AC room).
Also read: Boston Fern Temperature Tolerance: +Ideal Temperature
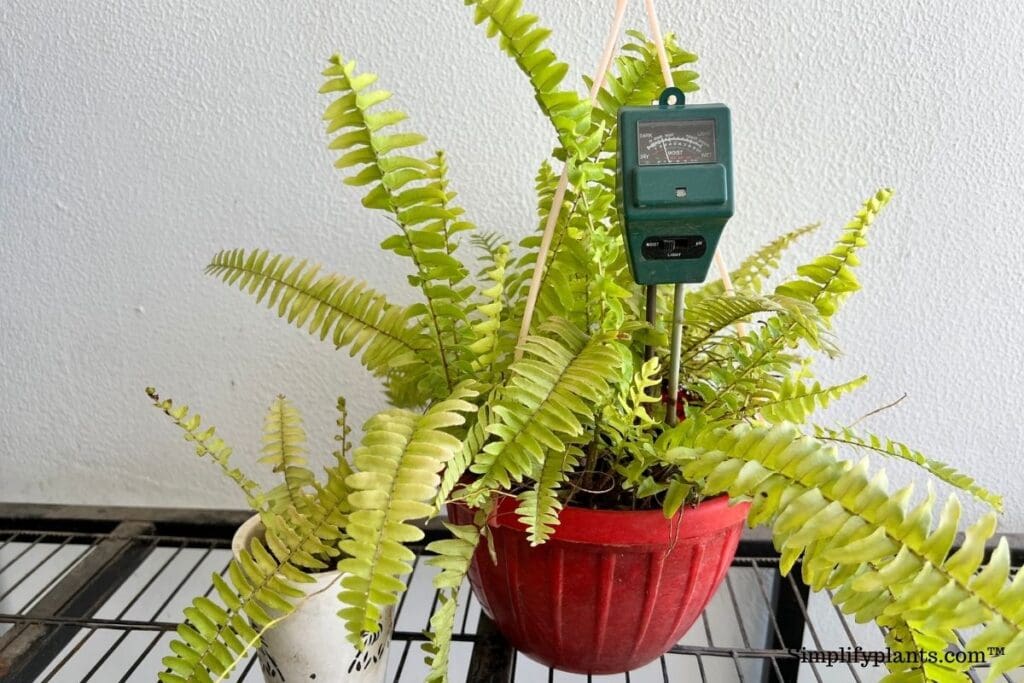
Boston fern humidity requirements

Boston ferns enjoy high humidity levels above 80% in the wild.
Low humidity can result in brown leaf tips, yellow leaves, crispy and dry leaves, defoliation, etc.
The humidity shouldn’t drop 50% to 60%.
To maintain ideal humidity for Boston ferns:
- Fix a humidifier in the room.
- Add pebble trays with water under the container. As the water evaporates, it will add moisture to the plant.
- Keep the plant near the aquarium or add some water tanks. The humidity will increase once the water evaporates.
- Mist the plants. However, this solution doesn’t last for a long time. It is only done when you cannot perform other methods. If you consider misting, you have to do it multiple times.
- Group tropical plants together. The plants create a high moisture environment and help increase each other’s humidity.
- Cover your plant with a plastic bag. It will stop the moisture from escaping. The moisture level will remain intact inside the bag, thus increasing the humidity to a great extent.
Also read: Should I Mist My Boston Fern? (How Often+Pros & Cons)
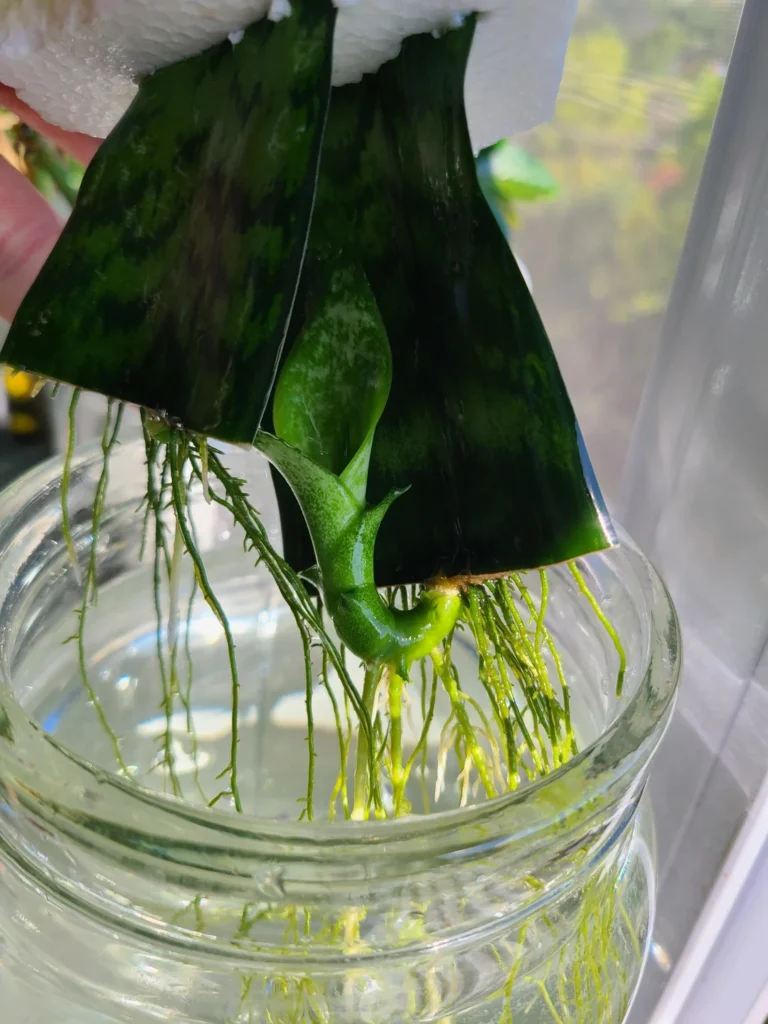
Boston fern propagation

The best time to propagate is spring.
Though there are many methods, ferns respond best to division.
Spread the leaves, and you will see multiple crowns.
Take the plant out of the container and divide the root ball half with a knife.
Again divide it into 1/4th or 1/8th until each division has a crown of foliage with healthy root mass.
Transfer the divisions to a new container and water them deeply to help settle down the roots.
Make sure they receive bright indirect sunlight.
Propagate Boston fern from runners or offshoots.
They are found at the base of the plant.
Use a knife to separate them from the mother plant, keep them aside for some days to heal, and plant them in a new container with new soil.
Don’t worry if they don’t have roots.
Once they get soil, they will develop roots.
Cover it with a plastic bag and keep it under bright filtered sunlight.
Remove the bag once you find new growth.
You can also place the divisions in water.
But here, the offshoots must have roots.
Otherwise, they won’t grow in the water.
Let them have a few hours of morning sun and then bright filtered light for the whole day.
Change the water regularly.
Another method is by spores.
Cut a front and fold it in a paper. Within 24 hours, the front will drop ripe spores.
Spread them in sterilized earthworm compost mix and cover them with plastic.
Place them under a fluorescent light for 14 hours daily.
After some weeks, a new green haze will appear.
Mist them to maintain the moisture.
Two weeks after the green haze appearance, shift them to a new contains in clumps.
Also read: How To Propagate Boston Fern? (3 Methods+Step-By-Step Guide)
Boston fern repotting

The best time to repot a Boston fern is spring.
Watch for the root-bound signs like roots coming out of drainage holes.
When this happens, it means the plant requires repotting.
Another sign is when the plant slows down its growth.
Since Boston ferns are slow-growing plants, you don’t have to report them too frequently.
Repot them every 2-3 years.
Choose a container 1-2 inches bigger than the old one and 1 inch larger than the root ball.
Also read: Do Boston Ferns Like To Be Root Bound? (+When To Repot)
Boston fern pruning

Pruning Boston ferns help in new growths.
Look for the brown or yellow fronds.
These are the old fronds and need to be removed for new frond growth.
Cut them down at the soil level.
Consider radical pruning in the months of spring or summer.
Prune the side fronds at the base.
The best time for repotting besides the season is when you think of repotting them.
For pruning, use clean, sharp, and sterilized scissors.
To avoid mess, either place a paper under the container or take the plant outside.
Bring it in after pruning.
Also read: Should I Trim My Boston Fern? (+How To Prune)
Boston fern toxicity
Boston ferns are non-toxic to pets and other animals, according to ASPCA.
So, you can easily grow these ferns if you have pets.
You don’t have to take any extra measures.
However, munching in excess amounts can arise serious problems like digestion, vomiting, and nausea.
Then you have to take them to the doctor for treatment.
Also read: Are Boston Ferns Pet Friendly? (Cats, Dogs & Other Animals)
Boston fern problems
Despite taking proper care, Boston ferns will have some issues.
Let’s have a look at the problems Boston ferns may face.
Yellow leaves

Both overwatering and lack of water can make the leaves turn yellow.
Recheck your watering habits. Stop watering and let the plant recover but also maintain moist soil.
The lack of light makes the fronds yellow.
Find a spot where the plant receives bright indirect light.
Pests will also make the leaves yellow.
The sap-sucking pests suck the saps and chlorophyll of the plant and make them turn yellow or brown.
Due to this, the plant loses its color and vigor and dies.
Identify the pest and take immediate action.
They will sometimes turn yellow at first if there is not enough humidity.
If the problem progresses, the leaves turn brown at the tips and edges.
Lack of Nitrogen or excessive nitrogen sometimes makes the leaves turn yellow.
Make sure to use a fertilizer that is high in nitrogen.
You can also use organic fertilizers like coffee grounds or dirty aquarium water as they are a great nitrogen source.
Also read: Why Is My Boston Fern Turning Yellow? (Causes+How To Fix)
Brown leaves

Boston ferns will enjoy high humidity levels.
Low humidity will make the leaves turn brown.
Make sure that humidity doesn’t go below 50%.
Using soft water for watering or over-fertilizing will make the leaves scorch.
It results in salt build-up.
As a result, the front and runner tips and the leaflets will turn brown due to scorching and ultimately die.
Always use tepid distilled or rainwater.
If you are confused about fertilizing, use it less than more.
Excessive light results in sunburns, causing the leaves to turn brown and dry.
If the plant is very close to the window, bring it a few feet back or fix transparent curtains to filter the light.
Transplantation shock can make the leaves turn brown.
Don’t worry, as the plant will have green leaves once they get adjusted to their new growing conditions and recover from the shock.
Extremely high temperatures can dehydrate the plant, which further causes browning, wilting, and curling.
Make sure the temperature doesn’t go beyond 90-95°F.
Ensure that the ferns don’t get temperature fluctuations suddenly.
That can make the leaf tips and edges brown.
Sometimes brown spots could result from diseases like Leaf tip burn or Rhizoctonia Blight.
Treat the problem with fungicide as soon as possible.
Also read: Why Is My Boston Fern Turning Brown? (Possible Causes+Fix)
Curly leaves

Dry air can make the leaves curly.
It happens when the humidity level is low around the plant.
Since they are tropical plants, they will enjoy high humidity levels ranging between 60% and 80%.
The level should not go below 50%.
Consider humidifiers, pebble trays, aquarium water tanks, and misting to increase the humidity.
You can also keep the plant in the bathrooms if there is filtered sunlight.
Underwatering for a long time will make the leaves brittle, dry, yellow, and curly.
Boston ferns enjoy consistently moist soil.
Ensure that the soil remains moist 2-3 inches at the bottom.
Also, make sure that the soil holds the moisture for some time.
Sometimes, the leaves start aging, turning yellow and curly.
If your plant is not having any issues but is still curling, it is due to old age.
Overfertilization makes the leaves curl.
When you apply excessive fertilizer, the unused fertilizers build up in the soil.
These salts damage the roots and make the leaves brown and curly.
A pest infestation can make the leaves curly as they suck the saps of the plant and make them weak.
You need to observe the plant daily to find and identify the problem at the initial stage and take immediate steps to prevent spreading.
One quick solution is neem oil.
Also read: Why Is My Boston Fern Drying Out? (Causes+How To Fix)
Drooping

Leaves droop due to underwatering and overwatering.
When the plant lacks water, it loses its strength, due to which they begin to droop.
But if the plant is drooping despite standing over wet soil, it is due to overwatering.
Check the watering habits and improve them.
Dry soil will also make the plant suffer dehydration.
Assure that the soil has a good balance between drainage and retention.
The plant will suffer dehydration and nutrient deficiency if the soil fails to retain.
On the contrary, poor drainage will make the plant suffer overwatering.
Lack of moisture means lack of humidity.
So, low humidity can also make the plant droopy.
Maintain ideal humidity.
Droopy leaves are not a very serious issue.
In most cases, it is the early sign of a problem.
If you ever see the leaves droopy, detect the problem and take immediate action to prevent further deterioration.
Also read: Why Is My Boston Fern Drooping? (9 Causes+How To Fix)
Defoliation
Defoliation due to aging is a normal issue in the Boston ferns.
First, they turn yellow, then brown, and slowly they will wilt and fall off the plant.
Boston ferns should remain consistently moist because they used to live like that in their native land.
If the soil remains too dry for a long time, the leaves will become limp, dry, brittle, and curly.
Over time, the plant will lose the energy to hold the leaves, thus causing defoliation.
Too much or too little light can result in leaf drops.
Excessive light will burn the leaves, and the leaves will fall off eventually.
On the other hand, too little light will make them leggy and fall from the plant.
They should receive 2-3 hours of bright but indirect sunlight.
Over-fertilizing is another reason. It burns the root and makes the leaf tips turn brown and curly.
Along with that, excessive fertilizer will give the plant a chemical shock.
A sudden shock will make the plant lose healthy green leaves.
You should use less fertilizer with less frequency if you are unsure about it.
Less will not harm your plant. Always fertilize only during the growing season.
Root rot

The main reasons for root rot are overwatering, poor drainage in the soil, and no drainage holes in the container.
To save the plant from root rot, you should take steps when the plant shows signs of overwatering.
Here are some steps to fix the problem:
- Take the plant out of the container. Since they have been wet for a long time, taking the plant can be easier. Just tap the sides of the pot. Turn over the container and tap the bottom to take the plant out.
- Now, remove the maximum old soil from the root portion to look at its condition.
- Check the roots. The damaged roots are black and mushy, and they will also release a foul smell. The white firm roots are the healthy plants.
- Remove all the damaged roots from the plant.
- Remove some leaves, too, as fewer roots won’t support many leaves. There has to be a balance.
- Now, rinse the healthy roots to remove the old soil.
- Take a new container and prepare a new soil mix. The old container and the soil will get contaminated by the root rot fungus. So, you should use everything new and fresh.
- Choose only an inch larger container. It will delay root-bound and keep the plant from frequent repotting. Make sure it has drainage holes.
- Repot the plant in the new container in the ideal soil mix having perlite and sand for good drainage.
- Water the plant only when the top 1-2 inches have dried. Keep them under bright, indirect sunlight, and don’t fertilize until the plant has fully recovered.
Also read: Boston Fern Root Rot: Signs, Causes+Fix
Boston fern pests and diseases

Pests: Flying insects like whiteflies stay under the leaves, suck the saps of the plant and release honeydew.
This honeydew makes the leaves sticky, thus causing sooty mold.
Sucking bugs like mealybugs, spider mites, scales, and aphids will also attack your ferns.
They, too, leave behind honeydew and result in sooty mold.
Spider mites also leave behind white webs on the leaves and stems.
Rasping insects like thrips will also suck the leaves’ juices and leave behind silvery grey scars on the leaves.
The leaves become curly and distorted. Fronds will lose their vigor and die.
To get rid of the pests:
- Remove the infested, sticky leaves and other damaged branches from the plant. It can control the spreading of the infestation.
- Shower the plant to help remove the bugs from the plant. Showering helps in scattering and removing the bugs that arrive in communities.
- Dip a cotton ball into rubbing alcohol and dab it on the infected parts. It will weaken the hard-shelled pests like mealybugs and hard-shelled scales and kill them.
- You can even spray rubbing alcohol. Mix 10% of the alcohol with 90% water and spray on the infected parts.
- Handpick can help if the bugs are visible and in small amounts.
- Use soap and water spray to coat the bugs. It will cease their oxygen, and the soap’s chemical will kill them.
- Spray Neem oil. It is a safe and effective way to get rid of bugs.
- If the infestation is huge, use insecticides and pesticides. Read the instructions carefully and then use them.
Diseases: If the conditions are unfavorable for them for a long time, Boston ferns can become prone to diseases.
If the plant is suffering from overwatering for a long time, the plant gets a disease called Pythium root rot.
The leaves will turn grey, wilted, and stunted.
Keeping the plant dry for a long time can give rise to a Graying disease.
You will identify the problem when the leaves turn gray, and the soil remains dry.
Another disease is Rhizoctonia Aerial Blight, where dark lesions rapidly occur on the foliage and roots.
Over time, the whole plant will get covered with brown web-like mycelium.
To get rid of diseases:
- First, isolate the plant to prevent the disease from spreading.
- Remove the damaged parts of the plant.
- Take the plant out to see if the roots are affected or not.
- Spray some fungicide on the roots and the whole plant. You can use both chemical and organic fungicides.
- If you identify the disease early, spray some Neem oil to prevent it from getting worse.
- The best way to prevent the diseases is to avoid overwatering and underwatering. Maintain evenly moist soil, neither too wet nor too dry. Avoid wetting the fronds at the time of watering.
- Don’t buy a diseased plant. Whenever you find that the plant is suffering any problems, keep steps immediately, especially in the case of pests, because some pests can transfer diseases.
- If you are confused about fertilizing, use a little amount and always feed the plants in spring and summer only.
Also read: Boston Fern Pests And Diseases: Common Bugs & Diseases+How To Fix
Summing up

Let them have 2-3 hours of bright indirect sunlight. Water the plant every 2-3 days. Before watering, ensure that the soil’s top 1-2 inches are dry. Reduce frequency in winters but don’t stop watering.
Use well-drained loamy soil that has a good balance between drainage and retention. Use a glazed terra cotta or plastic container with drainage holes. The size should be proportionate to the plant.
Fertilize only during the spring and summer with liquid fertilizer having an NPK value of 20-10-20. Avoid it during winters and when the plant is stressed.
The temperature should remain between 68 and 78°F. It should neither rise above 95°F nor should it go below 55-60°F.
The humidity has to be within 60-80%. It must not drop below 50%.
Repot Boston ferns every 2-3 years. Use a container 1-2 inches bigger than the old one.
Prune the damaged, yellow, brown, and old fronds to keep the plant looking good. The best time is spring and summer.
Propagate Boston ferns to get for plants.
Since they are non-toxic, you can grow them around the pets. But, you should still be careful, as munching too much can result in indigestion, vomiting, and nausea.
Reference: University of Florida, The University of Arkansas Division, Texas A&M University System, The University of Georgia, University of New Hampshire, Wikipedia, The Royal Horticultural Society.
Note: Some images in the articles are sourced from Reddit and Other Platforms For Reference Purpose.