How To Propagate Boston Fern? (3 Methods+Step-By-Step Guide)
Boston fern (Nephrolepis Exaltata) are popular fern species widely grown as a houseplant. The foliage of the ferns remains evergreen, and no wonder you might be thinking about getting more of these plants. One easy way to get more Boston ferns is propagation.
But how can you propagate a Boston fern? Let’s find out.
There are two common ways to propagate a Boston fern: division and propagation from runners. In the division method, you dig up the fern, separate the roots from each other, and repot the new plants. In the runner method, you separate the tiny shoots from the plant and grow them into new plants.
In this article, I will discuss how to propagate your Boston fern. I will also discuss the best time for propagation, the equipment you will need, and everything else involved in the propagation process.

Please note: Simplify Plants is reader-supported. As an Amazon Associate, I earn from qualifying purchases made by our readers with no extra cost added to you all! Some links in the post are affiliate links and I get a commission from purchases made through links in the post.
Why should you propagate a Boston fern plant?
Propagation is an economical way to get many plants at once.
Many of us would like to multiply the number of plants without spending much money on it.
Propagation will help us explore different species of this plant.
Another reason for propagation is when the plant turns leggy or too big.
Boston ferns are fast-growing plants, so they are a high chance to turn leggy.
You can prune their leggy growth and use the stems for propagation.
Pruning will give shape to the plant, and also, the pruned offset will not get wasted.
You can perform propagation to save your plant from dying.
You can cut the few healthy stems of the plant and propagate them to grow a new plant.
What is the best time to propagate a Boston fern?
The best time to propagate a Boston fern is in the early spring or summer season.
They are tropical plants and remain dormant during the winter season, so the ideal period for their propagation is the growing season.
The plant will receive all the ideal conditions during the growing season, and it won’t suffer from any stress.
While repotting the plant in early spring, cut off a section of a fern with healthy roots attached.
Plant all the divisions in separate pots with fresh potting mix and keep the soil slightly moist.
Keep the pot in a warm place where it is safe from drafts and temperature fluctuations.
Your plant’s roots will take the entire growing season to recover, and they will become stronger the following year.
Do not propagate an unhealthy plant. Otherwise, all your efforts will get wasted.
If the plant has turned dry, brown, or curly leaves, try to restore it before propagation.
What are the tools you will need for propagation?
You will need some tools for doing the propagation process in your Boston fern.
Let us have a look at the supplies you will need for propagation.
- A healthy Boston fern plant
- Sharp scissors or shears
- Potting mix and water
- Bleach or rubbing alcohol
- Plastic sheets
- Tray
- Plastic pots
- Pebbles
- Plant mister
What are the different ways to propagate a Boson fern?
There are three methods to propagate your Boston fern.
- Propagation by division
- Propagation by runners
- Propagation from spores
Let us now discuss all the methods in detail.
Propagation by division

While propagating through division, you will need to divide your Boston plant into sections, which brings us to the first step.
1. Take out your plant from the pot.
You need to cut the plant into separate sections, including the root system.
To do this, take out your plant from the pot.
The plant has delicate leaves, so you should hold them cautiously so that the leaves do not tear apart.
If the roots are packed together, you need to shake off the potting mix and put your finger through the roots to loosen them.
2. Separate the plant into sections
The total number of sections you cut off depends on the size of the mother plant.
For dividing your plant, use sharp shear for slicing the root system.
3. Cut the root ball into two halves.
Again cut the halves into quarters and the quarters into eights.
A mature and healthy Boston fern can generate up to 8 sections.
If the root ball is not so big, cut it into quarters and do not divide it further.
Ensure that all the sections have leaves, stems, and roots so that the new plants can grow optimally in their new pots.
You may need to cut directly through the roots, but do not get worried as this will not affect the health of your new plants.
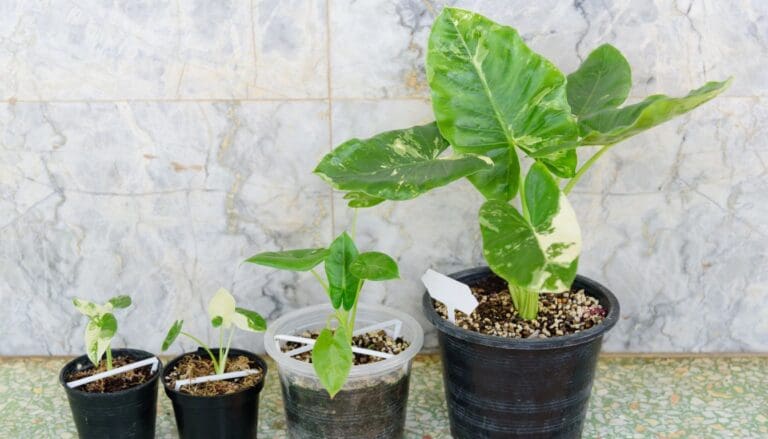
4. Place the offsets into the new potting mix.
Put the mother plant back into the original pot in the third step.
If you have taken a large section of the plant, use a small pot to plant the mother plant.
Now plant all the new Boston sections into their pot.
The pot for the new divided sections should fit them properly.
Make sure that there is about 2 inches gap on either side of the roots and the pot.
5. Care for the new Boston plants
After you plant your baby ferns, it’s time to provide them with water and light.
Water the ferns only when the top inch of the soil feels dry to touch.
Make sure the soil is moist but not waterlogged.
Provide the ferns with bright, indirect light and keep them away from direct sunlight.
Propagation by runners

If you want to divide your plant into sections, you can propagate it using runners.
Runners are leafless stems present in the fern which can be used for propagation.
The steps involved in this propagation method are:
1. Select a healthy runner from the plant
First of all, select some healthy green runners poking out from the plant.
Do not choose those runners that have turned brown or crispy, as they will not grow well.
2. Separate the runners from the plant
This step removes the runner from the plant at its closest possible point.
The cutting must include a few sections of the root system needed for successful propagation.
3. Plant the runners in the potting mix
Now select a good-sized pot and fill it with fresh, high-quality potting mix.
Dig the soil, bury the root system, and lay the runner on top of the pot.
The runner should frequently contact the soil as this is the point where the roots will start to develop, and a new Boston fern will grow.
4. Water the potting mix
After you have planted the Boston fern runners into the soil, it is time for watering them.
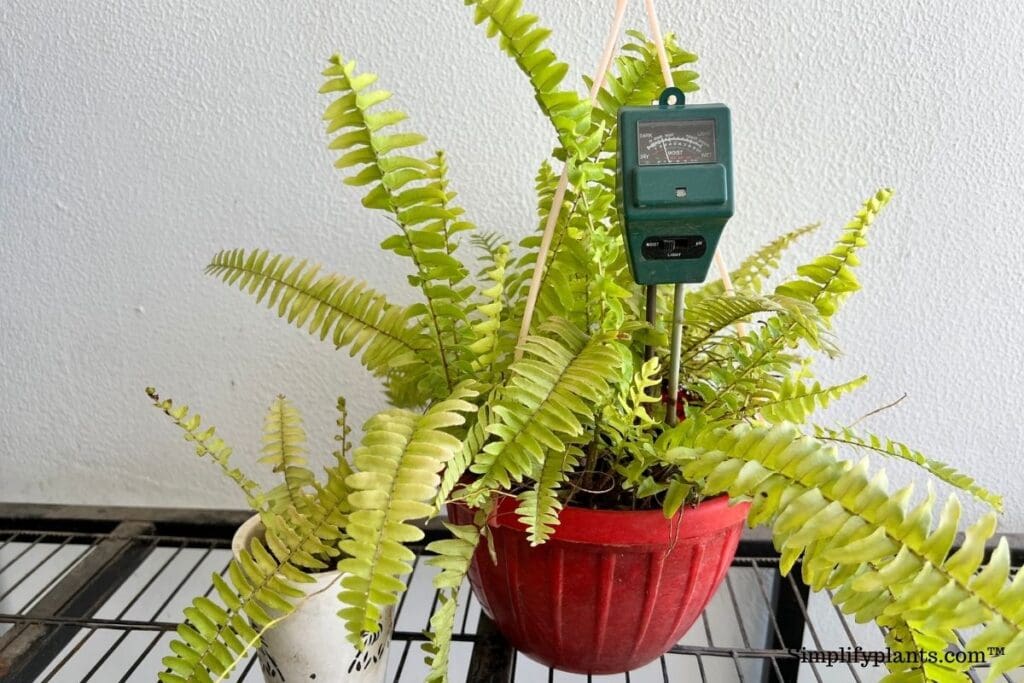
Water the runners only when the top inch of the soil feels dry to touch.
You can use a moisture meter for your plant in the initial stages.
Always make sure that the soil is moist and not waterlogged.
5. Wait for the new growth
All you are required to do is follow a good watering routine keeping all other factors in check.
You might want to check the growth of the upcoming baby fern, but avoid touching or lifting the runners.
This can damage their delicate roots, due to which the success rate for the new growth decreases.
Be patient, and soon you will notice new growth from the pot.
6. Care for the new growth
Once you notice the new growth, resume the usual care routine that you follow for your plant.
Propagation from spores

Propagation from spores is a common propagation method used by gardeners.
Spores are found on the underside of fronds and in small capsules called sporangia.
Let us look at the steps involved in this method.
1. Collect the spores from the plant
Firstly, you should start looking for dark brown or black raised bumps present on the underside of the fern fronds.
When the fronds look ripe, cut them off and place them on a white sheet.
Cover the paper with another piece of paper and place a book over it so that there is no space left for air movement.
After a few days, you will notice some brown powder on the paper coming from the fronds.
Those particles are known as spores that will be used for propagation.
Spores are dust particles that are similar to pollen grains and can use for growing new plants.
If the fronds don’t produce spores, you might have collected the fronds too early.
Although you can propagate ferns the whole year, the best time for spore propagation is during the March and July months.
2. Prepare the fern compost.
In this step, you need to prepare fern compost.
Add peat moss and compost in a ratio of 50:50.
Take an unglazed pot and sterilize with bleach and water solution.
Once the pot has dried, add the fern compost.
Put a paper towel over the compost and pour boiling water into the pot.
The hot water will cause the compost to expand and helps in sterilizing the soil.
Wait for the compost to cool down.
3. Sow the fern spores
Once the compost has cooled down, remove the paper towel and sow the spores.
The spores of Boston ferns are sown in the same manner as seeds by spreading a thin layer on the compost surface.
After sowing the spores, cover with a plastic bag to prevent any contamination.
4. Keep the spores moist
You need to keep the compost moist to accelerate the germination process.
Keep the pot in a saucer of water so that the entire mixture receives enough moisture.
Do not water the pot from above as this can injure the spores.
Once the plant is watered, put it back in a plastic bag and keep the pot in a warm location, away from direct sunlight.
The plastic cover will act as a small greenhouse, and it will overheat if direct light falls on it.
Keep the soil moist all the time and if the top layer of the compost becomes dry, peel off the plastic and add some drops of hot water and recover it.
5. Transplant the baby fronds
Now all you need to do is keep patience and wait for the spore propagation as it takes time.
After a month, you will notice a slime-like green coating on the compost surface.
This is the beginning of this process, and now it takes months to develop this slime into small fronds.
Transplant them into their pots once the baby fronds are big enough to handle.
How will you take care of a propagated Boston fern?

Before you begin any propagation process for growing Boston ferns, you must understand its basic care requirements.
Maintaining the right growing conditions will help your plant to thrive.
Let us now discuss all the basic care requirements that you can follow for your newly propagated plant.
Light
Boston ferns prefer to grow in bright, indirect light.
Place your Boston fern near a bright window that provides 2-3 hours of sunlight.
Do not keep the fronds in the darkroom as they can lose their bright colors. Also, avoid keeping the fronds in direct sunlight as that will cause sunburn.
You can also use artificial lights to fulfill your plant’s light requirements.
Also read: What Kind Of Lighting Does A Boston Fern Need?
Water
To get successful Boston ferns, you need to keep the soil lightly moist but not soggy.
Do not overwater your plant, which will lead to complete saturation, making the soil soggy.
Check the soil regularly, and whenever the soil feels dry, water the plant immediately.
Water the soil whenever the top 1-2 inches of the soil feels dry to touch.
During the fall and winter months, reduce watering as the plant goes dormant and does not show any growth.
Also read: How To Water Boston Fern? (How Often, How Much & More)
Soil
The potting mix for a Boston fern should be well-draining, porous, and organically rich. The soil for Boston fern should be moist but not waterlogged.
You can prepare your ideal potting mix before transplanting your baby ferns by mixing:
1 part potting soil, 1 part peat or shredded sphagnum, and 1 part perlite.
Peat will improve water retention in the soil, while perlite will improve the drainage for the plant.
Make sure that the soil should be slightly acidic with a pH level of 5.0 to 5.5.
Also read: What Kind Of Soil For Boston Fern? (Ideal Soil Mix+How To Make)
Fertilizer

Fertilize your Boston ferns once a month during the spring and summer seasons.
Use a water-soluble fertilizer at half strength in the NPK ratio 20-10-20.
Avoid fertilizing the plant during the dormant season as the plant remains inactive and does not need fertilizers.
Also read: Should I Fertilize My Boston Fern? (Ideal Fertilizer+When & How Much)
Temperature
Boston ferns are tropical plants and prefer a temperate range between 65 and 75°F. They can’t survive either extreme cold or extreme heat.
Temperature exceeding 95°F can harm them, as can the low temperature of 35°F. Try to maintain the ideal temperatures for your plant and protect it from any extremities.
Propagate your plant only during the spring and summer months.
Humidity

Boston ferns being tropical plants need higher humidity levels both before and after propagation.
Try to maintain a minimum of 50-60% humidity for your plant.
You can use a humidifier or keep the plant in a pebble tray to raise the humidity level around it.
Also read: Should I Mist My Boston Fern? (How Often+Pros & Cons)
Final words
Boston ferns are easy to grow and maintain plants. Propagation is an economical way to get more of these beautiful plants. Propagation is also helpful if your plant has turned leggy or if you want to save a dying plant.
I have explained the two ways of propagating a Boston fern in this article. During and after propagation, provide the ferns with ideal growing conditions such as proper watering, temperature and humidity, sufficient sunlight, suitable soil mix, and fertilizers.
Providing the baby ferns with good care and ideal conditions is the key to a successful propagation process.
Reference: University of Florida, The University of Arkansas Division, Texas A&M University System, The University of Georgia, University of New Hampshire, Wikipedia, The Royal Horticultural Society.
Note: Some images in the articles are sourced from Reddit and Other Platforms For Reference Purpose.