Orchid Roots Growing Outside The Pot?
Orchid roots sneaking out of the pot can look a little wild at first. You might wonder if your plant is trying to escape or if something has gone wrong with your care routine. I’ve been there, staring at those silvery tendrils hanging over the edge and questioning everything.
The good news is that roots growing outside the pot are usually a sign your orchid is healthy and doing what comes naturally. Orchids aren’t like most houseplants. In the wild, many of them grow on trees instead of in soil, so their roots are designed to grab onto surfaces and pull moisture from the air.
That said, there are a few situations where those wandering roots might signal it’s time to make a change. I’ll walk you through how to tell if your orchid is happy or if it needs a little help.
Please note: Simplify Plants is reader-supported. As an Amazon Associate, I earn from qualifying purchases made by our readers with no extra cost added to you all! Some links in the post are affiliate links and I get a commission from purchases made through links in the post.
1) Understand aerial roots and their purpose
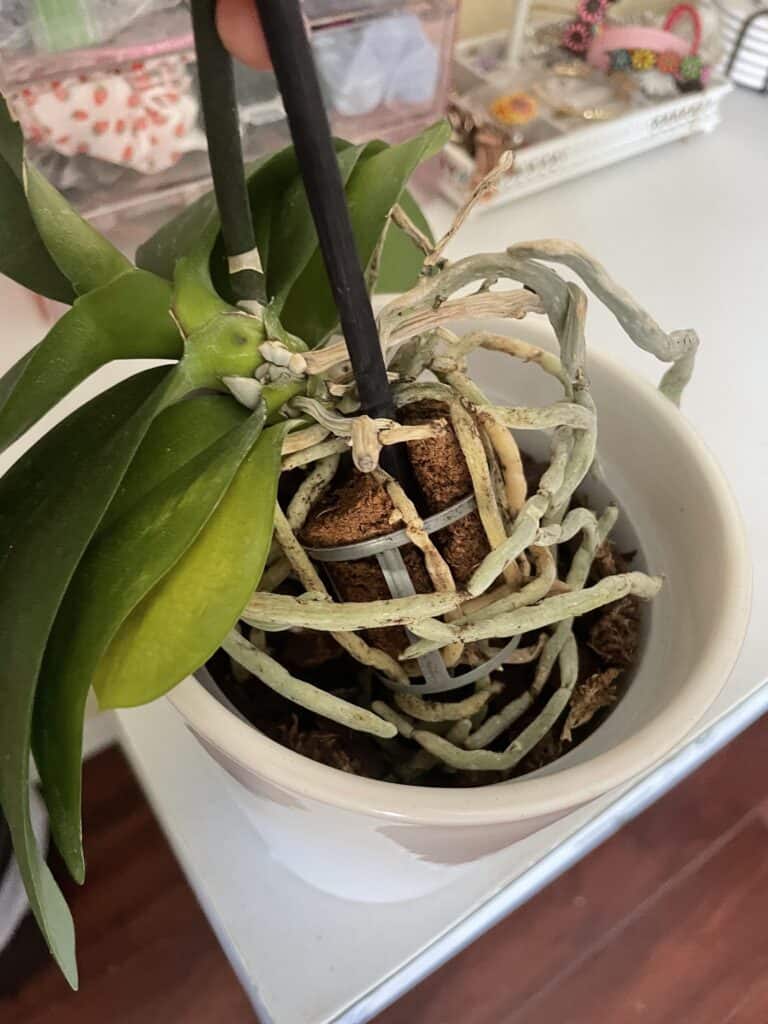
Orchid roots growing outside the pot are called aerial roots. They’re completely normal and actually show your orchid is healthy.
In nature, most orchids grow on trees, not in soil. Their roots cling to bark and hang in the air to absorb moisture and nutrients from rain and humidity.
These roots are designed to be exposed, so seeing them outside your pot is nothing to stress about.
Aerial roots help your orchid breathe and collect water from the air around them.
They also use photosynthesis, which means they can make food from light just like leaves do. That’s why many orchid roots look greenish.
Quick Tip: If your aerial roots look plump and silvery-green, your orchid is happy and well-hydrated.
Don’t confuse aerial roots with a rootbound plant, though. If roots are bursting out everywhere and the potting mix looks compressed, your orchid might need repotting.
But a few wandering roots? That’s just your orchid doing what it does best.
2) Check humidity levels in your home

I always tell people that orchids are picky about moisture in the air, not just in their pot. When the air gets too dry, those roots start wandering outside looking for water anywhere they can find it.
Most orchids like humidity between 40% and 70%. You can grab a cheap hygrometer from any hardware store to measure it.
If your home sits below 40%, your orchid is probably feeling stressed.
Dry air is especially common in winter when heaters run constantly. You might notice the roots turning silvery or shriveling up at the tips.
That’s your plant telling you it needs more moisture in the air around it.
Quick Tip: Place a shallow tray of water with pebbles near your orchid to boost humidity without making the roots soggy.
You don’t need to panic if one or two roots escape the pot. But if you see lots of aerial roots growing wild and they look dry, check your humidity first before doing anything else.
3) Inspect for healthy white or green root tips
I always check the tips of exposed roots because they tell me everything I need to know about the plant’s health.
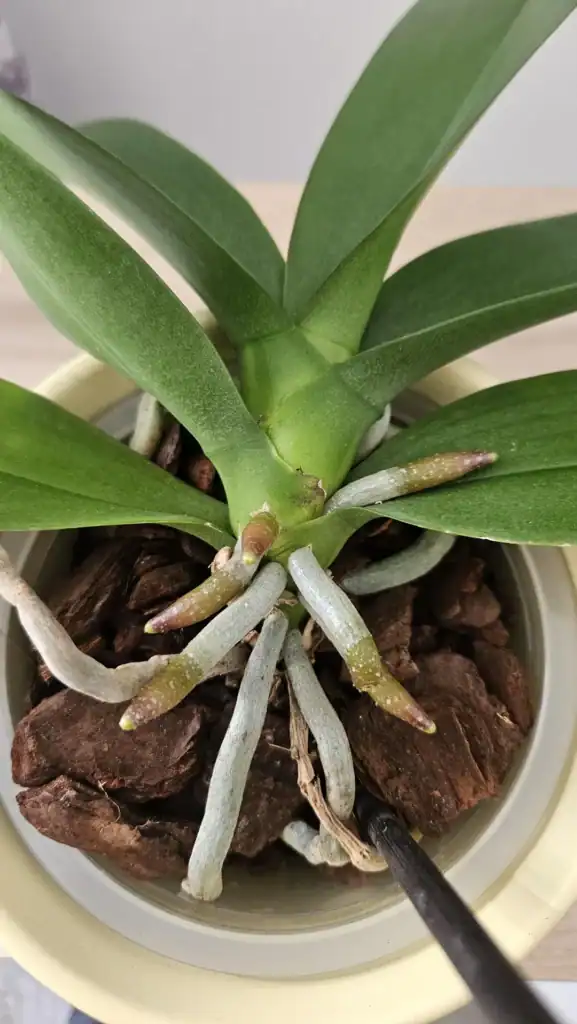
Healthy orchid roots show off white or bright green tips when they’re actively growing. The white tips mean fresh growth is happening right now.
Green tips usually show up after watering or in humid conditions. That green color comes from chlorophyll, which means the roots are soaking up light and doing their job well.
If I see these vibrant tips on roots outside the pot, I don’t worry at all. It’s actually a good sign that my orchid is thriving and searching for more resources.
Brown, black, or mushy tips are a different story. Those signal rot or damage, which means I need to adjust my watering schedule or check for other problems.
Quick Tip: Gently touch the root tips to feel if they’re firm and plump, not squishy or paper-dry.
4) Repot only when roots choke the pot
I only move my orchids to bigger pots when the roots actually crowd out the growing medium. If roots are just hanging outside looking happy and green, that’s normal orchid behavior.
The real sign to repot is when roots circle so tightly inside that water runs straight through without soaking in.
You might also notice the potting bark breaking down into mush or the plant tipping over because it’s top-heavy.
I check by gently lifting the orchid and peeking at the drainage holes. If thick roots are pushing through every opening and the pot feels jam-packed, it’s time.
Quick Tip: Repot right after your orchid finishes blooming, when it has energy to recover and grow new roots.
Don’t rush to a huge pot, though. Orchids like feeling a bit snug. I go up just one pot size, maybe two inches wider.
Too much extra space holds moisture too long and can rot the roots you’re trying to help.
5) Use a breathable mix like bark or coco chips
I always make sure my orchids are potted in a chunky, airy mix. Regular potting soil is too dense and holds water for too long. That’s a recipe for root rot.
Bark chips are my go-to choice. They let air flow around the roots and water drains right through. Coco chips work great too, and they break down a bit slower than bark.
When roots grow outside the pot, it often means they’re searching for better air circulation.
A breathable mix gives them what they need inside the pot, so they’re less likely to wander.
Quick Tip: If your mix looks broken down and muddy, it’s time to repot with fresh bark or coco chips.
I aim to replace the mix every 1-2 years. Old mix gets compacted and stops draining well. Your orchid roots will thank you for the upgrade.
6) Provide bright, indirect light
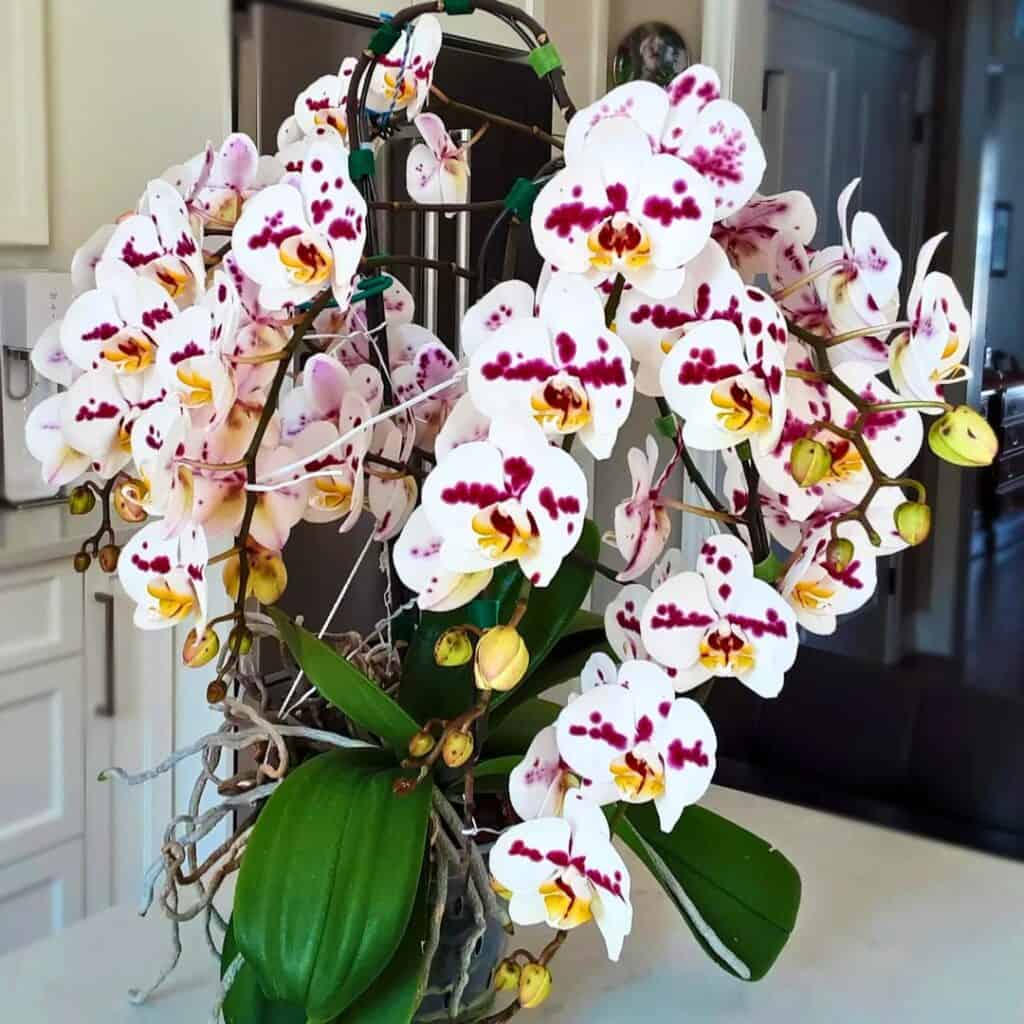
Light plays a big role in keeping orchid roots healthy, whether they’re inside the pot or hanging out in the open air.
Those roots growing outside need light just like the ones tucked away in the bark mix. I always make sure my orchids get plenty of bright, indirect light throughout the day.
Direct sunlight can actually burn exposed roots and turn them brown or crispy. Place your orchid near an east or west-facing window where it gets filtered light.
If you only have a south-facing window, move the plant back a few feet or use a sheer curtain to soften the intensity.
Those aerial roots have a special coating that helps them photosynthesize, which means they’re working hard to feed your plant.
When they get enough light, they stay green and plump. Too little light and they might shrivel up or stop growing altogether.
Quick Tip: If your orchid’s aerial roots look pale or yellowish, try moving the plant to a brighter spot.
Watch for signs your light levels are off. Roots that look bleached or papery probably got too much sun, while dark green leaves with limp roots suggest you need more brightness.
7) Mist roots occasionally for extra moisture
I like to give my orchid’s aerial roots a light misting every few days, especially when the air feels dry.
The roots absorb moisture through their velamen layer, which is that spongy coating you see on the outside. A quick spray helps keep them plump and happy without making them soggy.
You don’t need to drench them. I aim for a fine mist that makes the roots look slightly damp but not dripping wet. If you live somewhere humid, you can skip this step most of the time.
Quick Tip: Mist in the morning so the roots can dry out before nighttime, which helps prevent rot.
Watch for roots that stay wet for hours after misting. That’s a sign your air circulation might be too low or you’re using too much water.
In winter, when indoor heating dries everything out, I mist a bit more often to keep the roots from shriveling up.
8) Anchor long roots with orchid clips
I use orchid clips to gently guide wayward roots back toward the pot without forcing them.
These small plastic clips attach to the pot rim or a stake and hold the root in a loose curve. They’re cheap and won’t damage the root like wire or ties can.
The goal isn’t to stuff roots back inside. I just keep them from flopping around or getting caught on things. If a root is actively growing outward, I let it be until it stops moving.
Quick Tip: Position the clip a few inches from the root tip so it doesn’t pinch new growth.
Check the clips every few weeks. As the root thickens, you might need to loosen or move the clip to avoid creating a dent.
In humid rooms, clipped roots usually stay green and healthy because they’re not squished.
9) Trim only dead, brown roots with sterilized scissors
I always check my orchid’s roots carefully before I start cutting. The mushy brown ones need to go, but those thick silvery-green roots are doing their job just fine.
I use rubbing alcohol or a flame to sterilize my scissors before trimming. This simple step stops bacteria and fungi from spreading between cuts.
Dead roots feel soft and papery, and they often smell bad too.
I cut each dead root back to where healthy tissue starts. If the whole root is brown and squishy, I remove it completely at the base.
Healthy roots should feel firm when I squeeze them gently.
Quick Tip: Wipe your scissors with alcohol between each cut if you’re removing multiple dead roots.
Some people panic and want to trim every aerial root hanging outside the pot. Don’t do that. Those roots are actually absorbing moisture from the air and helping your plant thrive.
10) Replicate natural epiphytic conditions on a mount
Mounting your orchid mimics how it grows in the wild—clinging to tree bark with roots exposed to air. I use a piece of cork bark, driftwood, or even a hardwood slab as my base.
First, I gently tie the orchid to the mount using cotton string or fishing line. The roots should sit against the surface, not buried. Over time, they’ll grip the mount on their own.
Mounted orchids dry out faster than potted ones. I mist the roots every morning, sometimes twice a day in hot weather.
If you live in a dry climate, you might need to water even more often.
Quick Tip: Add a small pad of sphagnum moss under the root ball to help with moisture retention, but don’t pack it too thick.
The roots will turn silvery when dry and green when wet. This makes it easy to tell when your orchid needs water. Just watch for shriveling—that means you’re waiting too long between waterings.
Understanding Orchid Root Behavior
Orchid roots behave differently than most houseplants, and knowing what’s normal helps you tell the difference between healthy growth and a real problem.
What Healthy Orchid Roots Look Like (And What They Tell You About Your Plant’s Mood)
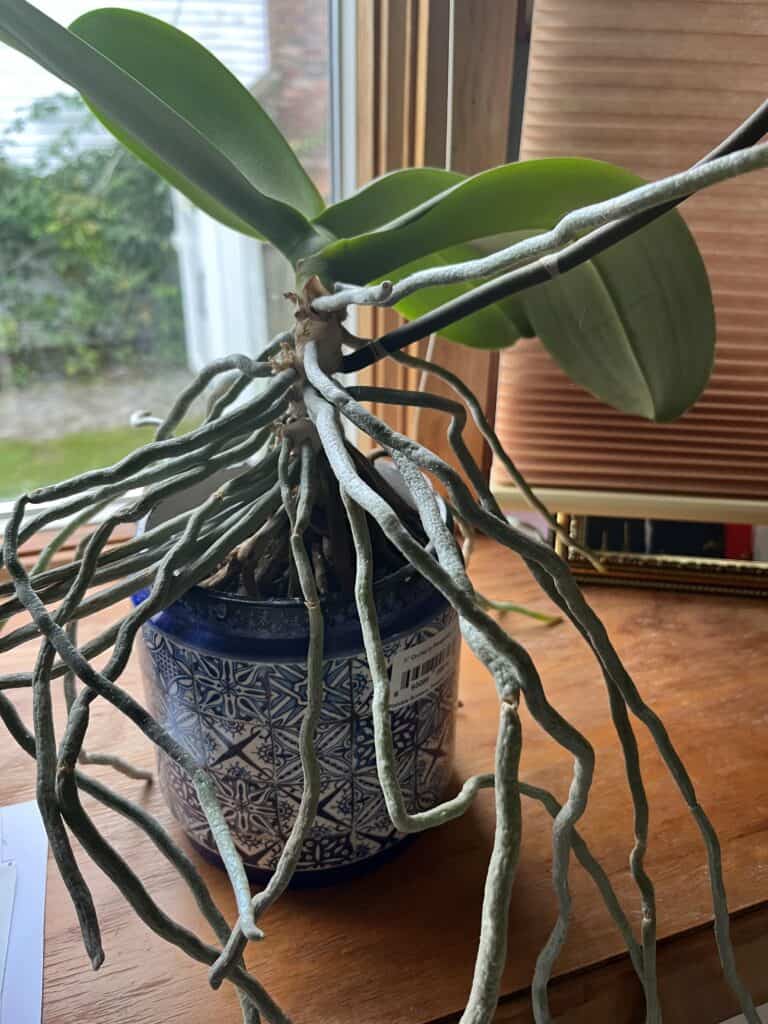
Healthy orchid roots have a silvery-green or white appearance when dry. When you water them, they turn bright green because they’re actively soaking up moisture.
The roots should feel firm to the touch, not mushy or papery. I check mine by giving them a gentle squeeze near the base. If they’re plump and solid, everything’s fine.
Thickness matters too. Most orchid roots are about as thick as a pencil or slightly thinner. They’re covered in a spongy white tissue called velamen that absorbs water and nutrients from the air.
Brown or black roots usually mean rot from overwatering. Yellow roots might be getting too much direct sun. If you spot these colors, it’s time to adjust your care routine.
Quick Tip: Silvery roots aren’t dying—they’re just waiting for their next drink.
Aerial Roots Versus Pot-Bound Roots (One Wants Freedom, One Needs Help)
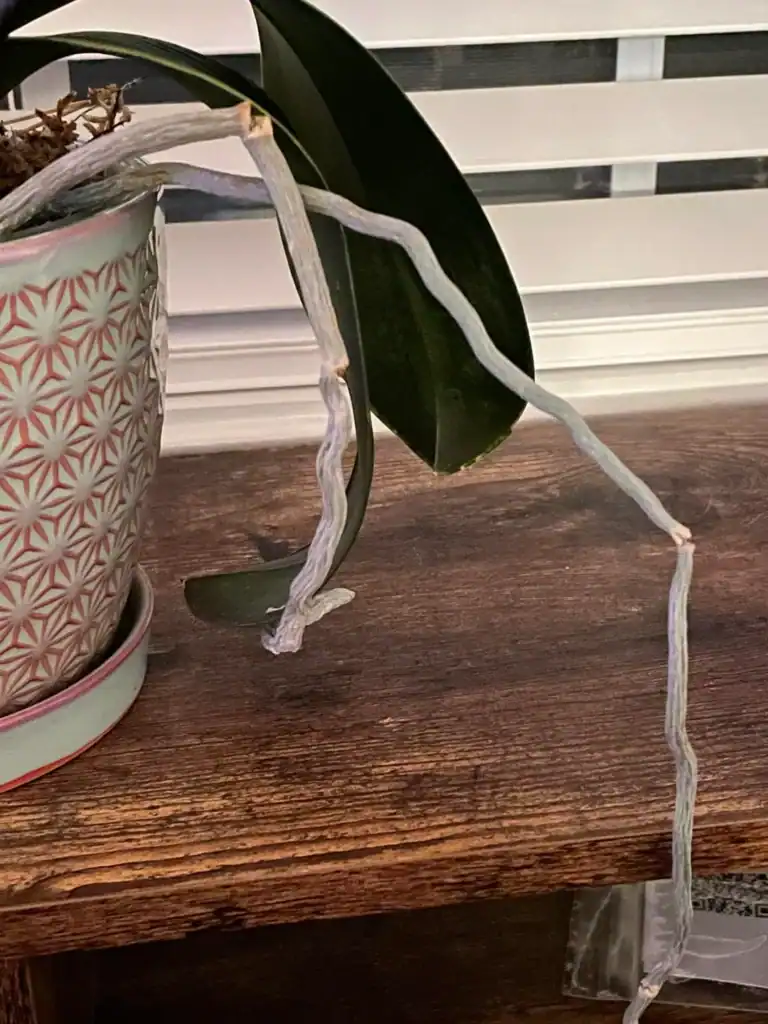
Aerial roots grow outside the pot on purpose. They’re designed to grab onto tree bark in the wild, so seeing them reach out into the air is completely normal behavior for your orchid.
These wandering roots help your plant breathe and collect moisture from humidity in your home. Don’t trim them unless they’re dead or damaged.
Pot-bound roots are different. They circle around inside the pot because they’ve run out of space.
You’ll see them pushing up against the container walls or spiraling at the bottom.
When roots get too crowded, they can’t get enough air. This leads to rot even if you’re not overwatering. I repot my orchids every 1-2 years to give roots fresh space to spread out.
Quick Tip: Aerial roots outside the pot are fine—roots choking themselves inside the pot need a bigger home.
Common Misconceptions and Practical Tips
Many orchid owners panic when they see roots escaping the pot, but most of these concerns come from misunderstandings about how orchids naturally grow.
Knowing when your plant actually needs a new home will save you time and keep your orchid healthier.
Myths About Overgrown Roots That Make New Orchid Owners Panic
I’ve heard people say that roots growing outside the pot mean the plant is dying or severely rootbound.
That’s just not true. In their natural habitat, orchids grow on trees with their roots exposed to air. They’re designed to do this.
Some folks think every visible root needs to be tucked back into the pot. Don’t do that.
Those aerial roots absorb moisture from the air and help stabilize the plant. Forcing them into the pot can damage them and increase rot risk.
Another myth says that roots growing over the rim mean you waited too long to repot.
I see healthy orchids with tons of aerial roots that don’t need repotting at all. The real signs of needing a new pot are different.
Quick Tip: If the roots are green or silvery and firm, they’re healthy—leave them alone.
When To Repot for Optimal Orchid Health Based On What The Roots Tell You
I repot my orchids when the potting medium breaks down into soggy bits, usually every 1-2 years.
If the bark or moss looks more like soil, it’s time. Degraded medium holds too much water and suffocates roots.
Check if roots are actually circling tightly inside the pot. Lift your orchid gently and peek at the bottom drainage holes.
If you see roots packed so densely that water can’t drain properly, that’s your signal.
Watch for roots that look mushy, black, or papery. Those are dead or dying, often from old media that stays wet. Healthy roots should be plump and white, green, or silver.
The best time for repotting is right after your orchid finishes blooming. The plant has energy to recover and establish itself in fresh medium before the next bloom cycle.
Quick Tip: Repot in spring or early summer when most orchids enter active growth—they’ll adjust faster.
Frequently Asked Questions
Orchid aerial roots can spark a lot of questions, especially when they start crawling over the edge of your pot or dangling in mid-air.
Most concerns boil down to what’s normal, what needs attention, and when to leave things alone.
Is it normal for my orchid to grow roots outside the pot, and what does it mean for my plant’s health?
Yes, it’s completely normal. Orchids are epiphytes in nature, which means they grow on trees instead of in soil.
Their roots naturally reach out into the air to grab moisture and help the plant stay anchored.
When I see aerial roots on my orchids, I take it as a sign the plant is doing what it’s supposed to do. These roots are adapted to absorb water from humid air and rain. They’re not a distress signal.
If your orchid is pushing out tons of aerial roots and looks cramped, it might be time to check if the pot is too small. But a few roots waving around? That’s just your orchid being an orchid.
What should I do with orchid aerial roots that are getting very long and unruly?
You don’t have to do anything. Long aerial roots won’t hurt your plant. They might look a little wild, but that’s part of their charm.
If the roots bother you or get in the way, you can gently guide them. Some people drape them over the pot edge or let them hang naturally.
I like to leave mine alone unless they’re flopping into something they shouldn’t.
Quick Tip: If a root is shriveled or brown, you can trim it back to healthy tissue with sterile scissors.
Can I gently tuck aerial roots into the pot or should they stay out in the air for best results?
You can tuck them in if they’re still flexible, but don’t force it. Stiff or brittle roots can snap easily, and broken roots are open doors for infection.
I usually leave aerial roots out in the air since that’s where they’re happiest. They’re designed to breathe and soak up humidity without being buried.
If you do tuck them in, make sure your potting mix is loose and breathable, like bark or coco chips.
Buried aerial roots can rot if the mix stays too wet. Watch for mushiness or dark spots after tucking them in.
Is it safe to cut off orchid aerial roots, and when would that be necessary to protect the plant?
It’s safe to trim dead or damaged roots, but I avoid cutting healthy ones. Healthy aerial roots are doing important work, even if they look messy.
You’d need to cut a root if it’s completely dried out, brown, or mushy. Dead roots can attract pests or spread rot to other parts of the plant.
Use clean, sharp scissors and cut just above the damaged section.
Never cut a root just because it’s long or in your way. Removing healthy roots stresses the plant and takes away its ability to absorb water and nutrients from the air.
How can I tell if my orchid roots are healthy or dead so I know what action to take?
Healthy roots are firm and have white or green tips. The green color shows up when the roots are wet or actively growing. Gray or silver roots are healthy too, just dry.
Dead roots feel hollow, papery, or mushy. They’re usually brown or black. If you gently squeeze a questionable root and it collapses or oozes, it’s dead.
Quick Tip: Check the root tips first since that’s where new growth happens.
I inspect my orchid roots every few weeks, especially during watering. Catching problems early makes a big difference.
Should I mist orchid aerial roots, and how often is too often to avoid problems?
Misting can help if your home is very dry, but it’s easy to overdo it. I mist my orchid roots once or twice a week when indoor humidity drops below 40 percent.
Too much misting keeps roots wet for too long, which invites rot and fungal issues. The roots should dry out between mistings.
If you live in a humid climate or your home naturally stays moist, you probably don’t need to mist at all.
Quick Tip: Mist in the morning so roots dry before nighttime.
Instead of misting, I sometimes set my orchids on a tray with pebbles and water. The evaporating water raises humidity without soaking the roots directly.
Note: Some images in the articles are sourced from Reddit and Other Platforms For Reference Purpose.