Want a Bigger, Bushier Pilea? These 7 Simple Changes Can Help Your Plant Grow Fuller This Season
Pilea, also called the Chinese money plant, is one of my favorite houseplants. It has round, coin-shaped leaves and is easy to care for. But many people notice their Pilea growing tall and thin instead of full and round.
This happens because a Pilea tends to grow up from one main stem. A full, bushy Pilea usually comes from a mix of bright light, regular turning, and letting the plant grow and keep its baby plants, called pups.

I’ll share seven simple changes you can make to help your plant fill out its pot.
Please note: Simplify Plants is reader-supported. As an Amazon Associate, I earn from qualifying purchases made by our readers with no extra cost added to you all! Some links in the post are affiliate links and I get a commission from purchases made through links in the post.
1) Place it near a bright window with indirect sunlight
Light is the biggest factor I look at when a pilea starts to look thin or stretched. These plants need plenty of bright light to grow full, round leaves on a short, sturdy stem.
The key word is “indirect.” Pileas like a bright spot, but strong direct sun can burn their leaves. Burned leaves may turn pale, yellow, or get brown, crispy patches.
I like to keep my pilea a few feet back from an east-facing window. It gets soft morning light there and avoids the harsh afternoon sun. A spot near a south- or west-facing window can also work. Just pull the plant back from the glass or use a sheer curtain to soften the light.
North-facing windows are a bit trickier. A pilea can survive there, but it will usually grow slowly and stay small. If that’s your brightest option, you may want to add a grow light, especially in fall and winter when the days are short.
So how can you tell if your plant isn’t getting enough light? Here are the signs I watch for:
- Long, bare stems: The plant stretches toward the light, leaving big gaps between leaves.
- Small new leaves: Fresh growth comes in smaller than the older leaves.
- Leaning: The whole plant tilts toward the window.
- Slow growth: Few or no new leaves or pups for weeks at a time.
These are the opposite of the bushy look most of us want. A stretched pilea spends its energy reaching for light instead of filling out.
Turning the pot helps a lot. I give my pilea a quarter turn about once a week. This way, each side gets its share of light, and the plant grows evenly instead of leaning in one direction.
If your room is on the dim side, a mirror placed near the plant can bounce a little extra light its way. It won’t replace a good window, but it can help.
One more tip: make changes slowly. If your pilea has been living in a darker corner, don’t move it straight into a very bright spot. Shift it closer to the window over a week or two. This gives the leaves time to adjust and lowers the chance of sunburn.
Once your pilea has steady, bright, indirect light, you should start to see shorter stems and more leaves packed closer together. That’s the first step toward a fuller plant.
2) Rotate the pot a quarter turn each week
Pilea plants grow toward their light source. If one side of the plant always faces the window, the stems on that side get more light. Over time, the whole plant starts to lean in that direction.
This leaning is called phototropism. It’s a normal plant response, but it can make your pilea look lopsided and thin on one side.

The fix is simple. I turn my pilea pot a quarter turn, about 90 degrees, once a week. After four weeks, every side of the plant has had its turn facing the light.
Why this helps your plant look fuller
When all sides get light, new leaves can grow evenly around the stem. This gives you a rounder shape instead of a plant that tips to one side.
Even light also helps the plant stay upright. A pilea that leans hard for a long time can develop a bent stem. That bend is hard to fix later.
Rotating doesn’t make the plant grow faster by itself. It just spreads the growth more evenly. Paired with bright, indirect light, it can help your pilea look more balanced and full.
How I make it a habit
The easiest way I’ve found is to rotate the pot each time I water. That way, I don’t have to remember a separate task.
If you water less often than once a week, you can pick a set day instead. Sunday works well for me. Some people use a small sticker or mark on the pot so they know which side faced the window last.
I always turn the pot in the same direction. This keeps the pattern simple and makes sure no side gets skipped.
Signs you should adjust
If your plant still leans after a few weeks, check how much light it gets. A spot that is too dim can cause the plant to stretch and lean more, even with regular turning.
You might also see a strong lean if the plant sits very close to a single bright window. In that case, turning it more often, like every few days, can help.
If your pilea already looks even and straight, you can turn it less often. Every one to two weeks is usually fine for a balanced plant.
A few quick tips
- Turn the pot gently so you don’t knock off leaves or disturb the roots.
- Keep the plant out of direct sun while you rotate it. Strong, direct rays can scorch the round leaves.
- Watch the new growth. Fresh leaves will show you which way the plant is reaching.
This step takes only a few seconds each week. In my experience, it’s one of the easiest ways to keep a pilea looking neat, round, and full.
3) Prune the top growth to encourage branching
A Pilea usually grows from one main stem. It keeps reaching up toward the light, and over time the lower part of the stem can lose its leaves. This leaves you with a tall plant that has most of its leaves bunched at the top.
Cutting off the top can help change that. When the main growing tip is removed, the plant often sends out new shoots from lower down on the stem. These new shoots can make the plant look fuller.
I’ll be honest, this step felt scary the first time I tried it. It seemed wrong to cut off the healthiest part of my plant. But a few weeks later, I saw small green bumps forming along the stem, and they turned into new leaves.
When to prune
The best time to prune is in spring or summer. This is when your Pilea is actively growing, so it can recover faster.
I avoid pruning in fall and winter. Growth slows down in those months, and the plant may take a long time to respond.
How I do it
Here is the simple method I use:
- Clean your tool. I use sharp scissors or pruning snips. I wipe the blades with rubbing alcohol first to lower the chance of spreading disease.
- Pick your spot. Decide how much height you want to remove. I usually cut a few inches below the top so the cutting has a few leaves on it.
- Make a clean cut. Cut straight across the stem. Try not to crush or tear it.
- Leave some leaves on the base. I like to keep at least a few leaves on the stem that stays in the pot. These leaves help the plant keep making food while it grows new shoots.
What to expect after cutting
Don’t worry if nothing happens right away. New growth can take a few weeks to show up.
Keep caring for the plant as you normally would. Give it bright, indirect light and water when the top inch or so of soil feels dry. The stem may sprout one new shoot or several. Each plant responds a little differently.
Don’t throw away the top
The piece you cut off can grow into a new plant. I place the cutting in a glass of water and set it in bright, indirect light. Roots usually start to form within a few weeks.
Once the roots are about an inch long, you can plant the cutting in soil. Some people plant the cutting back into the same pot as the mother plant. This is another easy way to make the pot look fuller.
A few mistakes to avoid
Try not to cut off too much of the plant at once. If you remove almost all the leaves, the plant may struggle to recover.
Also, skip pruning if your Pilea is already stressed. If it has drooping leaves, root rot, or pests, I would fix those problems first. A healthy plant handles pruning much better.
4) Remove damaged or overcrowded leaves
A Pilea puts energy into every leaf it holds. When some of those leaves are yellow, torn, or crowded, the plant still spends resources on them. Removing them lets the plant focus on healthy new growth.
I check my Pilea about once a week when I water it. It only takes a minute.
Start with damaged leaves. Look for leaves that are yellow, brown, spotted, or soft. Older leaves near the bottom of the stem often fade first. This is normal as the plant grows, but those leaves won’t turn green again.
If you see a lot of soft or yellow leaves at once, check the soil. Too much water is a common cause. Cutting the leaves off helps the plant look better, but you also need to fix the watering problem.
Next, look for crowding. Pilea leaves grow on long stalks called petioles. When too many leaves grow in one spot, they can block light from reaching each other. Leaves in the middle may stay small or start to lean.
I remove a few leaves that are clearly squished or growing at odd angles. This opens up space so light and air can reach the rest of the plant. Good airflow also helps lower the chance of mold or pests.
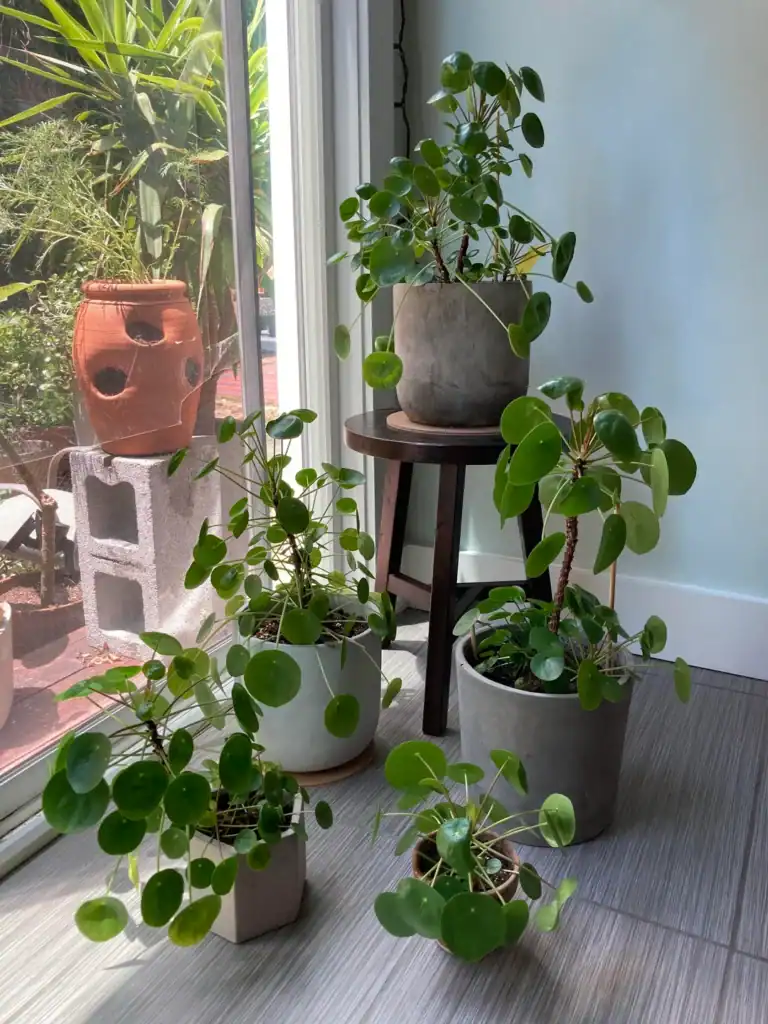
Here is how I remove a leaf:
- Use clean scissors or small pruning snips. I wipe mine with rubbing alcohol first.
- Cut the leaf stalk close to the main stem, but don’t cut into the stem itself.
- You can also gently pull off a fully yellow leaf if it comes away easily. Don’t tug hard.
Try not to take off too much at once. I stick to removing only a few leaves at a time, and I never take more than about a quarter of the plant in one go. Taking too many can stress your Pilea and slow its growth.
Also, keep the top of the plant in mind. The newest leaves grow from the center tip. Avoid cutting those unless you mean to pinch the top on purpose to encourage side shoots.
After trimming, place your Pilea back in bright, indirect light. Turn the pot a little every week or so. This helps the plant grow evenly instead of leaning toward the window.
With regular cleanup, your Pilea can put more effort into the leaves and pups that make it look full.
5) Let the top layer of soil dry before watering
Watering too often is one of the most common reasons a pilea stops growing well. I made this mistake with my first plant. I watered it every few days, and the leaves started to droop and turn yellow.
Pileas come from rocky areas in southwest China where water drains away fast. Their roots are used to getting a drink and then drying out. When the soil stays wet all the time, the roots can’t get enough air, and they may start to rot.
Unhealthy roots can’t support new growth. That means fewer new leaves and a thinner-looking plant.
How I check the soil
My rule is simple. I only water when the top inch or two of soil feels dry.
To check, push your finger into the soil up to your second knuckle. If it feels damp, wait a few more days. If it feels dry, it’s time to water.
You can also use a cheap soil moisture meter if you don’t like getting your hands dirty. I still use my finger most of the time because it’s quick and free.
How I water
When it’s time, I water slowly until water runs out of the drainage holes at the bottom. This helps make sure the whole root ball gets wet, not just the top.
After that, I empty the saucer under the pot. Letting the pot sit in standing water can keep the roots too wet.
Skip the fixed schedule
I used to water on the same day each week. It didn’t work well because my plant’s needs changed.
Several things affect how fast the soil dries:
- Season: Pileas grow more in spring and summer, so they usually need water more often. In fall and winter, the soil stays wet longer.
- Pot type: Terracotta pots let moisture escape through the clay, so soil dries faster. Plastic pots hold water longer.
- Pot size: Small pots dry out faster than big ones.
- Light and heat: A pilea in a bright, warm spot will use water faster than one in a cool, dim room.
Because of all this, checking the soil each time is more reliable than following a calendar.
Signs you may be watering too much or too little
Yellow leaves, soft stems, and soil that smells sour can mean the plant is getting too much water. Leaves that droop and feel thin or crispy, along with very dry soil, can mean it needs water sooner.
A pilea that is thirsty often perks up within a day after a good drink. Overwatering damage is harder to fix, so I’d rather wait an extra day than water too soon.
Good drainage helps a lot here too. I use a pot with drainage holes and a soil mix that drains well, so extra water doesn’t sit around the roots.
6) Use a pot with drainage holes and fast-draining soil
A Pilea can’t grow full and bushy if its roots are sitting in wet soil. Soggy roots can rot. When that happens, the plant often drops leaves, droops, or stops putting out new growth.
That’s why I always start with the pot. I only use pots that have at least one open drainage hole in the bottom. The hole lets extra water flow out instead of pooling around the roots.
If you love a pot that has no hole, you have a couple of options. You can drill a hole if the material allows it. Or you can use it as a cover pot and set a plastic nursery pot with holes inside it.
With a cover pot, I lift out the inner pot to water it. Then I let it drain in the sink before putting it back. This keeps water from collecting at the bottom.
You may have heard that a layer of gravel at the bottom helps drainage. It doesn’t. Gravel can actually cause water to sit higher up in the soil, closer to the roots. I skip the gravel and fill the whole pot with good potting mix instead.
Speaking of soil, the mix matters just as much as the pot. Pileas like soil that holds a little moisture but drains quickly. Dense garden soil packs down and stays wet too long, so I don’t use it in containers.

My go-to blend is simple:
- About two parts regular indoor potting mix
- About one part perlite or pumice
- A handful of orchid bark, if I have some
The perlite and bark create small air pockets. These help water move through and let the roots get oxygen. You can also buy a bagged mix labeled for aroids or houseplants that already contains these materials.
Pot size plays a role, too. A pot that is much bigger than the root ball holds extra soil that stays wet for days. I usually go up only 1 to 2 inches in width when I repot a Pilea.
If soil keeps washing out of the drainage hole, you can place a small piece of mesh or a coffee filter over it. This holds the soil in but still lets water pass through.
I also make sure the pot doesn’t sit flat in a saucer full of water. After watering, I empty the saucer within about 15 minutes. Some people set the pot on small pot feet so the bottom stays clear.
Even with the right setup, you still need to check the soil before watering. I push my finger about an inch or two into the mix. If it feels dry, I water until it runs out the bottom. If it’s still damp, I wait a few more days.
Light, season, and room temperature all change how fast the soil dries. So I go by how the soil feels, not by a set schedule.
7) Feed lightly with balanced fertilizer in spring and summer
Your pilea needs food to grow new leaves and baby plants. But it doesn’t need much. I’ve found that a light touch works much better than heavy feeding.
The best time to feed is spring and summer. This is when your pilea grows the most. You’ll notice new round leaves opening up from the center of the plant.
I use a balanced liquid fertilizer for my pilea. “Balanced” means the three numbers on the label are the same, like 10-10-10 or 20-20-20. These numbers stand for the main nutrients plants need. An even mix helps the plant grow steady leaves, stems, and roots.
Here’s my simple routine. I mix the fertilizer at half the strength the label suggests. Then I feed my pilea about once a month during the growing season.
Some growers feed every two to four weeks. That can work too, especially for a larger plant in a bigger pot. If you feed more often, just keep the mix weak.
Liquid fertilizer is easy to use. You can add it to your watering can and feed the plant when you water. I always water with it when the soil is a little damp, not bone dry. Feeding a very dry plant can harm the roots.
When fall comes, I cut back. In winter, I stop feeding completely. The plant grows much slower in the cooler, darker months, so it can’t use the extra food.

Too much fertilizer can cause problems. Salts from the fertilizer can build up in the soil. Watch for these signs:
- Brown or crispy leaf edges
- Weak, stretched-out stems
- A white crust on top of the soil or around the pot
- Leaves that droop even when the soil is moist
If you see these signs, stop feeding for a while. I like to flush the soil by running plain water through the pot for a minute or two. Let it drain fully before you put the plant back in its spot.
There are also a few times when you should skip feeding. Don’t feed a plant that was just repotted. Fresh potting mix already has some nutrients, so I wait several weeks until I see new growth.
I also don’t feed a pilea that looks stressed. If it’s wilting, dropping leaves, or recovering from a move, give it time first. Fertilizer won’t fix those problems.
If you want a more natural option, worm castings are a good choice. I sprinkle a thin layer on top of the soil in spring during years when I don’t repot. It adds gentle nutrients as you water.
A small amount of food at the right time can help your pilea grow fuller. With light, steady feeding, you may see more leaves and more baby plants popping up.
Understanding Your Pilea’s Natural Growth Pattern
A Pilea grows from one central stem that gets taller over time, while new plants called pups pop up from the soil or along the stem. Knowing which changes are normal aging and which ones mean your plant needs more light can help you decide what to fix.
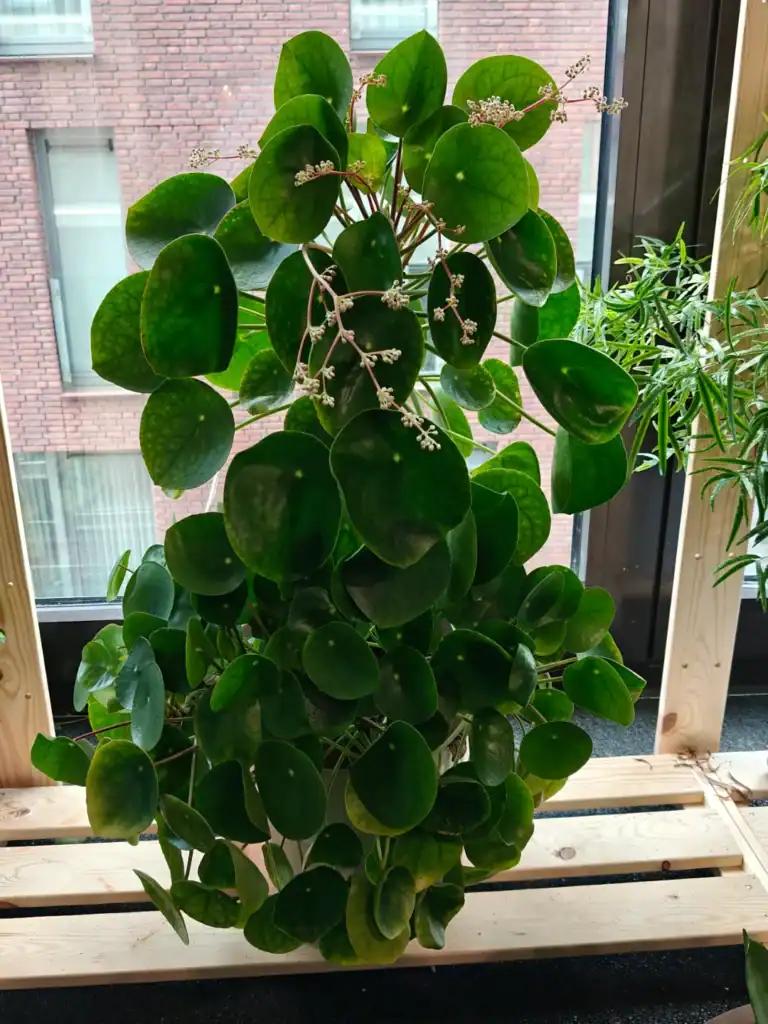
How the Main Stem and Pups Shape Your Plant
Your Pilea puts most of its energy into one main stem. Leaves grow from the top of that stem, and the oldest leaves at the bottom slowly drop off.
This is why a single Pilea often looks like a small tree instead of a full bush. I’ve noticed that the fullness most people want usually comes from pups, not from the main stem.
Pups grow in two main places:
- From the roots: These pop up through the soil, sometimes a few inches from the main stem.
- From the stem: These are small shoots that grow right off the trunk.
When you leave a few pups in the pot, they fill in the space around the main stem. Over time, this gives your plant a wider, rounder shape.
The Difference Between Healthy Maturity and Leggy Growth
As a Pilea gets older, its stem naturally grows taller and gets woody near the base. Losing a few lower leaves is normal. A mature plant still has plenty of large, flat leaves packed closely together at the top.
Leggy growth looks different. The stem stretches out, and the leaves grow far apart. In my experience, this almost always means the plant is reaching for more light.
| Sign | Healthy Maturity | Leggy Growth |
|---|---|---|
| Leaf spacing | Close together | Wide gaps on the stem |
| Leaf size | Large and even | Small or shrinking |
| Stem | Thick and upright | Thin, bent, or leaning |
| Lower leaves | A few drop slowly | Many drop quickly |
If your Pilea matches the right column, more light is a good place to start.
What to Expect as Your Pilea Fills Out
A Pilea grows fastest in spring and summer and slows down in fall and winter. Over time, you should see more leaves, wider growth, and small pups popping up around the base.
How Seasons Affect the Pace of New Growth
Pilea plants follow the seasons, even indoors. Longer days and more light give them the energy to grow.
Here is what I usually see with my own plants:
| Season | Growth Pace | What You May Notice |
|---|---|---|
| Spring | Fast | New leaves every week or two, first pups appear |
| Summer | Fast to steady | Bigger leaves, more pups |
| Fall | Slower | Fewer new leaves |
| Winter | Very slow | Little to no new growth |
Don’t worry if your plant seems to stop in winter. This is normal. I water less and skip fertilizer during these months.
Most of the bushy growth you want will happen in spring and summer. That’s the best time to repot, remove pups, or try new changes.
Signs Your Plant Is Making Healthy Progress
Filling out takes a few months, so it helps to know what good progress looks like. I check my Pilea about once a week for these signs:
- New leaves at the top that are flat, round, and bright green
- Short spaces between leaves on the stem, not long bare gaps
- Pups coming up from the soil or along the stem
- Even growth on all sides after you rotate the pot
- Firm leaves that are not drooping or curling
Yellow lower leaves are fine now and then. Older leaves drop off as the plant grows. If many leaves turn yellow at once, check your watering.
Frequently Asked Questions
A full Pilea needs bright indirect light, a weekly quarter turn, careful watering, and light feeding in spring and summer. Pruning the top and keeping pups in the pot can also help the plant look bushier.
How can I help my Pilea grow bigger and bushier?
I start with light. Place your Pilea near a bright window where it gets indirect sunlight for most of the day.
Next, turn the pot a quarter turn each week so all sides get equal light. You can also prune the top growth, remove damaged leaves, and let the top inch of soil dry before you water.
A bushy Pilea is often a cluster of plants, not one big stem. Keeping some pups in the pot adds a lot of fullness.
Why is my Pilea getting leggy, and how can I fix it?
A leggy Pilea usually isn’t getting enough light. The stem stretches toward the light source, and the space between leaves gets longer.
To fix it, move the plant closer to a bright window. If the stem is already very long, you can cut off the top and root it in water. The base may then grow new shoots.
Can I cut the top off my Pilea to encourage fuller growth?
Yes. I use clean, sharp scissors and cut the main stem just above a leaf node, leaving a few leaves on the base.
The cut base often sends out new shoots from the stem or the soil. The top piece can go in a glass of water until roots form, which usually takes 2–4 weeks. Then you can plant it in the same pot for extra fullness.
How much light does my Pilea need to grow full and healthy?
Pilea grows best with about 6 or more hours of bright, indirect light each day. An east-facing window works well. A spot a few feet back from a south- or west-facing window works too.
Direct afternoon sun can burn the leaves and leave brown or pale spots. In darker homes, a grow light set for 10–12 hours a day can help.
Should I leave Pilea pups in the pot for a bushier plant?
If you want a fuller look, I suggest leaving the pups in place. Each pup grows into a new stem, and together they fill the pot with round leaves.
If the pot gets too crowded, remove a few pups once they are about 2–3 inches tall. You can pot them up on their own or share them with friends.
How often should I water and fertilize my Pilea to encourage growth?
I water when the top inch of soil feels dry. That often means about once a week in summer and less often in winter. Always use a pot with drainage holes so extra water can drain out.
For fertilizer, use a balanced liquid houseplant feed mixed at half strength. Apply it about once a month in spring and summer, and stop in fall and winter when growth slows.
Note: Some images in the articles are sourced from Reddit and Other Platforms For Reference Purpose.