7 Ways To Aerate Houseplant Soil (+Mistakes To Avoid)
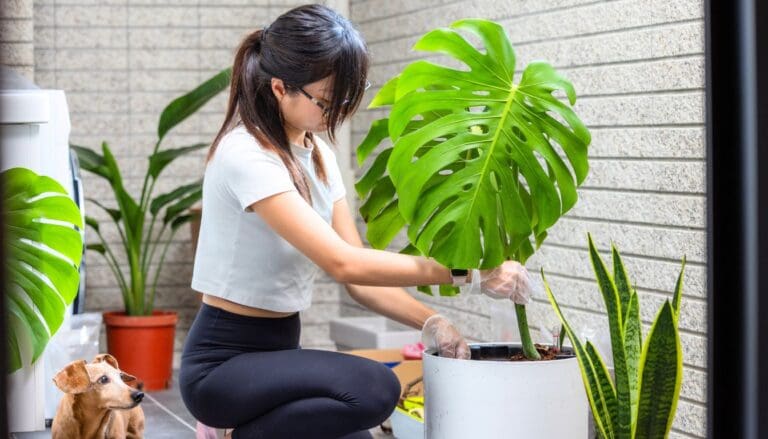
Sometimes, even when your houseplants get the required amount of light, water, and nutrients, they still show stunted growth and do not thrive. Aerating the soil of the plants can be the one thing you have been missing in your plant care routine.
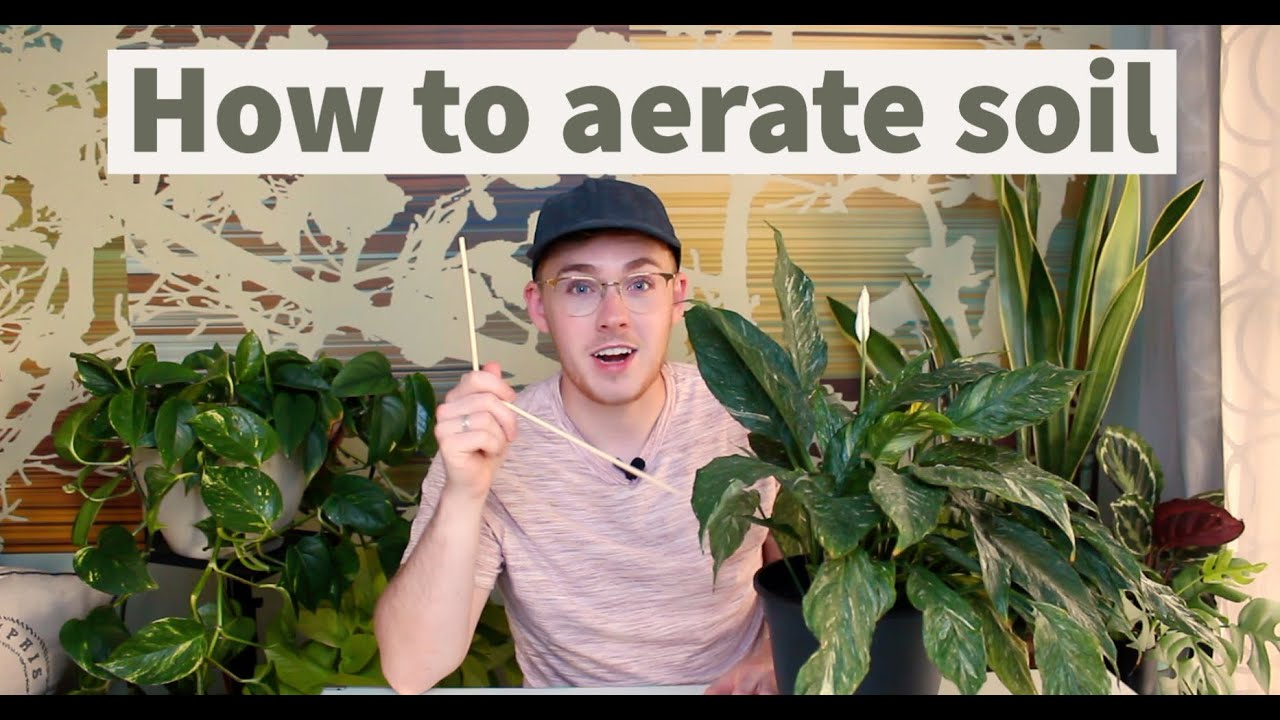
You can aerate the soil of your houseplants by adding materials like perlite, vermiculite, and coarse sand. You can also use pots with drainage holes to keep the soil aerated. The popular way to manually aerate the soil is by taking a stick and poking some holes in the soil.
Aerating the soil of our houseplants is very important and should not be ignored. This article will discuss the importance of aeration, the correct ways to aerate the soil of your houseplants, and the mistakes you should avoid. So, keep reading.

Please note: Simplify Plants is reader-supported. Some links in the post are affiliate links and I get a commission from purchases made through links in the post.
What is soil aeration?
In nature, the soil is naturally kept aerated by the various organisms that live in the soil, but when it comes to containers, those organisms are not able to break down the soil, and over time the soil gets tight.
Soil aeration allows for the flow of oxygen inside the soil so that the roots can breathe and not stay clogged and suffocated in the compact soil.
Hard soil does not let air flow, blocking the oxygen and trapping carbon dioxide inside the soil.
Thereafter it leads to poor drainage, by not letting water pass leading to chances of fungus growth and root rot.
The primary purpose of manual aeration in the soil is to gently move it so that more air and oxygen get inside it and pass to the roots.
Since the soil in the containers has no scope for natural aerators like worms to loosen up, it is important that we manually aerate the soil when we find that the soil has gotten clumpy.
When should you aerate the soil?
Aerating the soil of your houseplants must be done whenever you see signs of hard, compact soil.
Compact soil does not let the excess water flow freely and stays soggy for longer.
This also results in the browning of leaves and sometimes odor from the soil.
There is no hard and fast rule of how often you should aerate the soil, but you need to understand that compaction has already started when you see the following signs:
- When you water, the water sits on the soil surface for some time instead of flowing out.
- You find it difficult to insert your finger into the soil.
- You last repotted the plant 2-3 years ago, and now, the soil looks hard and clumpy.
Why the soil gets hard?
The passage of oxygen in the soil of potted plants gets more difficult due to lack of space.
Unlike natural aerators like worms and other creatures in outdoor soil, the soil inside pots indoors has no way to aerate itself, so the chances of soil getting compact are more prevalent in potting soil.
When the potting mix in the container becomes hard, nutrients, water, and oxygen fail to reach the roots.
Thus, aerating your houseplants’ soil becomes essential to improve the plant’s health.
Let us discuss a few reasons that make potting soil hard:
Old soil
Even good-quality potting soil begins to get hard with time.
With daily watering, the soil starts to settle down and gradually turns clumpy limiting air passage.
This is why it is recommended to change your plants’ soil every 1-2 years.
Wrong soil type

Using a soil type unsuitable for your houseplants is another reason for poor aeration in the soil.
For houseplants in pots, one should not use only garden soil as that can turn clumpy over time.
Potting soil should be lighter and airy, so you must amend the garden soil with other aerating agents to make it suitable for the containers.
Aerating materials get flushed away
Aerating materials like coco coir, perlite, and sand keep the soil aerated, and light gets washed away from the pot’s drainage holes or dies over time.
Once they start dying, they can no longer provide aeration and instead start becoming lumpy.
Dangers of poorly aerated soil
When the roots are left in stuffy hard soil over a prolonged time, it leads to multiple risks for your plants.
Lack of water flow

In a healthy soil mix, when you water, it travels freely to the roots of the plant, but the compact soil does not let the water travel.
So, when you water, the water sits on the soil surface or directly goes out of the drain hole instead of soaking the thirsty roots.
This makes the plants thirsty and dehydrated.
Overwatering
Clayey clumpy soil also stays soggy for a long time.
When water runs through the soil, it dries off it quickly, but in the case of clumpy soil, the soil does not dry off and stays saturated with water.
The oxygen supply is completely cut off inside, and the roots begin to get attacked by pathogens.
Also read: 10 ways to dry out an overwatered plant soil
Decreased aeration
With the decreased oxygen supply, the roots begin to suffocate, so the respiration system of the plant suffers.
In the process, the plant takes the sugar it makes during photosynthesis and turns it into food.
When this process is not complete due to lack of oxygen, the plant cannot make sufficient food, so its entire health and growth reduces.
Limited nutrients
As we have discussed, compact soil blocks nutrients from reaching the roots.
Nutrients like nitrogen, iron, calcium, phosphorous, potassium, magnesium, and manganese are all necessary for the development of plants.
So, the plant undergoes nutritional deficiencies and shows signs like stunted growth, wilting, fading, etc.
Reduced growth of roots
The roots of plants enjoy spreading out and need space and air.
In the hard soil, the movement of the roots reduces, and it begins to starve of nutrients and energy, and oxygen.
How to aerate the soil of your potted houseplants?
There are multiple ways to aerate the potting soil for houseplants.
You can aerate the soil by changing the existing soil, mixing aerating additives, changing the pots, changing potting mix, and other ways.
Let us learn what you can do to aerate the soil of your houseplants:
1. Aerate soil by adding more aerating materials
You can improve the aerating capacity of the soil by adding materials like sand, perlite, peat moss, charcoal, coconut husk, orchid bark, and vermiculite.
These natural elements help to make the soil lighter and fluffier, improving the soil’s aeration capacity.
Good potting soil should have the right balance of drainage, moisture retention, aeration, and fertility.
Multiple types of materials are used to increase the aeration capacity of your soil.
- Perlite: It is a kind of volcanic rock that improves the drainage quality of the soil and allows air to circulate in the soil. Perlite is often mistaken for the little white balls of Styrofoam which are synthetic elements.
- Coarse sand: Using large coarse particles of sand helps break the dense, compact soil and allows airflow and drainage.
- Vermiculite: It is a mineral that is formed by heating mica chips. Vermiculite is used in potting soil to increase the aeration and drainage of the soil while also helping in the retention of moisture and minerals. This is ideal to be used in plants that like moist soil.
- Peat moss: It is a material derived from decomposed plants and moss. It can retain a lot of moisture and release it when needed. It also helps in keeping the soil lightweight and allows airflow. They are used in plants that require moisture in the soil.
- Sphagnum moss: They are dried bog moss used for plants that require high moisture but do not like being overwatered. They increase the aeration and moisture retention quality in the soil.
2. Ensure the pot has airflow
Once you have prepared the ideal soil mix for your houseplants, look into the pot you choose to grow the plants.
The material of the pot is also another important factor that determines soil aeration.
Certain materials like clay are porous, which naturally lets air pass through them, while some, like ceramic and plastic, are non-porous, which keeps the soil more compact.
- Clay pots are the most recommended pots for growing plants because they are a great natural aeration agent. Due to its porosity, water and air can travel through it, increasing airflow in the soil and reducing the chances of wet and soggy soil by increasing water loss.
- Plastic, ceramic, and metal pots are non-porous and non-breathable. They hold the moisture trapped inside them and do not let air pass. Though moisture-loving plants may grow well in these pots, they also increase the chances of fungus, overwatering root diseases. Ensure to drill some holes in the bottom of the pot to let water flow out and allow air to flow.
Some ways to improve aeration in these pots are:
- Adding a layer of stones and pebbles at the bottom of the pot also helps in better drainage and helps in air circulation.
- Grow the plant in a smaller clay pot and then insert this pot in the bigger decorative pot.
3. Spike aeration
Spike aeration means using spiked objects to puncture some holes in the soil that let oxygen go deeper into it.
To aerate the soil of our plants, you can also use objects like toothpicks, chopsticks, plastic stirrers, sturdy straws, etc., to poke holes in the plant soil.
Poke the soil of your plants gently in healthy dry soil before watering so that the soil becomes loose and increases airflow.
This will also help the water to distribute evenly in the soil.
4. Monthly flush

Flushing out the soil every once in a while improves the aeration of the soil.
It removes all the accumulated toxins and salts from the soil.
So drench the container soil with water 2-3 times while flushing out.
5. Yearly soil refresh
Over time as you water the soil and it begins to harden, materials in the soil, like peat moss which eventually decompose, begin to harden the soil.
Any soil in the container begins to lose its goodness after 1-2 years.
So, even if your plant has not outgrown the pot, the soil needs to be refreshed periodically to encourage aeration.
6. Consider repotting
With prolonged use, even the most fertile soil loses its quality.
Daily watering, the soil starts settling down and gets clumpy.
It loses its nutrients and becomes less fertile.
Repotting every 2-3 years is important, though we do not follow it mostly due to busy schedules.
Repotting not just helps in aerating but also replenishes the soil.
7. Aerating the soil of an overwatered plant
When you notice the soil of your plants has been overwatered, you must increase aeration so that the soil dries quickly.
Or else the wet soil can lead to root rot in the plant.
Look for the signs of overwatering like:
- Yellow or brown leaves: Yellowing or browning could also be signs of other diseases, but overwatering is one of the most common reasons.
- Wilting: In overwatered soil, the leaves of the plants begin to wilt as the stem gets soft and mushy. Too much water saturated in the soil turns the plant wilted.
- Blisters on the leaves: Due to too much water saturation, the plant develops a disease called edema, which looks like tiny blisters on the leaves.
- Rotten smell: If the roots stay in water for too long, it may lead to the growth of fungus and diseases in the soil leading to root rot. The soil may have a pungent odor as the rot gradually progresses.
You must inspect the soil thoroughly to check for overwatering if you notice the above signs.
You need to move the plant to a well-ventilated spot and poke the soil with spikes to improve airflow.
Changing the plant’s soil is recommended if root rot has set in.
Will aerating damage the roots?

This is a fear among some plant owners that aerating the soil may destroy its roots.
The roots of a plant contain a set of small and large roots.
Aerating helps the oxygen to reach the roots in a better way so that they can breathe and function better.
But while aerating, you should be gentle and not too rough.
If you poke some smaller roots in the process, they will recover, as that will not destroy the plants’ core system.
But you should be careful not to run over the bigger root system might get injured, and it might be more difficult for them to recover.
1. Be careful not to over aerate
Though aerating the soil is essential, overdoing anything is harmful.
So if you mix too many aerating agents like sand or perlite, the soil will remain loose, but it will not be sufficiently nutrient-rich.
The soil needs organic-rich nitrogen, phosphorus, magnesium, potassium, iron, and calcium.
So finding the correct balance in the potting mix is crucial for the best growth of the plant.
Adding compost is a great way to make soil organically rich.
2. Avoid artificial compaction
Many of us are guilty of placing heavy decorative items on our houseplant’s soil for aesthetic purposes.
Though they look good, they are not good for the plant’s and soil’s health.
Final words
Soil aeration is a beneficial process of keeping the plant soil healthy and ensuring that your plants get the best environment. It is especially important when the soil becomes compact.
Add aerating materials, poke holes into the soil, use pots with drainage holes, and repot the plants periodically to keep the soil aerated. Be careful while performing any of these as you would not like to damage the roots.
Reference: Soil Aeration, Soil Mix for good aeration, Aeration of Potting Media
Recommended Garden Supplies
| Product Image | Our Recommended Gardening Supplies | Check Offers! |
|---|---|---|
Top Top
Top
Top
Top
Top
Top
Top
Top | rePotme Houseplant and Tropical Classic Potting Soil Mix | Check Offer On Amazon |
 Top
Top
Top
Top
Top
Top
Top
Top | Espoma Organic Indoor Plant Food | Check Offer On Amazon |
 Top
Top
Top
Top
Top
Top
Top
Top | GooingTop LED Grow Light 6000K Full Spectrum Clip Plant Growing Lamp | Check Offer On Amazon |
 Top
Top
Top
Top
Top
Top
Top
Top | Soil Moisture Meter | Check Offer On Amazon |
 Top
Top
Top
Top
Top
Top
Top
Top | Govee Hygrometer Thermometer, Bluetooth Enabled! | Check Offer On Amazon |
 Top
Top | LEVOIT Humidifiers for Large Room(Best For Plants) | Check Offer On Amazon |
 Top
Top
Top
Top
Top
Top
Top
Top | Upgraded DIY Automatic Drip Irrigation Kit, 15 Potted Houseplants Support | Check Offer On Amazon |
 Top
Top
Top
Top
Top
Top
Top
Top | Stainless Steel Heavy Duty Gardening Tool Set | Check Offer On Amazon |
 Top
Top
Top
Top
Top
Top
Top
Top | Bonide Insecticidal Soap | Check Offer On Amazon |
 Top
Top
Top
Top
Top
Top
Top
Top | Bonide 32 oz Spray Neem Oil for Organic Gardening | Check Offer On Amazon |
 Top
Top
Top
Top
Top
Top
Top
Top | Garden Safe Fungicide | Check Offer On Amazon |


