How To Fix A Root Bound Houseplant? (+Signs, Causes)
Rootbound is a situation when the plant doesn’t have any space left to expand its roots and grow further.
It is a typical situation found in all houseplants as all of them get rootbound at some point.
Being little rootbound will not harm the plants because some flowering plants promote flowering when rootbound. But being extremely rootbound can become a problem for the plants.
But should a houseplant be root bound? What are the signs, problems and how to fix the same?
Houseplants prefer to be slightly root bound as it helps them to hold the soil well. But if the plant gets tightly root bounded, it won’t absorb enough water and nutrients from the soil, resulting in stunted growth. Repotting once every 1-2 years will prevent severe root-bound conditions.
The roots appearing from the drainage holes or the soil and growing in circles are signs of a rootbound plant.
If your houseplant has the same issue, read this article till the end. This guide will help you with the knowledge of identifying the root-bound conditions in your indoor plants and fixing the situation by repotting.

Please note: Simplify Plants is reader-supported. As an Amazon Associate, I earn from qualifying purchases made by our readers with no extra cost added to you all! Some links in the post are affiliate links and I get a commission from purchases made through links in the post.
What is rootbound?
Before you deal with a rootbound situation, you should understand what it is.
The roots are channels that every plant utilizes to absorb nutrients, minerals, water, hormones, and gases. These are the essential materials plants need for surviving.
Roots help in keeping the plant upright. Without healthy roots, the plants, too, won’t remain healthy and strong.
As time goes by, the roots will need more space to grow longer.
But, if the pot is small-sized, the roots will come out of the drainage holes and start displacing the soil due to lack of space. This situation is called rootbound.
When this happens, it is an indication that your plant will need more space for flexible growth.
Why is my houseplant rootbound?
When the plant is developing and growing constantly, it will need more space for growth. Along with that, it will also need more water and nutrients.
When the plant keeps growing and fills up all the space in the pot, you will notice more roots than soil.
When this happens, the plant fails to receive sufficient water or nutrients from the soil. Hardly any soil remains from which it can absorb nutrients and water.
The roots keep growing in search of nutrients, and thus the plant becomes rootbound or potbound. Slowly, the roots peep out of potholes, out of the soil surface, twisted around the plant.
Symptoms of rootbound houseplant
When the plant becomes rootbound, it will barely absorb water and nutrients.
When this happens, the plant will show some symptoms indicating that it is rootbound. Understanding the symptoms will help you identify the problem.
Yellow leaves
When the leaves of your indoor plant start getting yellow, it indicates that your plant is not getting enough water and nutrients.
When the houseplant is rootbound, there is not enough soil left from which the roots can absorb water and nutrients. As a result, the plant grows weak, causing yellow leaves.
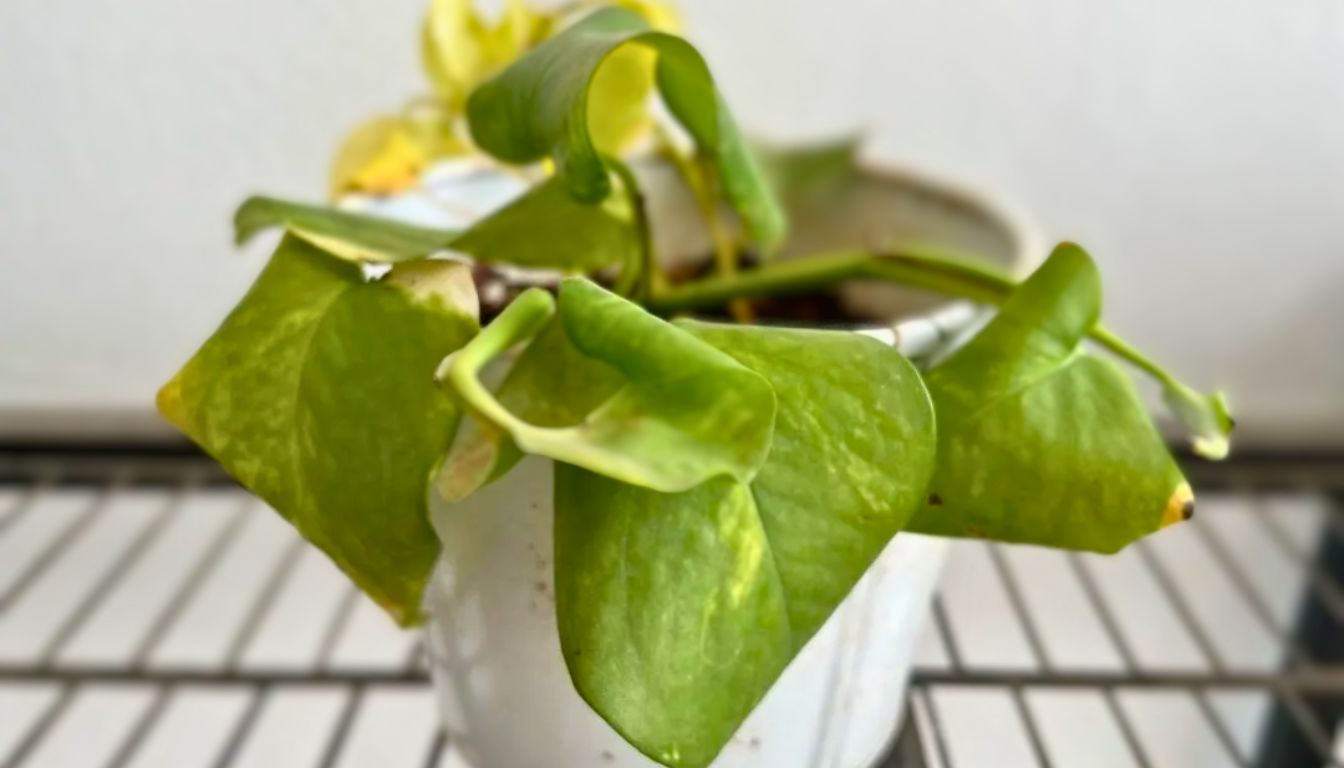
Wilted leaves
Even after providing a good amount of water, the roots fail to intake it due to its twisted state. As a result, the plant remains dehydrated and wilt.
Root rot
When the roots outgrow, they grow out of the drainage holes and block the holes. Due to this blockage, the water fails to flow out.
Due to the water remaining inside the pot, the roots will keep sitting in it for long, causing root rot.
Pot damage
In an extreme rootbound situation, the pot might face some bending or breakage.
Either the plant will grow much bigger and heavier, or the roots will keep growing for more space, and they might break the pots.
Lack of soil
When the roots grow continuously, they start displacing the soil in search of more space. Soon, there will be more roots visible than soil.
The roots will peek out from the soil surface. This condition is an indication that your houseplant is rootbound.
Underdeveloped and small leaves
As the roots outgrow, they exhaust all the nutrients and water entirely from the soil.
The plant absorbs the nutrients present in the potting mix, and some get washed away with each watering.
But as time goes, the roots keep growing, and not much remains after the plant absorbs everything the soil offers.
Moreover, the number of roots increases more than the soil. So whatever nutrient remains left in the soil doesn’t seem enough. As a result, the plant fails to develop or grow bigger leaves.
How do you know if your houseplant is rootbound?

The symptoms mentioned above will make it easy for you to understand that your plant is rootbound.
Some signs can indicate other problems, too, such as underwatering, overwatering, a lack of fertilization, or sunlight.
So, to identify the actual problem, you have to look at the 3 most important signs of a rootbound plant:
- Roots coming out of drainage holes of the pot.
- Roots come out from the soil surface or some few millimeters below the topsoil.
- The motion or direction of root growth above the soil.
If you notice the above results in your houseplants, you can be sure that the plant is rootbound.
To confirm it and check the stage, you can follow these 3 steps:
- Allow the soil to dry up if it is wet. But don’t kill the plant by letting the soil become compact. Just make it dry enough to check the roots.
- If you want to bring the plant out of the planter, you will need a proper location as it can get messy. Garden or backyard would do. Or place some cardboard on the floor, and then do it.
- If your plant is in a plastic pot, gently squeeze the pot at the borders to loosen the soil and the roots. If the pot is ceramic, wooden, or terracotta, gently tap on the borders or outer walls of the pot. This will help the plant to loosen the soil and take out the plant.
Once you dry up the soil or remove the plant from the pot, you can check the roots and confirm the problem.
What happens when a houseplant is rootbound?
Some houseplants enjoy the rootbound situation. Being slightly rootbound helps the flowering plants to produce abundant blooms.
However, root growth is a sign that your plant is receiving good growing conditions. They are developing well.
But, if the pot is small and the plant is rootbound, the plant won’t remain healthy for long. Other problems will arise if you don’t fix the problem on time and constantly ignore the signs.
Even if you transplant your houseplant to a bigger planter, the roots will still stay twisted in a tight knot.
Will the rootbound houseplants recover or die?
The rootbound condition will damage the plant if not fixed. Without proper care and attention, the plant will stop receiving water and nutrients.
When the situation worsens day by day, the roots will choke the plant, resulting in the death of the plant. The long, continuous, and constant stress and dehydration will kill the plant.
But, if you act on time by trying to retrieve the rootbound houseplant, you can help your plant recover from the excess rootbound conditions.
Proper re-potting and providing adequate water and nutrients can make your houseplant recover within a few weeks. Continue reading to know more about proper transplantation and care.
When to repot an indoor plant?
Generally, it would help if you considered repotting your houseplants every 12 to 18 months.
Repotting varies according to the plant type. Repotting the plants every year will help in preventing rootbound situations and other issues related to them.
However, this timing is not the same for all. Some fast-growing plants will need repotting at least every 8-9 months, whereas a slow-growing plant might need repotting every 4 to 5 years.
You might not remember these number mappings of repotting. But when your plant is getting rootbound, they will show you the signs.
Your plant will have droopy or discolored leaves, soil drying faster than its usual rate, or roots coming out of drainage holes. At that time, you will have to take steps as soon as possible.
Before maintaining these year gapping of repotting, reconsider your decision. Some plants would enjoy being slightly root bound as it promotes abundant flowering.
But, of course, once the plant starts showing signs of yellow or wilted leaves or roots coming out from the pot or soil surface, you will have to shift your plant into a bigger pot.
You can wait for the springtime as it is the best time to repot. Every plant will go in shock after transplanting.
Repotting during spring will help the plant recover quickly from the shock as it is most of their growing season.
However, some gardeners think that repotting during the springtime interfere with the plant’s active growth and development.
Thus, they support repotting during the winters as most plants remain dormant during winters. But the plants might be unable to recover much from transplant shock.
You can research and gather information about the ideal time of repotting for your particular houseplant. That will be the best work, I think.
Choosing the right planter for your houseplant

Before you opt for repotting, it is vital to know and select the right pot for your houseplant. The plant’s good health depends on the pot size to some extent.
When you are repotting your plant, you need to give them extra space for root growth. For that, you will have to select a pot bigger than the existing one.
When you use a much bigger pot, you will need more soil to fill up the pot. When you water it, the soil will take forever to dry out. The roots will remain wet for a long time, resulting in overwatering.
So, do not jump to a large pot. The new pot must be just 1-2 inches wider in diameter than the existing pot.
Use a pot of porous material. This helps in drying out the soil fast. But, make sure that your plant can handle dry soil.
Also, ensure that the pot contains proper drainage holes. Decorative pots might not have any drainage holes. In that case, you must drill and make holes beneath the pot.
How to fix a rootbound plant?
You will have to repot your plant carefully so that the plant can remain stress-free.
First, prepare an ideal potting mix for your plant. Use soil with proper drainage and moisture retention.
Using ingredients like coco coir, compost, manure, peat moss, bone meal, perlite, and vermiculite will make the potting mix quite nutritious for your plant. (Research the best mix for your plant and then use)
Water the plant 24 hours before repotting. This will keep the roots flexible and hold the soil in shape.
When the soil remains dry, it becomes difficult to take out the plant. You might have to use a stick or knife to loosen the soil. This can be risky as poking into the soil with sticks or knives can harm the roots, so be careful.
Watering the soil will keep it a little moist and loose. You’ll have to put less effort while taking the plant out.
Now, let’s discuss the steps of repotting in detail:
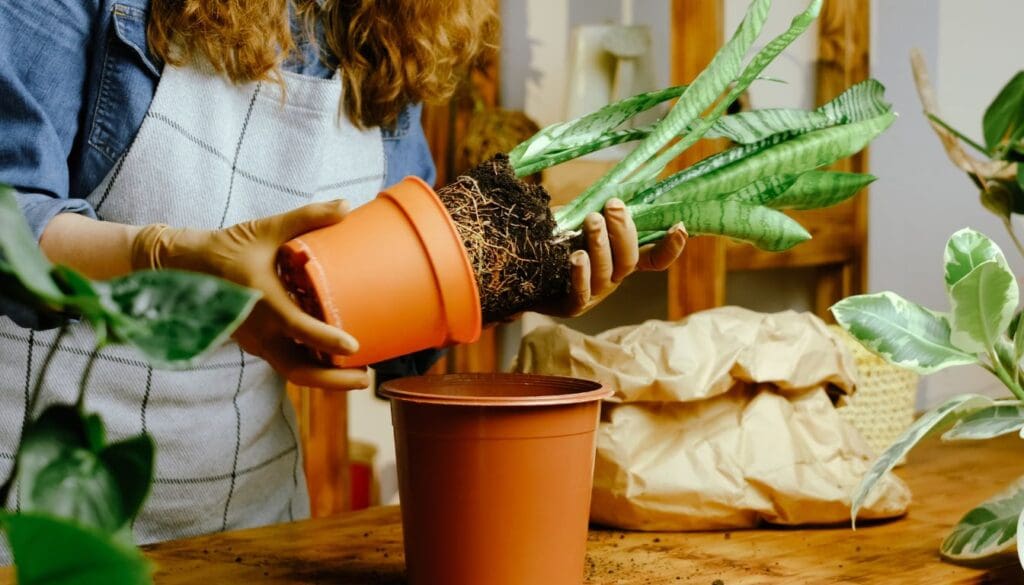
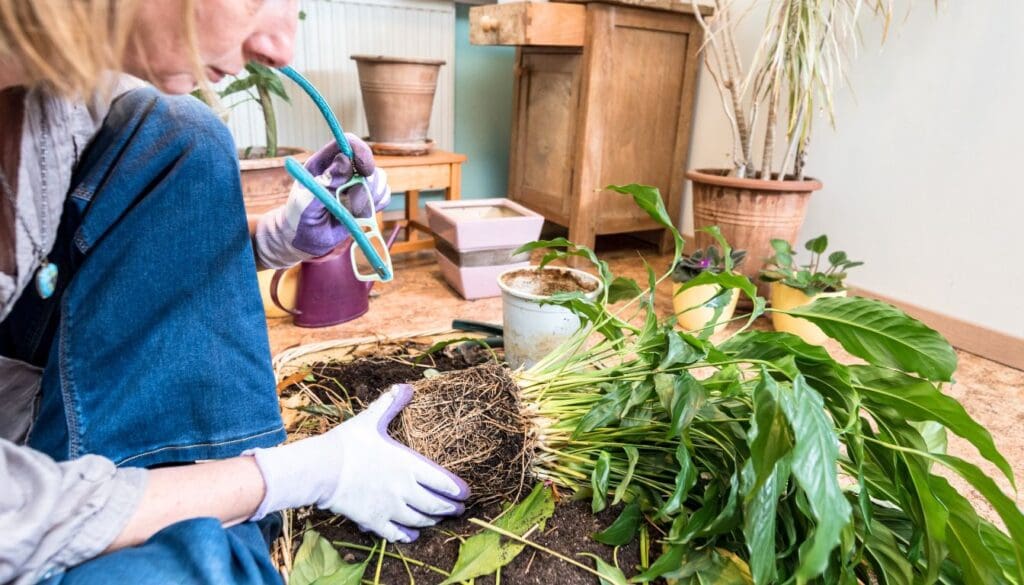
Removing the plant

If the pot is a terracotta or ceramic, you can tap the sides and bottom of your pot to loosen up the soil from the sides of the container.
If you are using a plastic pot, either tap the sides or squeeze the pot.
You can also hold your pot horizontally or sideways to tap the pot to loosen the soil and bring out the plant.
Examine the roots
The white or tan-colored roots are healthy, while the soft, mushy, and dark brown are damaged, rotten roots. They will also release a foul, rotten smell. These are the signs of root rot.
You will have to remove the rotten roots to stop further rotting and keep the plant healthy.
Managing the roots
A slightly rootbound state is acceptable. But the highly twisted and circular roots, choking the plant with tight knots, need to be pruned off.
But you can untangle the little circular roots.
For pruning these roots:
- Use a sharp, sterilized scissor, pruner, or knife to make clean cuts.
- Cut all the damaged, long thin roots.
- Remove the old soil from the roots.
Using your fingers or forks, try undoing the twists of roots from the sides and the soil surface.
Lesser roots mean less support. So to match and balance the support, you will have to remove some extra foliage. Then the roots will be able to give the plant the exact support it requires.
Pruning roots to maintain plant size
If the size of your plant is just the exact size you want, or you do not want to repot it to a new big pot, you will have to fix the rootbound plant by pruning the roots.
For that, use a sharp and sterilized pruner to prune off 1/3rd of the roots system. Cut off 1/2 inch around the outside of the root ball.
Do not disturb the root ball. Now, repot in that same container and soil.
Refilling the pot
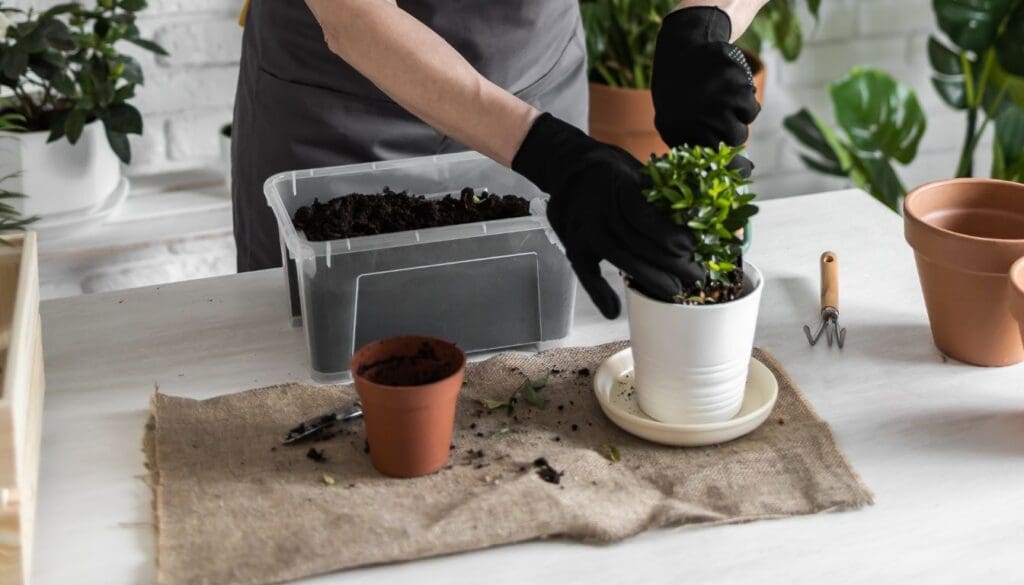
After choosing the right pot, taking the plant out, and managing the roots, you must refill the pot and plant back the plant.
- Choose a new and one-size bigger pot.
- Pour one layer of soil on the bottom of your pot.
- If the soil seems less or, the plant seems low, put another layer at the bottom.
- Now place your plant at the center.
- Fill up the sides with the fresh potting mix.
- Gently tap the soil around the plant. Do not press too much as that can block all the air pockets.
- Now, water your plant very well, allowing the soil to settle down around the roots and the plant.
- You can add some more potting mix if any hollow spot develops.
Tips for avoiding transplant shock
You must try to make the repotting experience as smooth as possible for your plant. Here are some tips to save the plant from transplant shock.
- Don’t choose a massive pot for your plant.
- Be gentle and careful while handling the roots. Don’t mess with the healthy roots or the root ball.
- Don’t expose the roots outside for a long time. The moment you start repotting, quickly move the plant to the new pot with fresh soil. Exposing them out for long will dry them up.
- Use the correct potting soil for your particular plant.
- Try to maintain all other requirements the same as before.
- While repotting the plant, try not to push it too deep down the soil. Maintain the original depth.
List of some plants which like being rootbound
Despite all the risks behind being rootbound, some plants enjoy being rootbound:
- Peace Lily
- Spider Plant
- Snake Plant
- Jade Plant
- Aloe Vera
- Boston Ferns
- Hoya
- Philodendron
- Succulents
Final words
You can’t do anything much to prevent your houseplant from getting rootbound. The plant will not stop growing if its surrounding conditions are favorable.
The best way to prevent your plant from experiencing an extreme rootbound state is to take immediate steps once they start showing signs like roots coming out of drainage holes. Maintain regular observation to watch out for these signs.
Use the correct repotting methods and repot your plant when the time is right. Take good care of your plant after transplanting. Avoid fertilizing for at least 6 months after repotting. Soon you will find your plant back to normal and happy health.
Note: Some images in the articles are sourced from Reddit and Other Platforms For Reference Purpose.