How To Save A Root Bound Spider Plant?
Spider plants are tough, but even they have limits. When roots start spiraling around the pot with nowhere else to go, your plant can’t get the water and nutrients it needs to stay healthy.
The good news is that saving a root-bound spider plant is simple—you just need to move it into a bigger pot with fresh soil.
I’ve rescued plenty of root-bound spider plants over the years. They bounce back fast once they have room to spread out again.
In this guide, I’ll walk you through how to spot the warning signs and repot your plant without damaging it.
You’ll also learn what to do with those baby spiderettes and how to stop this problem from happening again.
Please note: Simplify Plants is reader-supported. As an Amazon Associate, I earn from qualifying purchases made by our readers with no extra cost added to you all! Some links in the post are affiliate links and I get a commission from purchases made through links in the post.
What Does It Mean for a Spider Plant to Be Root Bound?
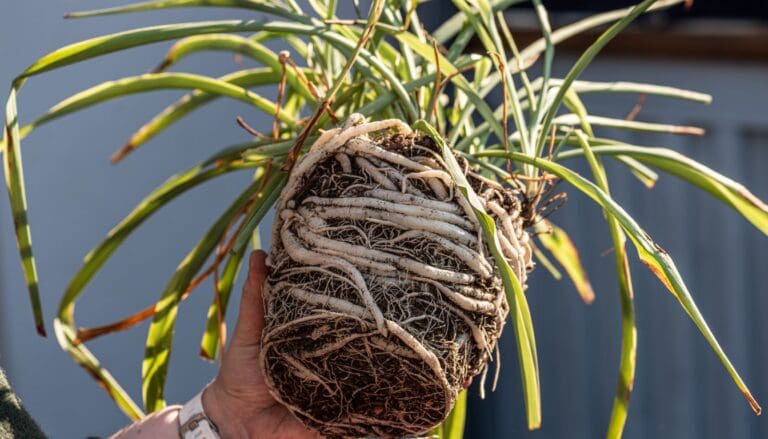
When a spider plant becomes root-bound, its roots have run out of space and start circling the pot. The roots get so cramped that they can’t absorb water and nutrients properly anymore.
Understanding Root-Bound Conditions (And Why Your Plant Starts Acting Weird)
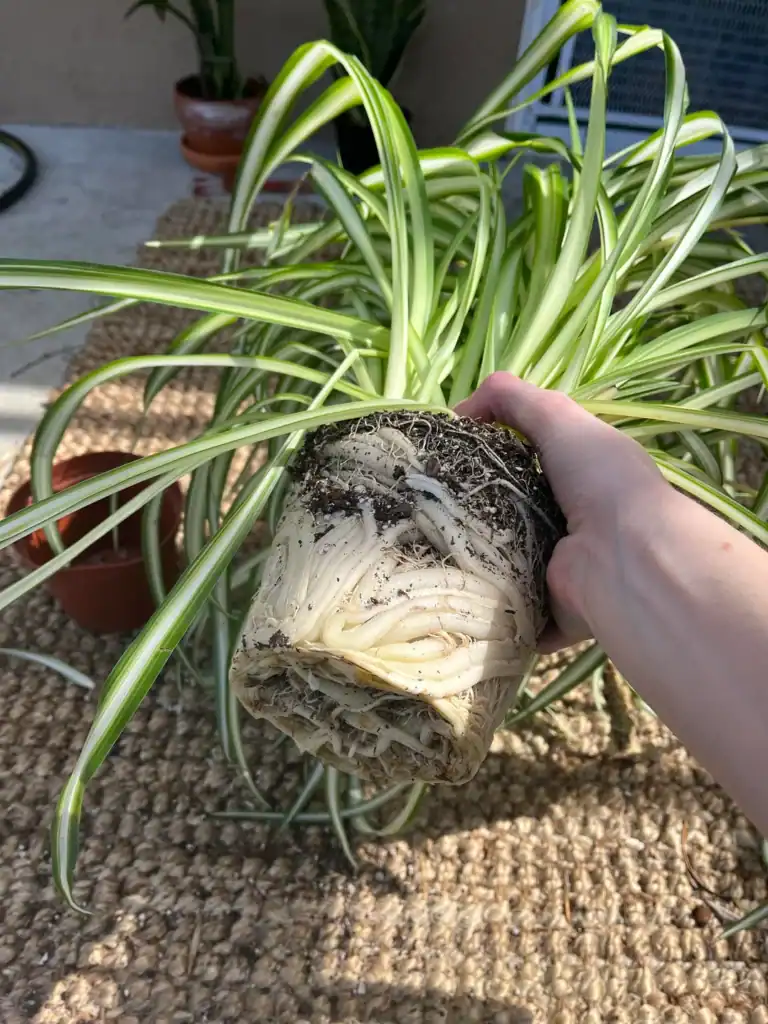
A root-bound spider plant has roots that have filled up every bit of available soil in the pot. I’ve seen roots wrap around themselves in tight circles because they have nowhere else to go.
Sometimes the roots even push through the drainage holes or pop up above the soil line. When this happens, the plant can’t take in enough water even when you water it regularly.
The soil dries out super fast because there’s barely any left. Most of the pot is just a tangled mass of roots.
You might notice your spider plant looking droopy or wilted more often. The leaves may turn brown at the tips or lose their vibrant color.
Growth slows down or stops completely because the roots can’t support new leaves. Quick Tip: If water runs straight through the pot without soaking in, your spider plant is probably root-bound.
Differences Between Slightly Root Bound and Severely Root Bound (When to Worry vs. When to Panic)
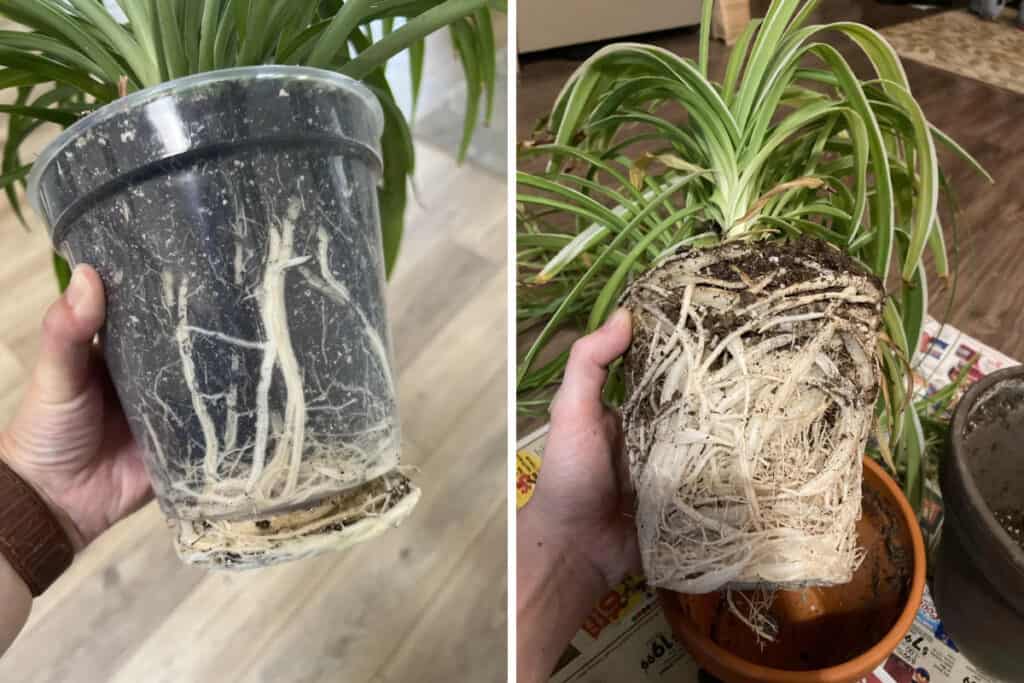
A slightly root-bound spider plant still has some soil between the roots. You’ll see roots when you pull the plant out, but they’re not completely packed together.
The plant still grows okay and doesn’t need water constantly. Severely root-bound plants are a different story.
The roots form a solid mass that looks like the shape of the pot. I can barely see any soil when I check these plants.
The root ball feels rock-hard.
| Condition | What You’ll See | Plant Behavior |
|---|---|---|
| Slightly Root Bound | Roots visible at drainage holes, some soil still present | Slower growth, normal watering needs |
| Severely Root Bound | Dense root mass, roots circling multiple times, minimal soil | Stunted growth, constant wilting, water runs through immediately |
Severely root-bound plants need immediate help. They can’t survive long in this state.
Common Causes for Cramped Roots (How Plants End Up This Way)
Spider plants grow fast and produce lots of roots. I’ve watched them fill a pot in just one growing season during spring and summer.
Many people don’t realize how quickly these plants outgrow their containers. Using a pot that’s too small from the start speeds up the problem.
Some folks keep their spider plants in the same nursery pot for years without checking on them. Forgetting to repot is the main reason spider plants get root-bound.
I recommend checking your plant every 12 to 18 months. Spider plants also produce baby plants (spiderettes) that take energy away from root health if left attached too long.
Quick Tip: Mark your calendar when you repot so you remember to check again next year.
Identifying Signs of a Root-Bound Spider Plant
A root-bound spider plant shows clear warning signs before it starts declining. I’ve learned that catching these symptoms early makes saving the plant much easier than waiting until it’s in serious trouble.
Roots Growing Out of Drainage Holes (The Most Obvious Red Flag)
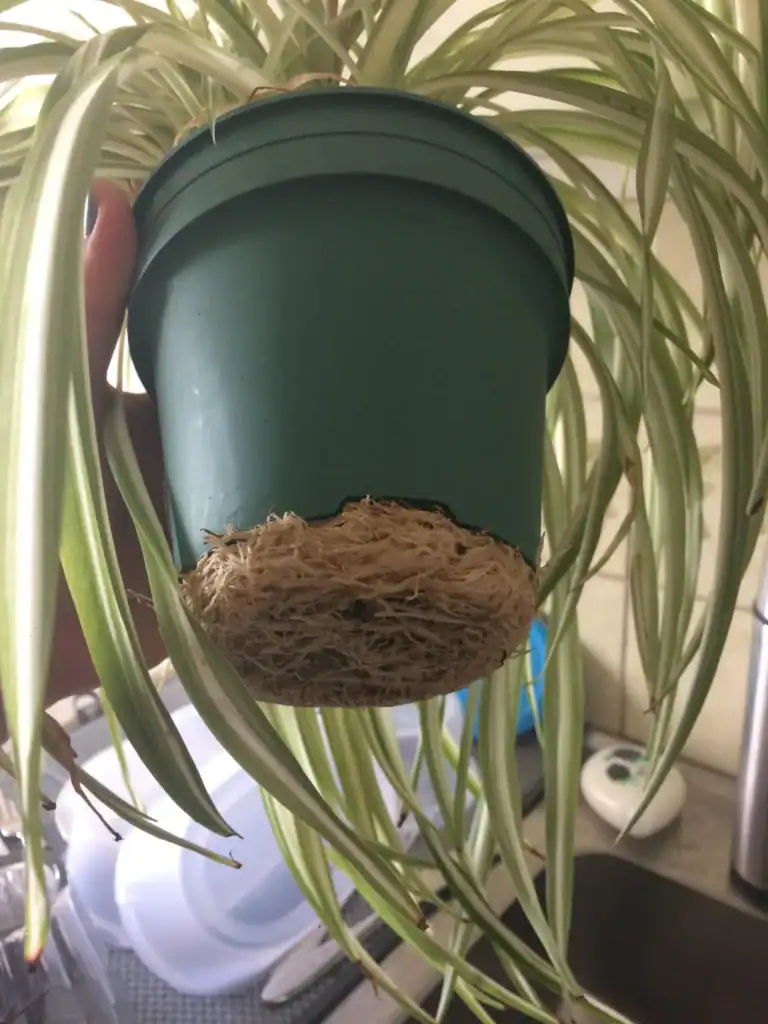
The first thing I always check is the bottom of the pot. When roots start poking through drainage holes, that’s my spider plant telling me it’s run out of room to grow.
These roots don’t just peek out a little bit. In a truly root-bound spider plant, thick white or tan roots push through every available opening.
Sometimes they even grow so aggressively that they lift the plant up inside the pot. I’ve seen cases where roots actually grow around the outside of the pot and attach themselves to whatever surface the plant sits on.
If you try to lift the pot and it feels stuck to the saucer, roots are probably the culprit. Quick Tip: Flip your pot over once a month to check the drainage holes—catching root growth early gives you more time to plan a proper repotting.
Visual and Growth Symptoms (When Your Plant Looks Off)
Spider plants normally produce babies and grow fresh leaves regularly. When mine stops making plantlets or the new growth looks stunted, I know something’s wrong.
The leaves might start turning yellow or brown at the tips even when I’m watering correctly. Root-bound spider plants can’t absorb water properly because the roots are too packed together.
I’ve noticed the soil also dries out way faster than it used to—sometimes within a day of watering. Another sign is when the plant starts pushing itself up out of the pot.
The root mass gets so thick that it has nowhere to go but up. You might see the crown of the plant sitting above the soil line when it used to be level with it.
Comparing Normal Growth to Root Stress (Knowing the Difference)
Healthy spider plants put out long, arching leaves and multiple baby plants throughout the growing season. The leaves should be vibrant green with crisp white stripes.
A stressed, root-bound spider plant behaves completely differently. Growth slows down or stops entirely, even during spring and summer when it should be most active.
The leaves might become pale or develop brown, crispy edges that keep spreading. I pay attention to how often I need to water.
If my watering schedule suddenly doubles because the soil won’t stay moist, the roots have probably taken over most of the pot space. Normal spider plants can go several days between waterings, but root-bound ones need constant attention because there’s barely any soil left to hold moisture.
Step-By-Step Guide to Repotting a Spider Plant
Repotting a root-bound spider plant involves selecting a larger pot, gently loosening tangled roots, adding fresh soil, and watering thoroughly to help your plant recover and grow.
Choosing the Right Pot Size and Type (What Your Spider Plant Actually Needs)
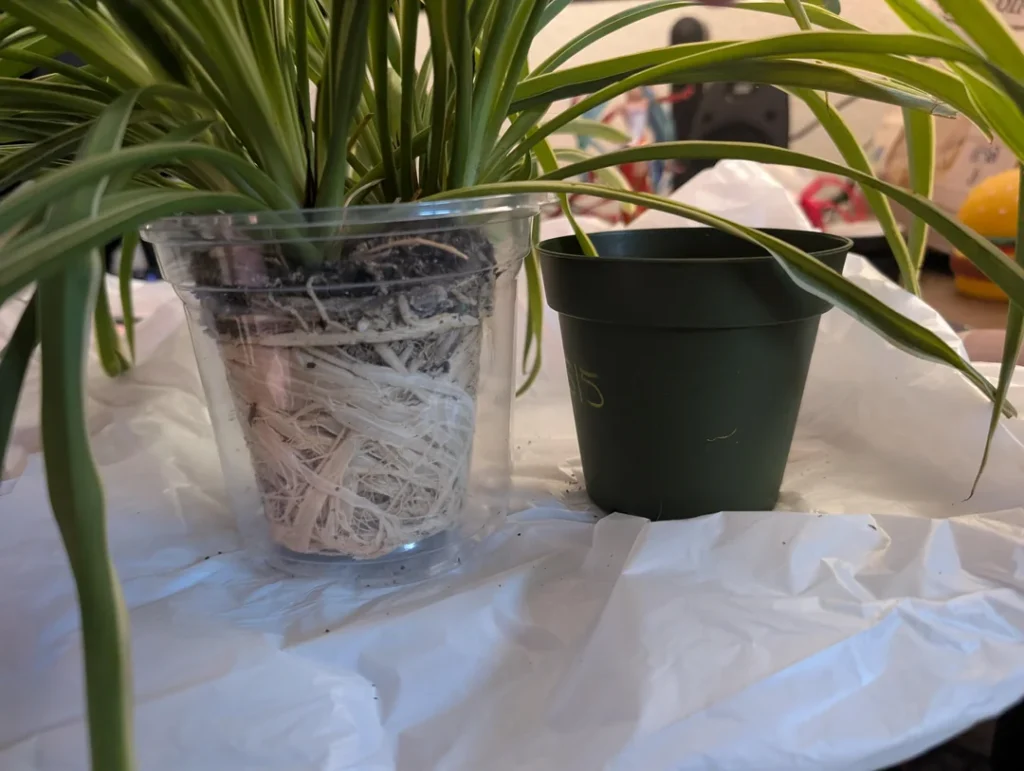
I always pick a pot that’s 1-2 inches larger in diameter than the current one. Going bigger than that might seem generous, but it can actually cause problems—too much soil holds excess water, and your spider plant’s roots won’t appreciate sitting in dampness.
Drainage holes are non-negotiable. I’ve seen what happens when people skip this step, and it’s not pretty.
Roots growing out of drainage holes are a clear sign your plant needs more space, but the new pot needs those same holes to prevent root rot. Quick Tip: Terracotta pots are my favorite for spider plants because they breathe and help prevent overwatering.
Plastic pots work fine too, especially if you’re careful with watering. The material matters less than having proper drainage and the right size.
I measure the root ball before shopping for a new pot to avoid guessing games at the garden center.
Loosening and Trimming the Roots (Getting Your Root-Bound Spider Plant Ready)
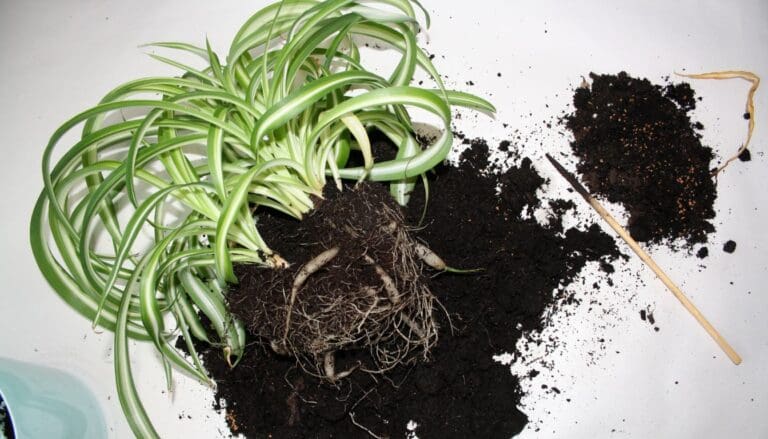
I start by gently squeezing the old pot or tapping the sides to loosen the root ball. Sometimes I need to run a knife around the inside edge if the roots are really stuck.
Once the plant slides out, I can see just how root-bound it really is. The roots on a root-bound spider plant form tight circles or a dense mat.
I use my fingers to gently tease them apart, working from the outside in. It might feel rough, but those roots need to spread out in their new home.
Quick Tip: Don’t be afraid to trim roots that are dead, mushy, or circling excessively—healthy white or tan roots will bounce back quickly. I snip damaged roots with clean scissors or pruning shears.
If the root ball is extremely tight, I make a few vertical cuts about an inch deep along the sides. This encourages new root growth in fresh directions once you repot spider plant specimens.
Selecting and Refreshing Potting Soil (The Foundation for Recovery)
I use a well-draining potting mix designed for houseplants. Spider plants aren’t picky, but they hate sitting in heavy, compacted soil.
A mix with perlite or vermiculite helps water move through without pooling at the bottom. I avoid garden soil or topsoil from outside—it’s too dense and can bring pests or diseases indoors.
Fresh bagged potting mix from the store works perfectly. Some people add a bit of compost, which is fine, but standard potting soil does the job.
Quick Tip: Check the expiration date on potting soil bags—old mix can lose its structure and drainage properties. I fill the new pot about one-third full before placing the plant inside.
The goal is to position the spider plant at the same depth it was growing before. I add or remove soil underneath until the crown (where roots meet stems) sits just below the pot rim.
Replanting and Initial Watering (Settling Your Spider Plant Into Its New Home)
I center the plant in the new pot and fill around the sides with fresh potting soil. I tap the pot gently on my work surface a few times to help soil settle into air pockets.
My fingers press the soil down lightly, but I don’t pack it hard—roots need some air space. The soil line should sit about an inch below the pot rim to leave room for watering.
I make sure no roots are exposed on the surface, and the plant stands upright without leaning. Quick Tip: Water immediately after repotting until you see it draining from the bottom holes—this helps eliminate air pockets and gives roots good contact with soil.
I let excess water drain completely before putting the pot back on its saucer. For the first week or two, I keep my spider plant in bright, indirect light and hold off on fertilizer.
The plant needs time to adjust and recover from being root-bound before pushing new growth.
Handling Spiderettes and Dividing Root-Bound Plants
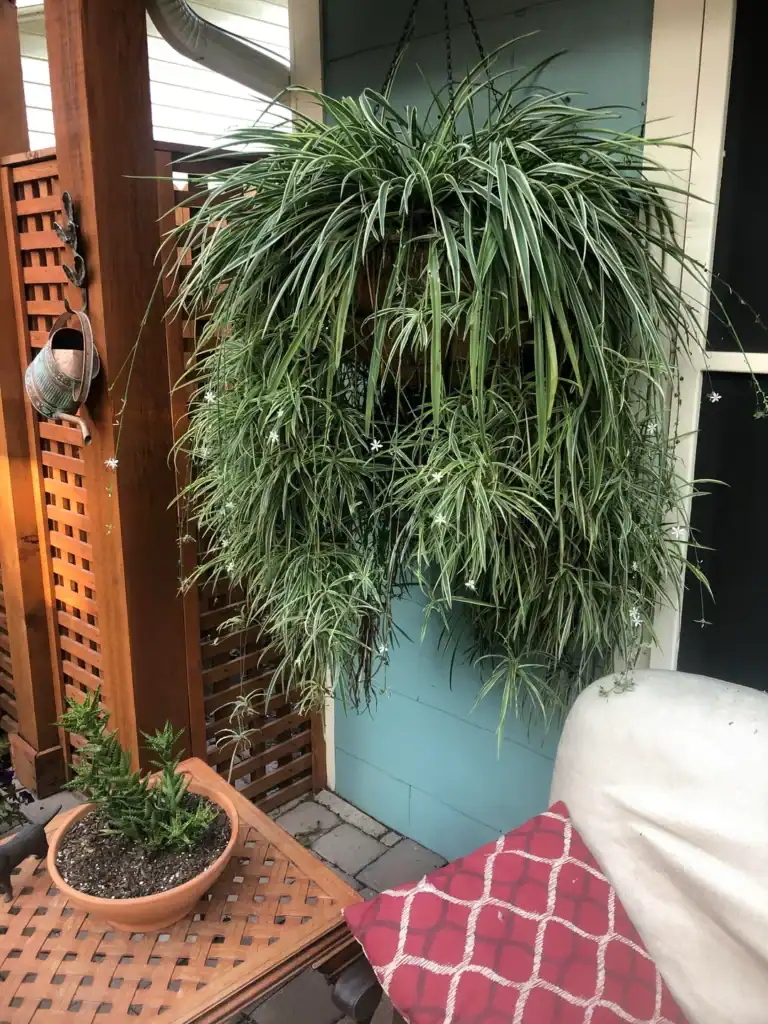
Spider plants produce baby plantlets called spiderettes that dangle from runners, and these can be removed and potted separately. Dividing a root-bound plant gives you multiple healthy plants while solving crowding issues.
Recognizing When to Divide Spider Plants (And Why Your Plant is Practically Screaming for Help)
I check for roots poking through drainage holes or circling the soil surface. Those are pretty obvious signs my spider plant’s outgrown its home.
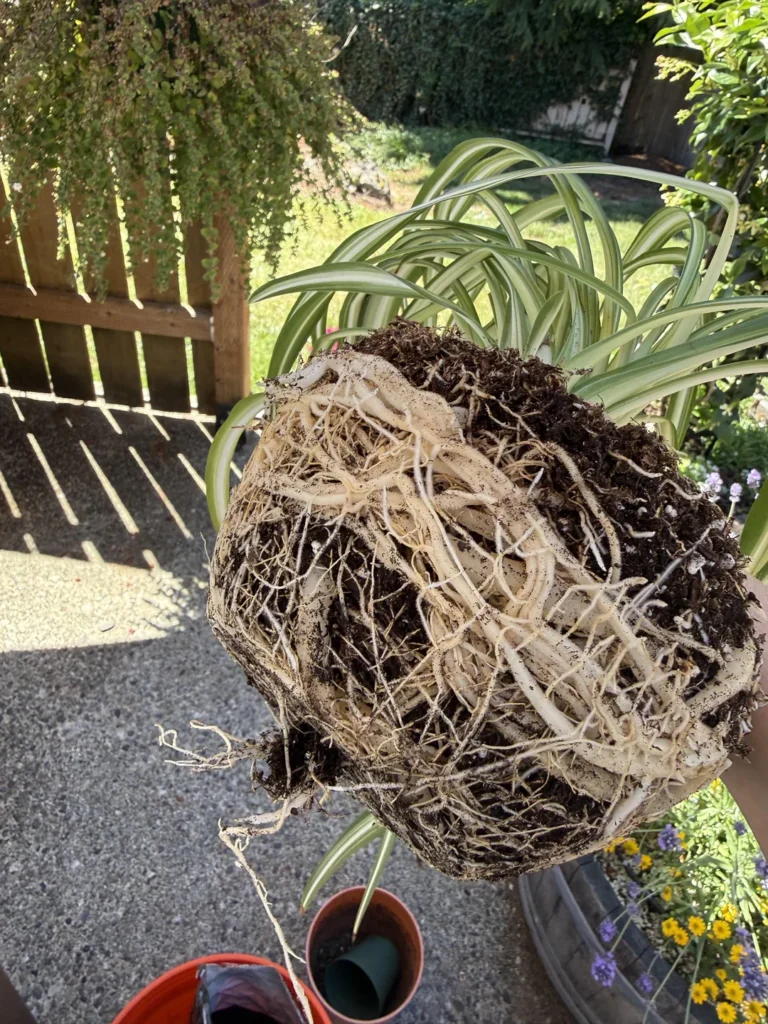
When I lift the plant out of its pot, a root-bound spider plant usually reveals thick, tangled roots forming a tight mass. Sometimes the roots are so packed together that there’s barely any soil left in sight.
If I see roots spiraling around themselves, division is definitely overdue. It always amazes me how determined they are to keep growing, even when things get cramped.
Quick Tip: Spring or early summer is the best time to divide because the plant can recover quickly during its active growing season.
I also notice slower growth or water running straight through the pot without soaking in. That’s what happens when roots take up so much space that the soil can’t hold moisture anymore.
If my plant looks crowded with several rosettes jammed together, splitting them up gives each section room to actually thrive.
How to Split and Replant Spiderettes (The Simple Way to Multiply Your Collection)
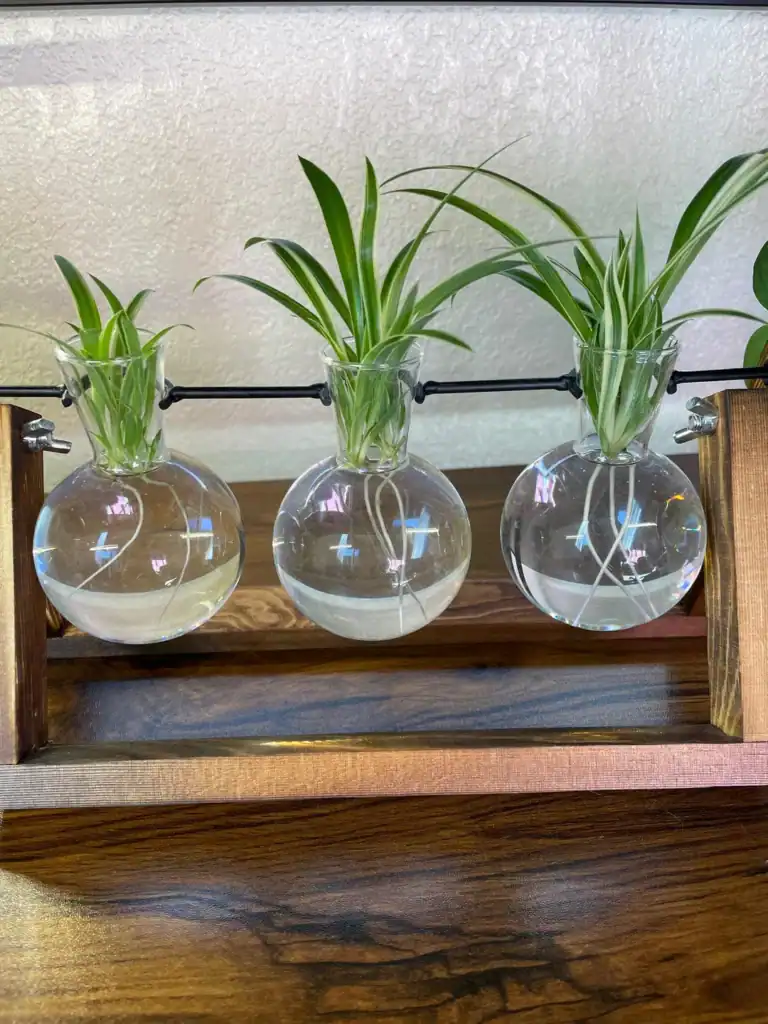
I start by snipping spiderettes from the mother plant with clean scissors. Each baby should have some tiny roots or at least root nubs at the base.
For spiderettes with visible roots, I pop them straight into small pots of regular potting mix. I press the roots in gently and water well.
If the spiderettes don’t have roots yet, I just put them in water until roots reach about an inch long, then move them to soil. It’s pretty satisfying to watch those roots appear.
Quick Tip: Don’t bury the spiderette’s leaves—just tuck the root area below the soil line and leave the rest above.
To divide a root-bound parent plant, I remove it from the pot and shake off excess soil. I look for natural splits where individual rosettes meet the root mass.
Using my hands or a clean knife, I separate the root ball into two or three sections. Each piece needs its own roots and at least one rosette of leaves.
I plant each division in a fresh pot with new soil, making sure not to pack it in too tightly. After planting, I water and keep the soil just slightly moist for a few weeks while the roots settle in.
Aftercare Tips for Thriving Repotted Spider Plants
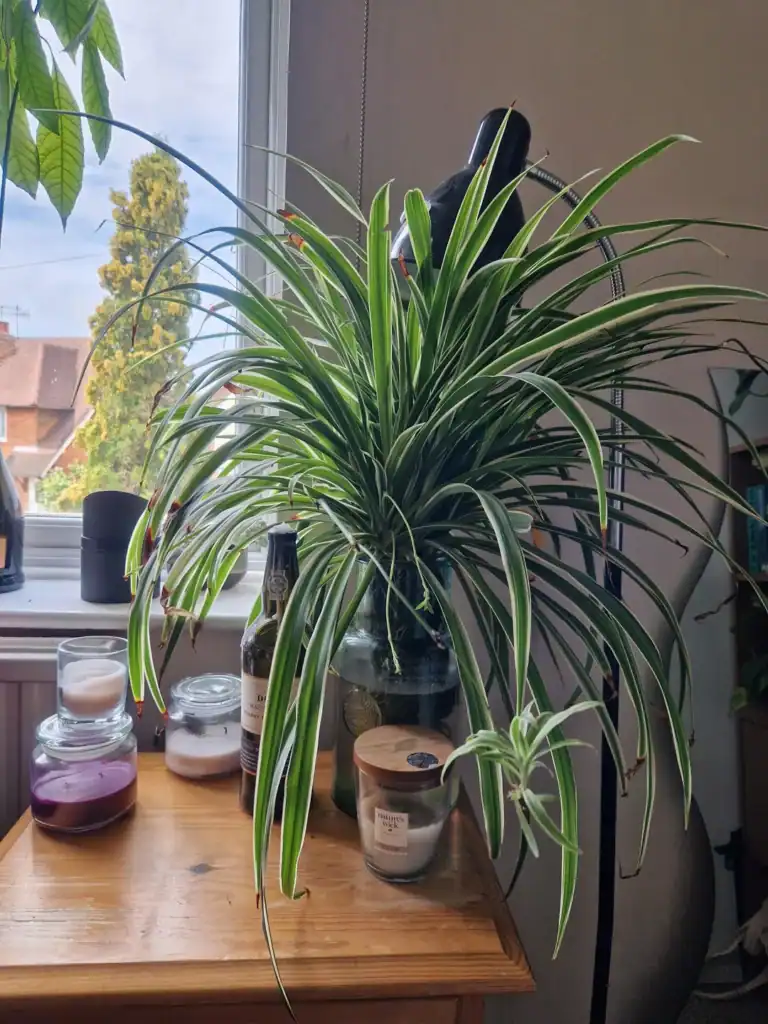
Your spider plant needs proper care after repotting to bounce back strong. The right watering schedule, light conditions, and a little patience will help it recover from transplant stress and start growing again.
Watering and Light Requirements After Moving Your Spider Plant to a New Pot
I always water my freshly repotted spider plant thoroughly right after transplanting. This settles the soil and helps get rid of any air pockets around the roots.
After that first drink, I let the top inch of soil dry out before watering again. Spider plants like their soil evenly moist, never soggy.
Overwatering is the fastest way to cause root rot, especially after a stressful move.
Quick Tip: Stick your finger into the soil up to your first knuckle—if it feels dry, it’s time to water.
Place your repotted spider plant in bright, indirect light. A spot near an east or north-facing window is usually perfect.
Direct sun can scorch the leaves, especially when the plant’s still recovering. If south or west windows are your only option, keep the plant a few feet from the glass or use a sheer curtain to soften the light.
Spider plants will tolerate lower light, but honestly, they’ll grow slower and make fewer babies if it’s too dim.
When and How to Fertilize Your Newly Repotted Spider Plant
Hold off on fertilizing for at least 4-6 weeks after repotting. Fresh potting soil already has nutrients, and your plant needs time to settle before you start feeding again.
Once it’s ready, I use a balanced liquid fertilizer at half strength. I usually fertilize once a month in spring and summer when things are growing fast.
Quick Tip: Skip fertilizer completely in fall and winter when growth naturally slows down.
Too much fertilizer leads to brown leaf tips and salt buildup. If you spot white crusty stuff on the soil, flush the pot with water and let it drain for a few minutes to wash away extra salts.
Managing Stress After Repotting (What to Expect and How to Help)
Your spider plant might look a little droopy or pale the first week or two after repotting. That’s normal—roots need time to adjust and start absorbing water again.
Some lower leaves could turn yellow or brown. I just trim off any dead or dying leaves with clean scissors, and the plant focuses its energy on growing new roots.
Quick Tip: Try not to move your spider plant around for at least a month after repotting so it can settle in.
Keep the temperature steady between 65-75°F if you can. Avoid heating vents, ACs, or drafty windows—sudden temperature swings just pile on more stress.
I watch for new growth at the center. Fresh green shoots mean the spider plant’s adjusted to its new pot. Most bounce back within two or three weeks and start making new leaves before you know it.
Preventing Future Root Bound Issues
Regular repotting, picking the right containers, and catching warning signs early keep spider plants happy and their roots healthy.
How Often to Repot (and Why Timing Matters More Than You Think)
I repot my spider plants every year or two, depending on how fast they’re growing. Young, fast-growers need bigger pots more often than older, slower ones.
Spring is the best time to repot because that’s when they’re waking up and ready to grow. Moving them now helps them recover faster from any root disturbance.
If your plant sends out lots of babies or if roots peek through drainage holes, it’s probably time to repot sooner. Some spider plants grow like crazy in bright, warm spots and outgrow their homes faster than you expect.
Quick Tip: Mark your calendar when you repot so you don’t forget when the next one is due.
Choosing Appropriate Containers (Size and Drainage Features That Actually Work)
I always pick a pot that’s just 1-2 inches wider than the current one. Going too big means water sits around the roots and can cause rot.
Drainage holes are a must. Without them, water builds up at the bottom and causes all sorts of headaches, no matter how careful you are.
Terra cotta pots are my favorite because they let moisture evaporate through the sides. Plastic pots hold water longer, which is handy if you travel or forget to water, but you have to adjust your routine based on the material.
Pot depth matters too. Spider plants have thick, tuberous roots that grow down, so shallow containers just force the roots to circle around themselves.
Quick Tip: If you fall in love with a pot that has no drainage, use it as a decorative cover and keep your plant in a plastic nursery pot inside.
Monitoring for Early Signs (What Root-Bound Actually Looks Like Before It Gets Bad)
I check my spider plants every few weeks for signs they’re getting cramped. If water runs straight through the pot without soaking in, it’s a big hint the roots have taken over.
Roots poking out of drainage holes or circling on top of the soil are clear warnings. If the plant starts leaning or tipping over easily, the root ball might be pushing itself up.
Wilting between waterings or leaves turning yellow for no clear reason can mean roots can’t access nutrients anymore. Stunted growth or fewer baby plants are subtle clues too.
I gently tip the plant to peek at roots through the bottom without pulling it out. If I spot a thick mat of white or tan roots, that’s my reminder to repot soon.
Quick Tip: Take a photo of your plant every month—it’s easier to catch slow changes that way than just relying on memory.
Frequently Asked Questions
Spider plants can act up when their roots get crowded, and you probably have questions about what to look for and how to fix it. The thick white roots can seem confusing at first, but they’re easier to deal with than you might think.
How can I tell if my spider plant is root bound and needs a bigger home?
I check for roots poking out of the drainage holes at the bottom of the pot. That’s usually the first sign something’s up.
If I lift the plant and see roots circling around the outside in a thick mat, it’s definitely root bound. The soil might also dry out super fast, like within a day or two of watering, because the roots have taken over all the space where soil should be.
Sometimes the plant pushes itself up out of the pot. The roots get so crowded they have nowhere to go but up, and the whole root ball starts lifting.
Quick Tip: If water runs straight through the pot without soaking in, the roots are probably too packed to let moisture reach the soil.
What’s the best time of year to repot a spider plant that has outgrown its pot?
I aim for spring or early summer when the plant is actively growing. This gives it time to recover and settle into the new pot before winter.
Spider plants go into a slower growth phase during fall and winter. Repotting during those months can stress them out because they’re not in the mood to push out new roots.
If I’m in a warmer climate where spider plants grow year-round, I have more flexibility. But I still avoid the coldest months if possible.
Quick Tip: Wait until nighttime temperatures stay above 50°F consistently before repotting if you keep your plant outdoors.
How do I safely loosen and trim the roots when repotting a crowded spider plant?
I start by gently pulling the root ball apart with my fingers to loosen the outer layer. The roots might be wound tight, but I work slowly to avoid breaking too many.
If the roots are really dense and circling, I use clean scissors or pruning shears to trim them. I cut away about one-third of the root mass, focusing on the bottom and sides.
It looks scary to cut roots, but spider plants bounce back fast. I make sure to snip any roots that look mushy, brown, or dead while I’m at it.
Quick Tip: Soak the root ball in water for 10 minutes before untangling if it’s rock-hard and difficult to work with.
Can I split a large spider plant into multiple plants, and how should I do it?
Sure, you can divide a big spider plant into two or more sections. First, I take it out of the pot and check for spots where the roots naturally separate.
I usually use my hands to gently tease the clumps apart. Each section really needs its own roots and at least a few leaves to stand a chance.
If the roots are just too stubborn, I’ll grab a clean knife and slice straight down through the root ball. It feels a bit harsh, but as long as each piece has a decent chunk of roots, it should be fine.
Quick Tip: Aim for divisions with at least three to five healthy leaves and a solid root system—otherwise, they might struggle.
What should I do with the thick tuber-like roots when I’m dividing or repotting?
Those chunky white roots? They’re actually storage organs, holding water and nutrients for the plant. I mostly leave them alone unless they’re clearly damaged or rotting.
If a tuber feels mushy or looks brown and unpleasant, I just snip it off with clean scissors. The healthy ones should be firm and white or cream-colored.
Honestly, if I break a few tubers by accident while repotting, I don’t stress. Spider plants are pretty forgiving and will grow new ones once they’re settled.
Quick Tip: Don’t bury the tubers too deep in the new pot. They should sit just below the soil surface, not way down at the bottom.
How can I prevent root rot after repotting a spider plant into fresh soil?
I always go for a pot with drainage holes—honestly, it’s non-negotiable. Heavy, soggy soil just feels like trouble waiting to happen.
After repotting, I give the plant a good drink, but then I back off. I won’t water again until the top inch of soil feels dry when I poke my finger in.
Airflow matters more than people think. I try not to shove the plant in a cramped corner where the air just sits there.
Quick Tip: If the new soil’s already damp, I usually wait a day or two before watering. It just seems kinder to any roots that might’ve gotten roughed up in the process.
Note: Some images in the articles are sourced from Reddit and Other Platforms For Reference Purpose.