When To Repot Alocasia? (Ideal Time+How To)
Have you ever wondered when to repot your Alocasia plant and how to do it? This article will discuss the best time to repot your Alocasia and the steps to do it properly.
The right time to repot an Alocasia is spring and early summer when the conditions are appropriate. You should repot your Alocasia if it shows signs of being root bound. A young Alocasia plant might require repotting every 6-12 months, whereas you can repot a mature plant once in 2-3 years.
This article will answer all your queries and provide more information about repotting your Alocasia.

Please note: Simplify Plants is reader-supported. As an Amazon Associate, I earn from qualifying purchases made by our readers with no extra cost added to you all! Some links in the post are affiliate links and I get a commission from purchases made through links in the post.
How do I know when to repot my Alocasia?
First, you should always remember to repot your plant only when necessary.
It is pointless to repot your healthy plant even when it grows perfectly in the existing pot because repotting causes stress.
Spring and early summer are the perfect times to repot your Alocasia because they are tropical plants, so they enjoy the warmer conditions and grow most rapidly during these times.
Alocasia plants prefer to remain cramped, but keeping it too suffocated can harm the plant.
The signs to look out for that indicate that the plant requires repotting are:
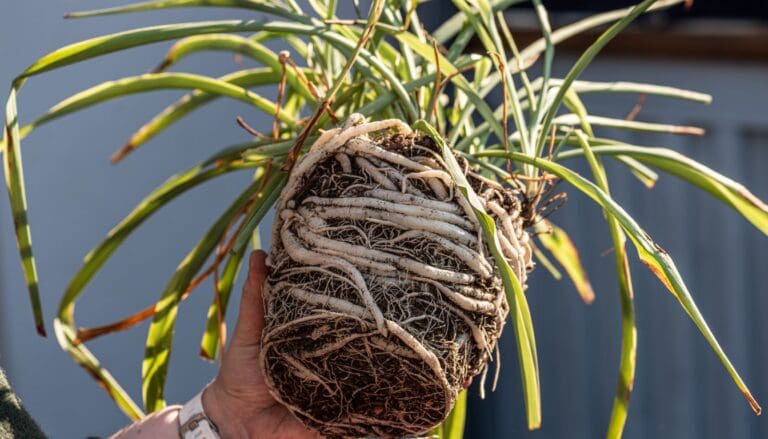
- Visible roots: Roots from drainage holes signify that your Alocasia roots have grown too big for the pot. Sometimes, you also see roots on the surface of the soil. This is a clear sign that your plant needs to be repotted.
- Reduced growth: When the plant gets rootbound and is suffocated in the pot, its growth slows down. So you might see your Alocasia not growing if it is rootbound and needs to be repotted.
- Frequent dehydration: One sign that your Alocasia requires repotting is when you notice your plant getting dehydrated more often. When the roots grow too big, they can’t soak up the water and nutrients properly, dehydrating your Alocasia.
Why is it important to repot Alocasia?
Many people skip repotting their plants, thinking it won’t be a problem, but if you want to keep your Alocasia healthy for a long time, you must repot it whenever required.
Let’s look at some reasons that explain the importance of repotting an Alocasia plant.
Give more space to the plant to grow and expand its roots.
Alocasia plants grow fast in perfect environments like temperature, humidity, light, etc.
In suitable conditions, Alocasias can grow up to 3-5 feet tall depending upon the variety, especially if you are growing it outdoors.
As houseplants, Alocasia can grow 1-2 feet every year.
Thus, they will require enough space for growth whenever the roots cover all the space inside the pot.
Repotting your Alocasia in a slightly larger pot gives the plant the much-needed space to grow more vigorously and expand the roots.
It is best to repot them annually for the initial period when Alocasias grow rapidly.
Once they reach the adult stage, you can wait for the plant to show signs of rootbound to repot it.
Also read: Do Alocasia Like To Be Root Bound? (+When To Repot)
Add fresh soil when the existing soil becomes of poor quality.

When an Alocasia grows in a pot, the soil loses its nutrients over time with regular watering.
When Alocasia grows indoors on pots, it has access to a limited quantity of soil and nutrients available in the pot, unlike those that grow outdoors.
Over the year, due to constant watering and the plant absorbing the nutrients, they start to deplete from the soil.
Even fertilization doesn’t help, as the soil has already become of poor quality.
So, it is best to change the soil of your Alocasia every few years to replenish the soil for fuller plant growth.
Also read: What Kind Of Soil Does Alocasia Need? (Ideal Soil Mix+Other Requirements)
Improve the condition of the roots.
When it comes to the roots of Alocasia, two primary issues that concern the plant owners are root rot and root-bound.
The root-bound state of Alocasia occurs when the plant has been growing in one pot for too long, which makes it grow too big compared to the pot.
This leads to the roots searching for more space to scatter and grow.
Rootbound plants suffer from several problems, such as frequent dehydration, nutritional deficiency, and stunted growth.
Root rot is a severe condition for the plant when the roots start to decay due to overwatering.
Overwatering causes the roots to stay in soggy soil, which cuts the oxygen supply to the roots, giving birth to the deadly virus, pathogens, and fungus that start to thrive in that soggy condition, destroying the plant gradually and leading to its death.
The signs of root rot are:
- Stunted growth
- Wilting
- Discoloration of foliage
- Dropping of young and old leaves
- A foul smell coming from the soil
So when such situations occur in your Alocasia, repotting the plant in fresh soil and a slightly bigger pot is the best way to save the plant.
Treat fertilizer overuse
The fertilizers we give to the Alocasia plant are nutrient-rich and acidic.
Sometimes, we overuse fertilizers, thinking it is good for the plant, but overusing fertilizers can harm your plants.
Overfertilization can burn your plant’s roots and soak up water from the sun, dehydrating the soil.
Some signs to look out for are brown leaves, wilted leaves, and dry, weak plants.
The only way to save a plant from over-fertilization is the transfer of soil by repotting the plant in new soil.
Also read: What Fertilizer To Use For Alocasia? (Ideal Fertilizer+Dosage Guide)
What do you need to repot your Alocasia?

Before you start repotting your Alocasia, gathering all the supplies in one place is best to ensure that you don’t have to go back and forth.
This would ensure fast and smooth repotting.
If you leave the uprooted plant outside for too long without potting it, that can cause damage to the plant.
So let us see what the things we need to repot:
- A new pot of the right size (no more than 1-2 inches bigger than the existing pot).
- Good quality potting soil
- Compost
- Sand, perlite, and peat moss
- Knife, pruners, or any object to clean and trim the roots
- Water
- A clean cloth to keep the uprooted plant
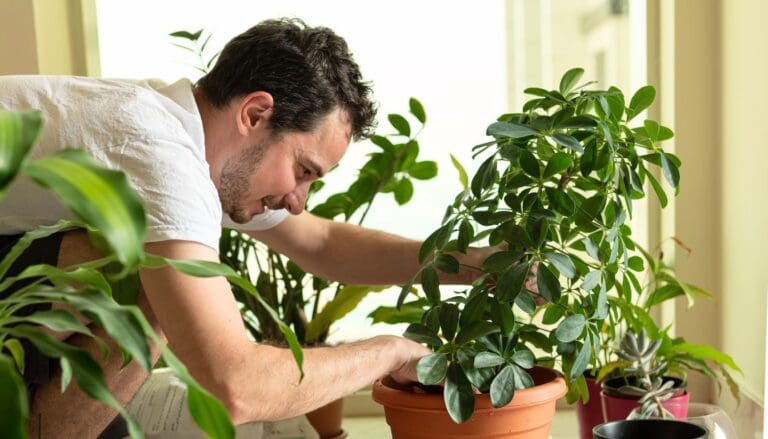
How to repot your Alocasia?
Repotting may sound easy, but it is a tricky job.
If not done correctly, it can damage your plant and diseases.
Choose the right pot size, prepare the correct soil mix, and repot in the correct technique.
To make your repotting session easy, I will guide you through the process in the below-mentioned points.
Choose the correct pot
Before we begin the repotting process, we must arrange a new pot.
You must keep a few things in mind to choose the correct pot.
| Factors | Requirement |
|---|---|
| Size | Do not make the mistake of planting your Alocasia in a fancy decorative pot without drainage holes. This can damage your Alocasia as the excess water accumulated at the bottom can lead to root rot. To protect the soil from washing away, put some pebbles in the hole to cover it. |
| Material | The pot size should not be more than 1-2 inches than the existing pot. A wrong-sized pot can be harmful to your Alocasia. |
| Drainage holes | Do not make the mistake of planting your Alocasia in a fancy decorative pot without drainage holes. This can damage your Alocasia as the excess water accumulated at the bottom can lead to root rot. To protect the soil from washing away, put some pebbles on the hole to cover it. |
Remove the Alocasia from its existing pot.
To remove the Alocasia from the pot, gently tap the bottom after turning it upside down.
The plant is probably root-bound if you see it’s stuck inside.
In this situation, take a knife and gently take the plant out.
Do not be harsh and pull your plant by force.
This will damage the roots and the stem of the plant.
Loosen up the roots
After taking the plant out, gently loosen up the root ball.
Shake the roots carefully to shake them and give them some fresh air.
Prepare the soil mix
Now, preparing the soil mix is an interesting part.
You take some regular potting soil. Decide the quantity depending on the size of the pot.
You must add a few more ingredients to the soil to make it more suitable for your Alocasia.
Add perlite, peat moss, and sand to the potting soil.
- Perlite makes the soil loose, well-aerated, and well-draining.
- Peat moss helps the soil retain water.
- Sand increases aeration and drainage.
Put the Alocasia in the new pot.
Now your soil and pot are ready.
Next, place your Alocasia in the middle of the pot.
Hold it straight and pour soil from all sides of the pot.
Tap the sides of the pot to let the excess soil settle down.
Water your Alocasia after repotting
After repotting the Alocasia, the first watering is crucial.
Water the plant slowly until you see the excess water running out of the drainage hole at the bottom.
Ensure the excess water does not stay clogged at the bottom, which might make the roots soggy.
Use room-temperature water to avoid shocking the Alocasia.
Try to use filtered or rainwater instead of tap water while watering your Alocasia.
If you don’t have an option, leave tap water in the open overnight, reducing the harmful minerals.
You can then use this to water your Alocasia.
Also read: How To Water Alocasia Plant? (How Much, How Often & More)
Feeding the Alocasia after repotting

Don’t feed your Alocasia right after repotting because the fresh soil is already rich in nutrients.
But after a few months, you need to start fertilizing your Alocasia.
You can use a balanced 20:20:20 NPK liquid fertilizer to fertilize your Alocasia.
Ensure not to overfertilize your Alocasia, resulting in root burn and wilted leaves, and do not fertilize your Alocasia in dry soil as this might cause a root burn.
Always water the soil 1-2 days before fertilizing.
Never fertilize your Alocasia during winter because Alocasia goes dormant, and its growth reduces during winter.
Fertilizing in winter can be dangerous and can burn your plant.
Look after the newly repotted Alocasia.
Repotting takes a lot of patience, and the plant goes through much stress when repotting.
Since the plant is exposed to a completely new environment, it gets stressed due to the changes.
To help your Alocasia deal with this stress, you should give it much love, care, and suitable growing conditions.
Do not place the plant under intense sunlight after repotting, as this might lead to leaf burn as the plant stays sensitive after repotting.
A freshly repotted Alocasia likes warmth and indirect light to produce new growth.
Since Alocasias are tropical plants, they like humidity and moisture in the air.
Maintain a humidity range between 50%-60% around the plant.
You can use a humidifier or a pebble tray and keep your Alocasia on it.
This way, the water will not touch the pot and give moisture to the plant.
Final words
Repotting is an important part of Alocasia care, and you must consider repotting it whenever the plant shows signs of rootbound.
Repotting also gives the plant fresh nutrients and removes any bacteria or fungi in the old soil.
The best time to repot an Alocasia is spring and early summer.
You should get a one-size-bigger pot and fresh potting mix and prune all the damaged roots and foliage before repotting the plant.
However, you must not repot your Alocasia too frequently, which can weaken the plant.
Take proper care of your Alocasia by providing the ideal conditions after repotting it to let it recover from the stress faster. Don’t expose the plant to unfavorable conditions that can increase stress.

Reference: Alocasia sanderiana, Alocasia micholitziana.
Note: Some images in the articles are sourced from Reddit and Other Platforms For Reference Purpose.