Alocasia Leaves Dying One By One: Common Causes and Quick Solutions to Save Your Plant
Watching my Alocasia leaves die off one at a time can feel pretty alarming. These tropical plants are known for their stunning foliage, so when leaves start yellowing, browning, or drooping, it’s natural to wonder what went wrong.
The good news is that most causes of leaf loss are fixable once you identify the problem. Common issues range from watering mistakes and lighting problems to pests and nutrient gaps. Each cause leaves different clues on the leaves themselves.
I’ve found that understanding what my Alocasia needs helps me catch problems early. By looking at the symptoms and adjusting care, I can usually stop the leaf loss and get my plant back on track.

Please note: Simplify Plants is reader-supported. As an Amazon Associate, I earn from qualifying purchases made by our readers with no extra cost added to you all! Some links in the post are affiliate links and I get a commission from purchases made through links in the post.
1) Overwatering leading to root rot
I get it—you love your Alocasia and want to keep it happy. But too much water actually does more harm than good.
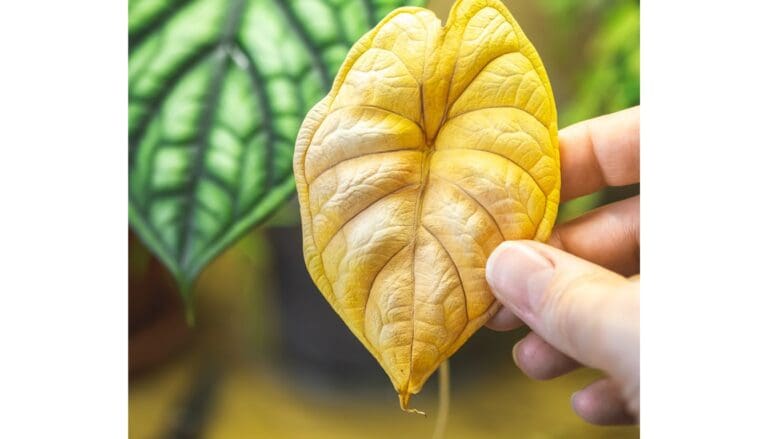
When soil stays wet for too long, the roots can’t breathe. They start to suffocate and rot. Once root rot sets in, your plant can’t absorb nutrients or water properly. That’s when you’ll notice leaves turning yellow and dying off one by one.
Check the soil before watering. Stick your finger about an inch down into the pot. If it feels damp, wait a few more days. Alocasias like their soil to dry out a bit between waterings.
Quick Tip: Yellow leaves that feel mushy near the base are a red flag for overwatering.
Look for other warning signs too. A soggy soil smell or black, mushy roots mean trouble. If you catch it early, you can still save your plant by letting the soil dry out and cutting back on water.
In cooler months or low-light spots, your Alocasia needs even less water than usual.
2) Underwatering causing brown crispy edges
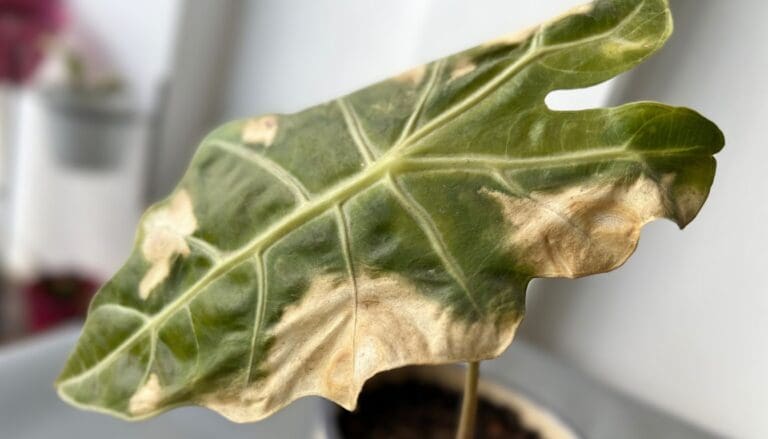
When I don’t water my Alocasia enough, the leaves start complaining with brown, crispy edges. The leaf tips dry out first because they’re the farthest point from the roots and get water last.
I can tell it’s underwatering when the edges feel papery and crunch when I touch them. The soil will be bone dry several inches down, not just at the surface.
Alocasias like their soil consistently moist but never soggy. I stick my finger about two inches into the soil, and if it feels dry, it’s time to water deeply until water runs out the drainage holes.
Quick Tip: Water when the top inch or two feels dry, and always check before you water instead of following a strict schedule.

During hot summer months, my Alocasia drinks faster and needs water more often. In winter, growth slows down and it needs less water, so I adjust my routine.
I’ve learned that smaller pots dry out quicker than large ones. If my plant keeps getting crispy edges despite regular watering, it might need a bigger pot or a spot away from heating vents.
3) Poor drainage in potting mix (When water has nowhere to go, roots pay the price)
I’ve seen so many Alocasias struggle because their soil just won’t let water drain through. When your potting mix holds onto moisture for too long, the roots sit in wet conditions and start to rot. That’s when leaves begin dying off one by one.
You can tell drainage is the problem if water pools on top of the soil or if the pot feels heavy days after watering. The mix should dry out within a few days in most conditions.
Heavy soils with lots of peat or garden soil create this issue. Alocasias need a chunky, airy mix that lets water flow right through. I always add perlite, orchid bark, or coconut husk chips to improve drainage.
Quick Tip: Squeeze a handful of moist potting mix—if water drips out easily and it crumbles apart, drainage is good.
Check your pot too. If there aren’t drainage holes at the bottom, water has nowhere to escape. Even the best soil mix can’t save your plant in a pot that traps moisture.
4) Low humidity stressing leaves
Alocasias come from tropical spots where the air is thick with moisture. When I keep mine in a dry room, the leaf edges turn brown and crispy. Eventually, entire leaves give up and die off one by one.
Indoor air is usually way drier than what these plants want, especially during winter when heaters run constantly. I’ve noticed my Alocasia struggles the most when humidity drops below 50%. The plant pulls moisture from its older leaves to keep newer ones alive, which explains that dying-one-by-one pattern.
I can tell humidity is the problem when leaf tips and edges turn brown before the whole leaf yellows. Sometimes the browning spreads inward like paper burning in slow motion.

Quick Tip: Place a small humidifier near your plant or set the pot on a pebble tray filled with water.
Grouping plants together also helps since they create their own little humid zone. I avoid misting because wet leaves can develop fungal spots, and the moisture evaporates too quickly anyway.
5) Insufficient indirect light
Alocasias need bright indirect light to stay healthy. When they don’t get enough, their leaves start dying off one by one. The plant basically decides it can’t support all its leaves anymore, so it sacrifices the older ones first.
I’ve seen this happen when plants sit too far from windows or in dark corners. The leaves might look pale or weak before they die. New growth comes out smaller and lighter than usual too.
Moving your Alocasia closer to a window usually fixes this problem. Just make sure the sun doesn’t hit the leaves directly, or you’ll create a whole different issue. East-facing windows work great because they give gentle morning light.

Quick Tip: If your plant sits more than 6 feet from a window, it probably needs more light.
You can also use a grow light if your space doesn’t have good natural light. The plant will perk up within a few weeks once it gets what it needs. Watch for new leaves that look healthier and fuller than the recent sad ones.
6) Cold drafts or temperatures below 60°F
Alocasia plants hate the cold. When temps drop below 60°F, my plant’s leaves start dying off one by one as a stress response.
Cold drafts from air conditioners, open windows, or even poorly insulated walls can cause the same damage. The plant thinks it’s winter and starts shutting down. I’ve seen this happen near entryways and vents countless times.
The leaves usually turn yellow at the edges first, then the whole leaf droops and dies. Sometimes they go straight to brown and mushy if the cold hits hard enough.
Quick Tip: Move your Alocasia away from AC vents, drafty windows, and exterior doors during cold months.
I always keep mine in a spot where the temperature stays between 65-80°F year-round. If you live somewhere with harsh winters, watch for cold spots near windows at night. Even a few hours of cold exposure can trigger leaf loss that takes weeks to show up.
7) Fungal leaf spot infection
Fungal leaf spots show up as brown or black circles on your Alocasia leaves. These spots often have a yellow ring around them and can spread fast if you don’t catch them early.
I’ve seen this happen when leaves stay wet too long or when there’s poor air movement around the plant. Fungi love damp conditions, so overwatering or misting too much can invite trouble.

Quick Tip: Remove infected leaves right away and throw them in the trash, not your compost pile.
You’ll want to cut back on watering and make sure your plant has good airflow. A small fan nearby can help if your room feels stuffy. Stop misting the leaves completely until the problem clears up.
Treat the remaining leaves with a fungicide if the spots keep spreading. Water only at the soil level from now on, keeping moisture off the foliage. Space out your plants a bit more if they’re crowded together.
8) Pest infestation: spider mites
Spider mites are tiny pests that love to feed on Alocasia leaves. They’re so small you might not spot them right away, but they leave clear signs behind. You’ll notice tiny yellow or white spots on the leaves where they’ve been feeding.
These pests thrive in dry conditions with low humidity. If you look closely at the underside of your dying leaves, you might see fine webbing that looks like miniature spider webs. The leaves will start to look dull and lifeless before they eventually die off one by one.

Quick Tip: Spray the leaves with water every few days to keep humidity up and knock off any mites hanging around.
I always check my plants by holding a white paper under the leaves and tapping them gently. If you see tiny moving dots on the paper, you’ve got spider mites. You can treat them with insecticidal soap or neem oil spray.
Make sure to spray the undersides of all leaves where these pests like to hide. Repeat treatments every five to seven days until they’re completely gone.
9) Calcium or magnesium deficiency (and why your Alocasia is showing weird spots)
I’ve noticed that when my Alocasia lacks calcium or magnesium, the older leaves start looking rough first. You’ll see brown spots or edges that look burnt, and the leaf might yellow between the veins while the veins stay green.
Calcium deficiency shows up as distorted new growth or brown tips. Magnesium problems make leaves turn yellow from the edges inward, but the center veins stay darker green.
This happens when you use distilled or rainwater for too long without adding nutrients back in. Tap water usually has some minerals, but if your soil is too acidic or you fertilize with the wrong stuff, your plant can’t grab what it needs.
Quick Tip: Mix a balanced fertilizer with micronutrients into your watering routine every few weeks during spring and summer.
I like adding a bit of Epsom salt (magnesium sulfate) to water once a month if I suspect magnesium issues. For calcium, crushed eggshells worked slowly for me, but a liquid fertilizer with calcium acts faster.
10) Transplant shock after repotting
Moving your Alocasia to a new pot can stress it out, even when you do everything right. The roots need time to adjust to fresh soil and a different space. During this period, older leaves might turn yellow and die off one by one.
I’ve noticed this happens most often when the new pot is way bigger than the old one. Your plant ends up sitting in too much wet soil before the roots can spread out and drink it up.
The dying leaves aren’t always a bad sign. Your Alocasia is just redirecting energy to grow new roots instead of keeping all its leaves alive.
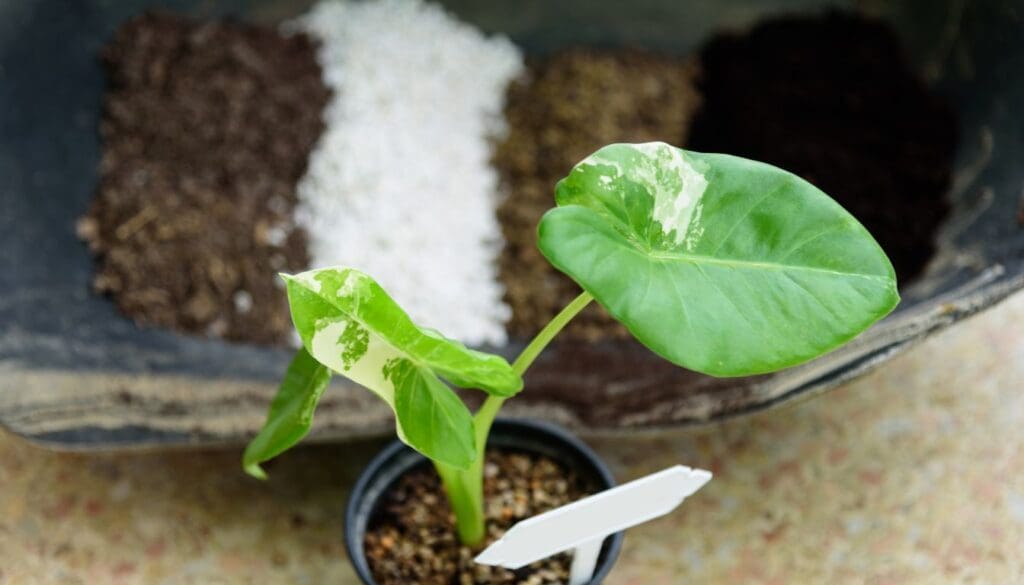
Quick Tip: Stick with a pot that’s only 1-2 inches wider than the old one, and don’t water as much right after repotting.
Give your plant about two to three weeks to settle in. Keep it in bright indirect light and hold off on fertilizer during this time. If more than half the leaves start dying, something else might be wrong with the roots or soil.
Understanding Alocasia Leaf Health
Healthy Alocasia leaves should feel firm and stand upright, but knowing when leaf loss is normal versus a sign of trouble can save your plant.
The way your plant responds to its environment tells you everything you need to know about what it needs.
Normal Growth Versus Stress Responses: When to Worry and When to Relax
My Alocasia drops an old leaf now and then, and that’s completely fine. As the plant pushes out new growth from the center, it naturally sheds its oldest outer leaves.
You’ll notice these leaves turn yellow slowly, starting from the edges, then brown before they fall off.
Stress responses look different. When leaves die quickly one after another, something’s wrong.
The plant might drop multiple leaves within days, and they often turn brown or black suddenly instead of going through a gradual yellow phase.
Quick Tip: If your plant loses more than two leaves per month, check your care routine immediately.
I watch for these stress signs: leaves drooping even when the soil is moist, brown spots appearing overnight, or leaves curling under at the edges.
Healthy leaves should feel thick and stay pointed upward. Stressed leaves feel thin, papery, or go limp at the stems.
Common Environmental Factors: The Usual Suspects Behind Leaf Loss
Light problems cause most Alocasia leaf issues I see. Too much direct sun burns the leaves, creating brown crispy patches.
Too little light makes the plant stretch and weaken, then drop leaves to conserve energy.
Water stress shows up fast. Overwatering leads to root rot, which cuts off nutrients to the leaves. They turn yellow from the bottom up and feel mushy.
Underwatering makes leaves crisp and brown from the tips inward.
Temperature swings below 60°F or above 85°F stress these tropical plants hard. Cold drafts from air conditioners or heating vents will cause sudden leaf drop within 24-48 hours.
Quick Tip: Keep your Alocasia away from windows in winter and AC vents in summer.
Humidity below 50% makes leaf edges turn brown and crispy. I notice this happens faster in winter when indoor heating runs constantly.
Low humidity also invites spider mites, which cause tiny yellow spots that spread across leaves before they die.
How Watering Habits Affect Leaf Longevity
Water is the biggest reason Alocasia leaves die off one by one. Too much water drowns the roots, while too little shrivels the plant from the inside out.
Signs Your Watering Schedule Is Actually Killing Your Alocasia (Overwatering vs. Underwatering)
Overwatering turns leaves yellow from the bottom up. The yellowing spreads slowly, and the leaf feels soft or mushy near the stem.
I’ve noticed the soil stays wet for days, sometimes developing a sour smell.
When roots sit in soggy soil, they can’t breathe and start rotting. You might see dark brown or black stems at the base. The pot feels heavy even several days after watering.
Underwatering shows up differently. Leaves turn brown and crispy at the edges first. The whole leaf might droop or curl inward like it’s trying to conserve moisture.
The soil pulls away from the pot’s edges when it’s too dry. Leaves fall off faster with underwatering because the plant can’t support them anymore.
I find that severely dehydrated Alocasias drop leaves within days once stress kicks in.
Quick Tip: Stick your finger two inches into the soil—if it’s bone dry, water thoroughly until it drains out the bottom.
Adjusting Your Routine for Alocasia
I water my Alocasia when the top two inches of soil feel dry. In summer, this happens every 5-7 days. Winter slows everything down, so I wait 10-14 days between waterings.
Room temperature matters more than you’d think. Warm homes dry out soil faster, while cool spaces need less frequent watering.
Use pots with drainage holes—this isn’t optional. Excess water needs somewhere to go, or roots will suffocate.
I empty the drainage tray 15 minutes after watering so the plant doesn’t sit in standing water.
If you’re in a humid climate, cut back on watering frequency. Dry climates need the opposite approach. Check the soil instead of following a rigid schedule, since conditions change with seasons.
Quick Tip: Water in the morning so excess moisture evaporates during the day instead of sitting overnight.
Frequently Asked Questions
Alocasia owners often face similar problems when leaves start dying off. Yellowing usually points to watering issues, while timing your leaf removal and understanding dormancy can save your plant from unnecessary stress.

Why are my Alocasia leaves turning yellow and dropping one at a time, and what does it mean for my plant’s health?
Yellow leaves on an Alocasia typically mean you’re overwatering. When roots sit in soggy soil, they can’t get enough oxygen and start to rot. The plant responds by dropping leaves one by one.
Sometimes yellowing happens from the opposite problem—not enough water. If the soil dries out completely between waterings, your Alocasia will sacrifice older leaves to save energy.
Poor drainage makes overwatering worse. If your potting mix holds water like a sponge instead of letting it flow through, roots stay wet too long.
I always check that my pots have drainage holes and use a mix with perlite or bark.
Quick Tip: Stick your finger two inches into the soil before watering—if it feels damp, wait a few more days.
Should I remove dying Alocasia leaves, or leave them until they fall off naturally?
I remove dying leaves once they turn completely yellow or brown. Leaving dead foliage on the plant can attract pests or create spots where fungus grows.
Use clean scissors or pruning shears to cut the leaf stem close to the base. Don’t yank or pull because that can damage the rhizome underneath.
If a leaf is only partly yellow, I wait a bit longer. The plant might still be pulling nutrients from it before letting it go completely.
Quick Tip: Wipe your cutting tools with rubbing alcohol between cuts to avoid spreading disease.
What are the most common watering mistakes that cause Alocasia leaves to die back?
The biggest mistake is watering on a strict schedule instead of checking the soil first. Your Alocasia needs water when the top two inches of soil feel dry, not every Monday at 9 AM.
Overwatering causes root rot fast. When roots turn mushy and brown, they can’t absorb water or nutrients anymore. The leaves die from the bottom up as the plant essentially starves.
Underwatering creates crispy brown edges and curled leaves. If you let the soil get bone dry repeatedly, your Alocasia will drop leaves to conserve moisture.
One or two leaves dying might be the plant adjusting, but multiple leaves means something’s off.
Using tap water with high mineral content can also cause problems over time. Brown tips sometimes come from salt buildup in the soil.
Quick Tip: Water thoroughly until it drains from the bottom holes, then dump any water left in the saucer after 15 minutes.
Why is my Alocasia declining after repotting, and how can I help it recover from transplant shock?
Repotting stresses plants because you disturb their roots. Your Alocasia might drop a leaf or two while it adjusts to the new pot and soil. This is normal and usually temporary.
Going up more than one pot size can cause problems. Too much soil holds extra moisture that roots can’t absorb quickly enough. I stick to pots that are only 1-2 inches wider than the old one.
If you damaged roots during repotting or used completely different soil, recovery takes longer. Keep the plant in bright indirect light and hold off on fertilizer for at least a month. The roots need time to heal and establish before taking in extra nutrients.
Quick Tip: Water lightly right after repotting, then wait until the soil dries out before watering again—don’t keep it constantly moist.
Is my Alocasia going dormant, or is it actually dying from disease or poor care?
Dormancy happens when light levels drop or temperatures cool down in fall and winter. Your Alocasia might lose all its leaves but the bulb stays alive underground. This is a natural rest period, not death.
A dying plant shows mushy stems, foul-smelling soil, or a soft squishy corm when you check it. Dormant plants have firm bulbs and stems that dry up cleanly.
If leaves die during the growing season (spring and summer) with good light and warmth, it’s probably not dormancy. Look for signs of overwatering, pests, or root rot instead.
You can test by gently digging near the corm. A healthy dormant bulb feels solid like a potato. A rotting one feels soft and might smell bad.
Quick Tip: Mark your calendar when dormancy starts so you remember to check for new growth in spring.
Can an Alocasia regrow from a bulb or corm if all the leaves die off completely?
Yes, Alocasias can bounce back from a healthy corm even after losing every leaf. The bulb stores energy and will push out new growth when conditions improve.
If your plant went dormant or lost leaves from stress, keep the corm in slightly moist soil in a warm spot. Don’t water as much as usual—just enough so the soil doesn’t turn to dust.
Check the bulb every few weeks by feeling it gently. As long as it stays firm, there’s hope. Root rot is the main thing that kills the corm completely.
Some Alocasias also make small baby bulbs (offsets) around the main corm. Even if the parent bulb dies, these babies might survive and grow into new plants.
Quick Tip: If you’re unsure whether the corm is still good, unpot it and inspect—a living bulb should feel dense and show no soft brown spots.
Note: Some images in the articles are sourced from Reddit and Other Platforms For Reference Purpose.