Dying Alocasia? 8 Causes & How To Revive
Are you worried your Alocasia(elephant ear) plant is not looking its best? In this guide, we’ll explore the common causes behind a dying Alocasia and provide valuable tips on reviving this stunning plant.
To save a dying Alocasia, you should:
- Check the plant and find the issue out.
- Place your alocasia in a spot with bright indirect sunlight, neither direct nor low light.
- Stop watering and check the roots if you suspect root rot. Repot the alocasia after removing the damaged roots.
- Stop fertilizing till the plant recovers.
- Use Neem oil to eliminate pests if you find them on your plant.
- Provide the ideal temperatures, humidity, and watering.
- Change the care routine during winter.
So, let’s dive into eight potential causes of a dying Alocasia(elephant ear) and discover the best strategies for its revival.

Please note: Simplify Plants is reader-supported. Some links in the post are affiliate links and I get a commission from purchases made through links in the post.
Signs of a dying Alocasia
To save your alocasia from dying, you must understand the plant’s signs whenever it faces any problem.
Early detection of such signs can help you to save the plant.
The most common signs are as follows:
- The leaves will lose all their shine and become drier, and then they will start wilting.
- The leaves will become yellow at first around the edge, then slowly spread to the entire leaves.
- The stem will become soft, and it will droop.
- The plant will stop growing at its normal rate.
- The leaves will become thin and unhealthy.
- Slowly the color of the leaves will turn brown, the veins will take a deeper yellow color, and the texture will become crumbly.
- Leaves falling off
Once you can spot these initial signs, it becomes easy to work on the steps of recovering the plant.
In the following parts of this article, I will be talking in-depth about the reasons and the causes of alocasia dying and ways to prevent the same.
Why is my alocasia dying?
For beginners, it is a challenge to keep their alocasia thriving as all the variants of this plant are sensitive to temperature fluctuations, wrong lighting conditions, incorrect watering, nutrients, etc.
There must be a balance between everything and an optimum favorable situation for healthy growth.
Let us discuss the different reasons for the Alocasia plant dying.
1) Alocasia dying due to Overwatering

One of the most common reasons for your alocasia dying is overwatering.
Ensure that you are not overwatering your Alocasia plant, as too much water at the roots is not good for the plant.
If the plant’s roots are always wet, it is not good.
Waterlogging for a long period will start clogging the plant’s roots, preventing it from breathing properly.
Due to a lack of oxygen, the roots will start decaying and fail to absorb the required amount of water to carry out photosynthesis resulting in the wilting of the plant.
The leaving will slowly start decaying, changing color, and becoming yellow.
If such an unfavorable condition persists over a period, the plant will die.
Symptoms:
- Limp and soft leaves
- New leaves turning brown
- Wilted foliage
- Leaves falling off
- Brown spots on leaves
- Roots covered in mold
- Mushy spongy roots
- Brown or black roots
Solution:
- Once the reason is clear, do not water the plant any further.
- Place the plant pot under indirect sunlight to help it dry. The only way to avoid further damage is to wait for the soil to dry completely. If the roots are not damaged, this method alone can work and save the plant.
- If you notice standing water, you can tilt the pot to get rid of it.
- You can take the alocasia out of its pot, spread the roots and soil on paper, and keep them under indirect sunlight. Once they are dry, shift them back to the pot.
- If you suspect root rot, you will need to repot your alocasia. We will discuss this in the Root rot section.
Prevention:
- Use pots with holes for drainage to let the excess water seep out.
- Use well-drained soil, which helps drain the excess water, preventing waterlogging at the roots.
- As discussed earlier, the plant roots need to be allowed to breathe. For that purpose, let the top layers of the soil get dry so that the roots are aerated and not waterlogged. This will prevent root rot.
- Before watering the plant, check the soil by putting your finger into the soil or using a moisture meter to check the moisture. If it’s wet, wait for a few days until the soil is 25-50% dry.
- Also, make sure that there is no excess water in the cache tray, as it can lead to fungal or bacterial growth.
- You should carefully evaluate the amount of water your plant requires depending on the seasonal changes. During the colder months, it will require less water, and during the summer season, a bit more moisture will prevent the soil from getting dry.
- Always pay close attention to how the plant is growing and whether it’s looking healthy or not. This can prevent many mishaps in the future.
Also read: How Can You Save Overwatered Alocasia?
2) Underwatered alocasia often turns droopy and dies.

If you do not provide enough water to your alocasia, it can be a reason for its death.
Water is an important source of survival for the plant, which helps the plant circulate nutrients and prevent it from getting dry.
Thus, lack of moisture will eventually lead to the plant drying up and dying.
Symptoms:
- Drooping leaves
- Stunted growth
- Curling leaves
- Smaller leaves
- Brown tips on leaves
- Brittle and dry stems
- Thin and unhealthy foliage
- Yellow and brown spots on leaves
- Dry and compact soil with a lighter color
Solution:
- If the soil is compact, poke holes with a chopstick to aerate the soil.
- Water thoroughly till it starts draining out of the drainage holes.
- Fill a container or the sink with water. Take the alocasia out of its pot and dip the soil into the water. Leave it for 20-30 minutes and plant the alocasia back in the pot.
- Make sure to water the plant at regular intervals.
- Check the drainage of the soil, and water the soil thoroughly. If the water is not seeping through the soil properly, it can evaporate before reaching the roots.
- Keep your plant in an area with moderate temperature. High heat can cause water from the soil to evaporate rapidly, causing it to dry fast.
- Water your plant sufficiently, not too much, not too little at a time, to prevent it from stressing.
Prevention:
- Keep the plant away from air-conditioners and heaters so that the moisture is not sucked out of the soil.
- Do not place the alocasia in direct sunlight. It will only lead to a loss of moisture.
- Mark the calendar to remind yourself to check on your alocasia.
- Use soil that is not only well-draining but also holds the required moisture.
- Use self-watering pots if you don’t have enough time to water the plant or plan to go on a vacation.
Also read: How To Water Alocasia Plant? (How Much, How Often & More)
3) Root rot is a common reason for dying alocasia plant
For Alocasia plants, root rot is a common reason for their dying.
It is sensitive to overwatering, so it cannot bear waterlogging at its roots for long.
Due to excess water, bacterial and fungal infections occur, and the roots start rotting.
Symptoms:
- Dry, wilted leaves
- Weak plant
- Yellow and brown leaves
- Falling of the leaves
- Brown or black roots
- Mushy and soft roots
- Fungus growth
- Foul-smelling soil
Solution:

- First, take the alocasia out of the pot and inspect its roots.
- Wash the roots gently to remove the soil to check the roots properly.
- All the roots that look soft and brown or black need to be removed. Take a sterilized and sharp pruner and remove them.
- Don’t forget to wear gloves and disinfect the pruners before and after use.
- Discard the roots you have pruned.
- Remove all the leaves or parts of the plant that have been affected due to the root rot. These are the discolored leaves and deformed leaves or stems.
- Prepare a fresh potting mix and get a new pot 1-2 inches bigger than the previous one.
- If you want to use the old pot, clean it thoroughly with bleach and let it dry.
- Spray fungicide on the healthy roots.
- Add the new soil to the pot and fill it halfway. Now, put the alocasia in it and add soil from all sides.
- Tap the pot from the sides and add more soil if required.
- Keep the plant under bright indirect sunlight and water only if the soil is 25-50% dry.
Prevention:
- Do not overwater your alocasia. Water only when the soil is 25-50% dry.
- If the soil doesn’t support proper drainage, add perlite or pumice to improve the soil structure.
- Always use a pot with drainage holes.
- You can switch to a terracotta pot if you are not using one already. Terracotta pots wick away the moisture faster.
Also read: How To Save Alocasia From Root Rot? (Causes, Signs & Fix)
4) Alocasia leaves dying one by one due to pest infestation
Infestation of the plant with pests is another chief reason it dies.
Like any other houseplant, alocasia is prone to pests and bug infestations.
They cause serious damage to the plant’s health if not removed on time.
The pests affecting Alocasia plants are mealybugs, spider mites, scales, and aphids.

Symptoms:
- Discoloration of the leaves
- Holes in the leaves
- Plant growth is halted
- Speckles or spots on the leaves
- Nests of various pests under the leaves
- White bugs on the stem of the plant
- Cluster formation of bugs like aphids
- Insect or bug eggs stuck on the plant leaves or the stems
Solution:
At first, isolate the plant so as not to affect any other healthy plant.
Examine the plant thoroughly to find the location of the infestation.
To remove spider mites:
- Spider mites hate cold water, so wash the plant with cold water.
- Wipe down the entire plant with insecticidal soap.
- Spray a Neem oil solution all over the plant.
To remove mealybugs:
- To remove all the mealybugs, use a cotton swab dipped in rubbing alcohol and wipe the areas with the pests.
- Take a cup of rubbing alcohol, mix liquid soap, and pour it into a spray bottle. Spray the entire plant with this mixture.
To remove aphids:
- Use soapy water to wash the plant, or spray it on the plant with some force to wash off the bugs.
- Use Neem oil as a natural remedy.
- You can also spray a 50:50 ratio of rubbing alcohol and water on the pest-infested areas.
To remove Scales:
- Spray or wipe the affected areas with Neem oil generously. Neem oil can break the shells of these pests and kill them.
- If the infestation is at the initial stage, prune the affected parts of the plant before spraying Neem oil.
Prevention:
- Keep regular tabs on the health of the plant and check for bugs.
- Spray the alocasia with diluted Neem oil once a month.
- Keep the plant in a considerably dry environment, as humidity gives most of the bugs a favorable environment. However, don’t keep the plant too dry, as that will be ideal for spider mites.
Also read: How Do I Get Rid Of Bugs In Alocasia? (+Common Bugs Identification)
5) Alocasia plant dying due to Wrong lighting conditions
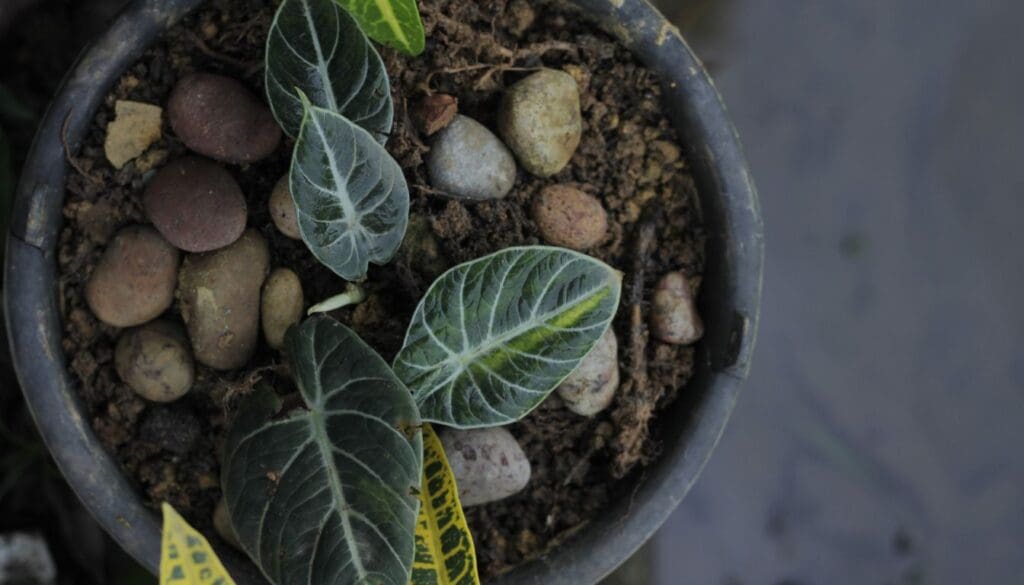
Light is one of the most important factors in the survival of indoor plants like alocasia.
If there is too much light, the plant will dry up and die.
On the other hand, if it does not get enough light, it won’t be able to create food and will not survive for long.
In other words, you must maintain an optimum amount of lighting for the proper growth of alocasia.
Symptoms:
- The plant will wilt.
- You will notice discoloration or color changes in the leaves.
- The plant will become weak and will not stand straight.
- Lack of healthy shine on the leaves.
- The leaves will get burned.
Solution:
- Ensure that your Alocasia plant receives at least 6 hours of indirect sunlight throughout the day.
- If it isn’t easy to get the optimum amount of natural light, you can also use artificial lights.
- You should place the plant so that nothing is blocking its path from the indirect light source.
- If it has received too much light and is drying up, consider relocating it to a shadier spot.
- Mist the plant frequently to prevent it from drying up due to too much light.
Prevention:
Choose the location very carefully, ensuring that it is not under direct sunlight or completely under shade. Alocasia requires indirect sunlight.
Also read: What Kind Of Light Does Alocasia Need? Alocasia Light Requirements
6) Incorrect Temperature often leads to several problems in alocasia plants.

Alocasia is a tropical plant, so it cannot bear extreme temperatures.
It grows best at a temperature of 65-85°F.
The wrong temperature can affect the growth of your Alocasia plant leading it to die.
Temperature shock is very easy to detect if you carefully inspect your plant daily.
Symptoms:
- Due to cell damage caused by very low temperatures, your plant will be unable to keep its natural form and droop.
- You will be able to see red, yellow, or white spots on the plant leaves that indicate the death of the plant cells.
- If the plant is exposed to higher temperatures than required, the leaves will dry up and become crumbly.
- The green color of the leaves will fade away and become pale yellow or brown.
- Leaves will wilt and fall.
Solution:
- Avoid placing your alocasia near doors and windows that are opened and closed too frequently.
- Don’t leave your alocasia outside when the sun is scorching.
- Bring your alocasia inside before the temperatures drop below average during winter.
- Keep the alocasia away from frosty windows.
- Use curtains or blinds to protect your alocasia from the direct sunlight that increases the temperature levels.
- You can also keep the plant 5-7 feet away from the window.
- Keep the alocasia away from heating sources such as radiators, heaters, fireplaces, furnaces, etc.
Also read: Alocasia Temperature Tolerance (How Hot Or Cold Can They Get?)
7) Wrong fertilization can lead to leaf burn and death.

For your indoor alocasia, you will need to provide enough nutrients with the help of proper fertilization.
Alocasia plants require proper nutrients as they are heavy feeders and grow large leaves.
If your plant does not get enough nutrition, it will die slowly.
Even excess application of fertilizers can be the reason for your alocasia’s demise.
Too many nutrients will burn the roots and the leaves of the plant.
Symptoms:
- The leaf veins become yellow
- Stunted growth
- The leaves will look scorched
- The edges of the leaves become yellow or brown
- The plant looks weak and unhealthy
- Twisted or abnormally shaped leaves
Solution:
- If your alocasia is not getting enough nutrients, start fertilizing it with a balanced liquid fertilizer.
- You can use compost and mix it in proper quantities with the soil, ensuring a continuous Nitrogen supply.
- In case of phosphorous deficiency, you can use additives like superphosphate. There are other sources, like bone meal or phosphate-based rocks, that you can consider.
- To recover your alocasia from potassium deficiency, you can use potash sulfate or chalky soil. Wrong pH levels can also lead to potassium deficiency.
- If your alocasia is getting excess fertilizer, stop fertilizing it immediately.
- Scrape the topsoil to remove the excess salt build-up.
- Take the plant to the sink and run water over the soil 3-4 times to leach away the excess salt.
- Stop fertilizing till the plant recovers.
Prevention:
- Use a balanced 20:20:20 NPK liquid fertilizer to fertilize your alocasia throughout the spring and summer seasons.
- Avoid fertilizing in the winter.
- Always dilute the dose with water to avoid overfertilization.
- You can also apply organic fertilizers alternatively.
Also read: What Fertilizer To Use For Alocasia? (Ideal Fertilizer+Dosage Guide)
8) Wrong potting mix can be the most underlooked reason for a dying alocasia plant.
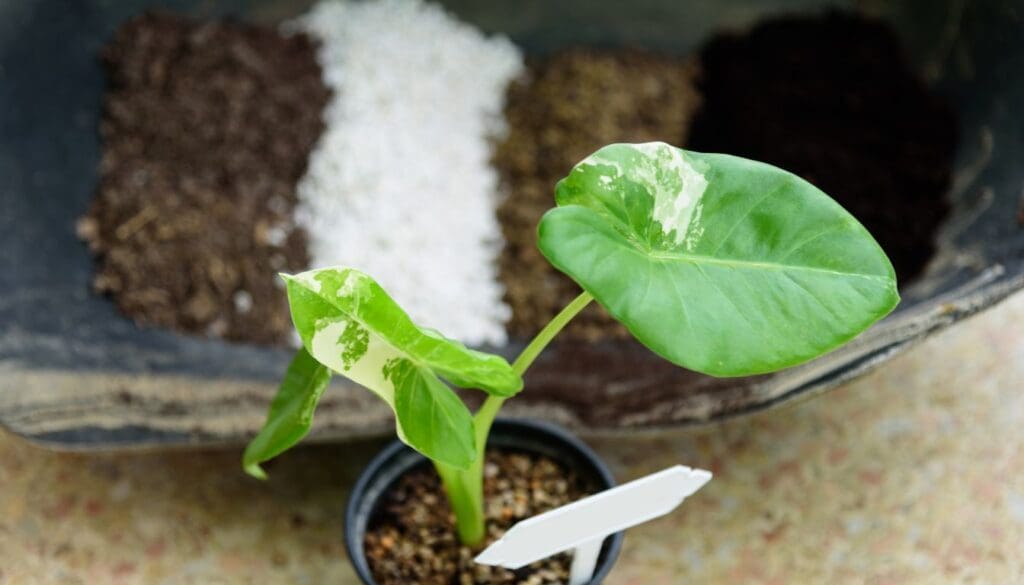
The nature, texture, and quality of the soil medium used impact hugely on your plant’s growth.
In other words, care for your plant begins with the soil.
If you use the wrong potting mix for your alocasia, it will not remain healthy and eventually die if you do nothing about it.
Symptoms:
- Root rot
- Stunted growth
- Falling leaves
- Discolored leaves
- Dehydrated plant
Solution:
- Alocasia grows in a slightly acidic soil medium (5.5 to 6.5), so use a pH meter to check it.
- Take the alocasia out of its pot and repot in a new and ideal potting mix.
Some ideal soil mixes for alocasia are:
- Equal parts of regular potting soil, perlite, peat moss, and sand
- Equal parts of orchid bark, coco coir, and perlite
- Equal parts of regular potting soil, fir bark, sand, and vermiculite, along with a handful of charcoal
Also read: What Kind Of Soil Does Alocasia Need? (Ideal Soil Mix+Other Requirements)
Final Words
Alocasia is a beautiful tropical plant that thrives when it gets the right care and suitable conditions. However, it is not unusual to make a mistake while bringing up the plant.
If your alocasia seems to be dying, don’t panic and try to find the underlying issue. Treat the plant based on the solutions I have shared in the article and avoid making the same mistakes again with the preventive measures.
Give your Alocasia time to recover and take proper care of it to avoid seeing it die again.

Reference: Alocasia sanderiana, Alocasia micholitziana.
Recommended Garden Supplies
| Product Image | Our Recommended Gardening Supplies | Check Offers! |
|---|---|---|
Top Top
Top
Top
Top
Top
Top
Top
Top | rePotme Houseplant and Tropical Classic Potting Soil Mix | Check Offer On Amazon |
 Top
Top
Top
Top
Top
Top
Top
Top | Espoma Organic Indoor Plant Food | Check Offer On Amazon |
 Top
Top
Top
Top
Top
Top
Top
Top | GooingTop LED Grow Light 6000K Full Spectrum Clip Plant Growing Lamp | Check Offer On Amazon |
 Top
Top
Top
Top
Top
Top
Top
Top | Soil Moisture Meter | Check Offer On Amazon |
 Top
Top
Top
Top
Top
Top
Top
Top | Govee Hygrometer Thermometer, Bluetooth Enabled! | Check Offer On Amazon |
 Top
Top | LEVOIT Humidifiers for Large Room(Best For Plants) | Check Offer On Amazon |
 Top
Top
Top
Top
Top
Top
Top
Top | Upgraded DIY Automatic Drip Irrigation Kit, 15 Potted Houseplants Support | Check Offer On Amazon |
 Top
Top
Top
Top
Top
Top
Top
Top | Stainless Steel Heavy Duty Gardening Tool Set | Check Offer On Amazon |
 Top
Top
Top
Top
Top
Top
Top
Top | Bonide Insecticidal Soap | Check Offer On Amazon |
 Top
Top
Top
Top
Top
Top
Top
Top | Bonide 32 oz Spray Neem Oil for Organic Gardening | Check Offer On Amazon |
 Top
Top
Top
Top
Top
Top
Top
Top | Garden Safe Fungicide | Check Offer On Amazon |

