4 Ways To Propagate A Rubber Plant: Easy Step-by-Step Guide
Lots of houseplant enthusiasts owning Rubber plants love their beauty and vigor so much that they want to know how they can have more of these plants. Apart from buying from local markets, individuals are interested in learning how to propagate Rubber plants at home.
Rubber plants can be propagated through stem cuttings, division, and air layering. Soil and water propagation through cuttings are the easiest methods. Air layering can be an enjoyable method, but it takes more time. Propagation through seeds or leaves is rarely used due to low success rate.
Many plant enthusiasts are interested in propagation, but some are hesitant due to their lack of experience.
Don’t worry, as I will help you understand the propagation methods easily and then take you through the ideal propagation conditions and the aftercare tips.
Please note: Simplify Plants is reader-supported. As an Amazon Associate, I earn from qualifying purchases made by our readers with no extra cost added to you all! Some links in the post are affiliate links and I get a commission from purchases made through links in the post.
Proper tools and materials needed for Rubber plant propagation
Before we delve into Rubber plant propagation methods, let’s gather the necessary supplies to ensure a smooth and easy process.
Here are the tools and materials you need:
- Scissors or gardening shears to take cuttings from the parent Rubber plant
- Rubbing alcohol or any other sanitizer to sterilizer the gardening tools
- A new pot to plant the new cutting in the soil
- Ideal potting mixes to make an ideal potting mix for the Rubber plants
- Gardening gloves to prevent your hand from being messed up or coming in contact with the sap of the plant
- Zip-tie bag to increase humidity for the cuttings
- Rooting hormone to use in the cuttings and promote root growth
- A jar or glass of water for water propagation
- Paper towels to clean the milky sap
- Sphagnum moss, garden twine or rubber band, and plastic or aluminum foil for air layering
Now that you have learned the use of each material, it is time to learn the different propagation methods and gather the tools beforehand.
4 Ways to propagate the Rubber plants successfully
Rubber plant propagation is mainly done through stem cuttings.
Through stem cuttings, you can propagate Rubber plants in two ways:
- Soil propagation
- Water propagation
The other propagation methods are:
- Air layering
- Division
Before starting with these methods, remember that Rubber plant propagation should always be done during the growing seasons, i.e., spring and summer.
Since it is the plant’s active growing season, proper care post-propagation can help in fast recovery.
1. Soil-based Rubber plant propagation through stem cuttings

A few months back, some of my friends bought new Rubber plants.
Now they want more plants.
So, when they asked me how to propagate them, I suggested they go for soil propagation through stem cuttings.
Not only my friends, whenever anyone asks me about it, I always suggest they propagate the Rubber plants through stem cuttings because it is easy and successful.
The only con is that you can’t see or monitor the root growth. But with the proper steps, expect better results.
Let’s get to the steps:
- Propagation can be very messy. So, find an ideal location to do it and gather all the required supplies.
- Wear protective gear like gloves (DIGZ 78976-23 Duck Canvas) because the sap from the Rubber plant can cause skin irritation.
- Now, find a suitable spot to take out stem cuttings. Choose an area that is green, soft, and tender. The chances of rooting are higher.
- The pieces you get from regular pruning can be used for propagation. This way, the pruned pieces get used, and you don’t have to take cuttings for propagation separately. Find a place where your plant can benefit from pruning, for instance, leggy areas or irregular spots where branches and leaves are growing in the wrong direction.
- Once you have found the spot, cut with sterilized shears (Fiskars Bypass Pruning Shears) or a knife just below the leaf node, the cutting should be healthy and at least 4-6 inches long.
- Wait until the sap stops oozing out of the wound. Take some paper towels and tap on the wounded area gently to pat it dry.
- After collecting the cuttings, remove some bottom leaves and leave behind 2-3 leaves and 1-2 leaf nodes.
- Take a small pot and make an ideal, well-drained potting soil and moisten it. I use half perlite (Espoma Organic Perlite) and half potting soil (Miracle-Gro Indoor Potting Mix 6 qt). You can check our soil article for suitable potting mix recipes. Use a small pot initially.
- Take the cutting, dip the end into the rooting hormone, and plant it in the potting mix. Whenever people ask me to suggest some good rooting hormones, I suggest Garden Safe Take Root Rooting Hormone and HydroDynamics Clonex Rooting Gel.
- The rooting hormone will promote root growth faster without any issues. Make sure that the exposed nodes are covered in the soil.
- Pat the surroundings to keep the cutting in place.
- Use a plastic bag, like a zip-tie bag, to create a humid environment. It encourages fast root growth.
- Finally, place your pot in a location receiving bright, indirect sunlight. Avoid direct sunlight.
- Within 2-6 weeks, you will notice new growth in the cuttings.
- Once it grows, you can repot it to a new pot 1-2 inches bigger than the old one.
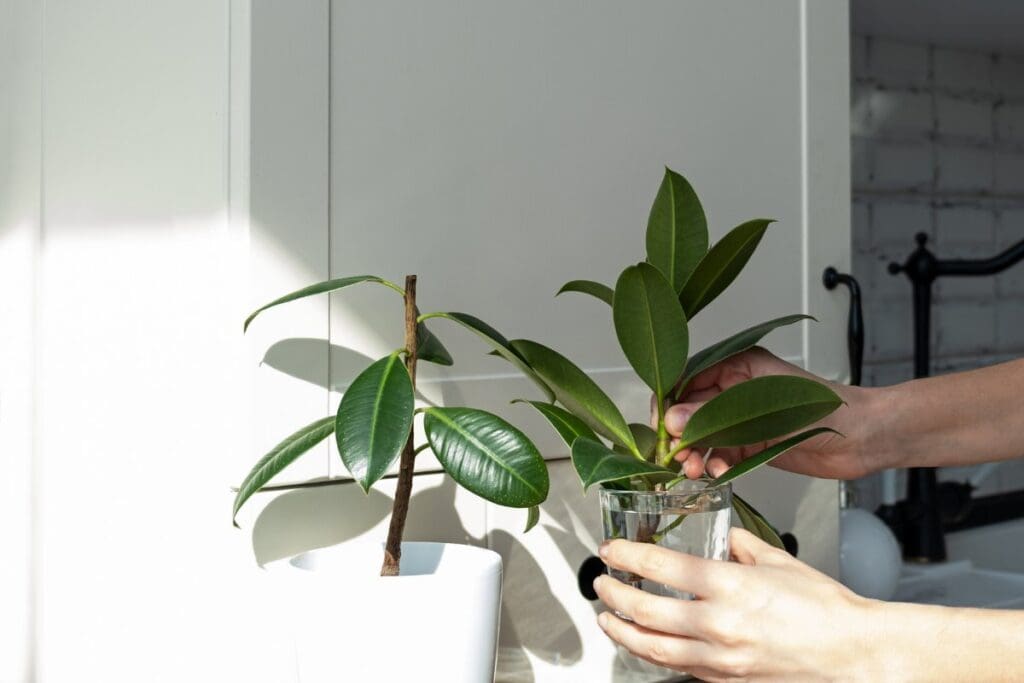
2. Water propagation through stem cuttings
Besides putting these stem cuttings in the soil, you can also propagate them in water.
Although water propagation is not a very effective method, success can be achieved through this.
Follow the steps outlined in the previous method until step 7.
Once you have made the cuttings and prepared them, follow the following steps after that:
- Take a glass half-filled with water. Don’t use a mouth with a vast mouth. The container you use should be such that it can hold the plant and doesn’t let the cuttings bend or fall over.
- Take the cutting and submerge it in water. For multiple cuttings, put one cutting in one glass.
- Make sure the nodes are under the water. It encourages root growth faster.
- Keep your container in a place that receives bright indirect sunlight and wait for the roots to appear.
- Water propagation will show results slightly slower than soil. You need to check the cutting for root growth regularly.
- Change the water once a week.
- After a few weeks, you will see white roots growing from the cutting.
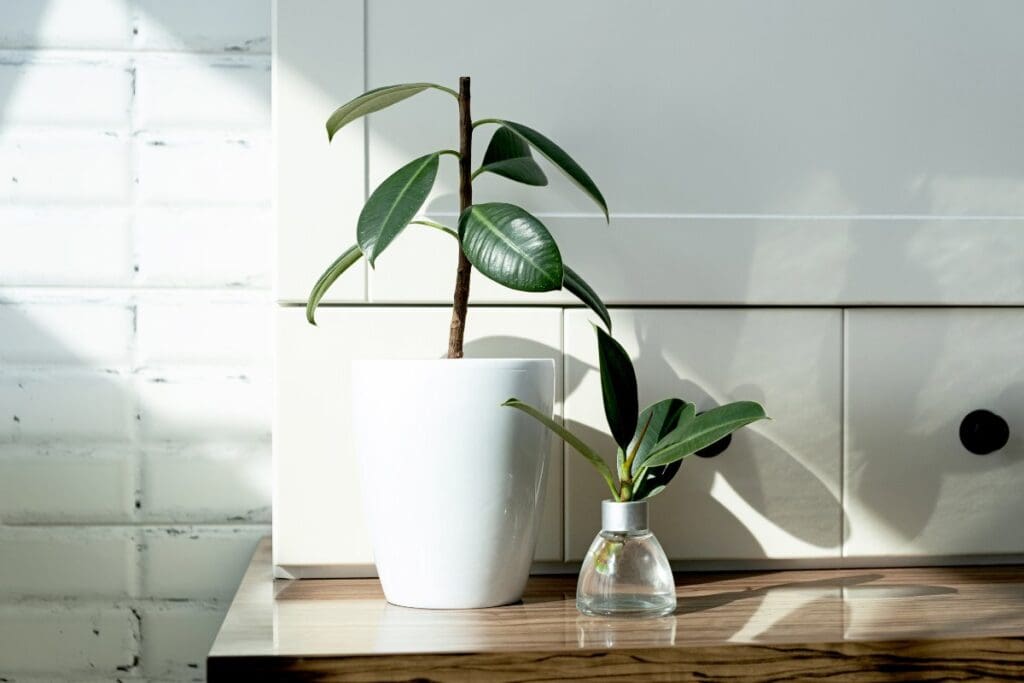
- After one month, the roots will be healthy and grow around 1-2 inches. Take a small pot, based on the cutting’s size, fill it with the ideal potting mix, and plant the cutting into it.
You can’t keep growing the cutting in water as it may start growing algae if it stays in water for too long.
So, shifting the young plant to the soil is a must.
3. Propagation by air layering

Some gardeners are just curious about trying out new methods, especially when they have some extra cuttings.
I keep getting questions about how to propagate through air layering correctly.
Are you curious? Be patient and read the steps because it is lengthy.
Remember that in this method, you don’t need any cuttings.
You can do it while the stem is attached to the plant.
The procedure is ideal for older plants with woody stems.
Here are the steps:
- Soak a handful of sphagnum moss in warm water for a few minutes; it will serve as the rooting medium.
- Choose an ideal spot. Since you will cut off the branch after the roots appear and plant it separately, the plant needs to be at least 12 inches after it is cut from the parent plant.
- Once you have chosen the spot, remove some leaves from above and below the spot and make a 1-inch cut on the branch to expose the inner stem.
- For faster root growth, consider cutting the softer and tender parts. You can also use the woody part, but the rooting will take time.
- Allow the sap to drip out completely. Gently pat the wounded area dry with a paper towel.
- Use a cotton swab and apply some rooting hormone to the exposed cut part.
- Take soaked sphagnum moss, squeeze the excess moisture, and wrap it around the cut portion. Make a perfect ball so that the exposed part and moss contact each other.
- To hold the moss in place, wrap it with plastic. Make a few wraps to hold it tight and secure it with the string or garden twine. Don’t tie it too tight.
- It will take a few months before the cutting grows roots. So, be patient and wait.
- After some weeks, you will see roots growing through the moss inside the wrap.
- Once enough roots exist, cut off the branch from the parent plant below the new roots and pot the plantlet. Remove 1-2 lower leaves before planting, if needed.
- Provide adequate requirements, and you are done.
4. Propagating Rubber plants by division

Besides the cuttings, you can propagate the Rubber plants by division.
Here, your division will have roots ready to go.
In this method, you will be dividing the plant parent.
The process is not really a propagation.
Instead, you split one plant into 2 and pot the two plants separately.
You can use the division method when your Rubber plant has multiple stems in a single plant.
The plant can benefit from being divided every few years.
I have divided my Rubber plants a few times and succeeded.
But I prefer stem cuttings.
It is easy to do and takes significantly less time.
Here are the steps for division:
- Take the parent plant out of the pot and remove the soil around the roots.
- Find a location where you can separate it into 2 different plants. You can either cut them apart or entirely separate the stems.
- Whatever you choose, make sure that each part contains all the parts of the plant – an existing root system, leaves, and stems.
- Take the pot, fill it with the ideal potting mix for the Rubber plant, and plant the divisions.
- Take care of them well as you usually care for the Rubber plant.
- Your plant may be shocked, but patience and regular maintenance can contribute to faster recovery.
Other propagation methods
Except for the above methods, there are 2 more ways through which you can propagate the Rubber plants.
But they are less successful than the above procedures.
If you are a Rubber plant lover like me, I won’t recommend these processes.
Are you wondering why I am sharing this despite knowing these don’t help?
I want to share why they don’t work and why you shouldn’t rely on these processes. You can give it a try and see it for yourself.
Seed propagation
I received a lot of questions about whether seeds can propagate the Rubber plants.
While you can propagate them by seeds, the chances of success are very low.
The Rubber plants belong to the Ficus genus.
For seeds, they need the Ficus pollinator, called the Fig wasp.
The Rubber plants rarely flower.
Instead, the plant grows some small fruits, which can attract these wasps.
The wasps burrow in these fruits and deposit eggs to inadvertently fertilize them with pollen from the plant they recently visited.
Pollinated fruits produce fertile seeds that fall from the plant, accumulate on the ground, and germinate into a new plant.
Unfortunately, this entire procedure will not happen outside the Ficus wasp’s range.
Indoors, there are no chances of such things.
That’s why you can’t propagate by seeds.
Purchasing seeds may not be effective due to numerous reviews citing germination failure and seed rot.
I do not recommend propagating the Rubber plants by seeds.
Besides, when you have such easy ways to propagate, why waste time behind seeds?
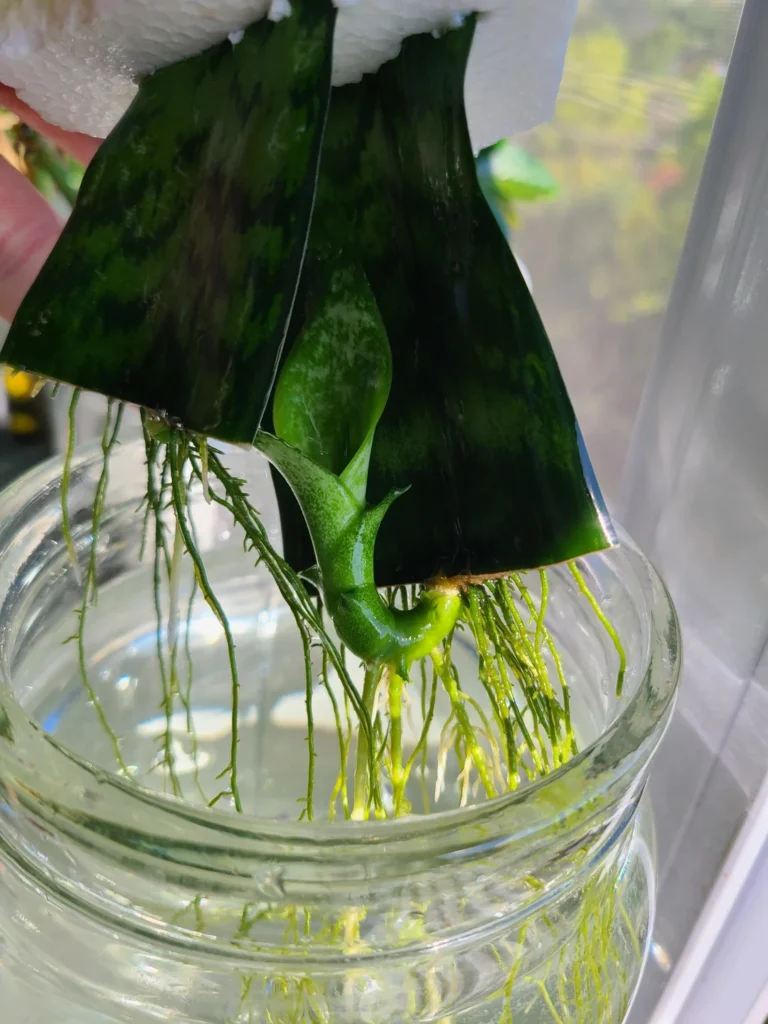
Leaf propagation
I never tried propagating Rubber plants through leaves.
So, out of curiosity, I tried to propagate by leaf cuttings in water.
I did witness some roots at the base after a few weeks, but nothing much.
I still kept waiting for some more weeks.
But that’s all I have seen.
Leaf cuttings without stems (containing nodes), you will only have the rooted leaf.
You can keep these leaves for months, but you won’t see any plants growing from them.
Optimal conditions and aftercare

Once your propagation is complete, you must create optimal conditions and care for the saplings to encourage well-established root growth and healthy plants.
Here are the things to check:
- Make sure to provide the cuttings with proper sunlight. They should be exposed to bright indirect sunlight and not direct.
- Check the soil regularly. The soil should remain consistently moist and not soggy. Initially, you can spray water to moisten the soil and avoid overwatering. If you have enough experience, you can directly pour water.
- Maintain warm temperatures throughout their lives. Rubber plants love temperatures between 60°F and 80°F. Save from fluctuations and drafts.
- Let the humidity stay between 50% and 60%. A perfect humidity encourages faster root growth.
- Don’t fertilize right now. Start feeding when the plant has grown a well-established root system.
Transplanting the new plants
Once your cuttings have turned into young Rubber plants and have grown a well-established root system, you need to transplant them to a new pot:
- While repotting, ensure the pot is 1-2 inches larger than the old one. If you have chosen water or air layering propagation methods, begin with a small 4 or 6-inch pot.
- Use a well-drained, peat-based potting mix for the Rubber plants.
- Continue with indirect sunlight, consistent moisture, and warm and humid conditions. Start fertilizing once the plant grows a few inches tall after repotting.
- A few weeks later, begin feeding the young plants with a balanced liquid fertilizer at half the recommended strength every month during the growing season.
- For standard repotting of Rubber plants, it’s best to do it annually in the spring and summer. When repotting, select a pot that is 1-2 inches larger than the old one.
Prune the Rubber plants regularly during the growing season to encourage proper shape and height and bushy growth.
Along with the plantlets, you also must take care of the parent plant.
After propagation, it receives a lot of stress.
Find it a nice place to recover, and continue caring for the plant as you did till now for quick healing.
Final thoughts
For propagating the Rubber plants, you need effort, time, and patience. Propagation is very easy once you are aware of the proper steps. Rubber plants can be propagated through stem cuttings in both soil and water. You can even divide the plant to propagate in the soil.
Another method is air layering. The process is lengthy but fun, and the chances of success are much higher than others. Propagating through stem cuttings in the soil is the most common method. You can even gift these small plantlets to your friends and family.
Propagation by seeds and leaf cuttings is not recommended. Once you have propagated, you must check out both the parent plant and the plantlets. Check them regularly and provide their requirements correctly to encourage healthy plants.
Can I propagate Rubber plants from a single leaf?
Leaf propagation typically results in failure as it only produces a rooted leaf without developing into a full plant. To successfully propagate, explore other methods such as stem cuttings, air layering, or divisions.
When is the right time to propagate the Rubber plants?
Rubber plants exhibit active growth during the spring and summer, making these the ideal months for propagation. It helps the cuttings to root faster and the parent plant to recover from propagation stress quickly.
Reference: Rubber Plant Wikipedia
Note: Some images in the articles are sourced from Reddit and Other Platforms For Reference Purpose.


That is a pretty nice post. I just stumbled upon your blog and wished to say that I’ve really enjoyed browsing your blog posts. After all, I’ll be subscribing to your feed, and I hope you write again very soon!
Thank you for sharing your info. I truly appreciate your
efforts.
What’s up to every one, the contents present at this website are genuinely amazing for people
knowledge, well, keep up the nice work fellows.