How To Propagate Croton Plant? (A Step-by-Step Guide)
Croton is a tropical plant with stunning vibrant foliage. If you own croton, you know how beautiful it makes your space look. And no wonder you would like to have more of these plants. One easy way to get more crotons is propagation.
But how can you propagate a croton plant? Let’s find out.
The easiest and most common way to propagate a croton plant is by stem cutting. Clip a healthy stem from your existing croton plant, apply some rooting hormone and propagate it in soil or water. Commercial nurseries and plant sellers also practice air layering, but it’s a complicated process.
Propagating is an economical way to increase the number of plants you want to have or give the last chance to a dying plant. In this article, I will explain all the ways with which you can propagate your croton.

Please note: Simplify Plants is reader-supported. As an Amazon Associate, I earn from qualifying purchases made by our readers with no extra cost added to you all! Some links in the post are affiliate links and I get a commission from purchases made through links in the post.
Best time to propagate croton
Although crotons don’t go dormant in winter like most tropical plants, they still grow best in the spring and summer.
Therefore, propagating the croton in the growing season is ideal, bringing the best results.
It will also reduce the plant’s stress as it will remain in the ideal environmental conditions.
If you need to propagate your croton to save it from dying, you can do it in any season as waiting for the spring or summer might be too late.
However, you must use a healthy cutting for propagation, or the propagation will not be successful.
Even if the propagation is successful, the plant you get out of it will be of low quality and prone to diseases.
If it is not a do-or-die situation, you can give your croton some time to recover if it is stressed.
Once the plant recovers from the stress, you can get a healthy cutting for successful propagation.
Supplies required to propagate croton
Get all the supplies in one place before starting with the propagation process.
Let’s take a look at all the supplies you’ll need.
- Pruners: Make sure that the pruner you use to make the cutting is sharp and disinfected.
- A small pot: If you are propagating in soil, you’ll need a small pot to keep the cutting.
- Appropriate potting mix: You can make a potting mix by mixing peat moss and regular potting mix.
- Rooting hormone: This allows faster development of roots. It also prevents bacterial and fungal infections. However, using this is optional.
- Pencil/chopstick: You will need this to make a hole in the soil while planting the stem cutting.
- Plastic bag: Since cuttings need a lot of moisture for successful propagation, you can use a plastic bag to trap the moisture.
- Glass container: You will need this if you propagate croton in water.
- Sphagnum moss: You will need this while propagating croton through air layering.
- Disinfectant: Use a disinfectant to disinfect the pruners before and after using them to take cuttings.
- A new pot and potting mix: You’ll need this after the successful propagation. After the cutting grows roots, you need to plant them in a new pot with fresh potting mix.
How do you propagate a croton?
There are 3 ways of propagating croton.
- Soil propagation
- Water propagation
- Air layering
Now, let’s dive into the particulars of each method.

Propagating croton in soil
For propagating the croton in soil, you need to take a stem cutting from the plant, which brings us to the first step.
1. Choosing a healthy stem
If you want a successful propagation, you must select a healthy stem from a mature plant.
Inspect your croton thoroughly and find a stem that is neither dry nor soft.
The stem you choose must have at least 3-4 sets of leaves for successful propagation.
2. Take the cutting
To take a cutting, first, disinfect the pruners.
The stem you choose should be at least 5 inches long.
Make a 45-degree angle cut on the stem and ensure that the cut is clean.
Cut right below a leaf joint.
3. Put the cutting in the soil
After taking the cutting, remove the bottom leaves and keep only a few leaves.
You can dip the cutting in a rooting hormone to encourage faster root growth. But you can skip this also.
Now, take a small pot and add a mix of peat moss and regular potting mix in it.
You can water the potting mix to ensure it remains moist enough for the cutting.
Take a chopstick or pencil and make a hole inside the soil. If you have more cuttings, you can make more holes.
Now insert the cuttings in the soil.
4. Provide moisture
The stem cuttings require a lot of moisture for successful propagation, so you must find a way to keep the environment moist.
For this, take a plastic bag and cover the pot with it.
The plastic will trap the moisture and keep the cuttings moist.
5. Provide proper care
The cutting should take about a month to develop roots.
But you need to give it the ideal growing conditions such as bright indirect light, timely watering when the soil starts getting dry, and correct temperatures.
If you have covered the cuttings with plastic, uncover after every 5 days or 1 week to check if the soil needs water.
You can also mist the soil to keep it moist.
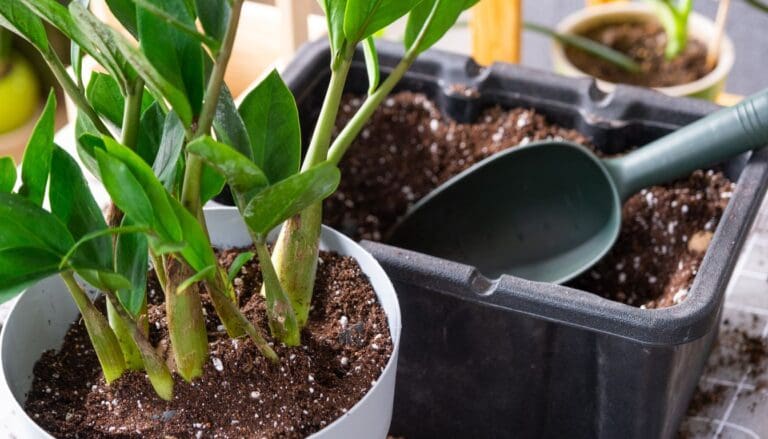
6. Repot the new plant
Once you notice root growth after a month, give more time for them to grow more.
Wait for one more month and then take the new plant out of its current pot and plant it in a bigger pot with fresh potting mix.
Place the pot in a well-lit area and provide full sun or indirect light depending on the species of your croton.
Can croton be propagated in water?

You can propagate the croton in water which might seem easier than propagating in soil.
The steps are not very different from soil propagation but let’s discuss them.
1. Select a healthy cutting
Getting a healthy stem cutting is the crucial initial step that decides the success of the propagation and quality of the plant.
So, always select a healthy stem with a few leaves.
2. Make the cut
Always use sharp and sterilized pruners to make a clear cut on the plant.
Make a 45-degree cut on the stem. Remove the bottom leaves as you will submerge that part in water.
3. Insert the cutting
You don’t need to get any pot or soil, but I recommend using a glass container if you want to witness the root growth.
Add clean water to the container and insert the stem cutting in water.
You can mix a little fertilizer into the water to encourage faster growth.
4. Take proper care
Keep the glass container in a bright area that gets enough indirect sunlight.
Check the water and change it whenever you find it dirty.
Provide the ideal temperatures to help the croton grow.
5. Check the roots
If you have propagated the croton in a glass container, you will be able to check the roots without taking the plant out.
If not, take the stem out of the water and check the roots.
In water propagation, you should see root growth in around 6 weeks.
After the roots have grown long enough, you can take the cutting out of the water and plant the croton in a pot filled with a suitable soil mix for croton plants.
Propagating croton by air layering
You can propagate croton by the air layering method other than the soil and water propagation.
You need to take a stem cutting from the plant in both methods above. But in the air layering method, you use a stem already attached with your croton.
Let’s look at the steps of air layering your croton.
- After choosing a healthy stem, take the pruner and make a diagonal cut on it.
- Use a stick or toothpick to keep the cut open.
- Now, take some rooting hormone and spread it on the cut.
- Take a plastic cover and put some moist sphagnum moss on it. Cover the cut with it.
- Keep checking every few days, and if the moss changes to a tan color, open the covering and mist the moss before covering the cut again.
- Wait for a few weeks and keep checking.
- You will notice roots coming out after some weeks.
- After the roots grow a bit long, cut that stem and plant it in a fresh potting mix and new pot.
Can you propagate a croton from a leaf?
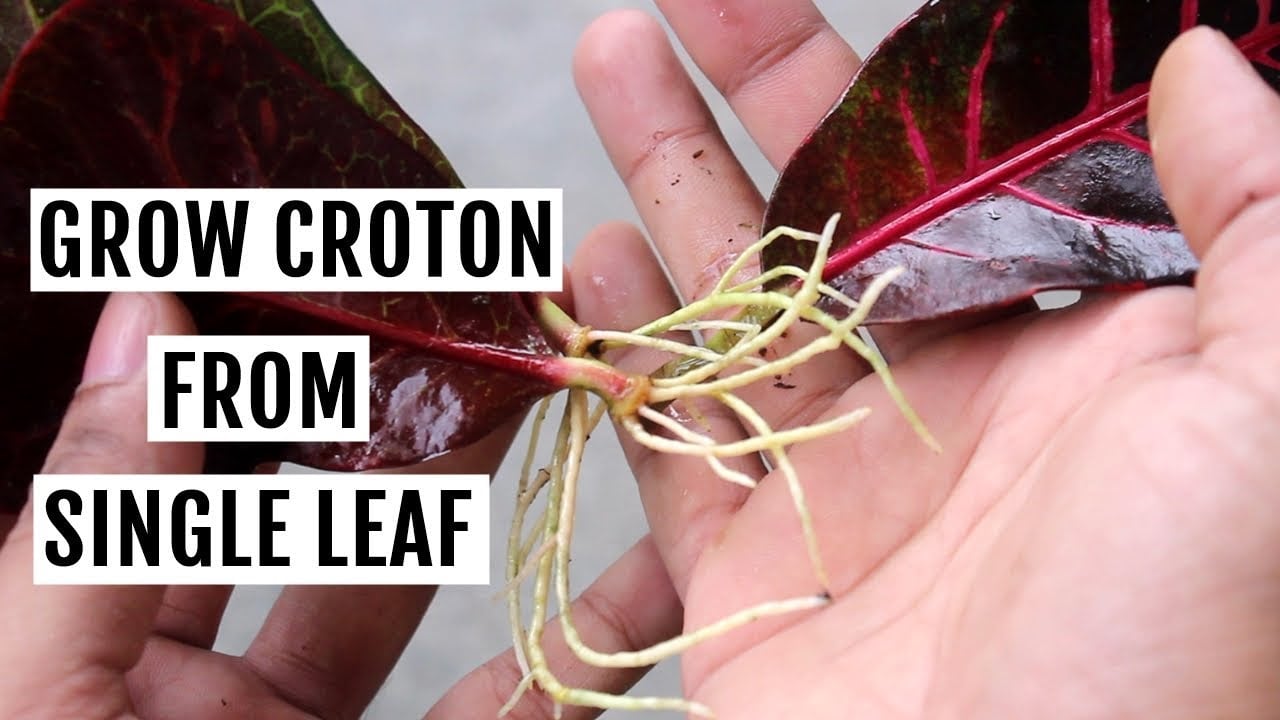
Many plants can produce a plant from their leaves, but croton is not one.
To answer the question, no. You cannot propagate croton from a leaf.
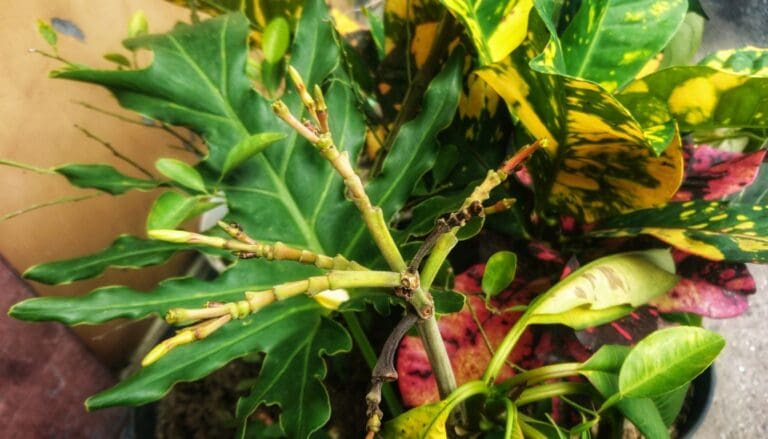
Crotons can grow quickly from even a tiny stem with leaves.
If you take a croton leaf and propagate it in water or soil, you will notice roots coming out of it, but that doesn’t mean it can grow a whole plant.
Croton leaves can’t produce axillary buds responsible for plant growth.
So, propagating a croton plant from a leaf will yield no results other than roots coming out. This is known as blind cutting.
How to care for a propagated croton?
After propagating the croton, you must take care of the new plant to make sure it thrives.
I have shared some basic requirements of crotons that will help you take proper care of the new croton.
Light: Crotons require full sun or bright indirect sunlight, depending on the species.
So, you can place the croton near a bright window that gets 6-8 hours of sunlight.
Avoid keeping the croton in too intense sunlight as that will cause sunburn.
You can use artificial lights if your croton is not receiving enough light.
Water: Crotons prefer moist soil, so you must regularly check the soil and water it whenever it gets dry.
Avoid keeping the soil dry for too long as that can put stress on your croton.
However, you must be aware of the soil moisture and not water without checking it.
Soil: A croton will do best in well-draining soil.
You can create a perfect soil recipe by mixing 30% potting mix with 25% peat moss, 25% compost, and 20% perlite.
This recipe will hold enough moisture to keep the soil moist and drain the excess to prevent overwatering.
Fertilizer: You can fertilize the croton with a 3-1-2 NPK liquid fertilizer.
Since croton is a heavy feeder, you can fertilize it once a month during its growing season.
Temperature: The young croton plant will thrive in warm temperatures between 65-80°F.
Crotons can tolerate high temperatures of even 100°F and low temperatures of 40°F, but you should try to maintain consistent temperatures for the plant.
Since summer and spring months have warm temperatures, it is best to propagate the croton during this time.
Humidity: Crotons require a lot of humidity both before and after propagation.
You can keep a humidifier near the young croton to make sure it gets sufficient humidity.
Final words
Crotons are easy to propagate and have shown excellent results when propagated the correct way. You can propagate croton from stem cutting in water and soil but don’t try propagating with a leaf.
During and after propagating, ensure the right growing conditions, such as suitable soil mix, proper watering, enough light, appropriate temperature, and humidity levels.
You can propagate the croton to get new plants that you can keep in the house, gift them to your dear ones or save a plant that is about to die.
Reference: Sciencedirect, Wikipedia, Wikipedia, Britannica, CABI, Academia, University of South Florida, The University of Georgia.
Note: Some images in the articles are sourced from Reddit and Other Platforms For Reference Purpose.


Hi my friends — thank you much for your valuable and generous information concerning re-growing crotons. I’d gotten this plant as a tiny thing and it grew it into a tree. I call it “Gloria” because it’s so beautiful, but I see that my beautiful plant which has given me so much joy will not be here forever.
I noticed this little plants growing along the stems and wondered if it were possible to regrow. With your information, I see it’s possible.
Thank you so much for this information. You have made my day!!
Happy holidays and stay safe.
Thanks for great information I was looking for this information for my mission.
Hey,
I am glad it was helpful!
Thank you for the great information. I had to trim a large Croton hedge and didn’t want to just throw it away(recycle). I have another place in my garden that it would be perfect for so now I’ll have something to put there