11 Pro Tips To Prune Roses For Healthier & Fuller Blooms
I love how just a few smart cuts can turn a wild-looking rose bush into something gorgeous.
Pruning can seem a little intimidating at first, but once you get the hang of it, it’s honestly pretty fun and rewarding.
Proper pruning keeps roses healthy, encourages new growth, and helps them bloom more fully.
Let’s get into some real-life tips that make pruning easier and way more effective.
You’ll find out when to trim, what tools actually work, and how to shape your roses so they get plenty of air and grow nice, sturdy stems.
Please note: Simplify Plants is reader-supported. As an Amazon Associate, I earn from qualifying purchases made by our readers with no extra cost added to you all! Some links in the post are affiliate links and I get a commission from purchases made through links in the post.
1) Prune in early spring before new growth appears
I always start pruning my roses in early spring, just as things start to warm up but before the plants really wake up. This way, I don’t accidentally chop off fresh buds that could turn into flowers.
If I wait too long, I end up removing new shoots the plant already worked for. Early pruning gives my roses a strong start and lets them put energy into healthy canes and future blooms.
I usually wait until I see the buds on the stems swelling, but not quite open yet. That’s my cue to grab the shears.
Pruning too early? A late frost can mess things up. Wait too long, and the plant wastes energy on growth I’ll just end up cutting. Finding that sweet spot really pays off.
Before I start, I always check that my tools are clean and sharp. Clean cuts heal faster and help keep disease away. I disinfect my shears between bushes, just to be safe.
Pruning in early spring gives my roses a shot at growing sturdy canes and those bigger, longer-lasting blooms I look forward to.
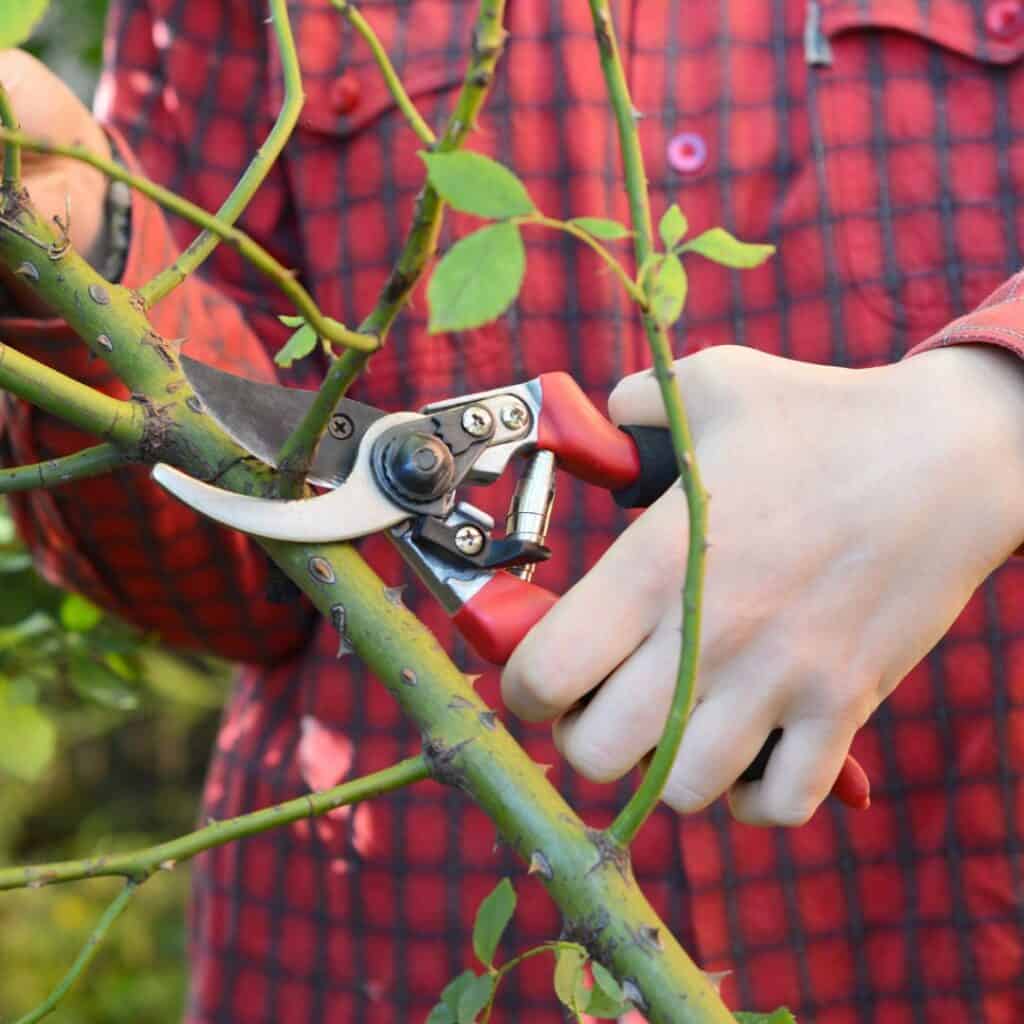
2) Use sharp bypass pruners for clean cuts
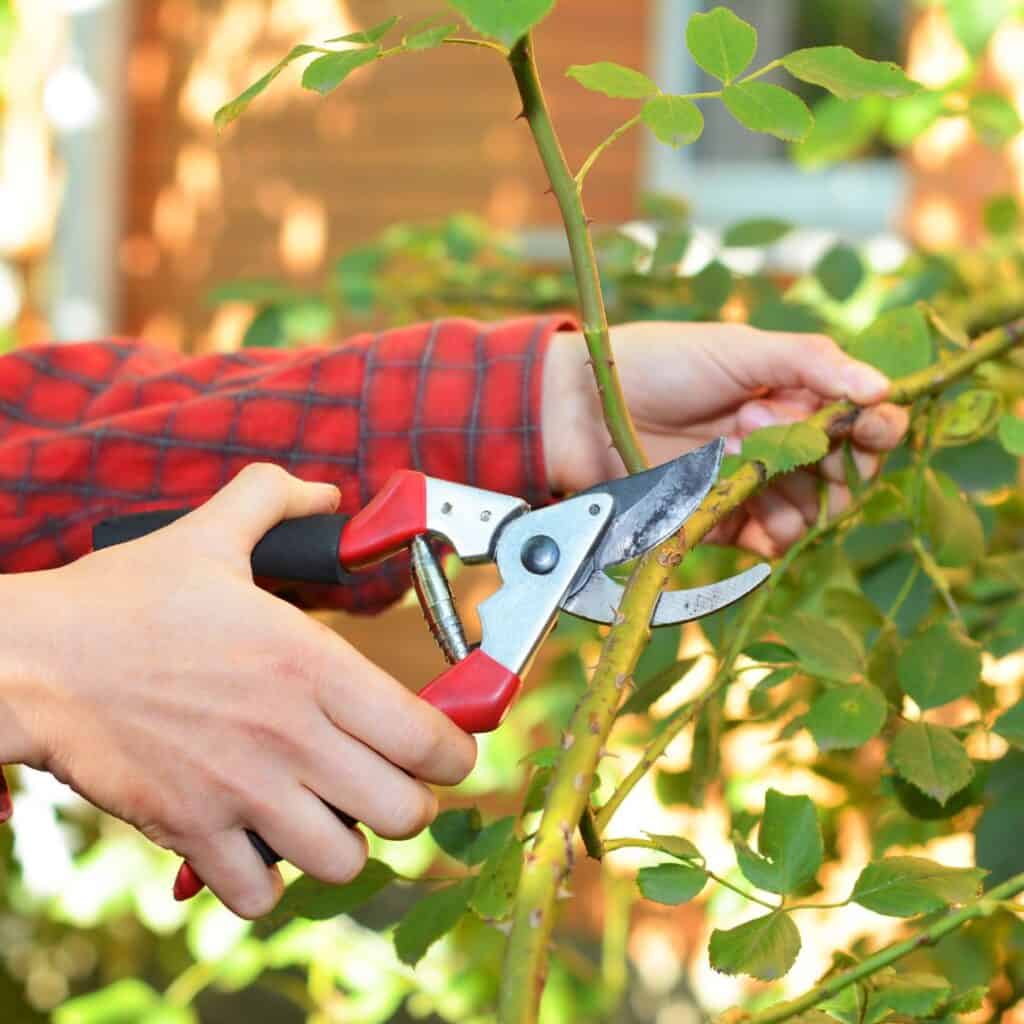
I always reach for sharp bypass pruners when I prune my roses. They give a nice, clean cut that helps the plant heal quickly. Dull blades just crush stems and invite trouble.
I check my pruners before each session. If they’re dragging or feel rough, it’s time to sharpen or replace them. Saves me effort and keeps my roses happier.
Bypass pruners work like scissors, with two blades gliding past each other. That’s what you want for a precise cut that doesn’t mess up the stem tissue. Anvil pruners? I steer clear—they just bruise the wood.
I also wipe the blades with rubbing alcohol before and after I prune. It’s a quick way to stop any fungus or bacteria from hitching a ride.
When I cut, I try to do it in one smooth motion. I aim for a 45-degree angle just above a healthy, outward-facing bud. That angle helps water run off and keeps rot away.
Having the right tool just makes everything easier. My cuts look tidy, and new growth gets off to a strong start. It’s a small habit, but it really matters.
3) Remove dead or diseased wood first

First thing I do is check for dead or diseased wood on my roses. Those weak spots can spread problems fast if I ignore them. I look for black, brown, or shriveled canes that don’t show any green when I scratch them.
If I spot a bad branch, I cut it back to healthy wood—right above a leaf node or a strong bud facing outward. That way, the plant can focus on new, healthy growth instead of wasting energy on damaged parts.
I always disinfect my shears between cuts when dealing with disease. A quick wipe with rubbing alcohol or bleach solution keeps things from spreading.
If any canes look soft, slimy, or spotty, I’m quick to remove them. Keeping only strong, green canes helps the rose breathe and grow evenly.
Afterward, I make sure to dispose of all the pruned material. No composting diseased wood—it just brings problems back. Clean-up keeps pests and fungi away.
Starting with dead and diseased wood gives my roses a fresh start. Healthy stems mean stronger leaves and blooms.
4) Cut back to outward-facing buds
When I prune, I always cut just above an outward-facing bud. It’s a small detail, but it really changes how the plant grows. New stems will head outward, not into the crowded center.
This keeps the middle open so air and sunlight can reach everything. Good airflow means fewer mold or pest issues.
I cut at a slight angle, about a quarter inch above the bud. Water runs off instead of sitting there, which helps prevent rot.
I pick a bud that points away from the center. That way, I get a nice, balanced shape without tangled branches. Neat, outward growth just makes the bush look so much better.
I use sharp, clean shears for smooth cuts. Dull or dirty tools slow healing and can spread disease.
After cutting, I step back to check the shape. If branches still cross or face inward, I trim again. A well-shaped bush just blooms better.
It only takes a few extra seconds, but the payoff is worth it. My roses stay open, bright, and easy to care for all season.
5) Thin out crowded branches for better air flow

I always make sure to thin out crowded branches when I’m pruning. It helps the plants breathe and keeps them healthy. When branches get too close, air can’t move and moisture builds up—hello, disease.
I look for branches that cross or rub and take out the weaker one so the stronger can thrive. It also gives the plant a cleaner look.
Then I check the center. If it’s packed with stems, I carefully snip a few out. Opening up the center lets sunlight and air reach everywhere.
Sharp, clean pruners are a must—dull tools just tear stems. After I’m done, I clear away the cut branches so pests have nowhere to hide.
Spacing out the branches means fewer mold and mildew problems. The blooms look better too, since each stem gets more light.
Even a few small cuts can really help. Healthy airflow means stronger, happier roses that keep blooming.
6) Cut stems at a 45-degree angle
When I prune, I always cut the stems at a 45-degree angle. That way, water runs right off and doesn’t just sit there, which helps prevent rot. Straight cuts can trap moisture and cause trouble.
I try to cut about a quarter inch above an outward-facing bud. That encourages new growth to spread outward and keeps the center open for better air movement. Good airflow helps keep mildew and other common rose problems away.
Sharp, clean shears make a big difference. Dull blades just crush the stems and slow things down. I wipe my tools with rubbing alcohol before and after, just to be safe.
I pay attention to the bud’s direction. Cutting above a bud facing outward helps the rose bush shape itself naturally.
Once I’m done, I check each cut—smooth and angled is what I’m after. A clean, slanted cut heals faster and gives the rose the best shot at strong, healthy shoots.
7) Disinfect tools between cuts to prevent disease
I always clean my pruning tools after every cut. It might sound a bit much, but it really helps keep diseases from spreading. Dirty tools can transfer bacteria or fungi in no time.
I keep a small spray bottle of rubbing alcohol or disinfectant nearby. After each cut, I give my shears a quick wipe or spray. Takes just a few seconds and saves headaches later.
If I’m working on a bunch of plants, sometimes I dip my tools in a bleach solution—one part bleach, nine parts water. I let them sit for a bit, then dry them off with a clean cloth.
Even a bit of sap or dirt can carry something nasty. Regular cleaning stops things like black spot or rust from spreading.
I also make sure my tools are totally dry before I move on. Wet blades can rust and get dull fast.
Keeping tools clean saves time and effort in the long run. My roses stay healthier, and I get to enjoy stronger, fuller blooms every season.
8) Remove suckers growing from the base
I always check at the base for suckers—those shoots that pop up from below the graft or rootstock. They steal energy from the main plant and can weaken it over time.
If I spot a sucker, I remove it right away. I follow it down to where it starts and cut it as close to the root as I can. Just trimming the top doesn’t work—they usually come back stronger.
Clean, sharp shears are key. Clean tools help prevent disease from spreading. I check again in a few weeks since new suckers can pop up as the plant grows.
Getting rid of suckers lets my roses put energy into healthy stems and flowers instead of unwanted growth. It’s a simple step that keeps everything balanced and blooming.
9) Shorten last year’s growth by one-third
When pruning, I usually cut back last year’s growth by about one-third. It keeps the plant balanced and encourages new, strong stems. Plus, it stops the rose from getting too tall or scraggly.
I look for the longest, lightest-colored stems from last season. I trim them down to a sturdy, outward-facing bud, making sure the cut is clean and slightly angled away from the bud.
Taking off a third of the old growth gives my rose bushes some breathing room. The plant stays compact, and sunlight can reach the center. Better air flow means fewer diseases and healthier blooms.
Sharp, clean shears are a must—dull tools just crush the canes. After trimming, I clear away any fallen leaves or cuttings so pests don’t move in.
Sticking to the one-third rule really pays off. Each year, I see fuller blooms and stronger growth when I follow this simple tip.

10) Leave healthy canes thicker than a pencil
When I’m pruning my roses, I always hang onto the canes that are thicker than a pencil. Those sturdy canes just seem to hold up better and support more leaves and blooms.
Honestly, the thicker canes are usually younger and way healthier, while the skinny ones barely manage new flowers. By focusing on the strong canes, I’m giving the plant a real shot at bigger, better blooms.
I stick with clean, sharp pruners and cut away any weak or dead stems. I try to trim just above an outward-facing bud so new growth heads outward instead of crowding the center.
After I finish pruning, I always double-check that the canes aren’t all bunched together. Good air circulation is a lifesaver for preventing disease and keeping the bush tidy.
I’ve noticed my roses do so much better when I clear out the thin, tangled growth and just let the sturdy canes do their thing. It’s a simple habit, but wow, does it make a difference.
11) Seal large cuts with pruning sealant
After pruning, I make it a habit to check for large cuts on my rose bushes. Those bigger wounds are like open doors for pests or diseases, so I don’t leave them exposed.
Using a pruning sealant helps protect the plant while it heals. I apply the sealant right after trimming, and it forms a thin, protective layer that keeps out moisture and bacteria.
For sealing, I grab a clean brush or applicator and cover the cut surface with a light coat. No need to go overboard; just enough to shield the wound does the trick.
If I’m pruning during damp or humid weather, sealing feels even more important. Fungal growth loves moisture, so the sealant helps cut down that risk.
I actually skip sealant on the small cuts since roses usually heal those on their own. I only treat larger cuts, the ones thicker than a pencil—no point in making the plant waste energy on minor wounds.
Choosing a non-toxic, plant-safe sealant is key. I look for products made for woody stems, and some with natural latex ingredients seem to work well for roses.
Once I’m done sealing, I let the area dry before watering or spraying anything nearby. That way, the coating sets and doesn’t wash off right away.
Sealing big cuts has saved my roses from a lot of dieback and infections. It’s a quick step, but honestly, it pays off every season.
Understanding Rose Growth Patterns
I really try to pay attention to how my roses grow before I prune them. Healthy plants put out stronger canes and more blooms if I understand their natural growth cycle and avoid messing with it too much.
How Roses Respond to Pruning
When I prune a rose, I’m basically triggering new growth from the buds just below where I cut. Every cut is like a little signal telling the plant where to send its energy next.
If I cut above an outward-facing bud, the new cane heads outward, which opens up the bush for better airflow and sunlight. Roses grow in cycles, and after pruning, they usually chill for a bit before sending out fresh shoots.
I’ve noticed younger canes bounce back faster and give more flowers than the old, woody ones. Clearing out the weak or dead wood lets the plant focus on its strongest stems.
I also try to remember that different types of roses—hybrid teas, floribundas, climbers—react in their own ways. For example, hybrid teas bloom on new wood, but some climbers do their thing on last year’s canes.
Common Mistakes That Affect Flowering
Cutting too much can really stress a rose and set back blooming. If I take off too many buds, the plant doesn’t have as many chances to flower.
But if I don’t prune enough, the center gets all tangled and shaded, which just invites disease and blocks airflow.
Another mistake I’ve made is cutting in the wrong place. Cutting too close to a bud can dry it out, but cutting too far above leaves a stub that might just rot. I aim for clean, angled cuts about a quarter inch above an outward-facing bud.
Timing matters too. Pruning too early in spring can expose new growth to frost, but pruning too late can mean cutting off developing buds. I try to time and shape my cuts so my roses stay healthy and ready to bloom.
Best Practices for Pruning Tools and Timing
To keep my roses happy, I use clean, sharp tools and prune at the right time of year. Good equipment makes clean cuts that heal fast, and timing is everything for strong growth and lots of blooms.
Choosing the Right Pruning Tools
I always start with bypass pruners for small stems—they make such smooth, close cuts. For thicker branches, I switch to loppers or a pruning saw since they give better leverage without crushing anything.
Keeping tools sharp and clean is non-negotiable. I wipe blades with rubbing alcohol after each use to keep disease from spreading. Dull blades just tear stems and slow healing.
I always wear gloves for the thorns and grab long-handled tools when I need to reach into the middle of dense bushes.
When to Prune for Maximum Blooms
I prune my roses in late winter or early spring, just before new growth shows up. That way, the plant’s energy goes into the strongest, healthiest canes.
If I go too early, frost can mess up the new shoots. If I wait too long, the plant wastes energy on weak growth, so I watch for swelling buds as my cue.
Throughout the season, I do light pruning to get rid of dead or crossing stems. After the first bloom, I deadhead faded flowers to encourage more.
In warm climates, I might give them another light prune in late summer to help with shape and airflow. Every cut is a chance to guide the plant toward fuller, healthier blooms.
Frequently Asked Questions
I focus on timing, technique, and tools to keep my roses going strong. I’m also picky about which canes I cut and how much to take off for the best new growth.
What’s the best time of year to prune my rose bushes?
For me, early spring is the sweet spot—right before new growth starts. Plants bounce back fast and put out more blooms.
How can I tell which canes to cut when pruning roses?
I always start by removing dead, damaged, or diseased wood. Then I cut out any canes that cross or crowd others for better airflow and sunlight.
Can you give me some tips on the proper technique for pruning roses?
I use sharp bypass pruners and make clean cuts about ¼ inch above an outward-facing bud. I angle the cut a bit so water runs off instead of sitting on the stem.
How much of the rose bush should I prune off for optimal growth?
I usually take off about a third of the plant’s height. That keeps things balanced and encourages strong new canes.
What tools do I need for safely pruning my rose plants?
Sharp bypass pruners and thick gloves are a must, and sometimes I use loppers for the thicker canes. Clean tools are essential for keeping disease away.
Is there a difference in pruning methods for various types of roses?
Absolutely! When I’m working with hybrid teas or floribundas, I tend to prune them back more aggressively to get that nice, tidy shape.
But with climbing and shrub roses, I usually just give them a lighter trim—mostly to keep their natural look.
Note: Some images in the articles are sourced from Reddit and Other Platforms For Reference Purpose.