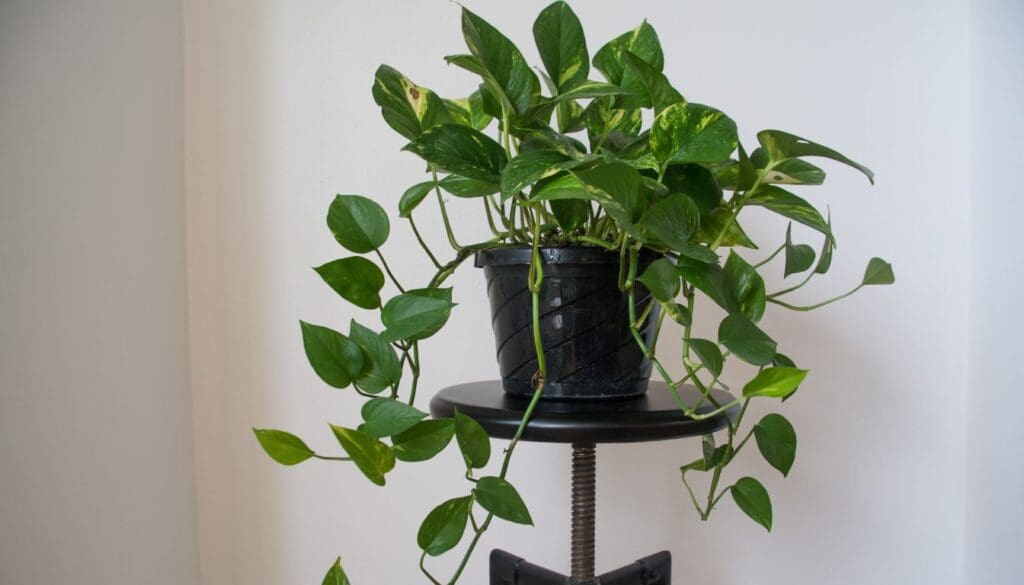
Root Bound Pothos: How To Know & What To Do?
When Pothos grow in a small pot for too long, the roots get rootbound due to insufficient space. Over time, your Pothos won’t flourish and lose their vigor and shine. But how will you understand whether Pothos is rootbound? Let’s see.
If your Pothos is rootbound, you will notice visible roots from the soil surface and drainage holes, spiraling roots, stunted growth, wilted and discolored leaves, leggy stems, quick-drying soil, and swollen pots. Repot your Pothos once you see these signs to reduce plant stress.
During my 12 years of gardening, I have discovered the signs that tell you if Pothos is rootbound and how we can fix a rootbound Pothos.
Please note: Simplify Plants is reader-supported. As an Amazon Associate, I earn from qualifying purchases made by our readers with no extra cost added to you all! Some links in the post are affiliate links and I get a commission from purchases made through links in the post.
Symptoms indicating that your Pothos is rootbound
When Pothos is rootbound, it shows specific symptoms.
Some of these signs will also indicate issues related to watering, light conditions, soil quality, temperature, and humidity.
But if you have provided all the requirements correctly and still get these signs, recall the last time you repotted your Pothos.
Pothos is a fast-growing plant that must be repotted every 1-2 years.
If it’s been more than that since you repotted, these signs indicate that your Pothos is rootbound.
Here are the symptoms of a rootbound Pothos:
- Pothos roots are visible: When Pothos gets rootbound, roots will be visible from the drainage holes. Roots will grow from any location containing some space for the lack of space inside the pot. You will also notice clusters of roots growing out from the soil surface. It is common for fast-growing plants like Pothos.
- Pothos are growing spiraled roots: If you check the Pothos roots closely, you will notice they are spiraling or growing in a circular motion. When the pot becomes small for the roots, they grow circularly around the walls and bottom of the pot. Spiraling helps them use the limited space left in the pot to grow and absorb oxygen, moisture, and nutrients.
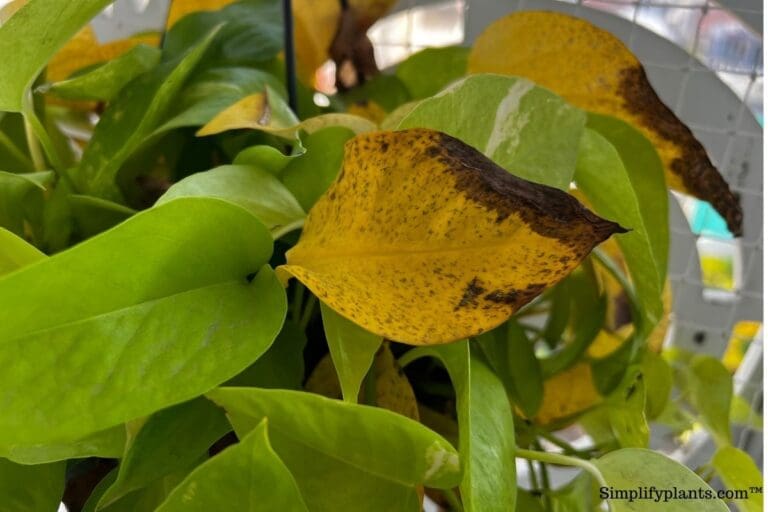
- Wilted and discolored Pothos leaves: As long as Pothos receive moisture and nutrients, they will keep growing and develop healthy leaves during the early stages of rootbound. As time goes by, the roots grow circularly and bind very tightly. Dense, compact roots cannot adequately transfer moisture and nutrients to Pothos. Over time, the leaves will wilt and turn yellow. Variegated leaves lose their patterns and colors, becoming dull. Even if you provide adequate moisture and fertilization, your Pothos will still have wilting and discoloration.
- Stunted growth in Pothos: Pothos might stop growing or grow very slowly due to a lack of nutrients and moisture. New leaves grow small, twisted, and wrinkled. Watering issues, inadequate light conditions, temperature stress, and nutrient deficiency can also lead to stunted growth. But if these are not the issues, unpot your Pothos and examine the roots. If roots are tightly entangled, rule out the other issues.
- Pothos soil dries out quickly: When rootbound, Pothos pot contains more roots than soil. Less soil holds less moisture and dries out within no time. Additionally, compact roots struggle to absorb moisture from the soil. Before the roots can absorb the moisture from the soil, the soil dries out quickly, and your Pothos suffers from dehydration.
- Pothos roots are decaying: When Pothos keeps growing roots, the soil gets displaced from its place. As a result, some areas of the pot accumulate more soil, and some don’t have enough soil. When watered, the areas accumulating more soil retain moisture for too long and cause root rot.
- Swelling and cracked pot: When you don’t repot your Pothos for several years, the roots will grow and fill the leftover space inside the pot. The roots will continue growing even if the pot has no space left. The roots are trying to crack through the pot for more space. At this point, the pot becomes swollen due to excessive root growth.
A few months back, one of my readers sent me a DM with a photo of his Pothos plant.
He wasn’t able to understand what led to yellowing and stunted growth.
The pot seems quite swollen, and I noticed a few cracks upon close observation.
It indicates that too many roots have clambered for space inside the pot.
So, I immediately told him the issue and advised him to repot it.
This sign screams that your Pothos need urgent repotting.
What to do when Pothos gets rootbound?
Identifying the signs of a rootbound Pothos is half the job.
You must treat your rootbound Pothos and help it recover from the stress by providing more space for the roots.
So, what will you do when you have a rootbound Pothos? There are two options:
Repotting Pothos if they are rootbound
Rootbound Pothos must be repotted to a new pot more extensive than the old one.
It will provide enough space for the roots to grow flexibly without issues.
When roots come out of the drainage holes and soil surface, Pothos has reached a point where roots are no longer getting space to grow, and repotting is the best option.
Dividing Pothos if they are rootbound
We normally repot a rootbound Pothos to give the roots more room to grow.
But with Pothos, you have another option – dividing the rootbound Pothos.
This method is applicable when you want more Pothos to increase your plant collection without changing the current pot.
I always repot my Pothos and propagate them through cuttings to get more Pothos.
But then, one day, one of my houseplant-lover friends suggested trying this method with a rootbound Pothos.
Let’s discuss how to repot and divide a rootbound Pothos in more detail.
How to Repot a rootbound Pothos?

When rootbound, repotting Pothos is the best and easiest option to treat it.
Let’s learn when to repot Pothos for a better understanding. Then, we will discuss the steps of repotting.
The right time to repot a Pothos
Pothos begin their active growth when the temperature rises in spring.
Since the plant will grow actively once the temperature rises above 60-65°F, repotting in spring is the right time.
Repotting stresses Pothos as the process is not smooth.
Repotting during the active season will help the Pothos to heal quickly from the stress and start growing.
Spring is not the only option. You can also do it in the summer.
You can repot your Pothos anytime from the early spring through mid-summer, as this is the plant’s peak growing season.
Avoid repotting during winter.
The plant remains dormant and won’t be able to overcome the stress received through repotting.
Pothos repotting steps for root-bound Pothos
Now that you know the right time for repotting, let’s gather the tools and learn the steps of repotting:
Repotting tools needed:
- A new pot 1-2 inches bigger than the old one
- New growing medium
- Gardening gloves
- A pruner or a knife
- Rubbing alcohol to clean the pruner or knife
- Water
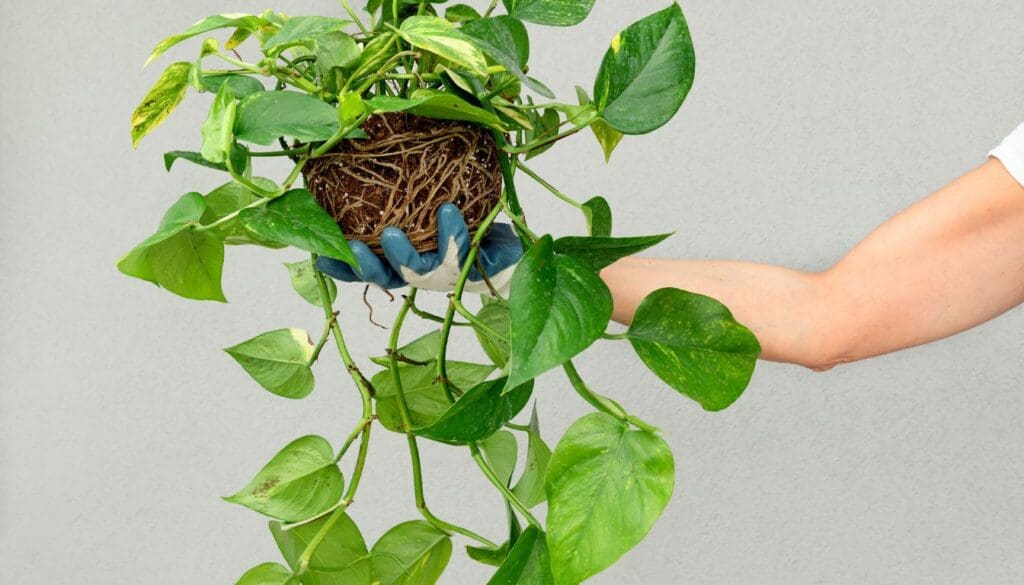
Step 1: Take out your Pothos from the pot
For repotting, unpot your Pothos.
The step is not easy because removing it after years of staying in the same pot is a bit difficult.
Water your Pothos 2-3 days before repotting.
With moist soil, loosening becomes easier.
Gently tap the sides and bottom of the pot to loosen the soil.
Run a knife around the pot sides to loosen the soil if needed.
Slowly take your plant out, ensuring it does not harm the roots.
Step 2: Examine and remove the rotten roots
Remove maximum soil from the roots of your Pothos to examine them closely.
The roots will be twisted and entangled with each other.
Some roots may be damaged due to prolonged entanglement.
Prune back some dead and damaged roots.
Remove any brown and mushy rotten roots, if any.
You can also trim the extremely long and thin roots back in line with the shape of the plant’s root ball.
This will encourage healthy and vigorous root growth.
Old plants greatly benefit from trimming these long and thin healthy roots.
However, younger plant roots are still developing.
Don’t trim other healthy roots except for the damaged and rotten roots.
Use a sharp, sterilized pruner to trim the roots.
Detangle and spread them as much as possible to avoid future spiral growth.
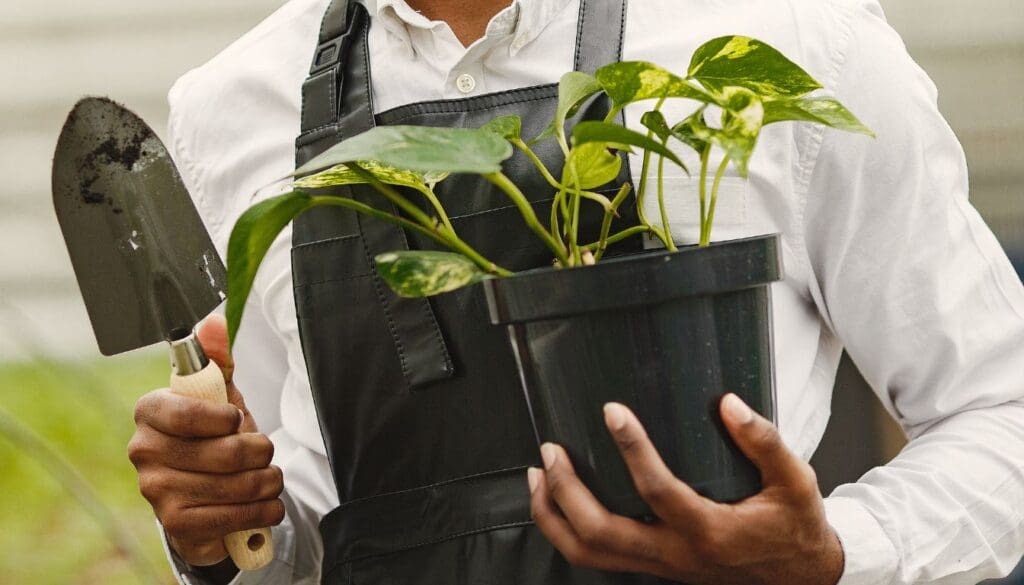
Step 3: Get a new pot for your Pothos
For repotting, get a new pot.
Choose a pot 1-2 inches bigger than the existing one for more space and flexible root growth.
The roots will stay happy with it for at least 1-2 years.
For Pothos varieties that grow slowly and need repotting every 2-3 years, choose a pot 2-3 inches bigger than the existing one.
Choose terracotta or ceramic pots if you overwater often or plastic pots if you don’t water your Pothos regularly.
Self-watering pots are the best option to reduce the risk of overwatering and underwatering.
Step 4: Prepare a new growing medium for Pothos
For these years, your Pothos has absorbed maximum nutrients from the soil and depleted them entirely.
The soil becomes poor and loses its quality over time.
Fresh soil mix will guarantee good drainage, retention, and fertility.
Use a well-drained fertile growing medium for Pothos.
The best option is to use 2 parts peat, 1 part perlite, and 1 part pine bark fines.
For other options, check our Pothos Soil Article.
Step 5: Repot your Pothos
Fill up ⅓rd of your new pot with the new potting mix.
Plant your Pothos at the center, spreading the roots properly.
Fill the pot with the remaining potting mix, leaving 1-2 inches of space at the top for easy watering.
Gently pat the sides and ensure the roots are adequately covered with soil.
Step 6: Water your Pothos and keep it in a bright location
After repotting, water your Pothos lightly to moisten the soil.
Let the soil dry out before every watering session.
As you see signs of dehydration, like wilting or drooping, soak the soil for 2-3 minutes to provide adequate hydration.
Step 7: Repotting aftercare to reduce repotting stress
After repotting, your Pothos might have signs of yellowing, defoliation, or stunted growth. These are signs of transplant shock.
Take proper care of your plant, and give it time to settle and adjust to the new environment.
After repotting, here are a few things to check for to reduce repotting stress:
- Let Pothos have dappled sunlight for 8-12 hours.
- Water only when the top few inches have dried.
- Please keep it in its previous place. It will help the plant to adapt to the surrounding environment and reduce stress faster.
- Use the same potting mix recipe you used earlier to let your Pothos believe they are growing in the same soil. It will quickly adapt to it.
- Monitor the temperature and humidity levels around Pothos. Aim for 65-90°F temperature ranges and 50-60% humidity.
- Don’t fertilize your Pothos after repotting for a few weeks. Start feeding once you notice signs of active and new growth.
Note: In the case of location and soil mix, use the exact location and soil mix recipe you used earlier, provided they have worked well for Pothos till now. Otherwise, you might have to change them for Pothos’s good growth and development.
Dividing a rootbound Pothos
Besides repotting rootbound Pothos, you can divide your Pothos to make new plants.
Here are the steps to divide a rootbound Pothos:
- Thoroughly water your Pothos 2-3 days before unpotting to easily remove it from the pot.
- Untangle the roots to ensure safe separation and division of Pothos without any physical injury.
- Divide the mother Pothos with a sterilized pair of pruners. Ensure each plantlet contains enough stems, leaves, and roots.
- Bring new pots suitable for the plantlets’ size, fill up the pot with new soil mix, and plant the Pothos divisions.
- Since the divisions already have roots, you don’t have to dip them into the rooting hormone. However, you can still do it to encourage healthy and faster root development. It is optional.
- Pot back the mother Pothos into the old pot. Here, you don’t have to change the pot anymore. After division, the amount of roots will reduce and the space in the pot will be enough for them to grow. As for the soil, I recommend using a new potting mix.
- While planting, leave 1-2 inches of space at the top of your pot for easy watering.
- Water all the Pothos plants properly for good hydration. Avoid feeding for some weeks, until the signs of new growth.
- Provide adequate sunlight, warmth, and humidity.
Final thoughts
While Pothos can tolerate staying rootbound for some time, letting it stay rootbound for too long can be stressful. When Pothos get rootbound, the entangled roots find it difficult to transfer the moisture and nutrients to other plant parts.
To understand if Pothos is rootbound, check for signs like stunted growth, discolored and wilted leaves, roots coming out of drainage holes and soil surface, spiraled roots, and swelling and cracked pots.
These signs make it evident that your Pothos is suffering from rootbound. To fix a rootbound Pothos, repot it to a pot 1-2 inches bigger than the existing one.
It will provide enough space for the roots to grow without any spiraling. Another option is to divide the Pothos into more new Pothos.
Divide the mother plant, ensuring each division contains sufficient stem, leaves, and roots, and pot them in new pots. Take care of them as you care for the mother plant.
To prevent Pothos from being extremely rootbound and suffering, repot your Pothos once every 1-2 years during the active months from early spring through mid-summer. After repotting, take good care of the plant to encourage faster recovery and quick adjustment to the new environment.
How often should I repot the variegated Pothos?
Variegated Pothos grow slower than the standard Pothos varieties. You can repot them once every 2-3 years.
Can I use a bigger pot for repotting Pothos?
While you need a big pot for repotting Pothos, an enormously big pot is unsuitable. That will hold a lot of soil that can hold moisture for too long and lead to root rot. Go for only 1-3 inches bigger pot than the old one.
Reference: Repotting Wikipedia, Pothos Wikipedia
Note: Some images in the articles are sourced from Reddit and Other Platforms For Reference Purpose.