7 Reasons Why Your Schefflera Is Turning Black
Maintaining Schefflera is one the easiest things to do as it does not require too much attention and can even thrive in various conditions. But if you notice that your Schefflera is turning black, it indicates something is wrong with your plant.
Schefflera leaves turn black mainly because of improper watering, low humidity, over-fertilization, fungus diseases, and pest infestations. To fix the plant, you need to identify the exact problem, prune the black leaves, and provide the right growing conditions to your Schefflera.
Keep reading this article to know every cause behind black leaves in Schefflera. We will also discuss fixing this issue and preventing the plant from turning black.

Please note: Simplify Plants is reader-supported. As an Amazon Associate, I earn from qualifying purchases made by our readers with no extra cost added to you all! Some links in the post are affiliate links and I get a commission from purchases made through links in the post.
What causes my Schefflera to turn black?
Letting the plant remain unhealthy for too long without the proper attention can make the leaves black.
There can be a lot of reasons behind black leaves in the umbrella plants.
Improper watering
Improper watering can cause black leaves in your Schefflera.
Both underwatering and overwatering can cause this issue.
In its natural habitat, Schefflera thrives in well-retained moist soil.
So, if you underwater your plant, the roots will stay dry and get no nutrients.
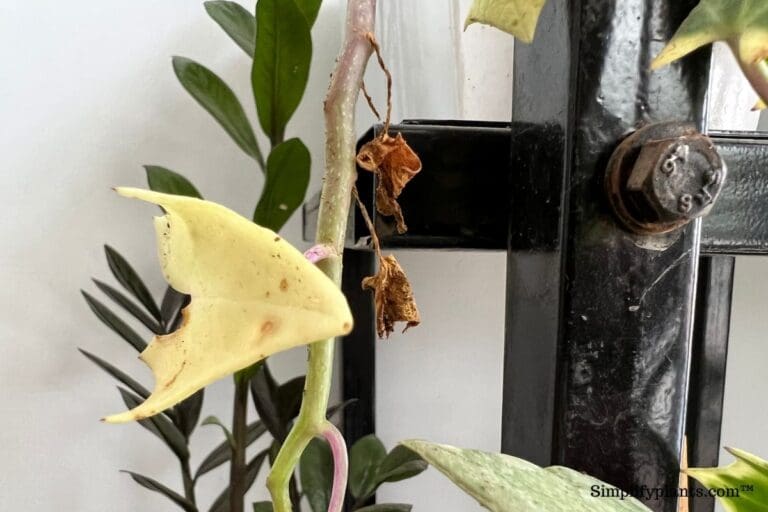
This will cause the leaves to turn dry, crispy, brown, or black at the tips.
Similarly, Overwatering can also cause black leaves in the Schefflera plant.
If you overwater the plant, the roots start to suffocate and eventually rot.
When root rot disease arises, the roots become weak and fails to perform their basic function like transferring moisture and nutrients to the plant.
Due to nutrient deficiency and moisture, the plant becomes unhealthy, causing the edges or tips of the foliage to turn black.
Also read: How Much Water Does A Schefflera Plant Need? (Watering Guide)
Low humidity
Low humidity is one of the most common reasons for black leaves in Schefflera.
As Schefflera is a tropical plant, it needs high humidity to thrive.
If your plant grows in a low humidity area, you can see black and shriveled leaves.
When humidity is low, the leaves begin to lose their moisture at a faster rate due to a rise in transpiration rate.
This damages the leaf cells and causes extreme dehydration to the plant causing the leaves to turn black.
Low humidity problems mostly occur in the indoor environment.
This is because:
- The air conditioner inside the room creates an unsuitable environment for the plant as the air becomes extremely dry.
- Heating sources like vents, chimneys, heaters, etc., create an unpleasant heat flow inside the house and dry up the atmosphere around the plant.
Also read: Should I Mist My Schefflera? (+Humidity Requirement Guide)
Incorrect lighting
Schefflera, grow well when they get bright indirect light.
Direct sunlight can cause sunburn to the umbrella plant.
Due to extreme sun exposure, the leaves start to lose their moisture at a faster rate.
This dehydrates the plant causing the leaves to turn crispy and black.
Contrarily, the leaves can also turn black when the plant fails to receive sufficient light.
Light is necessary for producing food and chlorophyll.
Without it, the leaves will not get the energy to produce their green color.
Hence, the leaves eventually turn yellow, brown, and black.
Also read: What Kind Of Light Does A Schefflera Need?
Overfertilization

Overfertilizing the plant is one of the common reasons behind black leaves in the Schefflera plant.
Sometimes people fertilize the plant more because they think it will promote healthier and faster growth.
But this is not true.
Feeding the plant too much with nutrients can burn the root system as it increases the soil’s acidity, and due to unhealthy roots, the plant can start to turn black.
Not only this, but excessive fertilization can also cause too much salt build-up inside the soil.
These salts absorb every moisture inside the soil, leaving the plant completely dry and making the edges of the foliage black.
The problem of overfertilization mostly occurs during the winter months as the plant stays dormant and does not require fertilizer during that time.
Also read: How Often Should I Fertilize My Schefflera? (+Ideal NPK Ratio)
Heat stress
Schefflera can tolerate temperatures between 45-105°F.
If there is an extreme rise in the temperature, then the leaves will lose moisture at a very faster rate.
It happens because of an increase in the evaporation rate.
Due to continuous moisture loss and stress of the plant, the leaf cell gets damaged, which causes the leaves to shrivel and turn black.
Also read: Schefflera Plant Temperature Tolerance: Ideal Temperature+Problems
Cold damage
Schefflera can’t tolerate a cold climate that is below 45°F.
If you expose this plant to such a cold climate, the leaves can turn black due to extreme stress.
During cold weather conditions, the leaf cells freeze, rupturing the cell membrane and causing cell death.
This leads to discoloration of the leaves.
Also, during extreme cold climates, the roots system fails to function properly, making it difficult for the plant to transpire and suffocate.
This lowers the plant’s metabolism causing the leaves to wilt, droop, and turn black.
Also read: Schefflera Care In Winter: Light, Watering,& More
Pest and fungus diseases

Many pests get attracted to the umbrella plant.
Mealybugs, aphids, fungus gnats, spider mites, scales, and thrips are common pests that you can find on your umbrella plant.
All these pests create serious damage to the plant and also give rise to various diseases.
This leads to black leaves in the Schefflera plant.
Let us discuss how some of the pests can cause damage.
Scales, Aphids, Mealybugs
These insects attach themselves to the plant and suck out sap from it with piercing mouths.
This gives rise to sooty mold (Black colored fungus) that eventually spreads to the whole plant causing black leaves in Schefflera.
Fungus gnats
These are small black insects that mostly attack the roots and lower parts of the plant, and as time goes by, the leaves turn black due to continuous secretion.
Broad mites
Broad mites are so tiny that they remain unnoticed until the plant is seriously damaged.
Broad mites can damage the cells or tissue of the leaves that later on turn black.
Spider mites
Spider mites feed on the leaf cells’ necessary materials, causing continuous damage to the plant.
If this pest attacks Schefflera, you will get to see wilt, shriveled, brown or black leaves.
Nematodes
Nematodes are thread-like roundworms that mostly live inside the soil surface of the plants.
They usually feed on the plant’s root system and reduce its ability to take out moisture and nutrients from the soil.
Other pathogenic nematodes also attack the leaf tissue and buds of a plant, causing extreme stress to it.
This interrupts the plant’s proper functioning, leading to black leaves.
If you see that the upper side of the leaves is turning brown with black spots, it may be because of nematodes present in the root system.
Bacterial soft rot
Bacterial soft rot is an infection caused by bacteria like Pectobacterium carotovorum, gram-negative bacteria, Erwinia, and Pseudomonas.
If you notice small black spots on the leaves and a foul smell coming from the plant, it is because of Bacterial soft rot.
This bacteria destroys molecules that keep leaf cells together, causing damage to the plant’s structure.
As the plant structure collapse, it leads to black leaves in Schefflera.
Alternaria leaf spot
Alternaria leaf spots are a group of fungal diseases caused by the Alternaria genus that attack mostly on the leaves and stems.
At first, you will see brown spots on the bottom of the leaves if your umbrella plant is experiencing Alternaria leaf spot.
As the day passes, brown spots appear on the leaves’ upper side and turn black.
Then those black-colored spots increase in size and slowly capture the whole part of the leaves.
Humidity above 90% is the most favorable temperature for the Alternaria leaf spot.
If not treated on time, it can spread to all parts of the plant and cause death.
Also read: Schefflera Pest Problems: Common Pests & Diseases+How To Fix
How to fix the black leaves in Schefflera?
If your Schefflera is turning black, you need to identify the problem quickly and save the plant as soon as possible.
As black leaves will not return to normal health, you need to prune them off.
After discussing all the possible causes, let’s discuss how to treat all these problems.
Fixing watering issues
If you don’t want the plant to develop black leaves, quickly fix the underwatering and overwatering problem.
Before fixing any issues, you should prune off the damaged leaves first using sterilized scissors.
Fixing underwatering:
Fixing underwatering is way easier than fixing overwatering.
Let’s look at the steps given below:
- If the soil is compact, cracked, and dry, provide water immediately after poking some holes into it.
- Make sure to start watering Schefflera little by little without sudden stress.
- Don’t keep the plant in direct sunlight. Otherwise, the soil will dry up quickly.
- Add mulch to the soil surface to keep the soil moist for longer.
Fixing overwatering:
- Stop watering Schefflera for some days until it recovers.
- Keep the plant in bright indirect sunlight to make the excess water disappear from the soil due to evaporation.
- Check to see whether the plant is undergoing root rot. If the roots have become soft, black, and stinky, cut them off and keep only the healthy ones.
- For repotting, bring a new pot and make sure it is 2-3 inches larger than the previous one, and it should also contain a sufficient amount of drainage holes.
- Add a fresh well-draining potting mix and then re-pot the Schefflera in the new pot.
- After repotting, add water to the plant and keep it under bright indirect sunlight.
- Don’t fertilize the plant while it’s recovering.
- Before watering again, always check the soil’s moisture level by inserting a finger inside the soil. You can also check it by using a moisture meter. If the top 1 to 2 inches of the soil is dry, you can water the plant.
Fixing low humidity
Schefflera is a tropical plant and needs high humidity to survive.
There are some ways to increase humidity around your Schefflera:
- Grouping plants: Group your Schefflera with other houseplants to increase the humidity. When the plants transpire, they will release some moisture into the atmosphere, which will increase the humidity.
- Use a humidifier: You can purchase a humidifier device to increase the humidity per the plant’s need.
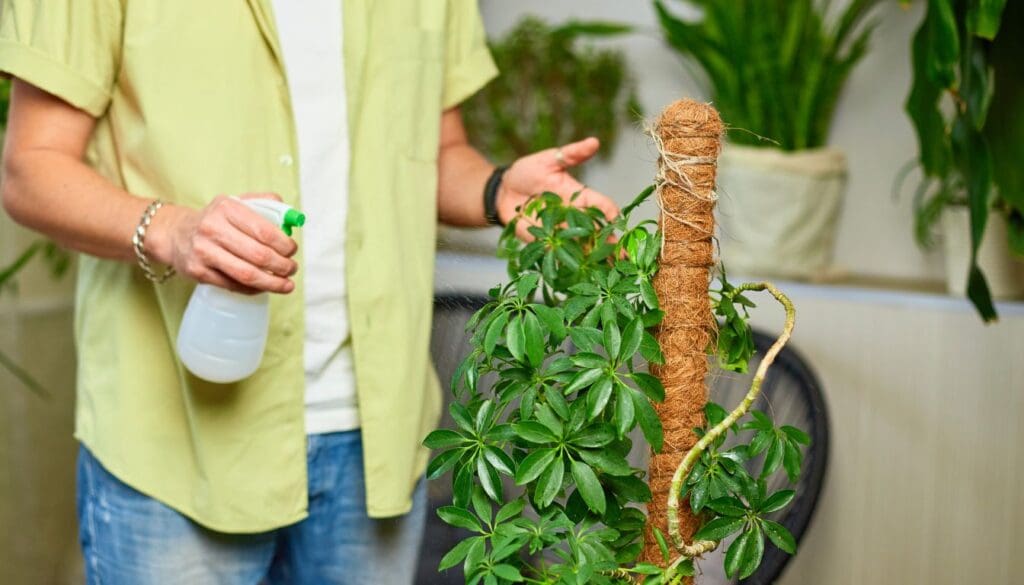
- Misting: The easiest way to increase the humidity is misting. You can mist the Schefflera 2 times a week to increase humidity around it.
- Pebble tray method: You can also place your Schefflera on trays filled with pebbles and water. When the water evaporates from the tray, it will increase the humidity around the plant.
Fixing light issues

Schefflera loves to thrive in bright indirect light.
Let us discuss how you can fix light issues.
- If your Schefflera is not getting sufficient light, change the location where it will receive bright indirect light.
- You can place the plant near south or west-facing windows. In these areas, the plant will receive a good amount of sufficient light. But make sure you filter the light with shade before placing it.
- You can filter the light by using sheer curtains or drapes.
- You can also keep the plant in the east or north-facing window as the light is indirect in these areas.
- Always keep Schefflera 5 to 6 feet away from the windows.
- Rotate the plant once a week to provide light to every corner.
- If Schefflera is still not getting enough light, you can use artificial light.
Fixing overfertilization
The first step to fixing overfertilization is pruning the damaged leaves and stems.
Now let us discuss what you need to do next:
- If you notice any signs of overfertilization, stop fertilizing the plant for some time.
- If there is excessive salt build-up, add water to the soil thoroughly to wash out the extra salts.
- If the situation is out of control, you must change the entire soil by repotting.
- You should fertilize Schefflera during its growing season, i.e., summer and spring.
- The next time you fertilize the plant, use a well-balanced (20-20-20) liquid fertilizer. Before applying it to the soil, make the fertilizer half strength by diluting it with the water.
- Always water before fertilizing the plant so it will get evenly spread to the soil.
Fixing heat stress
Unfortunately, your Schefflera cannot recover from the damage caused by heat stress, so it is better to prune all the leaves to encourage new growth.
Don’t keep Schefflera near heating sources like vents, chimneys, heaters, radiators, open fires, and stoves.
If you notice that the direct sunlight is hitting your Schefflera, try to provide shade or change the plant’s location to a shadier spot.
Keep your place in an area where it will get enough proper indirect light without causing any heat damage.
Fixing cold damage

If the plant is damaged by cold, immediately place it in a warmer location.
But don’t keep it in an air conditioner room or near a heater.
Avoid keeping the plant near a window with frost or cold drafts.
If any leaves are affected by any fungal or bacterial diseases, don’t get rid of them immediately.
Remove them during the growing season so the new tissues will grow faster at the affected parts.
Try to maintain a temperature between 45-105°F.
Fixing pest problems
Let us discuss how you can fix pest problems:
- Isolate the plant immediately in a specific location so the pests will not spread to other plants.
- Get rid of all the damaged parts and the leaves.
- Handpick the pests that are visible with the naked eyes.
- Then, wash the whole plant with a strong spray to eliminate the remaining pests. For spraying, you can use neem oil, dish wash, and insecticidal soap but make sure you read the instructions before using it.
- You can also use wet cotton balls to get rid of them. Dip the cotton balls in isopropyl alcohol and then wipe them to the infected areas of the plant.
- Use organic pesticides to keep the pests away from Schefflera if nothing else works.
Removing nematodes
To stop the growth of nematodes, you need to add well-rotted manure or compost to the soil.
Adding this substance will promote the growth of various friendly bacteria and fungi that will destroy nematodes.
If the infestation is serious, you need to change the existing soil with the new potting mix.
Fixing fungal diseases
At first, isolate the Schefflera so the infestation will not spread further.
Now let us discuss how to fix this issue:
- Get rid of the infected leaves, roots, and stems from the Schefflera plant.
- Use fungicides to treat all fungal diseases.
- Try to provide proper air circulation among the plants to keep the surroundings ventilated.
- Avoid keeping the leaves wet, and don’t overwater the plant at any cost.
- Try to water the plant in the morning but avoid it at night.
Final thoughts

Black leaves indicate that the plant has been unwell for quite a while. If you have ignored the health issues of your umbrella plant for a prolonged period, black leaves can occur.
I have discussed every possible cause that can make leaves turn black in this article. You should carefully identify the exact problem and treat it as soon as possible without neglecting it.
You must eliminate all the black leaves as they will not return to their green color again.
Reference: Wikipedia, Sciencedirect, Britannica, American Society for Horticultural Science, Schefflera taxonomic history.
Note: Some images in the articles are sourced from Reddit and Other Platforms For Reference Purpose.