How To Take Plants Out Of Plastic Container?
When you buy your plants from the nursery, you often get them in soft plastic pots. After letting them stay in the plastic pots, there comes a time when the plant outgrows it, and you wonder how to take the plants out of the plastic container. Let’s find out.
You can take plants out of plastic containers by:
- Water the soil a day before taking the plant out.
- Press or tap the sides of the pot to loosen the soil.
- Now hold the pot upside down and gently push the plant out.
- In the case of soft plastic pots, you can cut the pot if the plant doesn’t come out easily.
- In the case of hard plastic pots, run a knife along the edges of the soil to loosen it.
I will explain these steps in detail in this article and discuss the pros and cons of keeping your plants in plastic containers. So, keep reading.

Please note: Simplify Plants is reader-supported. As an Amazon Associate, I earn from qualifying purchases made by our readers with no extra cost added to you all! Some links in the post are affiliate links and I get a commission from purchases made through links in the post.
Taking a plant out of a plastic container
Taking the plants out of plastic containers is easier than any other container.
Taking the plant out of the nursery pot is even easier as these pots are made of soft plastic.
That said, let’s understand the steps of taking the plant out of its plastic container.
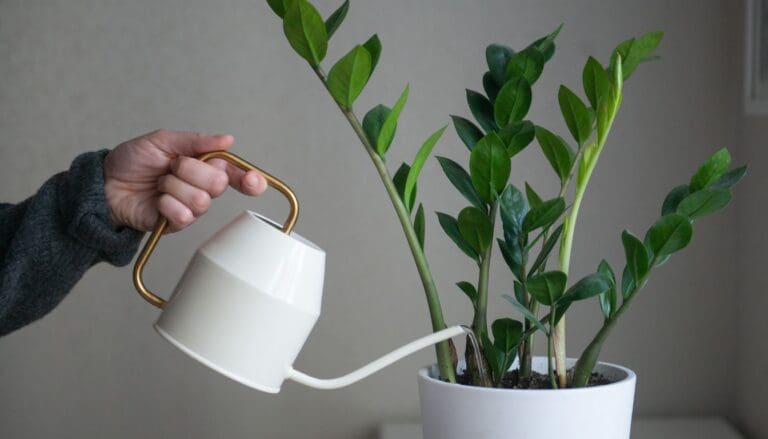
1. Water the soil
Watering the soil is a great way to loosen it up.
Although not everyone uses this step, I have always watered my plants before taking them out of their pots.
And I have done this for both plastic and non-plastic containers.
I usually water a day before I want to take the plant out, but you can also do it a few minutes or hours before.
Use a long-mouthed watering can to water the soil and avoid splashing the leaves.
After watering, allow the soil to soak up the water for a while.
Always use room-temperature water to avoid shocking the plant.
Also, use rainwater or filtered water instead of using regular tap water as many plants are sensitive to the harmful chemicals that tap water contains.
2. Tap the pot
This is where plastic pots are better than other materials.
You don’t need to put too much effort into taking the plant out or pulling it unless necessary.
You can start by pressing the pot on the sides.
If the plastic is hard, tap the sides to loosen the soil instead of pressing.
Doing these will allow the soil to loosen up, which will help the plant come out of the pot easily.
3. Hold the pot upside down

Hold the pot upside down with one hand to take the plant out, and take the plant out gently with the other hand.
My plant usually comes out of the pot easily when I do this.
4. My plant is not coming out – What should I do?
If your plant doesn’t come out after the first 3 steps, it might be stuck or rootbound.
Try pressing or tapping the pot a little more and check if the plant comes out.
If not, you can consider cutting the plastic pot.
This is possible if the plant is in its nursery or soft plastic container.
Take a sharp scissor or pruning shears and cut the plastic pot from the bottom.
Do this in a few places, and then take the plant out.
Now, if the plant is in a solid plastic pot, you won’t be able to cut it.
You can then take a knife and run it along the edges of the pot to loosen the soil.
Try taking the plant out after this, and it should work.
Repotting house plants into bigger pots
We usually take the plants out of their containers when we want to repot them.
If you are taking your plant out of its plastic container for repotting, these steps can help:
Step 1: Inspect the roots thoroughly

You can wash the roots with running water to remove as much soil as possible.
This will allow you to inspect the roots better.
If you have a rootbound plant, you can loosen the soil with a stick or with your hands.
Be gentle if you don’t want to damage the roots.
If you notice any damaged roots, you can use sharp pruners to trim them.
If you doubt root rot, spray a fungicide on the healthy roots after trimming the damaged or diseased ones.
Step 2: Prepare the container and potting mix
When repotting, get a container one size bigger than the last one.
This will allow the plant to grow freely.
For example, if you were using a 4-inch pot, the new one should be 6-inch.
It is best to discard the old potting mix and create a new one.
For this, prepare a fresh potting mix that is ideal for the respective plant and fill the pot with it halfway.
Step 3: Place the plant inside the new planter

After preparing the planter and soil, place the plant inside the pot.
Position it at the center with one hand and add soil from all sides.
Tap the pot on the sides to let the soil settle without leaving any air pockets.
If needed, add some more soil but leave out some space for watering.
Step 4: Aftercare
After repotting, you can water the plant and place it in a bright spot.
Maintain the same care routine that you follow for your plants.
If you find your plant showing signs of stress, don’t worry.
Give the plant some time to recover from the repotting stress.
How to remove dead plants from pots?
If you have a dead plant, you must remove it from the pot.
I have already explained how to take the plant out of the plastic pot.
But in the case of a dead plant, if the soil is not affected, you can use the same soil and pot for another plant.
In such a case, scrape the soil around the dead plant to loosen the roots.
Now, hold the plant with one hand and gently pull it out.
You can then add a new potting mix to the pot and put the new plant inside it.
When not to repot plants?

Taking your houseplants out of their pots and repotting them should not be done any time of the year.
It is best to repot plants when they are growing actively and are getting all the required conditions.
However, you should avoid repotting when the plants are dormant.
Most houseplants go dormant in winter because the conditions are unfavorable for their growth.
And since repotting is stressful for the plant, it will not be able to recover from it when it is dormant.
Repotting during the winter can even damage the roots as they can get exposed to the low temperatures when you take the plant out of its pot.
Can you use plastic containers for plants?

Yes, you can use plastic containers for plants.
Plastic pots have become popular for indoor gardeners because they are cheap, easily available, lightweight, and much more.
Even nurseries send their plants in plastic containers due to all its benefits.
But if you are growing your plants in plastic containers, you must understand a few things.
- Keep the plastic containers away from too much heat.
- Try to find plastic containers that don’t contain harmful chemicals.
- Use a rich potting mix with a lot of organic matter.
Since plastic is synthetically made, you need to take care of these.
If not, you can also use organic materials like clay and terracotta.
Pros and cons of using plastic containers
Let’s take a quick look at the pros and cons of using plastic containers for your plants.
| Pros | Cons |
|---|---|
| Plastic containers are cheap and don’t burn a hole in your pocket. | Plastic containers are non-porous, not allowing proper airflow inside them. |
| These are lightweight, so keeping your plants in plastic containers helps you move them around easily. | Plastic containers can get heated easily, which can harm the plants. So, avoid keeping it under direct sunlight on a hot day. |
| Plastic containers are durable and don’t break easily. | Plastic containers might not last as long as ceramic or clay pots. |
| You can reuse plastic containers. | Plastic containers can contain harmful chemicals as they are made synthetically. |
Final thoughts
Taking a plant out of a plastic pot is easier than the other materials. You must gently tap or squeeze the pot to loosen the soil and hold it upside down to take the plant out. In case of a rootbound or stuck plant, you can cut the plastic pot to take it out.
If your plant is in a nursery pot, you can let it stay there and take it out when it starts showing signs of rootbound. I have shared some points you should remember while growing your plants in plastic pots. Go through them to make sure you don’t make any mistakes.
After taking the plant out of a plastic pot, you can repot it in a new pot of any material and provide suitable conditions to help it thrive.
Sources: Pot size matters, Society for Experimental Biology, The Effect Of Container Size, Effects of Plant Growth Retardants and Pot Sizes on Plants, Pot size matters.
Note: Some images in the articles are sourced from Reddit and Other Platforms For Reference Purpose.