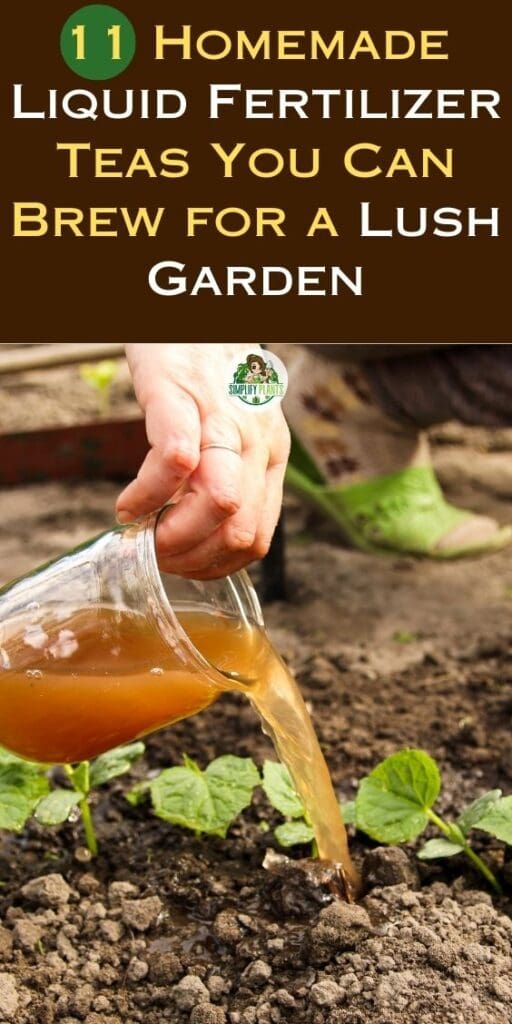
11 Homemade Liquid Fertilizer Teas You Can Brew for a Lush Garden
DIY enthusiasts and garden gurus, have I got a treat for you! Imagine turning everyday weeds and plants into a secret sauce for your garden. That’s right, I’m talking about homemade liquid fertilizer teas.
These nutrient-rich elixirs are super easy to whip up and can be the eco-friendly boost your plants are craving. With a pinch of this and a sprinkle of that, you can create natural concoctions that not only feed your plants but also improve soil health.
Now, you might be wondering why you should go the homemade route. Well, for starters, it’s way more cost-effective than store-bought options—and you know exactly what’s going into your garden.
No hidden chemicals or mysterious additives here! Plus, it’s a fantastic way to use up those kitchen scraps or yard waste that’s just lying around. So don’t toss those coffee grounds or banana peels; brew them into something beautiful for your blooms and edibles.

Please note: Simplify Plants is reader-supported. As an Amazon Associate, I earn from qualifying purchases made by our readers with no extra cost added to you all! Some links in the post are affiliate links and I get a commission from purchases made through links in the post.
Benefits of Using Homemade Liquid Fertilizer Teas
Have you ever wondered why gardeners rave about homemade liquid fertilizer teas? Let me break it down for you! You know how a good cup of tea can brighten your day? 😊 Well, it’s pretty much the same for plants!
First up, these teas are like a nutrient-packed smoothie for our green buddies. They provide a wealth of vitamins and minerals that help plants grow strong and healthy. We’re talking about a serious glow-up! 🌿✨
Here’s the deal:
- Cost-effective: Making your own brew means you save those pretty pennies. Who doesn’t love a gardening hack that keeps cash in their pocket? 💸
- Eco-friendly: You’re basically upcycling kitchen scraps and weeds. Bye-bye, waste! 🌎
- Easy to make: If I can brew it in my backyard, so can you!
- Gentle on plants: Unlike synthetic stuff, these teas are gentle and kind to the soil and roots. Think of it as a gentle hug for your plants! 🤗
- Boosts soil health: They not only feed plants but also improve the soil. That’s like hitting two birds with one seed, isn’t it?
I bet you’re thinking, “This sounds amazing, but is it really that simple?” Well, my green-thumbed friend, yes it is! Whether you’re a seasoned gardener or a newbie with a single houseplant, homemade liquid fertilizer teas are a game-changer.
So, why not give it a try? Have you ever made your own liquid fertilizer tea? Share your experiences or ask your burning questions in the comments! Let’s get brewing and see how our plants thrive! 🌱💪
Ingredients for Liquid Fertilizer Teas
Have you ever looked at kitchen scraps and thought, “I wish I could turn you into something magical for my garden!” Well, you can! 😄 Let me walk you through some fantastic ingredients to concoct homemade liquid fertilizer teas that can give your plants a boost.
- Vegetable Scraps: I’m all about recycling, and those veggie leftovers are gold! Simply toss them in a compost pile and let nature do its thing.
- Weeds: Believe it or not, those garden invaders can be repurposed. Nettles and comfrey make especially potent brews.
- Grass Clippings: After mowing the lawn, gather those clippings to create a nitrogen-rich tea that your plants will love.
- Herbs: Got excess herbs? Mint, dandelion, and yarrow aren’t just for tea-to-drink; they make excellent fertilizer teas, too.
| Ingredient | Benefit |
|---|---|
| Vegetable Scraps | Rich in nutrients, perfect for composting |
| Weeds | Packed with minerals, especially nettles |
| Grass Clippings | High in nitrogen, great for leafy growth |
| Herbs | Many have pest-repelling properties |
Feeling adventurous? Why not mix eggshells for calcium or banana peels for potassium in there?

Preparing Your Workspace for Brewing
Ever felt like you’re a wizard concocting potions when you’re mixing up some homemade liquid fertilizer tea? ‘Cause I certainly do! Let me share how I get my space ready for brewing that magical growth elixir!
First off, I find a spot that’s well-ventilated—because let’s face it, brewing fertilizer can whip up a stinky storm! 😅 I usually set up shop outdoors or in my airy garage.
Supplies Needed
- Bucket or container: Make sure it’s clean! Wouldn’t want to mix last week’s potion, would we?
- Stir Stick: Any long stick will do. I’ve even used an old broom handle!
Next, I gather all my brewing gear in one place. Here’s my checklist:
- Non-chlorinated water: Gotta keep those beneficial microbes happy, right?
- Compost: The heart of the tea!
- Aerator (if you’re getting fancy): Because oxygen is the life of the party.
- Additional nutrients (like molasses): To give it that extra zing.
- Protection for your hands (gloves): Because hygiene is key.
Pro Tip: I lay down some old newspaper or a tarp under my bucket. Trust me, spills happen, even to the best of us!
Now, who’s ready to brew some liquid gold for their plants? 🌻 Don’t forget to share your own weird and wacky brew spots below!
Recipes for Nitrogen-Rich Fertilizer Teas
Did you know that nitrogen is like the green smoothie for your plants? It’s essential for their growth, giving them that luscious, verdant look. So let’s whip up some nitrogen-rich fertilizer teas that your garden will thank you for. 😊🌱
1) Nettle Tea Ah, stinging nettles – not so fun to touch, but amazing for your plants! Here’s the rundown:
- Harvest nettles (wear gloves!)
- Crush or chop the leaves to help release nutrients
- Soak in water for a few weeks (cover to avoid mosquitoes)
- Dilute the tea with water until it looks like weak tea (1 part tea to 10 parts water)
- Apply at the base of the plant
2) Comfrey Tea This one is a powerhouse, packed with nutrients.
- Gather comfrey leaves (bonus points for being a bee-friendly plant!)
- Submerge in water (again, cover it up)
- Wait for 3 to 6 weeks – think of it as a fine wine for your plants
- Ensure to dilute – this stuff is strong!
Have you tried these teas yet? Let me know your experiences or share a pic of your vibrant veggies in the comments. Love seeing those lush gardens! 📷 And don’t forget to share this post with your fellow green thumbs. Spread the plant love, friends! 🌿💚
Recipes for Phosphorus-Rich Fertilizer Teas
Craving an easy-peasy phosphorus boost for your blooming buddies? I’ve got some tea-rrific homemade recipes for you! 🌱✨ Phosphorus is like a secret superpower for plant roots and flowers, so let’s brew!
3) Bone Meal Tea Nothing beats the classic bone meal tea for a phosphorus kick. I simply steep a cup of bone meal in a gallon of water for 24 hours and voilà—liquid gold for plants like roses and tomatoes that love to flower and fruit.
- Ingredients:
- 1 cup bone meal
- 1 gallon water
- Method:
- Soak for 24 hours
- Stir occasionally

4) Banana Peel Potion Yup, you heard that right! I dry banana peels, blend them into a powder, and then let them sit in water for a few days. Those peels are practically phosphorus-packed treasures.
- Ingredients:
- Banana peels, dried & powdered
- Water
- Method:
- Infuse for a few days
- Filter the liquid
5) Crab Shell Mix Got some seafood scraps lying around? Crab shells are a jackpot for phosphorus. I crush them up, soak ’em in a jar of water, and in a week, my plants are sipping on some nutrient-rich cocktail. 🦀
- Ingredients:
- Crushed crab shells
- Water
- Method:
- Soak for 1 week
- Strain before use
Remember, a little goes a long way! Always dilute these teas before giving them to your green friends (usually a 1:3 ratio works).
Have you tried making your own phosphorus tea yet? Tell me about it in the comments below! And don’t forget to hit the share button if you found this helpful! 🌼👩🌾
Recipes for Potassium-Rich Fertilizer Teas
Hey green thumbs! 🌱 Are you on the lookout for some top-notch, potassium-rich teas for your plants? Look no further because I’ve got some simple recipes to boost your garden’s potassium levels in no time!
6) Banana Peel Tea 🍌
Who knew those banana peels could do more than just cause cartoon slip-ups? They’re fantastic for making potassium-rich tea for your plants! Here’s what you do:
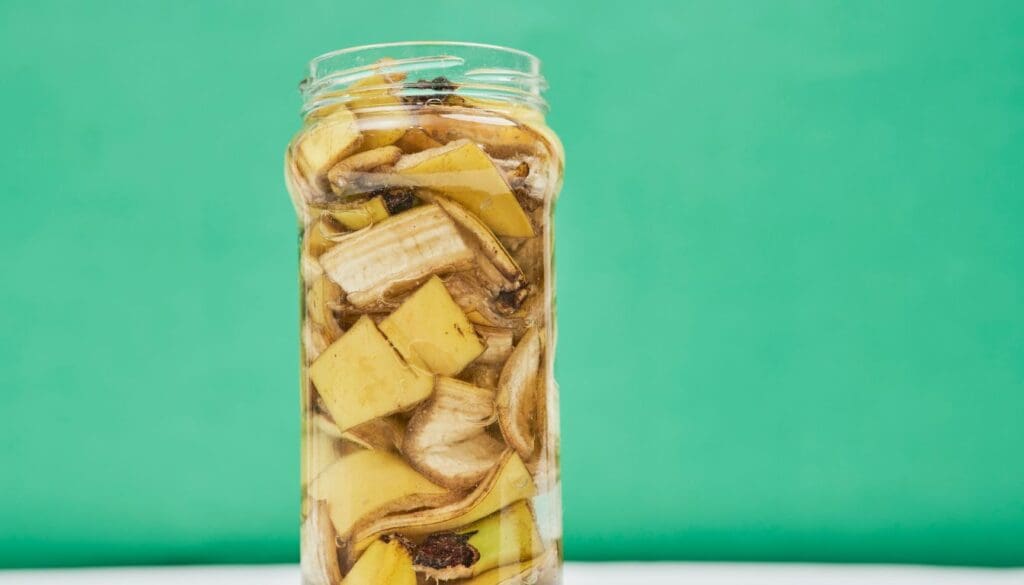
- Chop up banana peels.
- Place them in a jar, covering them with water.
- Let it steep for a few days.
- After that, just strain and dilute the tea with water and voilà!
7) Comfrey Tea
Oh comfrey, you leafy wonder! Abundant in potassium, comfrey tea is like a power drink for your plants!
- Fill a bucket with comfrey leaves.
- Top with water and cover.
- Allow it to sit for a few weeks to get all that goodness out.
- Strain, dilute, and serve to those potassium-hungry plants of yours!
Isn’t it amazing how these simple ingredients can make such a big difference? 🤗
Have you tried making one of these teas? Tell me how it went or share your own potassium potion in the comments! Remember, a happy plant is a happy plant parent! 🌼💪 Let’s get brewing—and don’t forget to share this with your fellow plant lovers!
Recipes for Micronutrient-Rich Fertilizer Teas
Hey there green thumbs! 🌱 Have you ever wondered how to give your plants that extra oomph without the chemical stuff?
Let me tell you about some awesome micronutrient-rich fertilizer teas that you can brew at home. They’re like superfood smoothies for your garden!
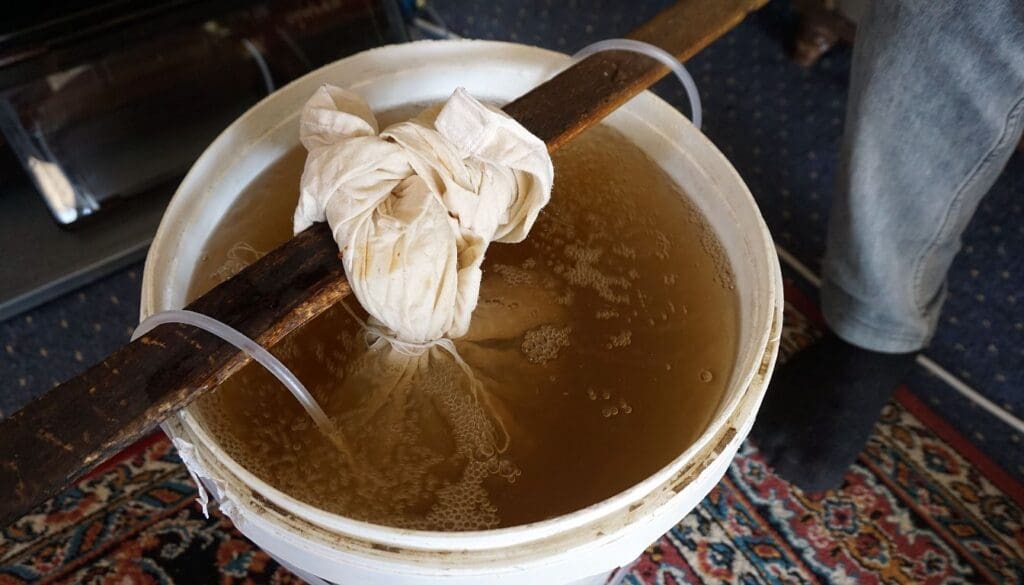
8) Compost Tea
- Start with your compost: Grab some of that black gold – your compost! 🏆
- Brew it: Add a couple of scoops to a 5-gallon bucket of water.
- Aerate: Stir it daily, let it sit for 3-5 days. Your plants will thank you for the aeration party!
9) Seaweed Potion
- Seaweed is packed with nutrients. Just soak dried seaweed in water and let it sit for a few weeks. Strain and then it’s party time for your plants! 🎉
10) Eggshell Tea
Crushed eggshells can add a calcium boost. Boil a gallon of water, add 10-20 crushed eggshells, and let it steep overnight. Strain and serve to your plants for strong bones, I mean leaves! 😂
11) Banana Brew
Bananas aren’t just for monkeys, they’re for plants too! Potassium alert! 🍌
- Chop up banana peels, dunk them in water, let it sit for a few days, and voilà – liquid gold for plant growth.
Isn’t it amazing what you can do with some kitchen scraps and a little patience? Have you tried making any of these teas? What’s your plant’s favorite? Drop your brewing tales and tips in the comments and let’s grow this community garden of knowledge together! 🌻📈
Brewing Methods and Techniques
When I get my hands dirty with garden work, nothing beats the excitement of brewing my homemade liquid fertilizer tea. It’s like a magic potion for the plants! 🌱✨ So, let me share how I brew up a nutrient-rich storm for my green buddies.
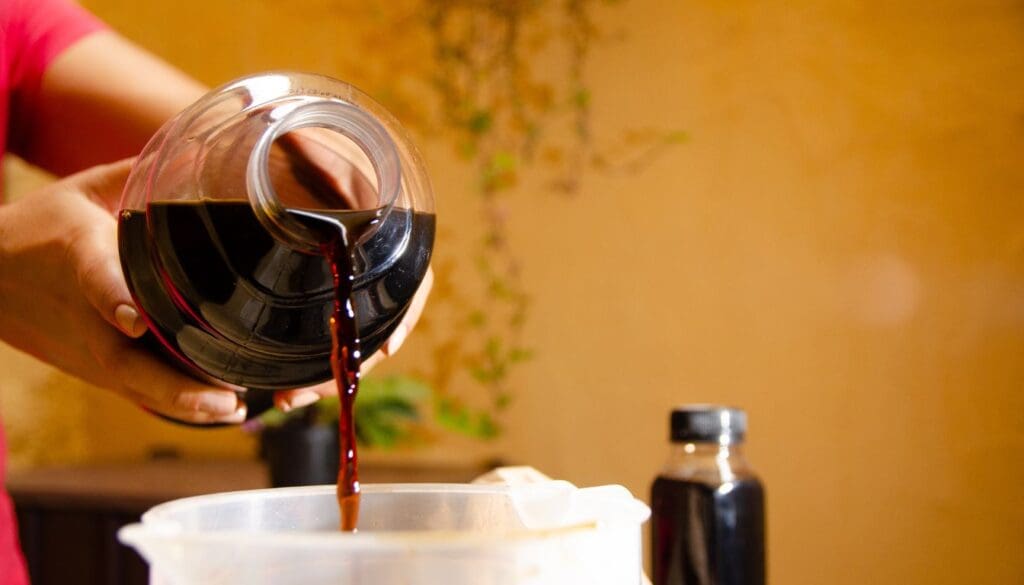
Batch Brewing: I start by grabbing a decent size bucket or container – you know, something I won’t miss if it gets a bit smelly. I add my chosen plant materials to water. Whether it’s compost, banana peels, or weed leaves, they all go for a swim. Then, I stir vigorously to get the oxygen flowing – think of it like a mini workout!💪
Continuous Brewing: Got a spare old fish tank? Why not turn it into a continuous brew system? Just fill it with water and your plant goodies, then let it sit. I use a spigot at the bottom to dispense my tea whenever I need it, like a never-ending tap of plant goodness. 🚰
Here’s a quick look at the steps I follow:
- Fill a bucket with water (dechlorinated for bonus points!)
- Add organic matter (compost, leaves, kitchen scraps)
- Stir daily to provide oxygen
- Strain the mixture after 3-5 days
- Dilute the concentrated tea with water (usually 1:10 ratio)
And bada-bing bada-boom, it’s ready! Did I mention this is a totally eco-friendly fertilizer? Let’s keep it green! 🌍
Who else loves the idea of treating plants to a gourmet meal? 😄 If you’ve tried this at home, how did your garden fare? Share your stories and let’s grow together! 🌼📢
Application Tips for Liquid Fertilizer Teas
I’m here to share some quick application tips that’ll help you make the most of your liquid fertilizer teas. Trust me, your plants will thank you with some serious growth spurts!
Dilution is Key! Just like humans, plants don’t enjoy a strong brew. You want to dilute your tea before giving it to your leafy friends. Typically, I go for a 1:10 ratio of tea to water. That’s like turning a double espresso into a smooth latte.
Frequency Matters: I hit the gym regularly to stay fit, and similarly, your plants need their nutrient fix at the right time. Apply your homemade tea every 2-4 weeks for best results. Think of it as their workout routine!
Be Smart with Application: I’ve found two great ways to apply liquid fertilizer teas:
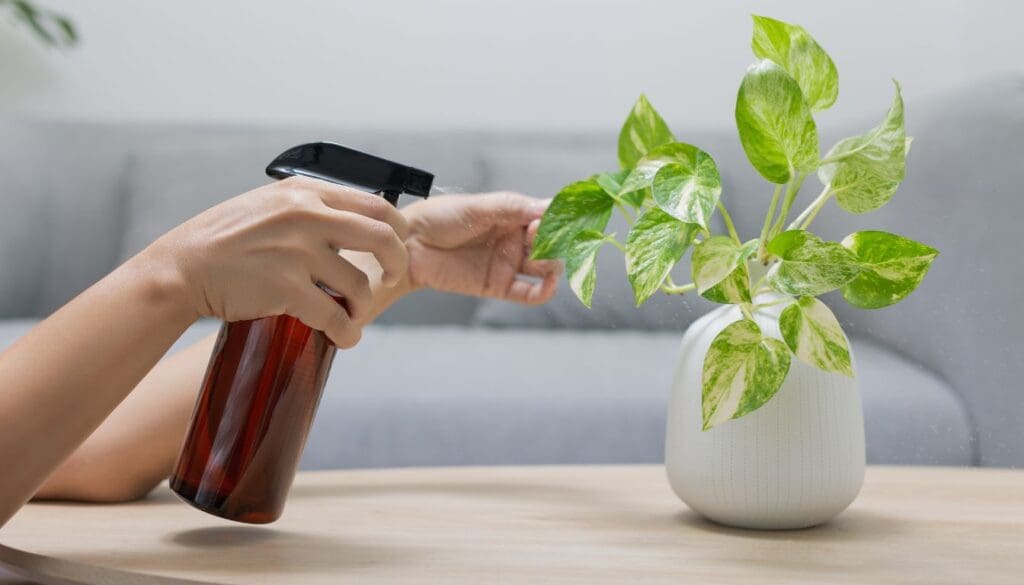
- Foliar Feed: Spray directly onto the leaves in the early morning or late afternoon when the sun is not too harsh. It’s like a spa treatment for your plants!
- Soil Drench: Pour the mix around the base of your plant to nourish those roots. Doing this feels like you’re cooking a gourmet meal for your plant’s underbelly.
Here’s a simple cheat sheet:
| Method | Frequency | Ratio |
|---|---|---|
| Foliar Feed | Every 2-4 weeks | 1 part tea to 10 parts water |
| Soil Drench | Every 2-4 weeks | 1 part tea to 10 parts water |
Now, I’d love to hear from you! 🌟 Have you got a secret recipe for your liquid fertilizer tea? Maybe a special technique you swear by? Drop a comment and let’s get those plants thriving together! Happy gardening, folks! 🌻👩🌾
Frequency and Timing of Fertilization
Have you ever wondered when and how often to spread the liquid love (aka fertilizer tea) on your garden darlings? 🌱
Let’s talk timing! Liquid fertilizer provides a sort of “fast food” for plants – it’s quickly absorbed. This means I can give my plants a quick nutrient boost when they seem a little lackluster. 🚀
For your early birds (your springtime plants), splashing on liquid fertilizer can help them kickstart their growing season.
Now, for the frequency, I strike a balance. I’ve learned that a biweekly splash party – that’s once every two weeks – keeps my leafy friends happy without overdoing it. Remember, too much of a good thing can be…well, not so good. Think of it like overfeeding a goldfish, not exactly the best idea, right? 🐟
Here’s a quick routine I follow:
- Spring: A balanced feed to wake up the sleepy plants.
- Growing Season: A nitrogen-rich mix for leafy growth.
- Flowering Time: Switch to a potassium-heavy tea to get those blooms popping! 🌸
Finally, always check the weather forecast – a calm, cloudy day is ideal for fertilization, as it means less stress for the plants and less evaporation.
So, what’s your plant feeding schedule like? Share your plant’s dining diary in the comments! And if you’ve got tips or fertili-tea recipes of your own, don’t hesitate to spill the beans. Let’s grow our garden know-how together! 🌻✨
Safety Considerations When Handling Fertilizer Teas
When I brew my homemade liquid fertilizer teas, I always remember safety first! Here are some important pointers:
- Wear Gloves: Just like cooking, you want to keep your “ingredients” off your skin.
- Avoid Splashes: No one wants a surprise facial, right? 😆 Keep it neat to protect your eyes and skin.
- Proper Ventilation: Some of these teas can be a bit stinky. I mean, we are talking about decomposing organic matter! 😷 Work outside or in a well-ventilated area.
- Label Your Brews: I label my containers as “Fertilizer Tea” to avoid any mix-ups. You wouldn’t want to mistake this for your regular morning tea! 🍵
Keep Away from Pets and Kids: My curious critters and kiddos might think it’s a cool potion, but these brews are not pet or child-friendly.
Lastly, remember that when you handle concentrated teas, they can be very strong. Dilute them according to your plant’s needs to avoid overwhelming them with too much love! 💚
Got any funny stories or tips from your gardening adventures with fertilizer teas? Share them below! I’m all ears! 👂🌱
And hey, don’t forget to give that like and share button some green-thumb love if you found these tips helpful! 🌟
Storing Homemade Liquid Fertilizer Teas
Storing my homemade liquid fertilizer teas is like keeping leftovers in the fridge – it’s all about maintaining their goodness for later use! 🌿
When it’s time to store: After brewing up a nutritious batch of liquid gold for my plants, I make sure it’s completely cooled down. Nobody likes a hot drink after all, right? 😆
Keep it airtight: To lock in freshness, I use containers with tight-fitting lids. This prevents unwanted odors and keeps my curious pets out of the liquid feast.
Heads up! Always label the containers with the contents and date; it’s like meal-prepping for my garden.
Location, location, location: A cool, dark place – think a basement or garage – is the prime real estate for storage. I avoid any sunny spots because light and heat can degrade my tea faster than my dog finds my hidden snacks!
How long is too long? I aim to use my well-crafted concoction within a week or two. This ensures the nutrients are still partying and haven’t turned into a couch potato.
Alright, green thumbs, how do you store your homemade brews? Got any secret tips or hilarious mishaps to share? Drop them in the comments below and let’s swap stories! 😄👇 And hey, if you think your fellow plant lovers would dig these tips, be sure to hit that share button! 📤
Troubleshooting Common Issues
Ever try making homemade liquid fertilizer teas and run into a snag? Don’t worry, I’ve got you covered with some quick fixes. 🌱✨
- Stinky Situation: If your tea smells more like a swamp than a garden oasis, it’s likely too anaerobic. Give it a good stir or even better, an air pump to add oxygen. Fresh as a daisy!
- Tea Too Strong? Your plants are looking a little… shocked? They might be telling you the tea’s too concentrated. Just dilute it with water—think of it like watering down a potent fruit punch!
- Mold on Top: Yuck, right? This can happen if the tea sits too long without movement. Skim off the mold and stir daily to keep things clean.
Not Straining Properly? Nobody wants chunky tea. Use a cheesecloth or fine mesh to strain those bits and pieces out. Your plants will thank you for the smooth sip!
No brew is perfect on the first try, and that’s okay! 🌼 Have you guys run into other issues while steeping your garden potions? Share your stories in the comments.
Let’s learn together and watch our gardens thrive! Remember to hit the like and share buttons if you find these tips helpful!
Conclusion
I’ve had a blast sharing my top 10 homemade liquid fertilizer teas with you! 🌱 Isn’t it remarkable how we can turn everyday weeds and plants into nutrient-rich food for our gardens? I bet you’re as excited as I am to get brewing!
Remember, each plant in your garden has its own preferences. It’s like us with our favorite snacks! 🍟 Whether it’s comfrey tea for your tomatoes or a well-balanced grass clipping concoction for your greens, your plants will thank you with bountiful harvests.
Experimenting is part of the fun! Try different recipes, and don’t forget to watch your plants react. They’re the best judges of your tea-making skills! 🌼 Got a success story or a funny fail? I want to hear it! Drop your tales and tips in the comments.
And sharing is caring, right? If you know someone with a garden that might love these teas, pass this article on! Let’s spread the green love. 🌿
Now, go on and give your plants a treat they deserve! Which fertilizer tea will you try first?
Note: Some images in the articles are sourced from Reddit and Other Platforms For Reference Purpose.


I only use Neem oil with Castile soap to get rid of any and all bugs and fungi. It works good and I soak the soil as well. The plants take it in and it goes systematic and it’s bugs and fungi no more. If done correctly it does not hurt the beneficial bugs.