5 DIY Self-Watering Pots You Can Make in Minutes for Effortless Plant Care
I love having plants around, but honestly, I sometimes forget to water them. With self-watering pots, I can keep my plants healthy, even when life gets hectic.
These pots are super easy to make and don’t require fancy tools. I usually just grab stuff I already have at home, which makes the whole process more fun and less stressful.
Please note: Simplify Plants is reader-supported. As an Amazon Associate, I earn from qualifying purchases made by our readers with no extra cost added to you all! Some links in the post are affiliate links and I get a commission from purchases made through links in the post.
1) Plastic Bottle Self-Watering Pot
Making a self-watering pot out of a plastic bottle is honestly one of the easiest hacks out there. All I need is an empty bottle, scissors, a piece of string, and some potting soil.
First, I cut the bottle in half. Then I flip the top upside down and fit it into the bottom half.
If the bottle cap doesn’t already have a hole, I poke one so the string can go through. I thread the string (or a shoelace) through the cap—this will act as the wick.
I fill the bottom half with water, then place the top half (with the cap and wick) inside. After that, I add soil and my plant or seeds to the top section.
I make sure the string is nestled in the soil so it can pull water up to the roots. As the soil dries, the wick does its magic and keeps things moist.
It’s honestly pretty satisfying to see how the water travels up the string. Plus, I get to recycle a plastic bottle instead of tossing it.
With just a few minutes and some basic stuff, I’ve got a handy little planter for my windowsill or desk. It’s quick, cheap, and you really don’t need any special skills.
2) Pot with Wicking System

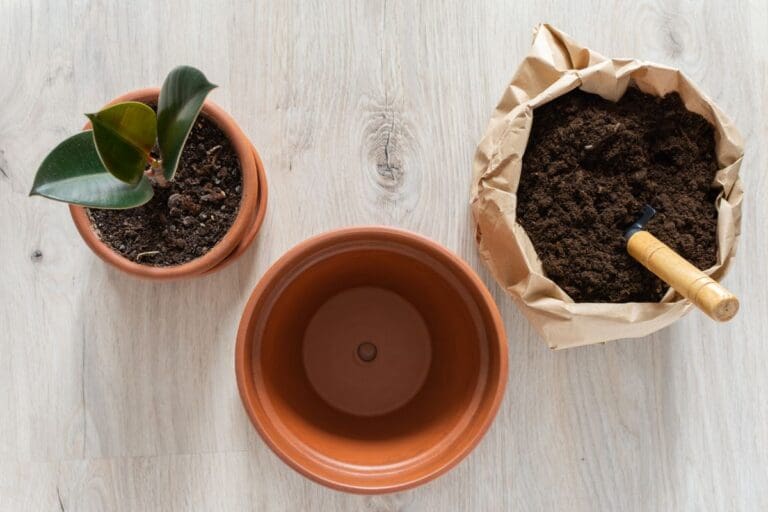
Terracotta/ceramic pots are everywhere, and I like them because they let my plants breathe. For this setup, I grab a regular terracotta pot and a small plastic container.
I cut a hole in the bottom of the plastic container and push a piece of cotton rope or thick string through. The rope should be long enough to dip into the water reservoir below.
I put the plastic container inside the terracotta pot, making sure the rope touches the soil and dips into the water underneath. That rope is my wick—it pulls up water when the soil gets dry.
I fill the terracotta pot with soil and add my favorite herbs or flowers. Then I pour water into the bottom section or set the pot on a shallow dish of water.
It’s a relief not to worry about watering every day. This setup keeps my plants happy, and I can go about my day without fuss.
Honestly, all I need is a pot, a small container, some rope, and water. That’s it.
3) Mason Jar Self-Watering Planter

Mason jars are just so versatile. Making a self-watering planter with one is honestly both easy and kind of satisfying.
All I use is a mason jar, a strip of cotton fabric or thick string, and a small plastic cup. I poke a hole in the bottom of the cup, just big enough for the fabric or string.
After threading the fabric through, I fill the mason jar with water and set the cup on the jar’s lip so the fabric hangs into the water. Then I fill the cup with potting soil and add my plant.
The fabric works as a wick and keeps the soil moist for days. I like that I can see the water level through the glass and just refill when it gets low.
This one’s perfect for herbs on a sunny windowsill. It’s a super simple way to keep plants healthy even if I get distracted or busy for a few days.
4) Recycled Tin Can Self-Watering Pot
I’m a big fan of reusing old stuff, so this tin can self-watering pot is right up my alley. All I need is a clean, empty tin can, some cotton string, and a plastic container that fits inside the can.
First, I poke a hole in the bottom of the smaller container and thread a length of cotton string through it. That string will be my wick.
I pour a little water into the bottom of the tin can, just enough so the string can soak it up. Then, I set the smaller container (with the string) inside the can, making sure the string touches both the water and the soil.
After adding potting soil and my plant, the string keeps the soil moist by pulling up water as needed. I check the water level every few days, just to be safe.
This method is quick, easy, and gives new life to old cans. It’s also a fun way to show kids how recycling and plant care can go hand in hand.
These little pots are perfect for herbs or succulents. It always feels good making something useful and eco-friendly in hardly any time.
5) DIY Spool Planter with Water Reservoir
Old spools from thread or crafts make surprisingly great planters for small plants. I like how easy they are to find, and they’re just the right size for little cuttings.
To make a DIY spool planter with a water reservoir, I clean out the spool and grab a small plastic cup or bottle cap for the reservoir.
I poke a hole in the side of the spool, just above the cup, and thread a cotton string or strip of cloth through as the wick. That’s what pulls water up to the soil.
Once the wick’s in place, I fill the top of the spool with soil and pop in my plant. Then I fill the cup with water, making sure the wick touches both water and soil.
Reusing old spools is budget-friendly and keeps stuff out of the trash. I like being able to see when it’s time to add more water, and honestly, I only need to refill every few days.
This mini planter is great for a sunny windowsill or even my desk. If you want to try self-watering pots without spending money, this is a fun way to start.
How Self-Watering Pots Work
Self-watering pots are a game changer—they give plants just the right amount of water, right when they need it. I find them easy to use, whether you’re new to plants or have been at it for years.
Basic Principles of Self-Watering Systems
A self-watering pot usually has two main parts: a water reservoir at the bottom and a spot for the plant on top. There’s a divider or space between them, and a wick (even just a string or cloth) pulls water up from below.
The plant’s roots take up water as needed, so the soil stays moist but not soggy. Some pots even have a clear window or tube so I can check the water level without guessing.
Here’s what you’ll usually find in a self-watering setup:
- Water reservoir
- Wick or capillary mat
- Divider or platform
- Overflow hole (so you don’t flood your plant)
It’s a clever way to avoid both under-watering and over-watering.
Benefits for Indoor and Outdoor Plants
Self-watering pots are a lifesaver for hot weather, busy schedules, or folks like me who forget to water. Indoors, the steady supply keeps plants strong and healthy.
I love that I don’t have to water as often, and there are fewer spills since I’m not pouring water from the top. The roots always get moisture but never sit in soggy soil, which helps prevent root rot.
For outdoor plants, these pots help my flowers or veggies survive heat waves or those weekends when watering just slips my mind. My plants seem to grow better, and I see fewer crispy leaves.
Tips for Customizing Your DIY Self-Watering Pot
When I make my own self-watering pots, I try to choose materials that help my plants thrive and look good on my shelves. I also like to experiment with ways to make my pots unique.
Material Choices for Different Plant Types
The material I pick can make a difference. For herbs and veggies like basil or lettuce, I go with plastic or glass containers—they keep the moisture steady.
Succulents need faster drainage, so I lean toward ceramic pots with little drainage holes.
Here’s a quick side-by-side:
| Plant Type | Best Pot Material | Why |
|---|---|---|
| Herbs/Vegetables | Plastic, Glass | Holds moisture longer |
| Succulents | Ceramic, Clay | Allows for better drainage |
| Tropical Plants | Glazed Ceramic | Keeps soil moist but not too wet |
Matching the pot to the plant helps avoid issues like root rot or dry soil. When I reuse bottles or jars, I always clean them really well and add drainage holes if needed.
Decorative Ideas to Personalize Your Pots
I love giving my pots a little personality. Paint is probably the easiest way to jazz up a plain container.
Sometimes I use stencils or just paint random stripes and dots if I’m feeling artsy. Washi tape and stickers are a quick way to add color, too.
Wrapping twine or yarn around the pot gives it a natural vibe. I’ve even glued on beads or shells for texture.
For gifts or kids, chalkboard paint is fun—I can write plant names and change them whenever I want. These little touches make my self-watering pots feel special and totally mine.
Frequently Asked Questions
I enjoy sharing ideas for simple self-watering pots—they really do make plant care easier. Using stuff like plastic bottles, jars, or terracotta pots, I can throw together planters that basically water themselves.
What are some simple steps to make a self-watering planter using a soda bottle?
First, I cut a plastic soda bottle in half.
I flip the top half upside down and fit it into the bottom half.
Then I thread a cotton string or strip through the mouth of the bottle to act as a wick.
Fill the bottom with water, add soil and a plant to the top, and let the wick bring water up.
How do I create an indoor self-watering planter for my houseplants?
I pick a leak-proof container and set up a water reservoir at the bottom.
A strip of fabric acts as a wick, or I use a mesh screen to separate soil from water.
After planting, I fill the bottom with water and just check it now and then to refill as needed.
Can you explain the wick method for DIY self-watering planters?
The wick method uses a strip of cotton or fabric to draw water from the reservoir up to the plant’s roots.
I thread the wick through a hole so one end rests in the water and the other in the soil.
Water travels up the wick, keeping soil moist without overwatering.
What materials do I need to assemble a homemade self-watering pot?
I usually grab a container for the outer pot or reservoir—sometimes it’s just an old bottle or a random jar I have lying around.
Then I find a smaller container or cup for the soil.
For the wicking part, I’ll use string, cotton, or maybe a strip of felt—whatever’s handy, honestly.
Of course, you’ll need some soil and a plant you want to grow.
A drill or just something sharp comes in handy for poking holes to let air and water move around.
What’s the best way to set up a self-watering system for my tomato plants?
I like to use a big plastic bucket or maybe a recycled tub as the reservoir.
Wicks or even PVC pipes work for getting water up to the soil—just make sure the soil sits above the water line.
After planting the tomato, I keep an eye on the reservoir and refill it when it gets low.
That way, the plant can just take water whenever it feels like it.
How can I transform a terracotta pot into a self-watering planter?
First off, I usually seal the inside of the terracotta pot—otherwise, it just leaks everywhere, right?
Next, I drop a little water reservoir at the bottom and thread a cotton wick through the drainage hole.
After that, I pile in the soil and nestle my plant in, making sure the wick actually touches both the water and the roots.
It’s a simple setup, but honestly, it works surprisingly well.
Note: Some images in the articles are sourced from Reddit and Other Platforms For Reference Purpose.


