11 Tips to Grow Spider Plant in Water
Spider plants are honestly some of the easiest houseplants you could try growing, and the wild part? You don’t even need soil.
Growing them in water is actually a fun way to watch all those roots develop, and it keeps your plant looking pretty happy too.
You really can get a thriving spider plant in water with just a few simple steps, from picking a good container to swapping out the water now and then.
This guide’s got all the basics. We’ll talk about water choices, root support, and those little habits that keep your plant looking its best.

Please note: Simplify Plants is reader-supported. As an Amazon Associate, I earn from qualifying purchases made by our readers with no extra cost added to you all! Some links in the post are affiliate links and I get a commission from purchases made through links in the post.
1) Use clean, room-temperature water
I always start with clean water for my spider plants in water. Tap water is usually fine, but I let it sit out for a day so the chlorine can evaporate—chlorine can be a pain for their roots.
Room-temperature water is just safer. Cold water can shock the roots, so I fill a jar and leave it on the counter until it feels about the same as the room—somewhere around 65-75°F most days.
Quick Tip: Change the water every week to keep things fresh and stop bacteria from taking over.
Distilled water isn’t actually my favorite for spider plants since it’s a bit too pure (no minerals). Filtered or treated tap water usually gives them what they need. If your tap water is super hard or heavy on chemicals, filtered is definitely better.
If you see cloudy water or catch a whiff of something funky, that’s your sign to change it out right away.
2) Change water every 1-2 weeks
I switch out the water in my spider plant jars every week or two. Fresh water keeps those roots happy and helps avoid that slimy stuff nobody wants.
Old water gets murky and loses oxygen fast. Plus, it can start growing bacteria or algae, which is just gross. When the water looks cloudy or the level drops, I know it’s time for a refresh.
I just pour out the old water, rinse the container, and refill it with room-temp water. Cold water’s a no-go, so I let tap water sit out for a bit first.
Quick Tip: If it’s hot in your house, you’ll probably need to change the water more often since it evaporates faster and can get weird quickly.
3) Place plant in indirect sunlight
Spider plants really aren’t fans of harsh, direct sun. I keep mine near a window where the light’s bright but not blasting—filtered light is always safest.
If you see pale leaves or brown tips, that’s the plant telling you it’s getting too much sun. Move it back a bit if you notice any burning.
Quick Tip: A north-facing window is perfect, or you can just hang a sheer curtain to soften strong light.
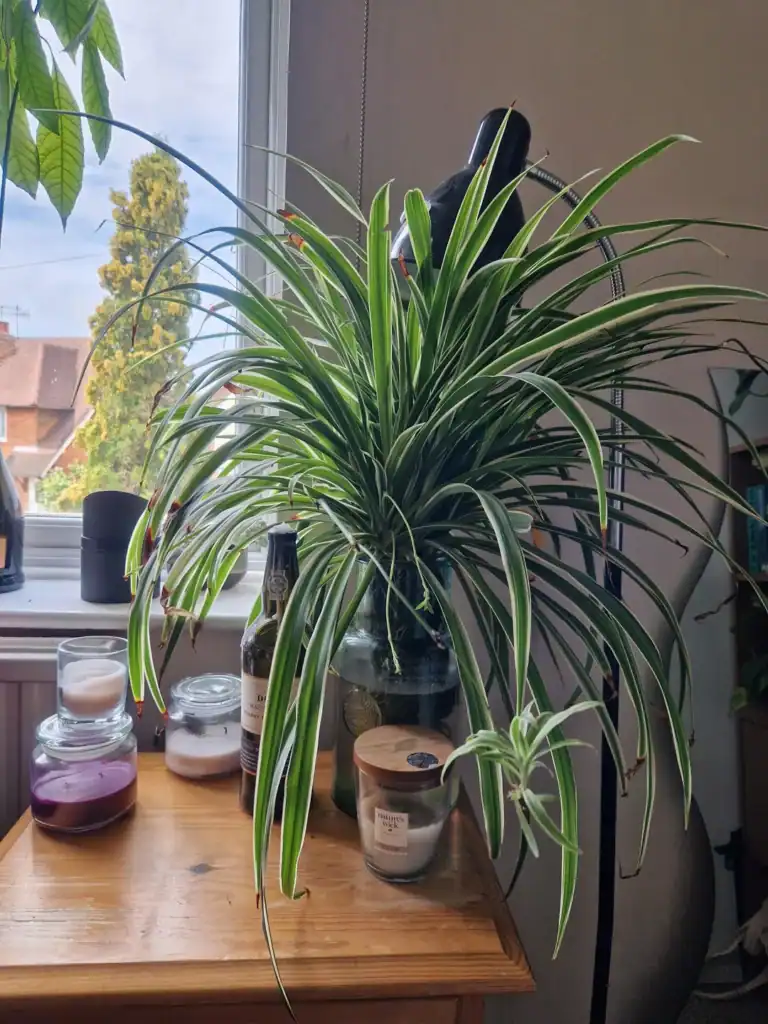
They’ll survive in lower light too, though they might slow down a bit. I’ve even kept spider plants in bathrooms with tiny windows and they were just fine. Just skip the dark corners or those sunny spots where the afternoon sun is relentless.
4) Use a glass container for better root visibility
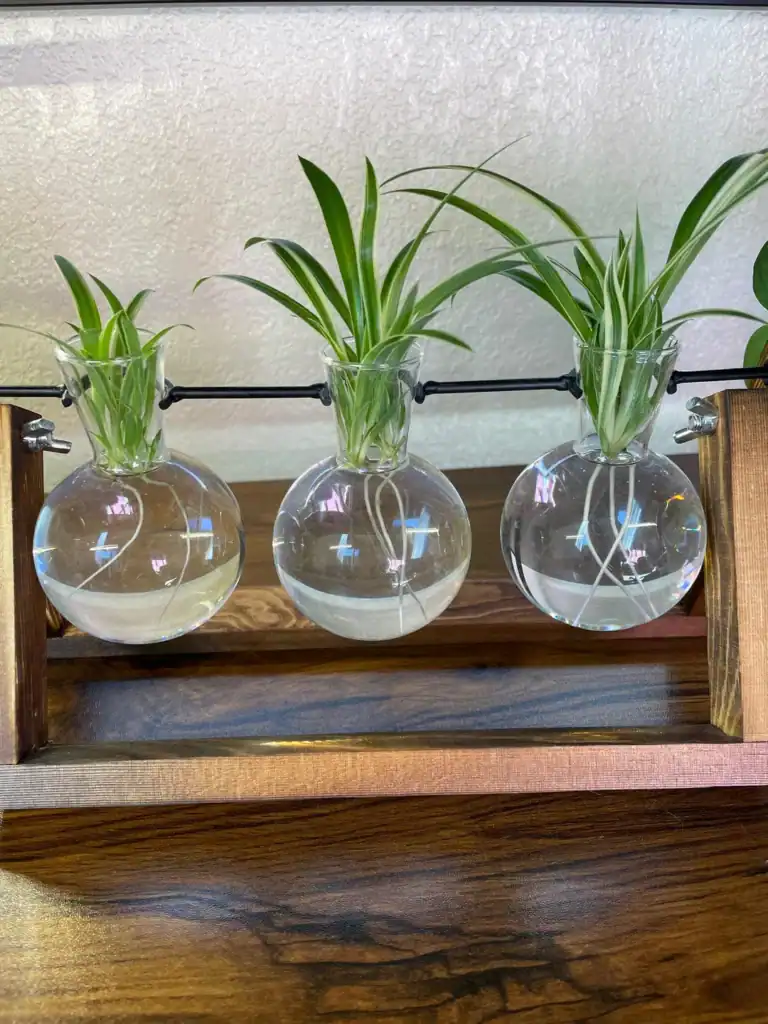
I always reach for clear glass containers when growing spider plants in water. It’s just easier to keep an eye on the roots.
Healthy roots are white or cream—if they start turning brown or mushy, you’ll see it right away. Plus, you can check the water level at a glance and spot algae before it gets out of hand.
Quick Tip: Go for a container with a narrow neck. It’ll help hold the plant upright and let the roots hang down freely.
Any clear glass works. Mason jars, old vases, even a cleaned-out pasta jar if you’re feeling thrifty. Just make sure it’s clean before you start.
5) Add a few drops of liquid fertilizer monthly
Spider plants in water miss out on the nutrients they’d get from soil, so I give them a little liquid fertilizer boost. Just a few drops once a month during spring and summer is plenty.
I always dilute the fertilizer more than the label says—maybe a quarter-strength. Too much can burn the roots or turn the tips brown, which is the last thing you want.
Quick Tip: If the water gets cloudy or the roots start browning, you’re probably overdoing it with the fertilizer.
In fall and winter, I usually skip feeding or maybe do it every other month. The plant slows down in cooler months and just doesn’t need as much. I stick with a balanced liquid fertilizer for houseplants, but honestly, any gentle one will work if you keep it weak.
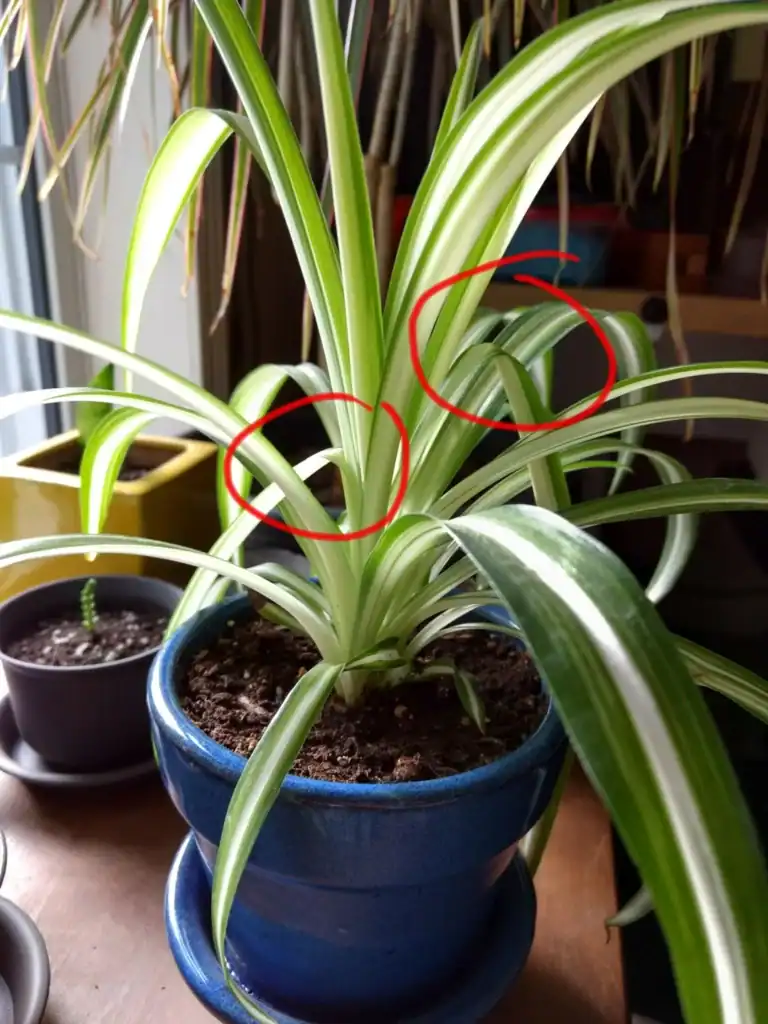
6) Trim brown leaf tips regularly
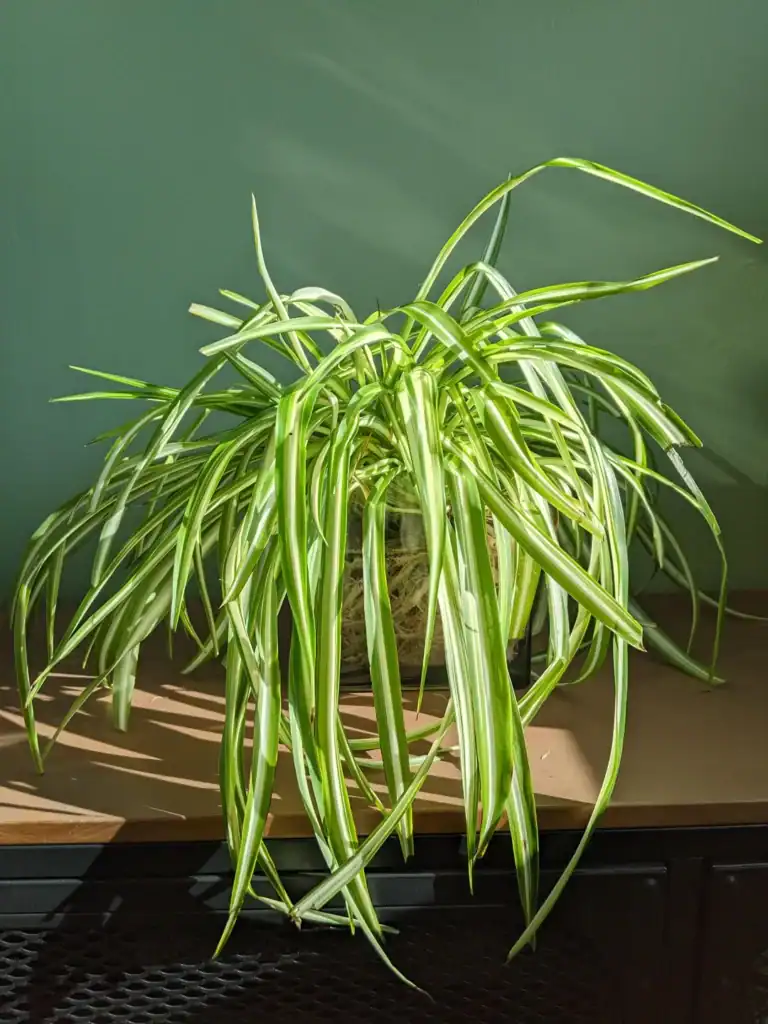
Brown tips are just part of the deal sometimes. Even in water, spider plant leaves can get crispy from low humidity or minerals in the water.
I use clean scissors to snip off only the brown parts, cutting at an angle so it looks natural. It takes two minutes and makes the plant look a lot better.
Quick Tip: Cutting at a slight diagonal blends in with the leaf shape—way nicer than a blunt cut.
If I see a bunch of brown tips all at once, I check my water. Chlorine or fluoride in tap water can do that, so switching to filtered or distilled usually helps. Trimming doesn’t hurt the plant, so I just do it whenever those brown bits get on my nerves.
7) Keep water level consistent
I always make sure the roots are underwater. If the level drops too low, the roots dry out and the plant gets stressed. Check every few days and top off if you need to.
Water disappears faster in warm rooms or summer. I top up whenever I see the level dipping. You want at least an inch or two of water covering the roots at all times.
Quick Tip: I put a piece of tape on the jar to mark the perfect water line—it saves me guessing.
Don’t overfill though. Leave a small gap at the top so the base of the plant isn’t sitting in water. Just the roots need to be wet, not the stems or leaves.
8) Avoid direct sunlight to prevent leaf burn

Spider plants just can’t handle harsh, direct sun. I learned the hard way—my leaves turned pale and crispy at the tips. When you’re growing in water, glass can actually magnify sunlight and cook the roots even faster.
I keep mine in bright, indirect light. An east-facing window or a few feet back from a sunny window does the trick. You want enough light for healthy growth, but not so much it drains the color out.
Quick Tip: If leaves start looking washed out or develop brown, papery spots, move your plant away from the window.
Watch for yellowing or faded stripes on variegated kinds. That’s usually your first warning the light’s too strong. In summer, you might need to move your plant back even more than in winter.
9) Use filtered or distilled water if possible
I usually go for filtered or distilled water for my spider plants in water. Tap water can have chlorine, fluoride, and other stuff that builds up and causes brown tips.
Spider plants are sensitive to those additives. They won’t kill the plant right away, but the stress shows up in the leaves.
If you don’t have filtered water, just let tap water sit out overnight in an open jar. That lets the chlorine evaporate before you use it.
Quick Tip: I keep a pitcher of filtered water at room temperature near my spider plants so I’m always ready for water changes.
Honestly, my spider plants look greener and grow faster when I use filtered water. If your tap water’s really hard, this makes an even bigger difference.
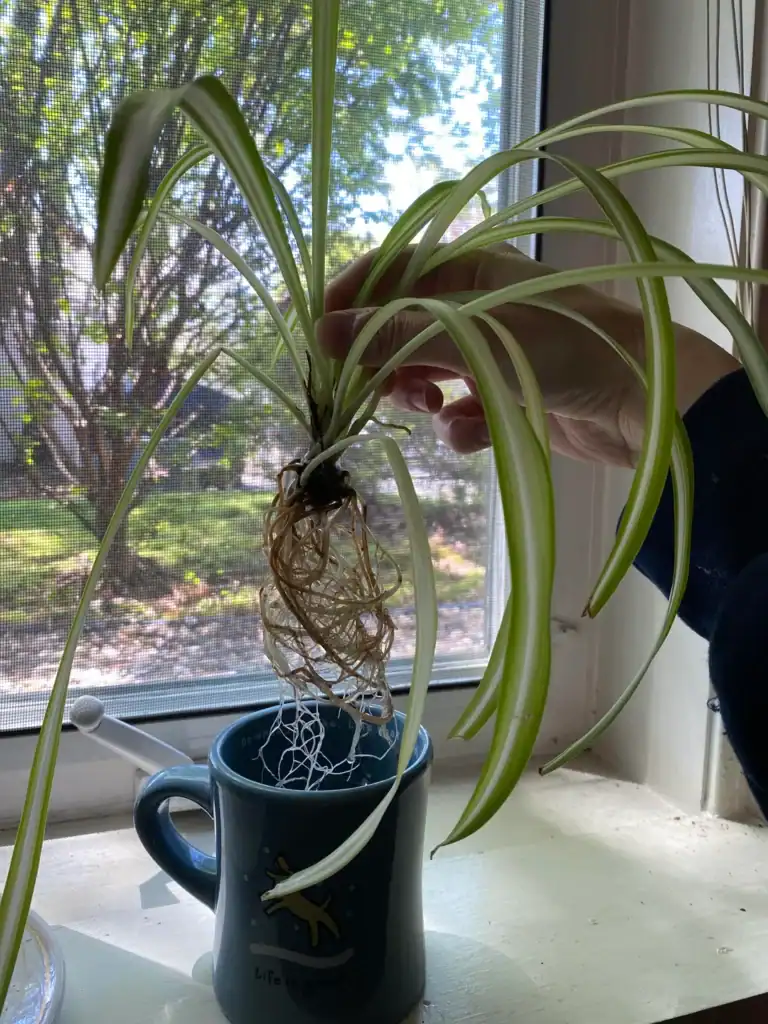
10) Check roots for rot weekly
I make it a habit to check my spider plant’s roots once a week. It only takes a minute, and catching any rot early can really save the plant. Just lift the plant gently and look for roots that are brown, mushy, or smell bad.
Healthy roots should be white or light tan and feel firm. If you see slimy or dark brown parts, snip them off with clean scissors and rinse the rest under cool water. Then swap out the old water completely.
Root rot happens faster in warm weather or if you forget to change the water. Cloudy water is usually the first sign something’s off.
Quick Tip: Give the water a sniff when you check the roots—if it smells off, it’s time for a change.
11) Increase humidity with a nearby humidifier
Spider plants in water still need a bit of humidity to keep their leaves looking good. I like to set a small humidifier near my spider plants, especially in winter when the air gets dry indoors.
The extra moisture helps prevent brown tips and keeps the leaves bright. You don’t need anything fancy—a basic cool-mist humidifier is fine.
Quick Tip: Aim for 40-60% humidity for happy spider plants.
If the leaf tips start browning even with regular water changes, the air’s probably too dry. Running the humidifier for a few hours a day usually fixes it.
Just don’t let the humidifier spray directly onto the leaves. A little space is good—you want moisture in the air, not soggy leaves.
Choosing the Best Water for Your Spider Plant
The kind of water you use really does matter for spider plants in water. Knowing what to avoid will help keep those roots healthy and happy.
Tap Water Versus Distilled Water
Honestly, distilled water works best for spider plants in water—it doesn’t have all the chemicals and minerals in tap water. Spider plants are sensitive to fluoride and chlorine, which are common in city water. Those can cause brown tips and slow down the roots.
Tap water is okay if you let it sit out overnight in an open jar so the chlorine can evaporate, though fluoride sticks around. If your plant seems unhappy or your tap water is heavily treated, switching to distilled usually helps.
Rainwater is another solid option if you can collect it safely. It’s naturally soft and free of chemicals. I keep a clean bucket outside during rainstorms just for my water-grown plants.
Quick Tip: If you’re using tap water, fill a pitcher and leave it uncovered for 24 hours before using it for your spider plant.
Avoiding Common Water Contaminants
Fluoride is the big culprit behind brown, crispy leaf tips in spider plants. Lots of cities add it to drinking water, and spider plants soak it up fast. Once the leaves are damaged by fluoride, they won’t bounce back.
Hard water has a lot of calcium and magnesium. These minerals can leave white, crusty deposits on your container and eventually block nutrients. If you see a white film, it’s time to switch water types and clean things up.
Salt and other dissolved solids build up over time too. I change the water completely every week to keep things fresh and avoid root problems.
Quick Tip: If you spot white residue on your container or brown leaf tips, that’s your early warning your water quality needs a look.
Supporting Healthy Root Development
Strong roots need clean water and a good container to grow thick and white instead of mushy or brown.
Changing Water Regularly
I usually change the water in my spider plant containers every 5 to 7 days. Fresh water keeps oxygen levels up and helps stop bacteria from piling up around the roots.
Stale water turns cloudy and sometimes even smells weird. If I spot murky water or that odd film on top, I just dump it out right then and there.
Tap water works fine for me, but I let it sit out overnight so the chlorine can evaporate. Some folks are pickier, but honestly, it’s worked for me so far.
Quick Tip: Mark your calendar or set a phone reminder so you don’t totally forget about water changes.
During hot summer months, I might change the water twice a week. The heat really speeds up bacteria growth, and the roots seem to drink a lot more so the water level drops faster than you’d expect.
Selecting the Right Container for Water Propagation
I like using clear glass containers because I can actually watch the roots grow and catch any problems early. The opening should be wide enough to support the plant, but not so wide that the leaves fall into the water—nobody wants soggy leaves.
A narrow neck is usually best since it holds the plant at the right height. Mason jars, old vases, even those leftover pasta sauce jars, they all work pretty well for me.
I avoid containers shorter than 4 inches because the roots really need space to stretch out. Anything smaller just feels cramped.
Quick Tip: Pick containers that hold at least 8 ounces of water so the roots stay fully submerged.
Dark glass can help slow down algae growth on the inside, but honestly, I still prefer clear containers. Being able to see green roots or brown spots makes it easier to catch issues before they get out of hand.
Frequently Asked Questions
Spider plants in water need the right setup to really thrive—from water quality to feeding schedules. Temperature, light, and knowing when to propagate all play a role in keeping your plant happy and healthy.
What kind of water is best for growing spider plants?
I usually go for filtered or distilled water when I can. Tap water often has chlorine, fluoride, and other chemicals that build up and can mess with the roots over time.
If tap water’s all you’ve got, just let it sit out in an open container for about 24 hours to let some of that chlorine evaporate. It’s not perfect, but it helps.
Room-temperature water is best—cold water can shock the roots, and nobody wants that. I keep a pitcher sitting on my counter just for my water-grown plants.
Quick Tip: If your tap water is super hard or heavily treated, filtered or distilled is probably the safer bet to avoid those annoying brown leaf tips.
How often should I change the water when cultivating spider plants hydroponically?
I change the water in my spider plant containers every 1-2 weeks. This keeps algae in check and makes sure there’s enough oxygen for the roots to breathe.
In the summer, I sometimes change it weekly since the water evaporates faster and can get cloudy. Cooler months? Every two weeks is usually fine.
If the water looks cloudy or murky, that’s your sign to change it sooner. I always give the container a quick clean when I refresh the water to get rid of any slimy stuff.
Quick Tip: Mark your calendar or set a reminder so you don’t totally lose track of your water-change schedule.
Can you recommend any nutrients or fertilizers to enhance the growth of spider plants in water?
I add a couple drops of liquid fertilizer to my spider plant water once a month. I use a water-soluble houseplant fertilizer, but I dilute it to about a quarter of what the bottle says.
Too much fertilizer can burn the roots and make the leaf tips brown. Trust me, I learned that the hard way with my first water-grown spider plant.
In winter, I back off and only fertilize every 6-8 weeks. The plants slow down when there’s less light, so they just don’t need as much food.
Quick Tip: Less is more with fertilizer in water—if you’re unsure, go easy rather than overdo it.
Are there any specific temperature or light conditions that promote the health of spider plants in water?
Spider plants seem to love bright, indirect sunlight when they’re growing in water. I keep mine near a window with a sheer curtain or a few feet away from a sunny spot.
The ideal temperature? Somewhere between 65-75°F is perfect. They’ll tolerate as low as 50°F, but growth slows way down if it gets too cold.
Direct sun can actually heat up the water too much and cook the roots. I learned that the hard way after leaving a glass container in a south-facing window during summer—the water was so warm, it felt like bathwater.
Quick Tip: If you live somewhere hot, move your water-grown spider plants out of direct sun during those blazing afternoon hours.
How do I know when to propagate my spider plant babies in water?
I wait until the baby spider plants have small root nubs or at least 5-6 leaves before snipping them off. The plantlets should be about 2-3 inches across so they’ve got enough energy to make it on their own.
Cut the baby from the mother plant with clean scissors or shears, and leave a little bit of stem attached to the plantlet.
Pop the baby into a clear glass container with enough water to cover just the bottom inch. In a week or two, you’ll start seeing those roots grow longer.
Quick Tip: Clear glass containers make it easy to watch the roots develop and catch any problems early on.
What are the common signs of overwatering in spider plants, and how can I avoid it?
In water culture, overwatering usually happens when the water level’s just too high. I try to make sure only the roots and a bit of the bottom stem actually touch the water—not the whole base.
If you notice brown or black mushy roots, that’s probably root rot from too much water contact. Healthy roots, on the other hand, should be white or maybe a light tan, and they feel pretty firm if you give them a gentle squeeze.
Yellow leaves? That can mean trouble with water quality, or maybe you’ve gone a bit heavy with the fertilizer. If you spot yellowing, it’s probably best to swap out the water completely and hold off on fertilizer for a while—maybe a month?
Quick Tip: Always keep the crown of your spider plant above the waterline. Roots in, leaves out—sounds simple, but it really helps prevent rot.
Note: Some images in the articles are sourced from Reddit and Other Platforms For Reference Purpose.