11 Tips To Grow And Harvest Dill Like A Pro Gardener
Honestly, I love how ridiculously easy it is to grow fresh dill and enjoy its bright, zippy flavor all season.
With just a little attention, this simple herb can make any dish pop. Once you know a few tricks, you’ll feel pretty confident growing and harvesting dill.
So, here’s how I pick the best spot, plant and care for dill, and harvest it at just the right time.
It’s funny how little things—like sunlight and watering—end up making a huge difference in the flavor and health of your dill.
Please note: Simplify Plants is reader-supported. As an Amazon Associate, I earn from qualifying purchases made by our readers with no extra cost added to you all! Some links in the post are affiliate links and I get a commission from purchases made through links in the post.
1) Choose a sunny spot with at least 6 hours of sunlight
I always start by hunting down a bright, sunny spot for my dill. This herb really loves warmth and light—honestly, the more sun, the better.
I look for somewhere that gets at least 6 hours of direct sunlight daily. If I plant dill in a shadier spot, it just grows tall and spindly, not lush and leafy.
Sunlight is what keeps the plant strong and, I swear, the leaves taste richer when they get plenty of it. I also try to find a spot with good air flow because dill isn’t a fan of damp, crowded corners.
If I’m growing it in containers, I’ll move the pots around to chase the sun. Portable pots are a lifesaver for giving dill all the light it craves.
I always double-check that taller plants nearby won’t block out the light. Tomatoes and corn can be real sun-hogs.
Picking a sunny location really sets my dill up for a steady supply of fresh, fragrant leaves all season.
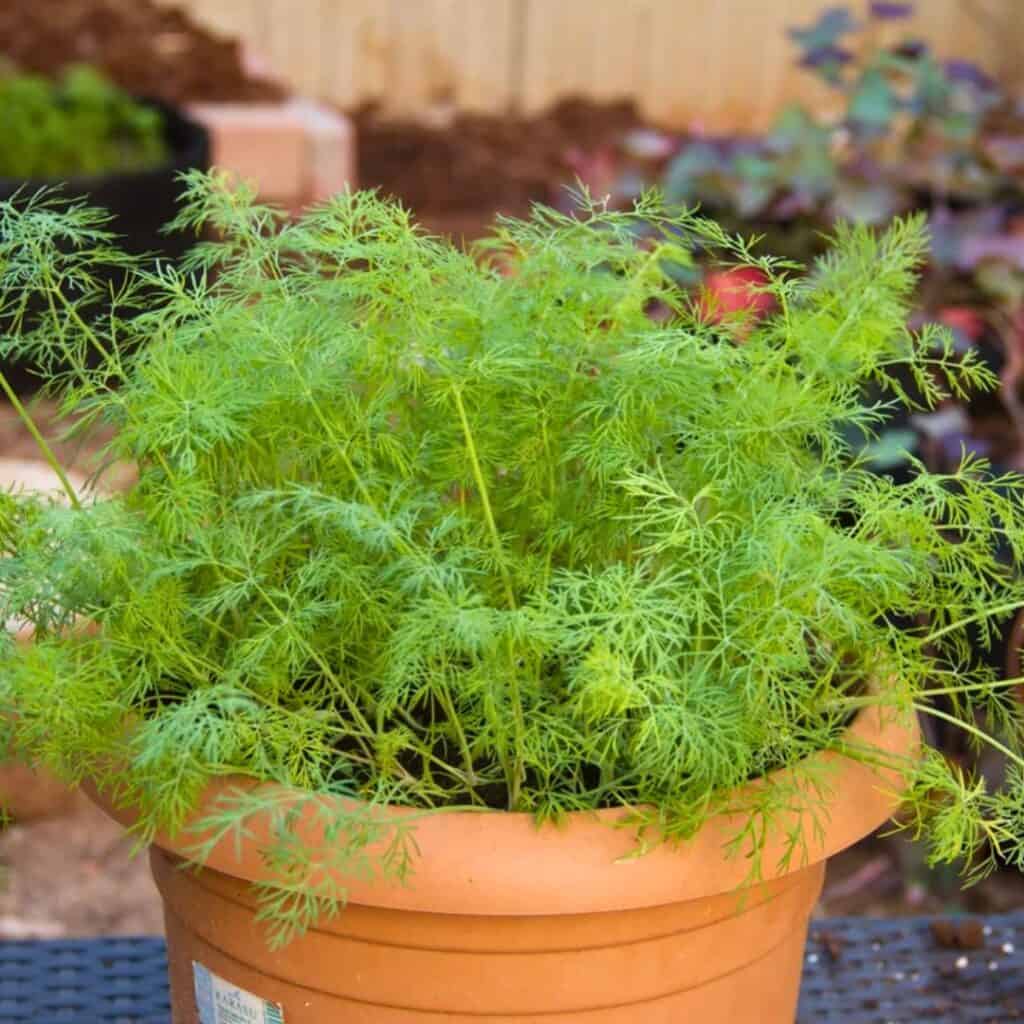
2) Plant dill seeds directly in well-drained soil
I always plant dill seeds right where I want them to stay since dill really doesn’t like being moved. The roots are kind of delicate, and transplanting just stresses them out.
I pick a sunny spot with well-drained soil—dill needs air around its roots. If the soil is too soggy, seeds might rot before they even get started.
Before planting, I’ll loosen the soil a few inches down and get rid of any rocks or big clumps. Makes it way easier for roots to spread, and water drains better.
I sow the seeds directly about a quarter-inch deep and just barely cover them. Keeping the soil slightly moist until they sprout seems to help them pop up faster.
Once the seedlings show up, I thin them so each one gets a fair shot at sunlight and nutrients. Crowded dill just doesn’t thrive.
Every few weeks, I’ll plant new seeds to keep a fresh supply all season. That way, I always have tender leaves for cooking or drying.
If it’s windy, sometimes I’ll add a little support stick to keep the stems from flopping over. Dill can get pretty tall, and it bends easily.
I’m careful not to overwater too. Too much water brings root problems, but if it’s too dry, growth just stalls. A light, steady watering habit works best for me.
By planting dill seeds right in the garden, I end up with healthier plants and a longer harvest. It’s honestly so simple and gives me loads of fresh flavor.
3) Space seeds 12 inches apart for healthy growth
I always try to space my dill seeds about 12 inches apart. It gives each plant plenty of room to stretch out and get strong.
When dill is planted too close, it just ends up fighting for sunlight, water, and nutrients. I’ve noticed the plants stay greener and healthier with a little breathing room.
If I’m planting in rows, I leave about a foot between each seed. For container gardening, I stick to one or two seeds per pot so things don’t get crowded.
I usually mark the spots with a stick or label before planting—helps me keep the spacing even. Once seedlings pop up, it’s easy to see which ones need thinning.
When thinning, I gently pull out the extras and keep the strongest one in each spot. Proper spacing leads to fuller leaves and better flavor, making my dill perfect for cooking.
Good spacing also makes watering and harvesting less of a hassle. I can reach each plant without breaking stems or disturbing roots. That little bit of planning early on saves a lot of frustration later.
4) Water dill plants regularly but avoid waterlogging
I make sure to water my dill plants often, especially if it’s hot or dry out. Dill likes moist soil, but it really hates sitting in puddles.
I check the top inch of soil—if it feels dry, that’s my cue to water. I always water at the base instead of spraying from above, just to keep the leaves dry and avoid disease.
A gentle stream of water works best. I use well-draining soil and always make sure pots or beds have drainage holes. Standing water is a recipe for root rot.
If it’s been raining a lot, I back off on watering. Too much water can be just as bad as not enough. I’ve found consistent but moderate watering keeps the plant healthy and tasting great.
On hot days, I water early in the morning so the soil holds moisture longer. This habit seems to help my dill produce plenty of fresh leaves.
5) Thin seedlings to prevent overcrowding
When my dill seedlings come up, they’re usually way too close together. If I don’t thin them, they just end up fighting for space and nutrients. Weak, spindly plants aren’t much use in the kitchen.
I wait until the seedlings are about 2 inches tall before thinning. Then I gently pull or snip the extras so the survivors have about 8 to 12 inches of space between them.
If the roots are tangled, I’ll use scissors and just snip at the base instead of pulling. That way, I don’t mess up the roots of the plants I want to keep.
After thinning, I give the soil a light watering to help the roots settle in. I also check that each plant is standing tall and getting enough light.
Good airflow around each plant really helps prevent mold and other issues. If I have extra seedlings, I’ll sometimes replant them in another pot or share with friends.
Spacing dill out makes a world of difference. Each plant gets fuller, with more flavorful leaves for me to harvest all season.
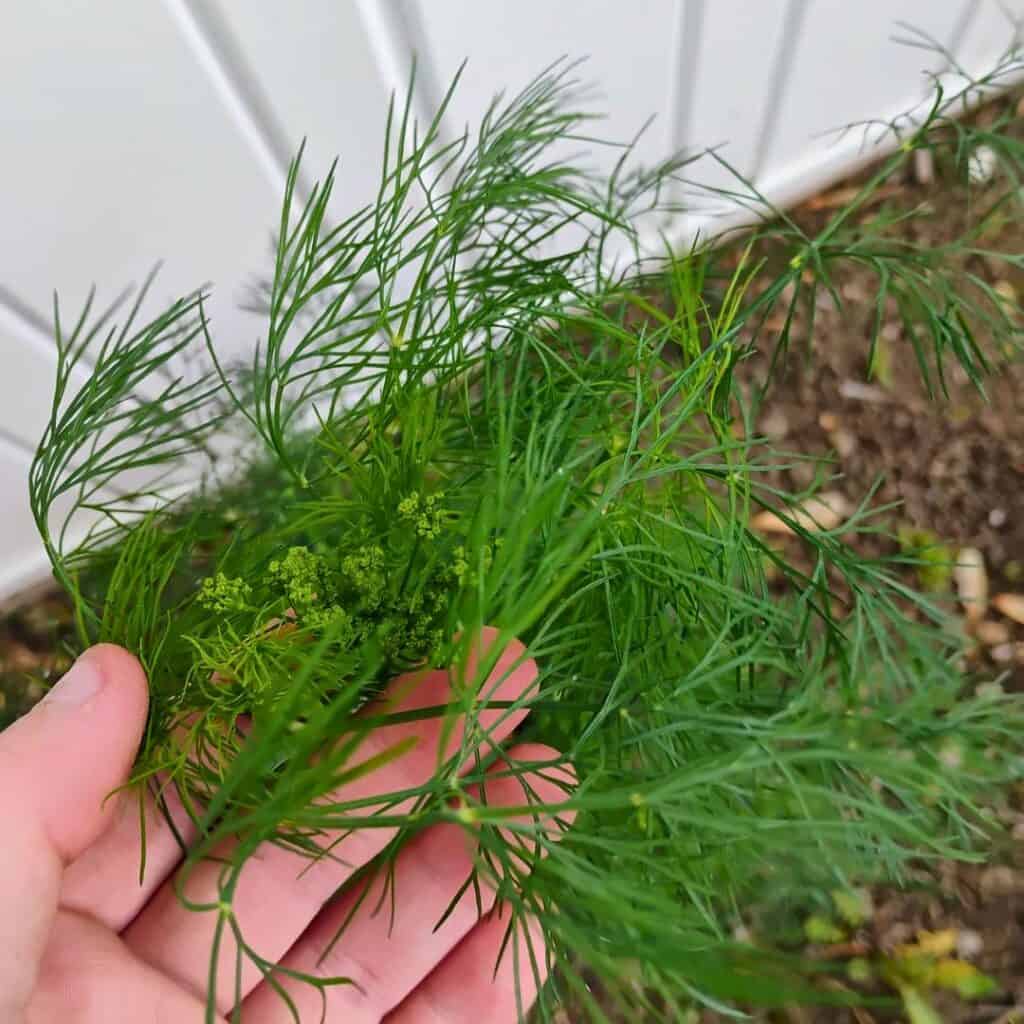
6) Harvest dill leaves early in the morning for best flavor

I always pick my dill leaves early in the morning once the dew dries. That’s when the leaves are loaded with essential oils, giving dill its punchy flavor and scent.
I use clean scissors or shears to snip leaves gently from the top. I try not to take more than a third of the plant at a time—gotta let it keep growing. This way, I get fresh dill for weeks, not just one big haul.
When I bring the leaves inside, I’ll rinse them lightly to get rid of any dust or bugs. Then I pat them dry with a paper towel. Wet leaves wilt super fast, so I make sure they’re dry before I use or store them.
If I’m not cooking with them right away, I store fresh dill in a glass of water like a little bouquet. Covering it with a plastic bag keeps it crisp in the fridge for a couple days. For longer storage, I’ll freeze or dry the leaves.
Harvesting early in the morning just makes the flavor pop in salads, soups, and sauces. It’s a small habit, but it really makes a difference.
7) Pinch off flower heads to encourage leaf growth
I always pinch off the flower heads on my dill as soon as I spot them. It’s such a simple thing, but it keeps the plant focused on making leaves instead of seeds.
Once dill starts flowering, the leaves lose some of their fresh taste. By nipping those buds early, I get way more tender, tasty leaves.
I use my fingers or a small pair of scissors to pinch off the flower stems right above a leaf node. The plant bounces back with new growth pretty quickly.
Regular pinching makes dill bushier and keeps the leaves coming. I check every few days for new flower buds.
If I want seeds, I’ll let a few plants flower at the very end of the season. Until then, I just keep removing blooms for better leaves.
This habit honestly gives me fresh, flavorful dill all season, without the leaves turning tough or bitter.
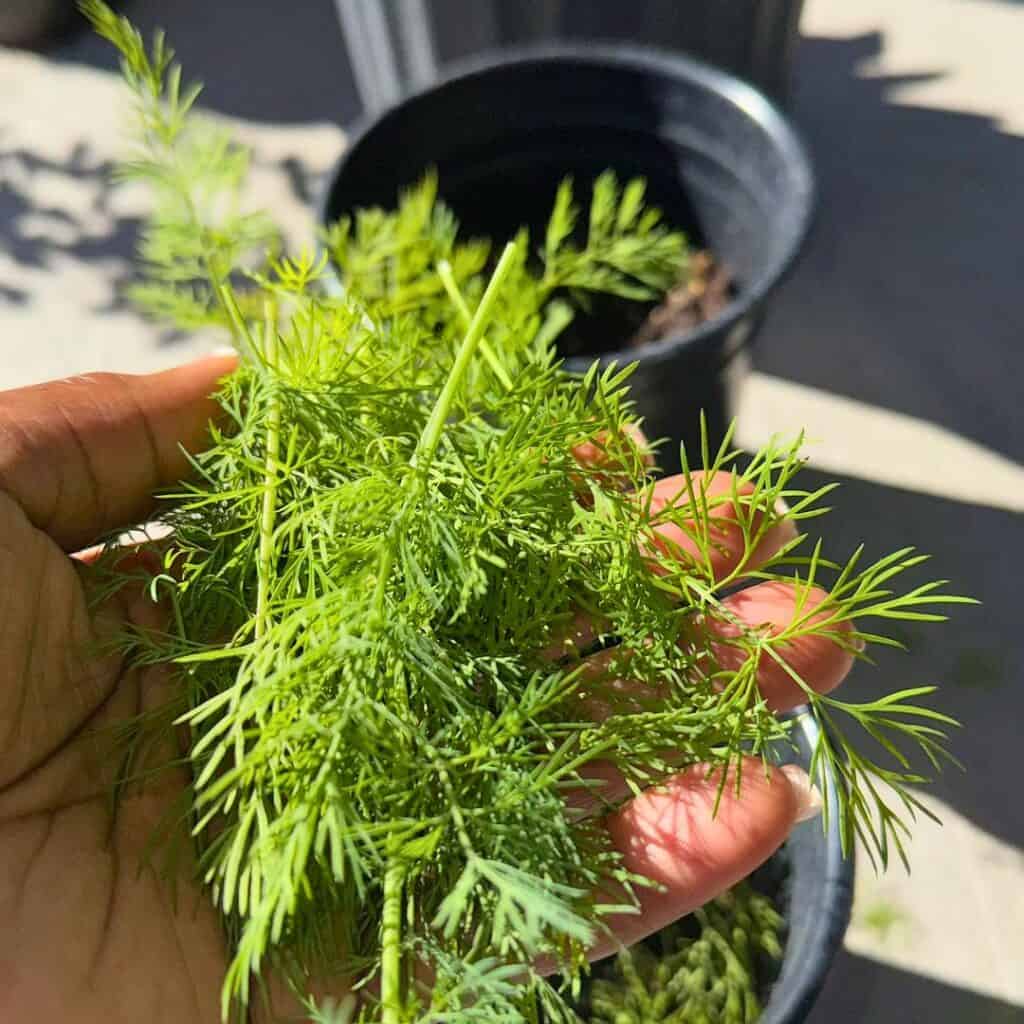
8) Use a sharp pair of scissors to harvest dill leaves
I always reach for a sharp pair of scissors when I’m harvesting dill. Sharp blades make a clean cut and keep the plant happy. Dull scissors just crush stems and slow down new growth.
Before I start, I make sure my scissors are clean and dry—it’s a quick wipe with rubbing alcohol, nothing fancy. That way, I’m not spreading anything nasty from one plant to another.
I like to snip the outer leaves first, leaving the center to keep growing. I cut just above a leaf node so new shoots can pop up.
If I only need a little, I’ll just take a few sprigs. For a bigger harvest, I trim several stems but always leave enough so the plant can bounce back. Never cut more than a third of the plant at once.
I usually harvest in the morning once the dew has dried but before the sun gets too intense. The leaves are at their tastiest then. If I wait too long, the oils that give dill its scent can fade.
After cutting, I gently rinse and pat the leaves dry. Too much moisture can make them spoil fast. I store the fresh dill in a glass of water or wrap it in a damp paper towel in the fridge.
Using sharp scissors just makes the whole thing easier and cleaner. Keeps my dill plants healthy and my harvests fresh for whatever I’m cooking.
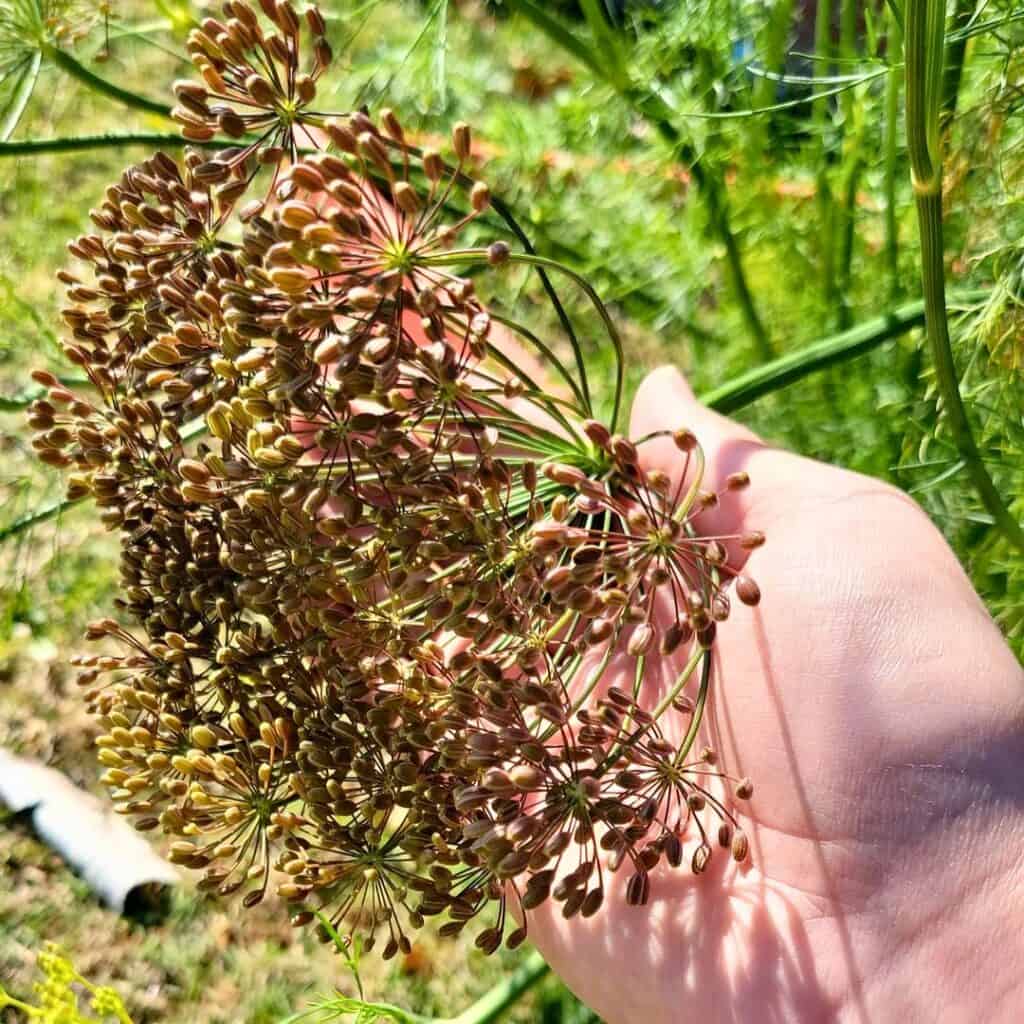
9) Harvest dill seeds when they turn brown and dry
I wait until the seed heads turn brown and dry before I collect them. That’s how I know the seeds have fully matured and are ready to use or store.
If I pick them too early, they don’t dry well or keep their flavor. So, I always cut the seed heads from the plant on a dry, sunny day.
Moisture’s a real enemy here—it can cause mold—so I make sure everything is totally dry first. I usually hold a paper bag underneath the seed heads to catch any seeds that fall.
After cutting, I hang the seed heads upside down in a warm, airy spot. I either keep them inside a paper bag or over a tray to catch any seeds that drop during drying.
It usually takes about a week for them to dry. When the seeds feel crisp and break easily between my fingers, I rub the heads gently to release them.
I pick out any leftover stems or plant bits before storing. Clean seeds just last longer and taste fresher.
For storing, I use a sealed glass jar or paper envelope. I tuck them away in a cool, dark place, far from sunlight and moisture.
This keeps their flavor for months. Sometimes, I save a handful to plant next season—dill is notorious for self-seeding, but I like to have some on hand just in case.
Freshly harvested seeds are also fantastic as a spice. I toss them into soups, pickles, and breads—the flavor is mild but pretty distinct.
Having my own homegrown dill seeds feels surprisingly rewarding. My kitchen always has a little hit of fresh flavor.
10) Dry dill seeds in a warm, airy place
I like to collect dill seeds once the flower heads turn brown and dry. I cut the seed heads carefully and drop them into a paper bag to catch any loose seeds.
Paper bags are better than plastic since they let air move through. Then I hang the bags upside down in a warm, airy spot.
A dry porch, a sunny windowsill, or any well-ventilated room works fine. I just make sure the area stays dry so there’s no mold.
The seeds usually dry out in about one to two weeks. Every few days, I give the bags a gentle shake to help the seeds fall off the stems.
When I hear them rattle, that’s my sign they’re ready. Once dry, I remove the stems and store the seeds in airtight jars.
I stash them in a cool, dark place so they last longer. Proper drying and storage really keep that flavor locked in.
I like to label each jar with the harvest date. It helps me use up the older seeds first and reminds me when it’s time to plant more.
Drying dill seeds this way keeps their flavor strong and makes them easy to use—whether I’m cooking or planting.
11) Rotate dill planting spots each year to prevent pests
I always move my dill plants to a new spot each year to keep the garden healthy. This little habit helps break the life cycle of pests that might be lurking in the soil after the season ends.
It also cuts down on diseases building up in one spot. Whenever I plant dill in the same place too often, I notice weaker growth and more insect problems.
Pests like aphids and caterpillars seem to remember where they found food last time. Rotating where I plant keeps them guessing and helps protect my herbs.
I usually stick to a three-year rotation plan. That means I don’t plant dill or other herbs from the same family—like parsley or cilantro—in the same bed for at least three years.
This gives the soil a chance to recover and stay rich in nutrients. Changing locations also helps balance soil nutrients.
Dill uses certain minerals that run low if I plant it in the same spot every year. By rotating, I let the soil rest and rebuild what the plants took.
If space is tight, I use containers or raised beds to make rotation easier. I just move the pots or swap out the soil each season.
It might sound like extra work, but honestly, it helps me grow stronger, healthier dill with way fewer pest issues.
Rotation isn’t just for big gardens, either. Even in small spaces, a little planning goes a long way. Keeping dill on the move each year makes a big difference in how fresh and flavorful my harvest turns out.
Understanding Dill Growth Cycles
I pay attention to how dill grows so I can get the best flavor and steady harvests. Knowing when to plant and how the plant develops helps me plan for fresh leaves and seeds all season.
Optimal Planting Times
I start dill when the soil warms to about 60°F (16°C). That’s usually early spring after the last frost.
If I’m in a warmer region, I’ll plant again in late summer for a fall crop. Dill likes full sun and well-drained soil.
I avoid moving it once it sprouts, since dill has a long taproot that hates being disturbed. I sow seeds directly in the garden, spacing them about 12 inches apart.
To keep a steady supply, I plant new seeds every 2–3 weeks. That way, I always have fresh leaves coming, even as older plants start to flower.
I also make sure to water regularly, but I never let the soil stay soggy.
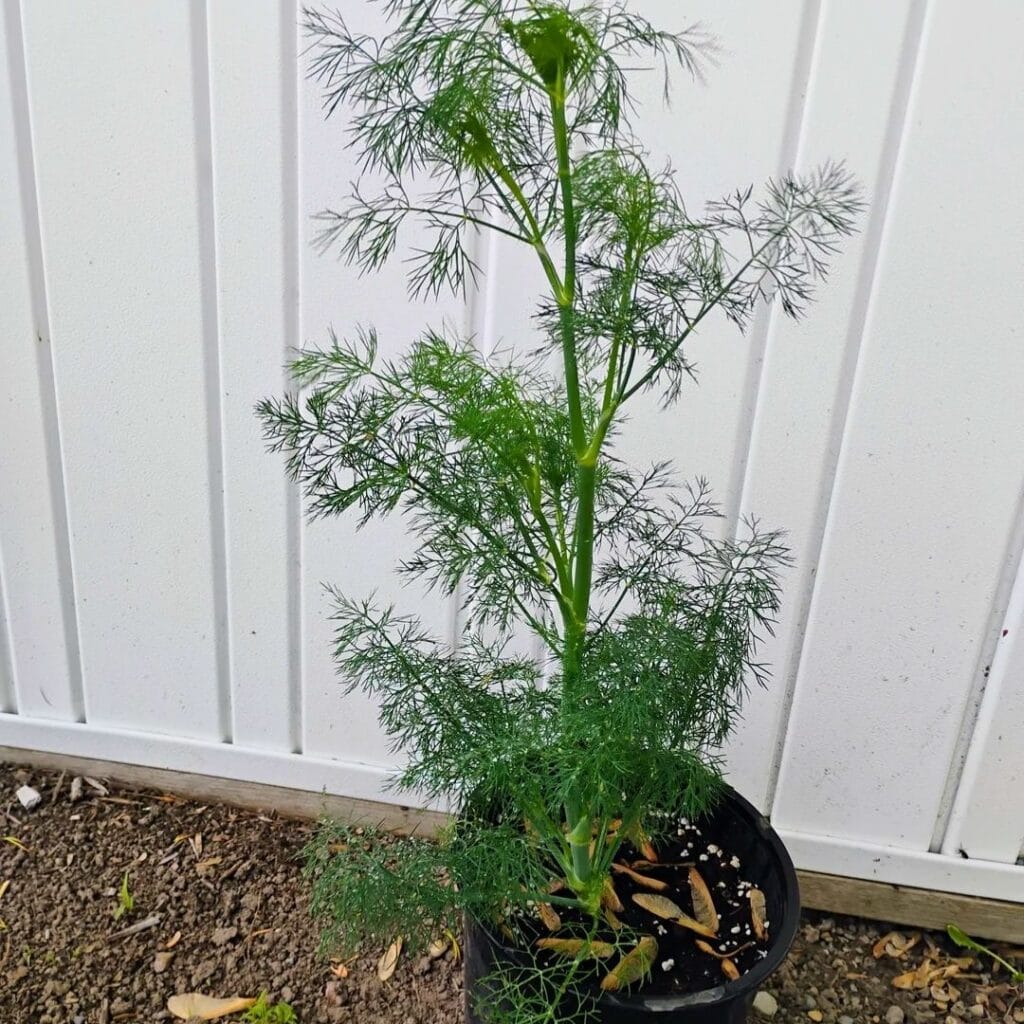
Key Stages of Dill Development
Dill grows through three main stages: seedling, vegetative, and flowering. Each stage needs a slightly different approach.
During the seedling stage, I keep the soil moist and thin any crowded sprouts. Once the plants reach about 6 inches tall, they enter the vegetative stage and start putting out those soft, flavorful leaves.
That’s when I harvest the most for cooking. When the plant starts forming flower heads, it’s moving into the flowering stage.
At this point, leaf growth slows and the plant shifts to producing seeds. I let a few plants mature fully so I can collect seeds for spice or replanting.
If I trim flower heads early, I can delay seeding and get more leaves for longer. That little trick helps me enjoy fresh dill deeper into the season.
Common Challenges and Fresh Flavor Solutions
I focus on keeping my dill plants healthy and flavorful by managing heat stress and harvesting carefully. These steps keep the leaves tender and full of taste, not bitter or dry.
Preventing Bolting in Warm Weather
When the weather heats up, dill can bolt—it starts flowering and loses flavor fast. I plant dill in cooler spots or partial shade to slow things down.
Regular watering keeps the soil moist but not soggy. I’ve learned that consistent moisture and cooler soil help a lot.
A layer of mulch helps regulate temperature and keeps roots from drying out. If I spot flower buds forming too early, I pinch them off to keep the plant producing leaves longer.
I also stagger my planting every few weeks so there’s always some young, leafy dill to pick. Here’s what helps me most:
Maintaining Flavor During Harvest
I pick dill early in the morning when the oils are at their peak. The leaves just smell fresher and taste brighter then.
I use clean scissors to cut only what I need so the rest of the plant keeps growing. To keep the flavor, I avoid washing the leaves until I’m ready to use them.
Extra moisture can make them wilt or lose aroma. If I need to store dill, I put the stems in a glass of water and cover them loosely with a plastic bag in the fridge.
That keeps them fresh for several days. For longer storage, I freeze chopped dill in small portions.
Drying works too, but honestly, frozen dill keeps more flavor for soups and sauces later.
Frequently Asked Questions
I’ve learned that timing, watering, fertilizing, harvesting, and storing all play a big role in keeping dill flavorful and healthy. Paying attention to these details helps me enjoy fresh dill for months.
What’s the best time to plant dill for a continuous supply?
I plant dill every 2 to 3 weeks during spring and early summer. This way, new plants are always coming up as older ones finish.
I make sure each batch gets at least 6 hours of sunlight daily.
How often should I water my dill plants?
I water my dill when the top inch of soil feels dry. Too much water can cause root rot, so I steer clear of waterlogging.
Consistent, light watering keeps the plants strong and flavorful.
Can you give me tips on fertilizing dill for optimal growth?
I use a balanced, all-purpose fertilizer once a month during active growth. Dill doesn’t really need heavy feeding, so I keep it light.
Over-fertilizing can reduce flavor and make the plants leggy.
What are the signs that my dill is ready to be harvested?
I look for bright green leaves and stems about 8 to 12 inches tall. The best time to pick is just before the flowers open—that’s when the flavor is strongest.
How do I properly harvest dill without damaging the plant?
I use scissors to clip the outer leaves first, leaving the inner ones to keep growing. That way, the plant keeps producing fresh leaves for weeks.
What are some effective ways to store fresh dill?
I usually wrap fresh dill in a damp paper towel, then tuck it into a sealed bag before popping it in the fridge. It seems to keep things fresher that way.
If I want it to last even longer, I’ll chop up the dill and freeze it in ice cube trays with just a splash of water. That way, I’ve always got some handy for cooking—super convenient, honestly.
Note: Some images in the articles are sourced from Reddit and Other Platforms For Reference Purpose.