11 Tips For Growing And Harvesting Thyme Like A Pro
I really enjoy growing herbs, but thyme always seems to be the one that’s both easy and super rewarding. Those tiny leaves? They pack such a punch—aroma and flavor that just make food taste extra homemade.
If you learn how to grow and harvest thyme the right way, you’ll get plants that last and taste amazing.
So, here’s what’s worked for me. From picking the right soil and sunlight to pruning and storing your harvest, I’ve got some straightforward steps that’ll help your thyme thrive.
By the end, you’ll probably feel way more confident about caring for your thyme and keeping it healthy year after year.
Please note: Simplify Plants is reader-supported. As an Amazon Associate, I earn from qualifying purchases made by our readers with no extra cost added to you all! Some links in the post are affiliate links and I get a commission from purchases made through links in the post.
1) Choose well-draining soil for thyme

First thing I always do: check if my soil drains well before even thinking about planting thyme.
Thyme really hates soggy roots, so water needs to run through the soil quickly, not just sit there. If the soil stays wet, you’ll probably end up with root rot—and the plant just won’t grow right.
I usually mix in some sand or small gravel with my garden soil to help with drainage. It keeps everything loose and lets the roots breathe.
A gritty soil texture is actually what thyme likes best—it’s just how it grows in the wild.
If I’m planting in pots, I always make sure there are drainage holes at the bottom. I use a light potting mix for herbs or succulents, which keeps water from pooling.
To test if my soil is ready, I’ll water a small spot and see how fast it drains. If it soaks in within a few seconds, that’s perfect. If it lingers for more than a minute, I just add more sand or perlite.
Well-draining soil really does make thyme stronger and tastier. The plant can focus on making healthy leaves instead of fighting too much moisture.
I steer clear of heavy clay soil since it holds onto water. If that’s all I’ve got, I’ll just use a raised bed or big pots so I can control the soil mix.
Letting the top inch dry out before watering again is a habit that’s saved my thyme more than once. It keeps the roots happy.
Choosing the right soil might seem like a minor detail, but honestly? Healthy soil means healthy thyme. That’s where it all starts.
2) Plant thyme in full sun

I always make sure my thyme gets plenty of sunlight. This herb just loves warmth and light—at least 6 to 8 hours of direct sun a day is the sweet spot.
If thyme doesn’t get enough sun, it gets thin and a bit sad-looking instead of staying full and robust.
When I plant thyme, I look for a bright, open spot in the garden or out on the patio. Indoors, it goes right by a south-facing window where it can soak up the most daylight.
Good light really helps the plant stay compact and flavorful.
I’ve noticed thyme grown in full sun has a much stronger aroma. The heat and light boost those natural oils that make thyme so fragrant.
That’s why I never put it in a shady spot or behind taller plants.
If it’s blazing hot outside, I might give my thyme a bit of afternoon shade, just so it doesn’t get scorched. Still, I make sure it gets most of its sun earlier in the day.
Whether it’s in the ground or in a pot, I always stick with this: more sun, better thyme. It really pays off with stronger plants and bigger harvests.
3) Space thyme plants 12-24 inches apart
I never crowd my thyme plants. Spacing them 12–24 inches apart gives them room to breathe and grow.
Good spacing keeps air moving, which helps prevent mildew and other moisture problems.
When thyme plants are too close, they end up fighting for sunlight, water, and nutrients. I’ve seen crowded plants stay stunted and yield fewer leaves.
I usually go with 18 to 24 inches apart if I want them to really spread out. If I’m tight on space, 12 inches is fine for a more compact look.
The variety and my garden space honestly decide the final spacing.
Proper spacing makes harvesting so much easier. I can get to each plant without stepping on others or breaking stems.
If I’m growing thyme in pots, I only plant one per pot or use a really big container for several, but with plenty of room between them.
That way, they don’t crowd each other and each gets enough light.
By keeping some distance between plants, I’ve found they’re just healthier and happier. Better airflow, healthier leaves, and a bigger harvest—that’s what you want.
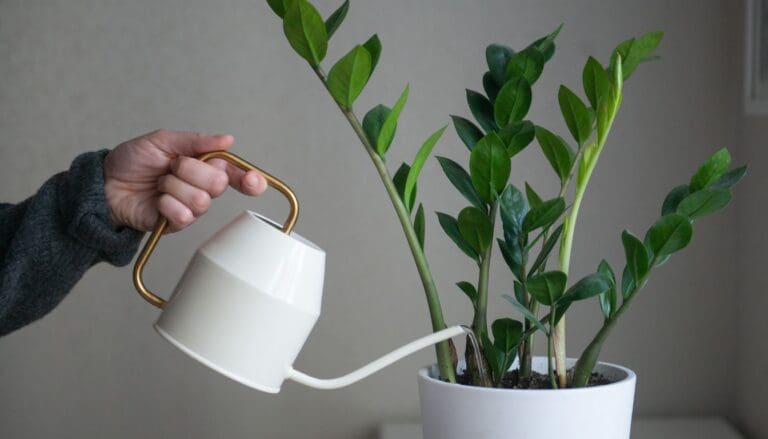
4) Water thyme sparingly once established
Once my thyme gets going, I really cut back on watering. Thyme is pretty tough and prefers dry soil over soggy feet.
Overwatering is the fastest way to get root rot, and that’s a headache nobody wants.
I always wait until the top inch of soil feels dry before watering. It helps the roots dig deeper and get stronger.
When I do water, I just soak the soil lightly—never a flood.
If it’s hot out, sure, I’ll check the thyme more often, but I still avoid watering too much. The plant handles a little dryness better than too much wetness.
Consistent, light watering is the way to go for healthy thyme.
For pots, I double-check that each one has holes in the bottom. Good drainage is a must to keep the soil light and disease-free.
Since I started watering less, my thyme’s flavor and fragrance have gotten noticeably stronger. The leaves stay firm, and the plant looks really perky.
It’s a small change, but it keeps my thyme thriving all season.
5) Prune thyme regularly to encourage growth

I’ve found that regular pruning is key for healthy, bushy thyme. Trimming often helps it grow thicker instead of tall and scraggly.
I like to start pruning once my thyme hits about 6 inches tall. Clean scissors or garden shears are a must, and I always cut just above a leaf node.
That’s where new stems will pop out.
I try not to take off more than one-third at a time—otherwise, the plant gets stressed and slows down.
A quick trim every few weeks is better than a drastic haircut.
After the first bloom, I’ll prune off any spent flowers. That way, the plant puts its energy into making new leaves, not seeds.
It stays greener and keeps producing all season.
I also snip out any dead or woody stems to keep the air moving around the plant. Good airflow means less mildew and a neater look.
When I harvest, it’s basically the same as pruning. I cut stems just before they flower, since that’s when the flavor’s best.
That way, I get tasty herbs and the plant bounces back stronger.
Keeping up with regular pruning has made my thyme so much more compact and healthy. It’s a simple habit, but wow, it makes a difference in new growth.
6) Harvest thyme in the morning for best flavor
I always try to pick my thyme early in the morning, after the dew dries but before the sun gets too strong.
That’s when the essential oils are at their peak, so the flavor and aroma are just better.
If I wait till later in the day, the scent isn’t as intense. The heat seems to make some of the oils disappear.
Morning harvests really make a difference.
I use clean scissors to snip a few inches from the top of each stem, but I never cut too close to the woody part. That way, the plant keeps growing.
Regular, gentle trimming keeps new growth coming in.
After I cut, I lay the sprigs out on a clean towel or drying rack—definitely out of direct sun so they dry slowly and keep their flavor.
Once they’re dry, I store the leaves in a jar, away from heat and light.
This little morning routine keeps my thyme fresh and tasty for whenever I need it. It’s a small effort for big flavor.
7) Use sharp scissors to snip thyme stems

I always reach for sharp scissors when it’s time to harvest thyme. Dull blades just crush the stems and can hurt the plant.
A clean cut helps thyme stay strong and healthy.
I snip stems just above a leaf node, since that’s where new growth will show up.
It’s such a simple trick, but it really does keep the plant full and bushy.
Before I start, I make sure my scissors are clean and dry—dirty tools can spread disease. A quick wipe with rubbing alcohol does the trick.
I only take a few stems at a time, never more than one-third of the plant.
That way, thyme keeps bouncing back with new leaves.
If I just need a little, I cut from the outer edges since those stems are usually older. The inner stems keep the plant growing.
After I cut, I shake off any dirt or bugs and, if I’m drying them, hang the stems in a cool, airy spot.
Sometimes, I just toss them straight into whatever I’m cooking.
Using sharp scissors makes the whole process fast and easy. It keeps my thyme healthy and productive.
A good cut today means fresh herbs tomorrow.
8) Avoid harvesting more than one-third of the plant at once
I always remind myself not to overdo it with harvesting. Taking more than one-third of the plant at once can really weaken thyme and slow down new growth.
The plant needs enough leaves to keep photosynthesizing and stay healthy.
When I trim, I just take the top few inches from each stem. This kind of light harvest keeps the plant bushy and full, and it doesn’t stress it out.
If I need more thyme, I wait a couple of weeks before cutting again. Giving the plant time to recover really helps it stay strong and keep producing.
I also avoid cutting too close to the woody base. Leaving some green growth on each stem helps the plant bounce back faster.
By taking small, careful harvests, my thyme keeps going strong. It’s a simple habit, but it really keeps my plants healthy and productive all season.
9) Dry thyme by hanging bundles upside down

I like to dry my thyme naturally—it just seems to keep the flavor strong and the color pretty vibrant. The process is honestly simple and you don’t need any fancy equipment.
After I harvest, I gather small bunches of thyme stems and tie them up with string or sometimes just a rubber band. I try not to make the bundles too thick so air can move around.
I hang the bundles upside down in a warm, dry place with decent airflow. A dark spot, like a pantry or even a shed, works best since sunlight can really fade those leaves.
It usually takes one to two weeks for the thyme to dry out completely. I check the bundles every few days to make sure they’re drying evenly and not getting moldy—moldy thyme is just not it.
When the leaves feel crispy and crumble easily, that’s my sign they’re ready. I gently strip the leaves from the stems and stash them in airtight jars, away from heat and light.
Keeping the dried thyme sealed helps it stay fresh for months. I love having my own herbs ready to grab for cooking, especially in the middle of winter.
10) Store dried thyme in an airtight container
I always make sure my dried thyme stays fresh by keeping it in an airtight container. Air and moisture are the enemies here, so sealing it tight keeps the flavor and aroma locked in.
I like using glass jars with tight lids—they don’t hold onto odors from anything else. Plastic works too, as long as it closes well.
My thyme jars live in a cool, dark place like a pantry or cupboard. Direct sunlight will fade the color and zap the flavor, so I avoid that.
Before sealing, I double-check that the thyme is completely dry. Even a little moisture can cause mold, and nobody wants that. If I’m unsure, I’ll just spread it out for another day to air dry.
Labeling the jar with the date helps me keep track of when I dried it. I try to use it up within a year, though sometimes it disappears faster.
When I open the jar, that earthy scent tells me it’s still good. If it smells weak or looks dull, I know it’s time for a fresh batch.
Storing thyme properly just makes life easier. I can grab a pinch anytime and know it’ll still taste fresh and flavorful.
11) Pinch back flowering thyme to extend leaf production

When I see my thyme start to bloom, I pinch back the flowers right away. The plant puts so much energy into blooms and seeds, which means fewer fresh leaves for me.
By removing the flowers early, I help my thyme keep producing more flavorful leaves for longer. I use my fingers or small scissors to snip off the flower tips just above a pair of leaves.
It takes only a few minutes and keeps the plant looking neat. I try to do this often during the growing season so the thyme stays full and bushy.
After I pinch back the flowers, I notice new shoots start growing from the sides. This makes the plant thicker and gives me more leaves to harvest.
Regular trimming encourages steady growth and helps prevent the stems from getting too woody. I also make sure to water lightly after trimming, just to reduce stress on the plant.
A bit of water and sunlight help thyme bounce back fast. I avoid cutting too much at once, since leaving some leaves helps the plant keep making food through photosynthesis.
If I want a few flowers for the bees or just for decoration, I let one or two stems bloom and pinch the rest. This way, my thyme stays productive and I still get to support pollinators.
It’s a simple habit, but it really makes a difference in how long my thyme stays lush and useful.
Understanding Thyme Varieties
I’ve learned that not all thyme plants are the same. Each variety has its own look, flavor, and best use in the garden or kitchen.
Knowing these differences helps me grow healthier plants and pick the right type for my space.
Common Types of Thyme
There are a lot of thymes out there, but a few really stand out for home gardeners. Common thyme (Thymus vulgaris) is the classic one—it grows well in sunny, dry spots and has small gray-green leaves.
The flavor is strong and earthy, which makes it perfect for cooking. Lemon thyme is another favorite of mine; it smells citrusy and tastes a bit brighter.
I like tossing it into fish dishes or teas. Plus, its yellow-green leaves add a pop of color.
Creeping thyme is a low grower that forms a dense mat, great for ground cover or between stepping stones. It’s tough and can handle some foot traffic.
Each type brings something different, so I like mixing them up to add variety to my garden.
Choosing the Right Thyme for Your Garden
When I pick thyme for my garden, I think about climate, soil, and purpose. Common thyme loves hot, dry areas, while lemon thyme prefers slightly cooler spots with good drainage.
If I want to fill gaps between stones or make a fragrant path, I go for creeping thyme. For cooking, I stick with common or lemon thyme because those have the best flavor.
I also pay attention to sunlight. Thyme does best in full sun, but some types can handle a bit of shade. Well-drained, sandy soil keeps the roots healthy and helps prevent rot.
Choosing the right thyme is all about matching the plant’s needs to what my garden can offer. With the right variety, I get strong growth, steady harvests, and a garden that smells amazing all season.
Best Practices for Soil and Watering
I’ve learned thyme does best when its roots stay healthy and dry—soggy soil is a no-go. The right soil and watering habits make all the difference in how strong and tasty the plants end up.
Ideal Soil Conditions
I always start with well-draining soil because thyme just hates sitting in water. I mix in sand or perlite to help with drainage.
A slightly alkaline pH (6.5–8.0) seems to work best for thyme’s growth and flavor. Before planting, I loosen the top few inches of soil so roots have room to spread.
I avoid heavy clay soils since they hold too much moisture. For pots, I use a light potting mix labeled for herbs or cacti.
To give the plants a little boost, I add a bit of compost or aged manure—but not too much, since too much organic matter can hold water and cause root rot.
I check the soil texture by squeezing a handful; it should crumble, not clump. Here’s a quick guide:
| Soil Type | Drainage | pH Range | Additives |
|---|---|---|---|
| Sandy Loam | Excellent | 6.5–8.0 | Compost, Lime |
| Clay | Poor | 6.0–7.0 | Sand, Perlite |
| Potting Mix | Good | 6.5–7.5 | Perlite, Compost |
Watering Frequency and Techniques
I water thyme only when the top inch of soil feels dry. Overwatering is probably the most common mistake. Thyme prefers to stay on the dry side, so I let the soil breathe between waterings.
In hot weather, I’ll water once or twice a week, depending on how fast the soil dries. I always water at the base of the plant, not the leaves, to avoid mildew.
For potted thyme, drainage holes are a must. I empty saucers after watering so roots don’t sit in water.
Early morning watering helps the plant soak up moisture before it gets too hot. I’ve found that consistent but light watering keeps thyme compact and flavorful.
When in doubt, I usually wait another day before watering again.
Frequently Asked Questions
I’ve noticed thyme thrives with plenty of sunlight, good drainage, and just enough care. Paying attention to planting time, watering habits, soil quality, and pruning really makes a difference in how healthy and productive the plants get.
What’s the best time of year to plant thyme for optimal growth?
I plant thyme in spring after the last frost. The soil warms up and the plants have time to get strong before summer.
In warmer spots, I can also plant in early fall so the roots settle in before winter.
Can you share some effective techniques for watering thyme plants?
I water thyme sparingly once it’s established. The soil should dry out between waterings—thyme really dislikes soggy roots.
I use a light soak at the base instead of overhead watering to keep the leaves dry and healthy.
How do I know when my thyme is ready to be harvested?
I harvest thyme when the stems are firm and the leaves are full and aromatic. The best time is right before it blooms since the flavor is strongest then.
I snip small sprigs rather than cutting too much at once.
What are the common pests to look out for when growing thyme, and how can I protect my plants?
I keep an eye out for aphids and spider mites. A quick rinse with water or a gentle spray of insecticidal soap usually keeps them in check.
Good air flow around the plants helps prevent pest problems, too.
Could you suggest the ideal soil composition for cultivating healthy thyme?
I use well-draining soil with sand or gravel mixed in. Thyme doesn’t like heavy or wet soil at all.
A slightly alkaline to neutral pH helps the plants absorb nutrients better.
Are there any tips for pruning thyme to encourage fuller growth?
I like to prune thyme pretty often—it just seems to help it stay bushy and healthy. Usually, I snip off the top couple of inches, especially after it flowers or if the stems start looking a bit woody.
Honestly, this simple trimming encourages new shoots to pop up and keeps the plant from getting too leggy.
Note: Some images in the articles are sourced from Reddit and Other Platforms For Reference Purpose.