10 Reasons Why Your Peace Lily Is Not Growing and How to Fix Them Fast
Peace lilies are a favorite among houseplant lovers—they look lovely and, at first glance, seem pretty forgiving. But when yours stops growing or just sits there looking sad, you can’t help but wonder what you’re missing.
The most common reasons your peace lily isn’t growing include poor lighting, watering issues, wrong soil conditions, lack of nutrients, temperature stress, pests, or simply being root-bound in its pot.
Thankfully, most of these problems are pretty fixable once you know what to look for.
Let’s dig into the main reasons peace lilies hit pause on growth and how you can help yours bounce back. From lighting and watering to soil and sneaky pests, you’ll get a clearer sense of what your plant actually needs.
Please note: Simplify Plants is reader-supported. As an Amazon Associate, I earn from qualifying purchases made by our readers with no extra cost added to you all! Some links in the post are affiliate links and I get a commission from purchases made through links in the post.
Understanding Peace Lily Growth Essentials
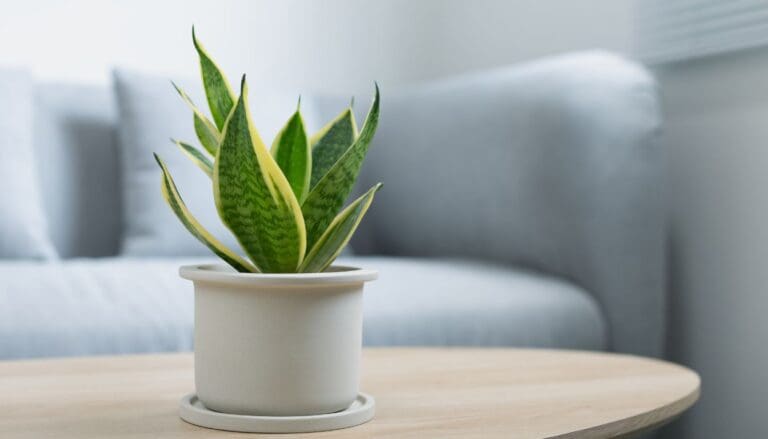
Peace lilies need a sweet spot of light, water, and humidity to be truly happy. They grow in phases, starting out slow and picking up speed as they mature.
A lot of folks expect peace lilies to shoot up quickly, but the reality is, they’re not exactly speed demons.
Basic Growth Requirements for Peace Lilies
Indirect light is where peace lilies shine. I’ve had the best luck keeping mine about 6 to 8 feet from a window or tucked in rooms where sunlight is filtered.
Direct sun? That’s a no-go. The leaves end up scorched and growth just stalls.
Water is a big deal for these plants. I water when the top inch of soil feels dry—just stick your finger in and check.
They like the soil to stay a bit damp, but never soggy. Too much water and they’ll sulk.
Since peace lilies come from humid, tropical forests, they’re happiest with humidity above 50%. My own plants get dry tips and slow down if the air is too dry.
A small humidifier can make a huge difference, or try placing your plant in a bathroom with a window for a natural boost.
Temperature matters, too. They prefer it between 65°F and 80°F, and anything below 60°F seems to put them into slow motion.
I make sure to keep mine away from chilly drafts or blasting heaters.
Growth Stages of Peace Lilies
Young peace lilies spend their first 6 to 12 months focusing on roots. Honestly, I don’t expect much action above the soil at this stage.
Once spring and summer hit, you’ll usually see new leaves popping out every couple of weeks if conditions are good.
It takes about 2 to 3 weeks for each new leaf to fully open up.
Older plants—think 3 to 5 years—start producing those classic white flowers. When they bloom, leaf growth slows down since all the energy goes to the flowers.
Winter is just downtime. Growth almost stops, and that’s perfectly normal. I cut back on watering and skip the fertilizer until things warm up again.
Common Expectations Versus Reality
A lot of people expect peace lilies to grow as quickly as pothos or spider plants. Nope, they’re more of a slow-and-steady type.
If you get one or two new leaves a month during the growing season, you’re doing just fine.
Most peace lilies indoors won’t get taller than 1 to 3 feet. Some stay even smaller, around a foot tall. So if yours isn’t turning into a jungle plant, don’t sweat it.
Quick Tip: Jot down when you see new growth—it’s a fun way to track your plant’s natural rhythm.
Flowering is unpredictable. Some peace lilies bloom once a year, some twice, and younger plants might not flower for a couple of years. Not enough light will put flowering on hold, even for mature plants.
They don’t grow year-round. Mine basically take a break in winter, and I’ve learned to just let them rest. Pushing them with extra water or fertilizer during dormancy usually backfires.
Insufficient Light

Peace lilies can survive in low light, but they won’t really grow or look their best without enough brightness.
Consequences of Low Light
When my peace lily isn’t getting enough light, it just kind of hunkers down and tries to survive.
New leaves? Forget about it. The plant just maintains what it’s got.
Stems get floppy and weak in dim rooms. Leaves turn a deeper green, almost like the plant’s trying to squeeze every last drop of light.
Sometimes I’ll even see yellow leaves dropping off.
No flowers, either. Peace lilies need decent light to bloom, so in a dark spot, you might not see those white blooms for ages.
Low light also makes them more sensitive to overwatering. They just don’t use water as fast, so roots can start to rot.
Ideal Light Conditions for Peace Lilies
Bright, indirect light is where peace lilies thrive. I keep mine a few feet from an east or north-facing window—never right on the sill.
Direct sun scorches the leaves. Learned that the hard way after a summer experiment near a south window.
Quick Tip: If you can read a book in the spot during the day without turning on a lamp, your peace lily will probably be happy there.
I don’t fuss over lux measurements, but 10,000 to 20,000 lux is a good ballpark. Mostly, I just look for a spot that feels bright and open, but not sunny.
A sheer curtain can help filter strong afternoon light. I also rotate my plant every so often so it grows evenly.
How to Adjust Lighting in Your Home
Just moving your peace lily a few feet closer to a window can make a world of difference.
If natural light is scarce, I use a simple LED grow bulb in a desk lamp. I keep it about a foot above the plant and run it for 10 to 12 hours a day.
Quick Tip: Look for grow lights labeled “full spectrum”—they’re better for plant growth.
I avoid windowless bathrooms or dark hallways unless I add artificial light. No amount of water or fertilizer can make up for a lack of light.
Mirrors can help, too. I’ve put one on the wall across from a window to bounce extra light onto my plant.
Watering Problems

Watering is probably the trickiest part of peace lily care. Too much? The roots drown. Too little? The plant droops and looks miserable.
Overwatering and Root Rot
I’ve seen plenty of peace lilies suffer from overwatering. If the soil stays soggy, roots can’t breathe and start to rot.
Root rot sets in quickly. Roots go from white and firm to brown and mushy. Sometimes there’s a sour smell coming from the pot.
You’ll notice yellow, droopy leaves that stay limp even after watering. Stems can turn black at the base. Growth just stops because the roots can’t do their job.
Quick Tip: Stick your finger a couple of inches into the soil—if it’s still wet, hold off on watering.
Drainage holes are non-negotiable. If your pot doesn’t have them, it’s time to repot.
If you’re watering more than once a week, chances are it’s too much.
Underwatering and Wilting Leaves
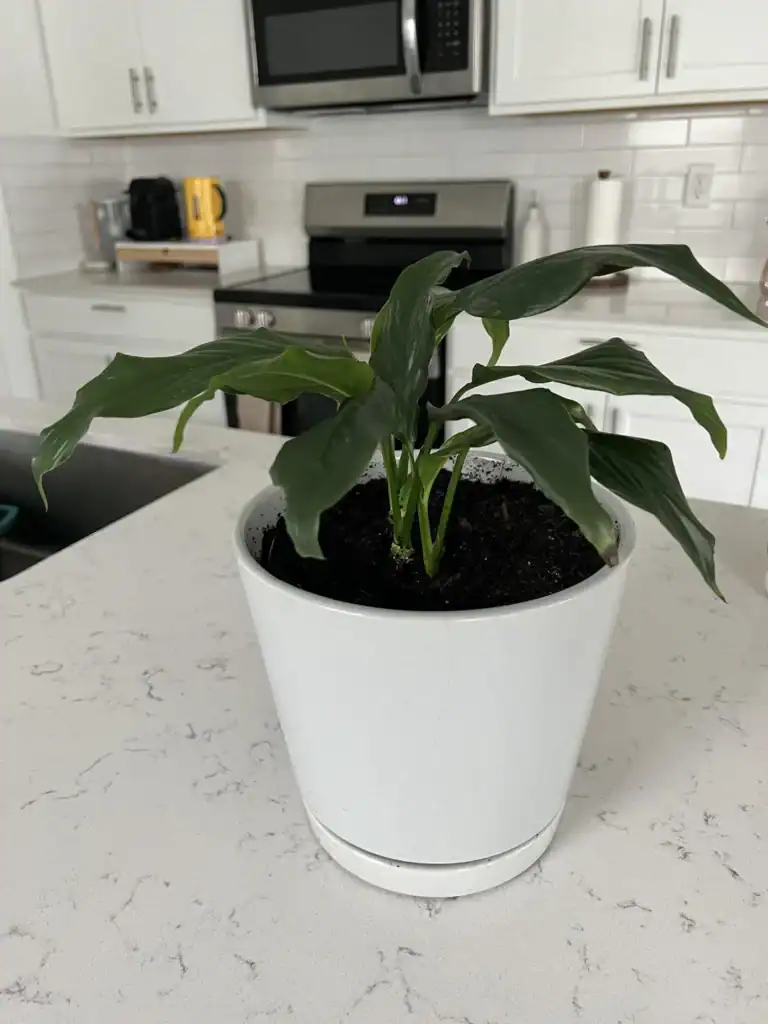
Peace lilies are drama queens when thirsty. The whole plant droops like it’s on its last legs.
But don’t panic—give it a drink and it usually perks up within hours.
Consistent underwatering, though, leads to crispy brown leaf tips and small, stunted leaves. The plant focuses on survival, not growth.
Quick Tip: When the leaves droop, water thoroughly until it drains out the bottom, then let the top inch dry before watering again.
Underwatering is easier to fix than overwatering. Just get back on schedule and trim off any dead tips.
Establishing a Consistent Watering Routine
My peace lilies seem happiest when I check the soil every 5 to 7 days in spring and summer.
In winter, I stretch it out to every 10 to 14 days since growth slows down.
I always use room-temperature water and pour slowly until it drains from the bottom. After about 15 minutes, I dump any water left in the saucer.
Quick Tip: Set a weekly phone reminder to check your plant so you don’t forget.
If the top inch of soil feels dry, it’s time to water. I’ve learned not to let droopy leaves fool me if I just watered recently—sometimes it’s something else.
Incorrect Potting and Soil Conditions
Peace lilies need just the right pot size and a soil mix that drains well. Bad drainage or a cramped pot can mean trouble for the roots.
Signs of Poor Drainage
If my peace lily suddenly stops growing, I check for drainage issues first.
Yellow, mushy lower leaves are an early warning. Sometimes there’s a funky smell coming from the soil.
If water sits on top of the soil for hours or refuses to drain out the bottom, it’s a sign the soil is too compacted or the drainage holes are blocked.
Quick Tip: Tilt the pot after watering—if water doesn’t flow out easily, you need to fix your drainage.
Choosing the Right Pot Size
A too-small pot means roots get crowded and can’t absorb enough water or nutrients. I’ve seen roots poking out the bottom or circling the pot when it’s time to repot.
Too big, though, and the extra soil holds water for too long, which can also cause root rot. I go up just 1 or 2 inches wider than the root ball when repotting.
I like to check the roots every spring by gently sliding the plant out. If they’re packed tight, it’s time to size up.
Quick Tip: Always pick pots with drainage holes, no matter the material—plastic, ceramic, terra cotta, whatever.
Selecting Proper Soil Mixes
Regular garden soil is too heavy for peace lilies. I use a mix that’s light and drains well but holds enough moisture.
Peat moss or coco coir mixed with perlite or orchid bark works great. I usually go with two parts peat to one part perlite.
Store-bought indoor potting mixes labeled for tropical plants are usually fine, but sometimes I add extra perlite if it feels dense.
I steer clear of mixes with added fertilizer. Peace lilies are sensitive to salts. The soil should feel fluffy, not clumpy.
Quick Tip: If your potting mix feels heavy, toss in a handful of perlite to lighten it up.
Nutrient Deficiencies
Peace lilies need certain nutrients to grow well, and missing out on even one can bring things to a halt.
Recognizing Key Nutrient Issues
Yellow leaves—especially older ones—usually mean a nitrogen shortage. New growth stays weak and small.
Brown tips and edges? That’s often a potassium issue. The leaves might also lose their shine.
Phosphorus deficiency shows up as slow growth and dark green or purplish leaves. Sometimes the plant won’t flower at all.
Quick Tip: Check the oldest leaves first—deficiencies tend to show up there before hitting new growth.
Magnesium problems create yellow patches between veins, while iron deficiency hits the youngest leaves and looks similar.
Fertilizer Types and Usage
I stick with a balanced liquid fertilizer—something like 20-20-20—diluted to half strength. I use it every 6 to 8 weeks in spring and summer.
No need to fertilize in fall or winter. The plant slows down and extra nutrients just go to waste.
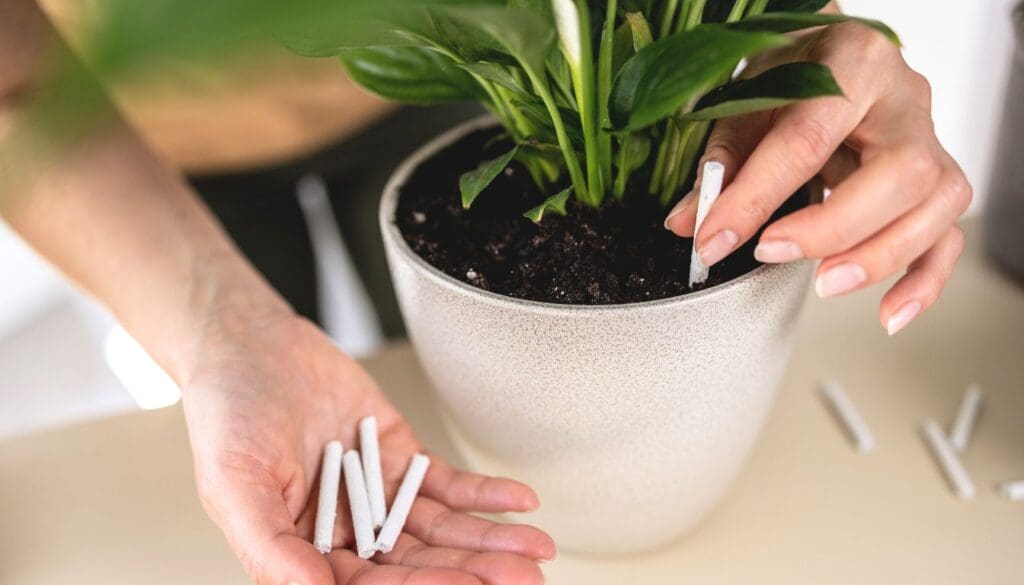
Slow-release granules are an easy option if you don’t want to fuss with mixing. Just sprinkle them on every couple of months during the growing season.
Quick Tip: Always water before you fertilize—dry roots and fertilizer don’t mix.
The Impact of Overfertilization
Too much fertilizer can fry your peace lily. Brown, crispy tips and a white crust on the soil mean it’s time to ease up.
Overfeeding can burn the roots and actually block water and nutrient absorption. It’s a frustrating cycle—plant looks worse, so you add more food, and things just get uglier.
If you’ve gone overboard, flush the soil by running water through the pot for several minutes. Skip fertilizer for a few months and let the plant recover.
Quick Tip: Less is more with peace lilies—they’re light feeders and do better with a gentle touch.
Temperature and Humidity Challenges
Peace lilies need steady warmth and a decent amount of moisture in the air to really thrive.
Cold drafts, sudden temperature swings, and dry air? All of these can slow growth or bring it to a complete stop.
How Temperature Affects Growth
Peace lilies really thrive when temperatures sit between 65°F and 80°F. They’re not fans of the cold at all.
If things dip below 60°F, I’ve noticed my plant just stops growing and the leaves get droopy. The roots slow down, struggling to take up water and nutrients, and the whole plant ends up looking pretty sad.
Quick Tip: Keep your peace lily away from air conditioning vents, drafty windows, and exterior doors in winter.
Heat above 90°F isn’t much better. You might see brown edges on the leaves and wilting, even if the soil’s moist. I’ve watched peace lilies near heating vents or in hot, sunny windows end up with scorched leaves and sluggish growth.
Honestly, temperature consistency is more important than hitting some “perfect” number. A steady 68°F is way better than bouncing between 60°F and 85°F every day.
Importance of Humidity for Peace Lilies
Peace lilies come from tropical rainforests where humidity hovers around 50-60%. Most homes, especially in winter, are closer to 30-40%.
Low humidity causes those classic brown tips and edges. The leaves lose moisture faster than the roots can keep up. I’ve watched gorgeous peace lilies get crispy and stop growing new leaves in dry rooms.
Quick Tip: Set your peace lily on a pebble tray with water or group it with other plants to bump up humidity naturally.
Misting helps a bit, but it’s a temporary fix. A small humidifier near the plant works way better if you’re serious about long-term growth. Sometimes bathrooms and kitchens have better humidity if they get enough light.
Managing Fluctuations in Climate
I try to keep my peace lily in a spot where the temperature doesn’t swing more than 10°F between day and night. That stability really lets it put energy into growth instead of just surviving.
Move plants away from windows in winter. Even closed ones let in enough cold to shock the roots. In summer, hot spots near south-facing glass can be a problem too.
Quick Tip: Stick a basic indoor thermometer near your plant. You might be surprised by temperature changes you don’t notice otherwise.
If you use heat or AC, bump up humidity when you turn them on. Both systems dry out the air fast. I run a humidifier from November through March and my peace lilies keep chugging along through winter.
After moving your plant, give it a couple weeks to adjust before deciding if it likes the new spot.
Pest Infestations

Tiny bugs can really slow down or even stop your peace lily’s growth by feeding on the leaves and roots. Let’s look at how to spot these pests, the damage they cause, and how to get rid of them without harsh chemicals.
Identifying Common Peace Lily Pests
The usual suspects I run into are spider mites, mealybugs, aphids, and scale insects. Spider mites are tiny—you’ll probably see their fine webbing under the leaves before you spot the mites. Leaves might look dusty or speckled with little yellow dots.
Mealybugs show up as small white cottony clumps in leaf joints and along stems. They’re easier to see than spider mites but just as annoying.
Aphids are tiny green, black, or brown bugs that cluster on new growth and flower stems. Scale insects look like little brown or tan bumps stuck to stems and leaves—they barely move, so you might mistake them for part of the plant.
Quick Tip: Check under the leaves weekly with a flashlight. Pests love hiding in those dark spots.
Damage Caused by Insects
Pests damage peace lilies by piercing the leaves and sucking out sap. That robs the plant of nutrients and water it needs to grow. You’ll see leaves turning yellow, curling, or getting brown, crispy edges.
Spider mites leave a stippled or bronzed look on leaves. If things get bad, leaves look pale and lifeless. Mealybugs and aphids leave behind sticky honeydew that attracts black sooty mold, which blocks sunlight.
Scale insects cause yellow spots where they feed. If you ignore them, leaves can drop off completely. All these pests weaken the plant so much it just stops making new leaves and flowers.
Natural Methods for Controlling Pests
First thing I do is move the infected plant away from my other houseplants. For mild cases, I’ll wipe the leaves with a damp cloth to get rid of bugs.
A good rinse in the shower works wonders for spider mites and aphids. Make sure you spray the undersides of the leaves—pests love it there. Let the plant dry before putting it back.
If pests stick around, I mix a teaspoon of mild dish soap with a quart of water in a spray bottle. Spray all the leaves and stems, then rinse after a couple hours. Neem oil is another option—just follow the directions and repeat every 5-7 days until the bugs are gone.
Quick Tip: For mealybugs and scale, dip a cotton swab in rubbing alcohol and dab them off instead of spraying the whole plant.
Disease and Fungal Issues

Peace lilies can run into diseases and fungi that slow growth. Root rot, leaf spot, and mildew are the usual problems, and they’ll weaken your plant if you don’t catch them early.
Spotting Signs of Disease
I always check the leaves first if something seems wrong. Brown or black spots with yellow halos usually mean bacterial or fungal leaf spot. Sometimes the spots look wet at first, then get crispy as they dry out.
Wilting leaves when the soil is still moist is often a sign of root rot. If I slide the plant out of its pot, mushy brown or black roots are a dead giveaway. Healthy roots should be white or tan and feel firm.
White powdery patches on leaves mean powdery mildew. A fuzzy gray coating is botrytis blight, which loves damp air and poor circulation.
Quick Tip: Smell the soil—if it’s sour or rotten, there’s probably a bacterial problem below the surface.
Preventing Mold and Mildew
Good airflow is my go-to defense against fungus. I keep my plants spaced out so air can move between them and avoid cramming them in corners. A small fan on low helps if the room feels stuffy.
I only water when the top inch of soil is dry. Wet soil all the time is just asking for root rot. Watering in the morning lets extra moisture evaporate before night.
Keeping leaves dry is important too. I water at the soil, not over the leaves, and if they get wet, I’ll just wipe them down.
Quick Tip: In winter or really humid weather, water less often since soil stays wet longer.
Treating Infections Effectively
I cut off infected leaves right away with clean scissors. That keeps the problem from spreading. Diseased leaves go straight in the trash—not the compost.
For root rot, I trim away all the mushy roots with sterilized shears, then repot in fresh, well-draining soil and a clean pot. I hold off on watering for a few days to let things heal up.
Fungal sprays with neem oil or copper fungicide work for leaf spot and mildew. I follow the package directions, usually spraying every week or so until symptoms clear up. I always treat both sides of the leaves.
Quick Tip: Keep sick plants away from healthy ones for at least two weeks after treating them. Diseases spread fast among houseplants.
Container and Crowding Concerns
Peace lilies need space to grow, but too much or too little room can hold them back. If roots run out of space or the pot doesn’t drain well, your plant will struggle no matter how much you fuss over it.
Symptoms of Root Bound Plants
First thing I check if my peace lily stops growing? The drainage holes. If roots are poking out the bottom or circling inside the pot, it’s probably root bound.
Leaves might look smaller than usual, even if they’re still green. New growth is often stunted or just doesn’t show up. I’ve noticed root-bound peace lilies dry out super fast since there’s more root than soil.
When I pull the plant out, the roots form a tight mass, holding the shape of the pot. Sometimes the soil falls away easily because the roots have taken over. Occasionally, the plant even pushes itself up out of the container as the roots run out of space.
Wilting between waterings gets more frequent, even if I’m sticking to my usual routine.
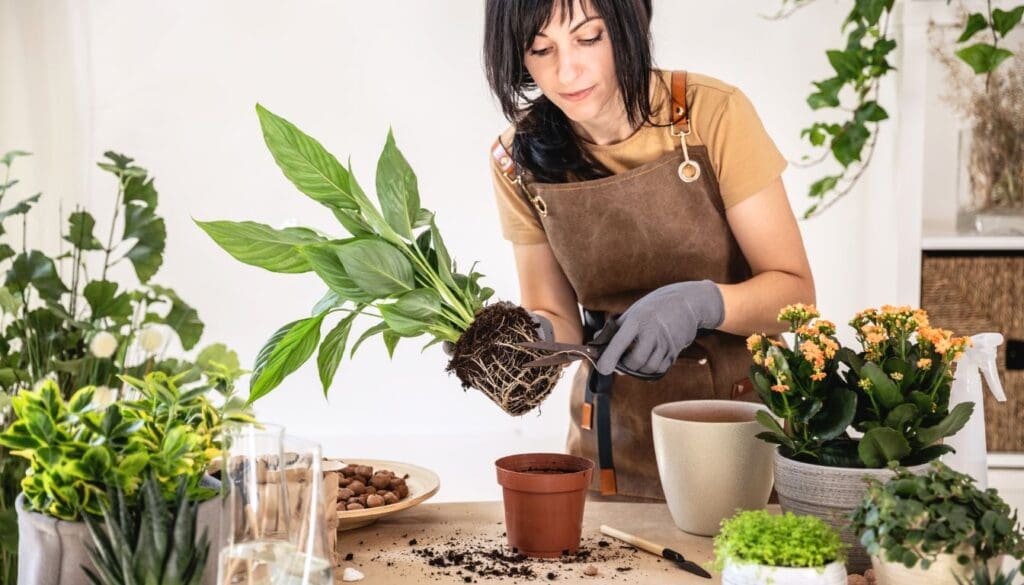
Repotting Tips for Healthy Growth
I pick a new pot just 1-2 inches wider than the current one. Too big, and you risk overwatering since there’s too much soil for the roots to reach.
Quick Tip: Always use a pot with drainage holes at the bottom—peace lilies won’t forgive you if you skip this.
I loosen the root ball with my fingers before placing it in the new pot. If the roots are really tangled, I’ll trim away any dead or mushy ones. Fresh potting mix goes around the sides, and I press it down gently to get rid of air pockets.
The plant should sit at the same depth as before. I water thoroughly after repotting and keep it out of direct sun for a week so it can adjust.
Spring is honestly the best time to repot, since the plant’s about to start growing again.
Environmental Stress Factors
Peace lilies are pretty sensitive, and sudden changes in their environment can completely halt growth. Chemical exposure from everyday products can also do damage without you realizing it.
Drafts and Sudden Temperature Changes
I’ve learned peace lilies hate drafts just as much as they hate cold snaps. They like things between 65-80°F, and anything below 55°F can send them into survival mode.
When cold air hits your peace lily from an AC vent, open window, or drafty door, it stops focusing on new growth. Instead, it’s just trying to hang on. You might see droopy leaves or yellowing tips.
Heat vents cause their own problems. Hot, dry air dries out the leaves faster than the roots can keep up. I always check for sneaky air currents by holding my hand near the plant at different times of day.
Quick Tip: Keep your peace lily at least 3 feet from any heating or cooling vents, exterior doors, and windows you open a lot.
Impact of Chemical Exposure
Household chemicals are sneaky growth stoppers. Cleaning sprays, air fresheners, and even some candles release stuff that coats peace lily leaves and blocks their breathing.
I stopped using aerosol sprays near my plants after noticing brown spots popping up within days. The chemicals settle on leaves and create a film that messes with photosynthesis. Even fabric softeners and dryer sheets can release fumes if your plant sits near the laundry.
Tap water with lots of chlorine or fluoride is another culprit. These minerals build up in the soil and burn roots over time. If your water smells strongly of chlorine, let it sit out overnight before using it.
Quick Tip: Wipe down leaves with a damp cloth every couple of weeks to clear off any chemical residue and help your plant breathe.
Seasonal and Dormancy Effects

Peace lilies naturally slow down in fall and winter. It’s not a problem—it’s just what they do when there’s less light and cooler temps.
During these months, my peace lily might stop putting out new leaves or flowers. Growth can pause almost completely from November through February. The plant’s just saving energy instead of pushing out new growth.
I adjust my care routine when this happens. Quick Tip: Cut back on watering and skip fertilizer during dormancy since the plant isn’t using extra nutrients.
Some folks panic when their peace lily looks exactly the same week after week in winter. That’s totally normal. Once spring rolls around and daylight increases, growth picks up again.
If I’m in a warmer climate or keep my home toasty year-round, I might see less of a slowdown. But most peace lilies still take a break, even in steady conditions.
The key is patience. Don’t try to force growth with extra water or fertilizer during this time—it can actually do more harm than good.
Watch for signs of spring growth—usually little new leaves popping up in the center. That’s when I know it’s time to get back to my regular watering and start feeding again.
Genetic and Plant Age Limitations
Sometimes your peace lily isn’t growing much because it’s already reached its natural size. Different varieties have different maximum heights. Some only get to about a foot tall, while others might reach three feet or more.
If you picked up a small variety like ‘Petite’ or ‘Wallisii’, don’t expect it to turn into a giant. These plants are bred to stay compact. I’ve seen plenty of folks get frustrated waiting for growth that just isn’t going to happen.
Age matters too. Young peace lilies grow faster than older ones. Once your plant hits its full size, growth slows way down. You might only see a few new leaves a year.
Older peace lilies put more energy into maintaining their existing leaves than making new ones. If your plant’s a few years old and not getting any bigger, it’s probably just doing what mature plants do.
Quick Tip: Check the plant tag or look up your variety online to see its expected mature size—you might already be there.
There’s really not much you can do to override genetics. A dwarf variety will never become a standard-sized plant, no matter how perfect your care is. Focus on keeping your peace lily healthy instead of pushing it past its natural limits.
Frequently Asked Questions
Peace lilies really like bright, indirect light, regular watering (but not soggy soil), well-draining potting mix, a bit of fertilizer each month, temperatures between 65-80°F, and some defense against pests like spider mites or aphids. Oh, and don’t forget to snip off dead leaves now and then.
What are the ideal lighting conditions for a peace lily to thrive?
Honestly, peace lilies seem happiest in bright, indirect light. I usually put mine near an east or north-facing window—somewhere with enough light to read by, but not where the sun beams right onto the leaves.
Direct sun will scorch the leaves and make them yellow or brown. If you spot crispy edges, that’s your cue to move the plant further from the window.
They’ll survive in low light, but don’t expect much flowering or fast growth. They’re forgiving, just not miracle workers.
Quick Tip: No blooms? Try moving your peace lily to a brighter spot for a week or two and see what happens.
How often should I water my peace lily, and what are the signs of overwatering?
I usually water when the top inch of soil feels dry. For me, that’s about once a week, but your home might be different—temperature and humidity play a big role here.
Stick your finger in the soil to check before you water. The plant will droop a bit when it’s thirsty, which makes things pretty straightforward.
Try not to let it wilt too often, though. That stresses the plant out.
Yellow leaves at the base? That usually means too much water. The soil should never be soggy or have water pooling on top.
Brown tips can be from overwatering or underwatering, so check the soil first. If it’s wet and the leaves are yellow, it’s time to cut back and make sure your pot drains well.
Quick Tip: Let the plant droop just a little between waterings, then soak it until water drains out the bottom. That helps avoid root rot.
Can you suggest the right type of soil and fertilizer to promote growth in peace lilies?
I go for a well-draining potting mix—something like regular houseplant soil with a handful of perlite or orchid bark thrown in. The roots need moisture but also air, so don’t use heavy garden soil.
Peace lilies really hate compacted, soggy soil.
For fertilizer, I feed mine once a month in spring and summer with a balanced liquid fertilizer, diluted to half strength. A 20-20-20 formula works, but honestly, anything balanced is fine.
Skip the fertilizer in fall and winter. Too much can burn the tips and leave salt in the soil.
Quick Tip: Every few months, flush the soil with plain water to wash out any fertilizer buildup. Your plant will thank you.
What temperature range is best suited for a healthy peace lily plant?
Peace lilies like it warm—65 to 80°F during the day is perfect. They can handle a slight dip at night, but try not to let it fall below 60°F.
Keep them away from cold drafts or heating vents. Sudden temperature swings will stress them out, and you’ll see droopy or brown leaves.
High humidity is a plus, since they’re tropical. If your home is dry, especially in winter, mist the leaves or put the pot on a tray of pebbles and water.
Quick Tip: If it’s cold outside, move your peace lily away from chilly windows at night so it doesn’t get shocked.
How do I identify and treat common pests that may hinder my peace lily’s growth?
Spider mites are tiny and leave fine webbing under the leaves. If the leaves look dusty or speckled with yellow, that’s usually them. I spray them off with water and wipe the leaves down.
Aphids are small green or black bugs that hang out on new growth. They leave a sticky mess behind. I wash them off with soapy water or use insecticidal soap if they’re stubborn.
Mealybugs look like little cotton balls on stems and leaf joints. I dab them with rubbing alcohol on a cotton swab and then spray the plant with neem oil.
Scale insects are small brown bumps on stems and leaves. They’re trickier, but rubbing alcohol on a swab usually works.
Check your plant often because catching pests early is way easier than dealing with an infestation.
Quick Tip: If you spot pests, move your peace lily away from your other plants right away. No one wants a pest outbreak on their hands.
What are some tips for proper peace lily pruning to encourage its growth?
I usually snip off any yellow or brown leaves right at the base, using clean scissors or pruning shears. Try to get as close to the soil as you can, but be careful not to nick any healthy stems nearby.
Dead leaves just sap energy from the plant, honestly. So, it’s best to get rid of them as soon as you notice.
When flowers start turning green or brown, that’s my cue to cut them off, too. I just follow the stem down to where it meets the base and snip it off completely.
That way, the plant can focus on making new blooms instead of wasting energy on the old ones. Makes sense, right?
If your peace lily starts looking a bit crowded, don’t be afraid to trim some of the outer leaves. It helps with air circulation and, honestly, gives the plant a tidier look.
I always wipe my cutting tools with rubbing alcohol between cuts. It’s a little extra work, but it helps keep disease from spreading.
Don’t go overboard—pruning more than a third of the plant at once is just asking for trouble. The plant gets pretty stressed if you do that.
Quick Tip: I find that spring is the best time to prune, since the plant’s actively growing and bounces back faster.
Note: Some images in the articles are sourced from Reddit and Other Platforms For Reference Purpose.