Oyster Plant Indoor Care Guide: Secrets to Thriving Houseplants
Looking to add a splash of vibrant green to your indoor space? The Oyster Plant is a fantastic choice for both seasoned plant parents and beginners.
With its striking purple and green foliage, this plant not only improves the look of your home but is also pretty easy to care for.
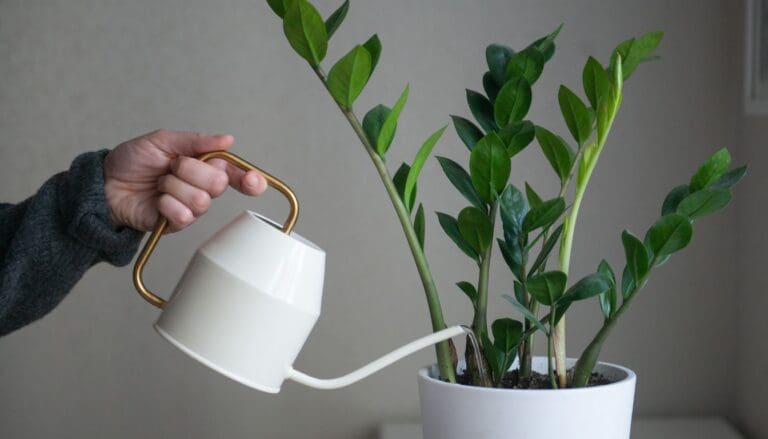
Oyster Plants thrive in higher humidity, so misting them occasionally can give them that extra boost they love.
Don’t forget to place them in bright, indirect light to keep those beautiful colors vibrant.
Water your Oyster Plant when the top inch of soil feels dry. They thrive in higher humidity, so misting them occasionally can give them that extra boost they love. Don’t forget to place them in bright, indirect light to keep those beautiful colors vibrant.
Have you tried growing an Oyster Plant before? Share your experience and tips in the comments! 🌿
Curious about more plant care tips? Stick around and dive into the wonderful world of indoor gardening with me! 🌸

Please note: Simplify Plants is reader-supported. As an Amazon Associate, I earn from qualifying purchases made by our readers with no extra cost added to you all! Some links in the post are affiliate links and I get a commission from purchases made through links in the post.
Getting to Know Your Oyster Plant
Caring for an Oyster Plant? 🪴 You’re in for a treat! These beauties are easy to maintain and bring a lovely, tropical vibe to any space.
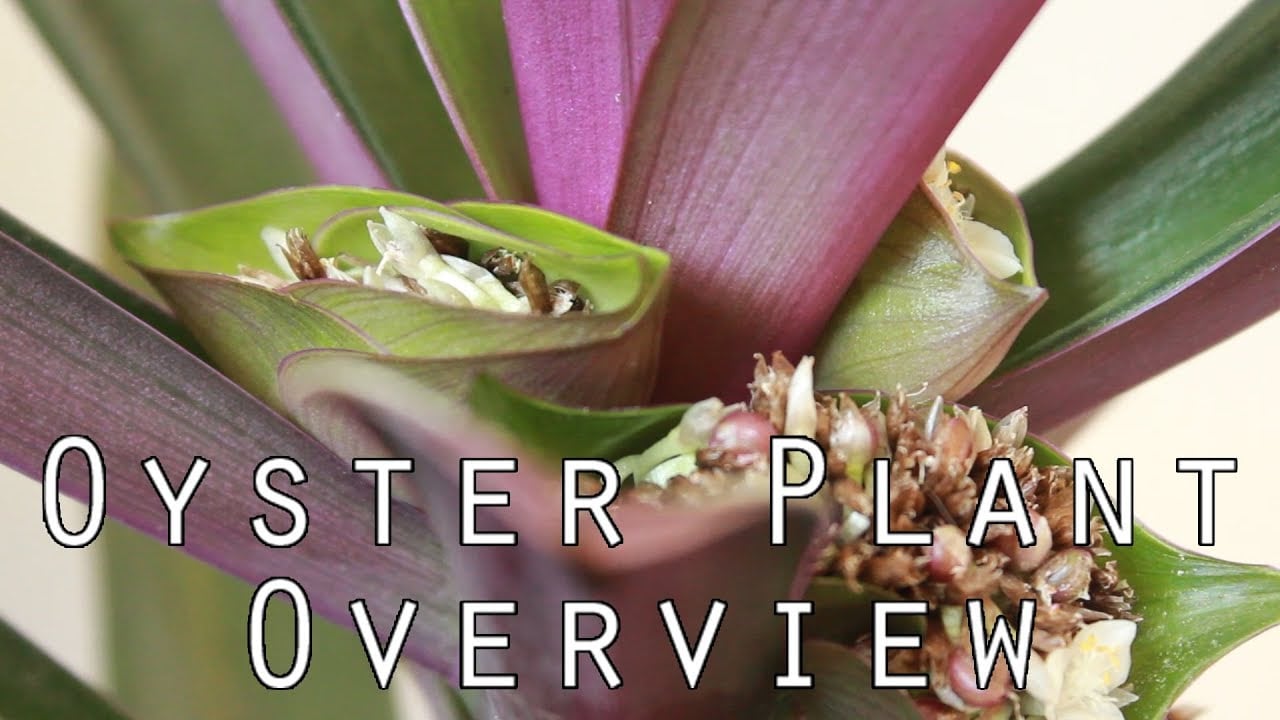
Species Overview
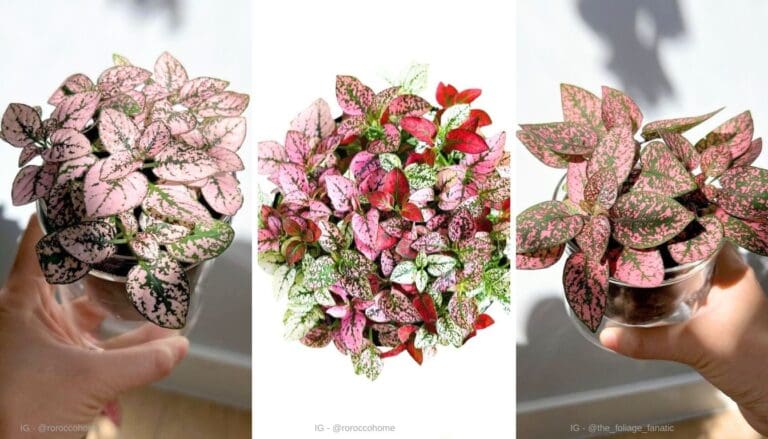
The Oyster Plant, also known as Tradescantia spathacea, is a popular houseplant known for its striking leaves. These leaves are green on top and purple underneath, creating a beautiful, eye-catching display.
This plant grows in a rosette pattern and can reach up to about 1-2 feet in height. It’s an evergreen, meaning it will stay vibrant all year round. The Oyster Plant is also quite hardy, making it a great option for beginners. Are you ready to add some color to your home? 🌿
Origin and Characteristics
Originating from Central America, the Oyster Plant loves warm and humid conditions. It’s native to areas like Belize and Guatemala, where the climate is tropical. This makes it well-suited for indoor growth as long as it gets enough light and moisture.
One cool fact about the Oyster Plant is that it produces tiny, white flowers nestled in the leaf bases. They might not be the showiest blooms, but they add a charming touch. The plant’s ability to tolerate various humidity levels makes it versatile for different home environments.
Do you have a spot with bright, indirect sunlight in your home? The Oyster Plant will thrive there! 🌞
Fundamental Care Requirements

Oyster plants are pretty easy to care for, but it’s important to get a few basics right. Let’s break down the essentials to keep your plant happy and healthy.
Lighting Needs
Oyster plants thrive in bright, indirect light. A spot near a window that gets filtered sunlight works best.
Too much direct light can scorch the leaves, turning them brown. If you notice the leaves turning yellow, it might be getting too much sun.
On the other hand, if the leaves turn dark green, your plant might need more light. Placing it in a well-lit room or using a sheer curtain to diffuse direct sunlight can make a huge difference. 🌞
Watering Schedule
When it comes to watering, let the top inch of soil dry out between watering sessions. This helps prevent root rot, which oyster plants are prone to if they sit in water.
I usually check the soil with my finger; if it feels dry, it’s time to water.
Use a pot with good drainage and be careful not to overwater. Keep the balance—too dry and the tips might brown, too wet and the roots could rot. 🚿
Temperature and Humidity Preferences
Oyster plants prefer moderate to high humidity levels. Keeping humidity above 40% is ideal. If your home is dry, a humidifier or occasional misting can keep the air moist enough for your plant.
Temperature-wise, aim for 60-80°F (15-27°C). They don’t like to be cold, so keep them away from drafts or chilly windows in winter. Adding other plants around can increase humidity too. 🌱
Potting and Soil Composition

When growing an Oyster Plant indoors, it’s important to choose the right pot and soil to make sure it stays healthy and happy.
Choosing the Right Pot
Choosing the correct pot is key. I usually pick a 6-8 inch diameter pot for a small Oyster Plant. This gives the roots plenty of room to grow. It’s also essential to have proper drainage holes at the bottom. Without these, water can get trapped and cause root rot.
Pro tip: Use a pot with multiple drainage holes. This makes sure excess water can easily escape, keeping the soil just right for the plant. 🪴
Soil Types and Drainage
For soil, Oyster Plants need something well-draining but that also holds some moisture. A mix of potting soil, perlite, and peat moss works wonders. I mix equal parts of each.
Why this mix?
- Potting soil: Provides necessary nutrients.
- Perlite: Enhances drainage.
- Peat moss: Retains the right amount of moisture.
It’s a balanced combination that lets the plant’s roots breathe while keeping them moist enough. Have you tried this mix before, or do you have another favorite? Let me know in the comments! 🌿
Plant Nutrition and Feeding

Feeding your oyster plant properly helps it thrive indoors. Let’s dive into the types of fertilizers and how often you should feed your plant to keep it healthy and happy.
Fertilizer Types
Oyster plants benefit from a balanced, water-soluble fertilizer. I usually look for one that’s diluted to half strength.
Using a liquid fertilizer makes it easy to control the amount of nutrients my plant gets. There are several types out there:
- Liquid Fertilizer: Easy to mix with water and apply. I find this best for higher control.
- Slow-release Granules: These release nutrients slowly over time, reducing the frequency of feeding.
I avoid using heavy-duty fertilizers meant for outdoor plants. They can overwhelm indoor plants. Do you have a favorite type of fertilizer? Share below! 🌿
Feeding Frequency
For oyster plants, monthly feedings during the growing season are ideal. Spring and summer are when my plant’s growth is most active.
I water them about once a week, making sure the soil doesn’t stay soggy.
In the off-season, such as fall and winter, I cut back on feeding. The plant’s growth slows down, so it doesn’t need as many nutrients. Over-fertilizing can do more harm than good. Any tips you’ve found helpful? Let me know in the comments! 🌱
Pruning and Maintenance

Keeping your oyster plant healthy and attractive involves proper pruning techniques and regular pest prevention. Effective pruning encourages bushier growth and reduces the risk of diseases, while pest prevention keeps your plant vibrant.
Pruning Techniques
When it comes to pruning, I always start by removing any dead or yellowing leaves. This not only keeps the plant looking fresh but also helps it focus on new growth.
For overgrown branches, it’s important to trim them back to the point where the branch meets the main stem.
Using clean, sharp pruning shears, I make a diagonal cut just above this junction. This precise cut helps the plant heal faster and minimizes the risk of infections. Don’t forget to clean your shears before and after each use to avoid spreading any diseases.
Remember, low pruning requirements mean it’s okay to prune lightly and often, rather than doing one big trim.
Pest Prevention
I’ve found that oyster plants are quite resilient but can still fall victim to pests. Spider mites and mealybugs are the common culprits.
To prevent these pests, I regularly inspect the leaves, especially the undersides, for any small webs or tiny white bugs.
If I spot any, I use a damp cloth to gently wipe them off. A mild soap solution can also be effective in keeping these pests at bay.
Another handy tip is to maintain moderate to high humidity levels as oyster plants love it and pests don’t.
Got any great pruning tips or clever pest prevention tricks? Share them in the comments! 🌱😊
Propagation Methods

Propagating oyster plants can be fun and rewarding. Let me show you two effective ways to do this: Division and Stem Cuttings.
Division Technique
This method involves separating the root clumps of the plant. First, gently remove your oyster plant from its pot. Be careful not to damage the roots 🪴.
You will see that the plant has natural divisions or clumps. Separate these clumps using your hands or a sharp knife.
Next, replant each division in a pot with fresh, moist potting mix. Make sure the soil covers the roots well. Give each new plant a good watering, but don’t drown them!
Keep the soil moist and place the pots in a location with bright, indirect light. Have you tried dividing plants before? It’s easier than it sounds!
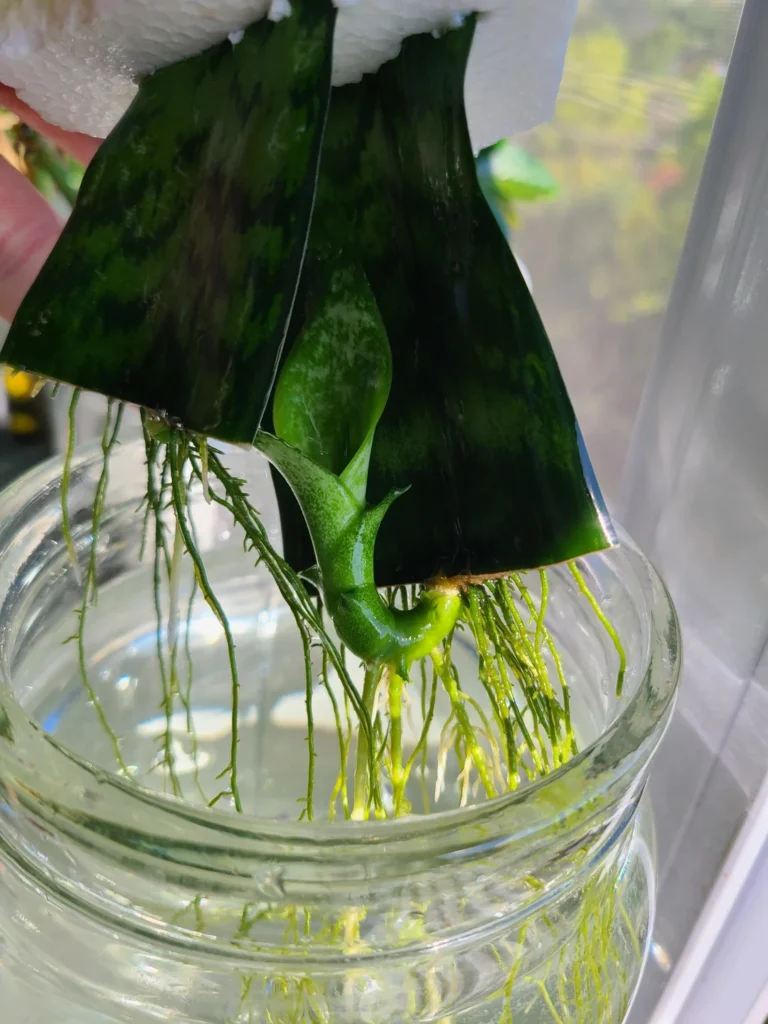
Stem Cuttings Process
Stem cuttings are another simple way to propagate. Start by cutting a healthy stem from the parent plant.
The stem should be around 4-6 inches long and have a few leaves at the top 🍃. Use a sharp, sterilized knife or pruning shears for clean cuts.
Remove the lower leaves from the stem. If you have rooting hormone, dip the cut end into it. This step is optional but can help roots develop faster.
Plant the cutting in a small container with moist potting mix. Cover the container with a plastic bag to create humidity.
Keep the soil moist and place the container in a warm, bright spot.
🌱 Watch for new roots in a few weeks! Does anyone else love seeing new growth from cuttings? It’s so satisfying!
Feel free to share your thoughts in the comments! How do you propagate your plants? 🌿😊
Troubleshooting Common Issues

Dealing with Yellowing Leaves, Root Rot, and Pest Infestations can be frustrating. Let’s explore what might be going wrong and how to get your oyster plant back to its best. 🌿✨
Yellowing Leaves
Yellow leaves often signal overwatering or poor drainage. When you see this, check the soil—is it too wet? If so, let it dry out a bit.
Another tip: make sure your pot has drainage holes. Without these, water can stay trapped, making things worse. I’ve found that adjusting my watering schedule usually solves the issue.
If the leaves stay yellow, it might be a sign of low light. So, try moving your plant closer to a window or adding a grow light. 🌞
Root Rot
Root rot is serious and often caused by too much water.
Keep an eye on the soil moisture. If it’s too damp, your plant might be suffering.
To fix this, remove the plant from its pot and inspect the roots.
Healthy roots are white; rotting roots are brown and mushy.
Cut off the rotting parts and repot your plant in fresh, well-draining soil.
It’s extra work, but necessary to save your plant! 🪴
It’s better to underwater than overwater.
What’s your go-to method for avoiding root rot?
Pest Infestations
Oyster plants are pretty tough, but pests like mealybugs can still cause trouble.
If you see small, white, cottony spots, it’s likely mealybugs. Don’t worry, you can handle this!
First, wipe down the leaves with a soapy water solution.
For tougher cases, you might need an insecticidal soap. If the infestation is really bad, isolate the plant from others to prevent the spread. 🚫🐛
Do you have any other tips for keeping pests at bay? Share your thoughts below!
Decorative Tips and Uses

When it comes to using Oyster Plants as decor, I have some fun ideas to share.
These plants are not only easy to care for, but they also add a pop of color to any room. 🌿
Centerpieces: Place an Oyster Plant in a stylish pot in the center of your dining table. It adds a touch of nature and brightens up the space.
Shelve Beauties: Pop them on your bookshelf. Their vibrant leaves can turn an ordinary shelf into a trendy focal point.
Bathroom Oasis: These plants love humidity, so a well-lit bathroom is the perfect spot. It’s like having a mini tropical getaway in your home.
Window Charms: Put your Oyster Plants near windows where they can get filtered sunlight.
This not only helps them thrive but also makes your windows look cozy and inviting.
Mix and Match: Pair them with other houseplants.
Create a small indoor garden by grouping your Oyster Plants with succulents or ferns for a variety of textures and colors.
Hanging Gardens: Use hanging planters for your Oyster Plants.
This creates an eye-catching vertical garden and saves space.
Workspaces: Place one on your desk. A bit of green can make your workspace feel more inviting and help reduce stress.
Do you have any favorite spots for your Oyster Plants? 🌱😊 Share your tips in the comments! I’d love to hear your ideas!
Safety and Pet Friendliness
Taking care of an Oyster Plant indoors is a joy, but it’s important to consider safety, especially if you have pets. 🐱🐶
These plants can be toxic to cats and dogs if ingested.
If you notice your furry friend chewing on your plant, move the plant to a safer spot, like a high shelf or a room your pets can’t access.
Have you ever found your pet munching on your houseplants? It’s so frustrating!
Keep in mind that the sap from the Oyster Plant can cause skin irritation.
When pruning or repotting, wear gloves to protect your skin. This way, you can avoid any annoying rashes or discomfort.
Pro Tip: Use a hanging basket for your Oyster Plant. It looks beautiful and keeps it out of reach from curious pets. 🌿
What creative ways have you tried to keep your plants safe from pets? Drop your tips in the comments below! 💡
FAQS
How often should I water my oyster plant?
I water my oyster plant once the top inch of soil feels dry.
Keeping the soil moist but not soggy works best for me.
What’s the best lighting for oyster plants?
Oyster plants love filtered sunlight!
I keep mine near a window with a sheer curtain. No direct sunlight, as it can scorch the leaves.
What type of soil is ideal for oyster plants?
I use a well-draining mix.
You can make your own by mixing equal parts peat moss, perlite, and vermiculite. 🌿
How do I know if my plant is getting too much or too little light?
If the leaves turn yellow or pale, it’s getting too much light.
If they get dark green, it’s not getting enough. Simple, right?
Can I propagate my oyster plant?
Yes! I cut off a healthy stem, dip it in rooting hormone (optional), and place it in moist potting mix.
Cover with plastic for humidity. New roots soon follow. 🌱
How do I deal with dead leaves?
Just prune them off! It helps the plant look tidy and avoids any health issues.
Why are my plant’s leaves drooping or falling off?
Drooping or falling leaves could be a sign of overwatering, underwatering, or root rot. Check the soil and adjust as needed.
Do oyster plants need high humidity?
They do best with moderate to high humidity.
I try to keep the room’s humidity above 40%. A small humidifier can help.
Have any tips or questions about oyster plants? Share them with me in the comments below! 🌸
Conclusion
Taking care of an Oyster Plant indoors can be a fun and rewarding experience.
Remember to keep the soil moist, but not soggy. Allow the top inch of soil to dry out before watering again. 🌱
Place your plant in a spot with bright, indirect light.
If the leaves are turning yellow, it might be getting too much light. If they’re dark green, it might need more light.
Make sure the plant gets moderate humidity. Pruning is easy — just remove dead leaves to keep it looking neat.
The Oyster Plant can even sprout new baby plants you can repot!
Got any funny stories about your Oyster Plant? Share them in the comments! 😊
Don’t forget to tag a friend who might need some plant care tips! 🪴
Happy planting!
Note: Some images in the articles are sourced from Reddit and Other Platforms For Reference Purpose.