Norfolk Island Pine Plant Care Guide: Easy Tips for Thriving Greenery
Looking for a houseplant that brings a touch of the forest into your living room? 🌲 Look no further than the Norfolk Island Pine! This tree isn’t a true pine, but it’s perfect for adding a unique greenery to your home while being relatively low-maintenance.
I love how the Norfolk Island Pine thrives with bright, indirect light and well-draining soil. It’s friendly enough that even beginners can give it a go without much stress.
How often do you need to water it? Well, you should water when about 25% of the soil gets dry. This ensures the tips don’t turn brown and crispy.
An added bonus? It can grow up to 8-10 feet tall indoors! How cool is that? 🌟
So, if you’re ready to give your space a fresh, green look, the Norfolk Island Pine could be your new plant friend. What do you think? Have you tried caring for one before? Let’s share some tips in the comments below!

Please note: Simplify Plants is reader-supported. As an Amazon Associate, I earn from qualifying purchases made by our readers with no extra cost added to you all! Some links in the post are affiliate links and I get a commission from purchases made through links in the post.
Understanding Norfolk Island Pine
The Norfolk Island Pine is a unique indoor plant that adds a touch of the forest to your home. Whether you’re interested in its background or it’s natural growing environment, I’ve got you covered with all the essential details.
Species Overview
The Norfolk Island Pine (Araucaria heterophylla) isn’t actually a true pine. It’s fascinating because it can grow up to 200 feet tall in its natural habitat, but indoors, it usually reaches around 6 to 8 feet.
This tree has soft, needle-like leaves that are friendly to the touch. They don’t drop easily, which means less cleanup for you! 😄
Did you know it prefers bright, indirect light? While it loves the sun, too much direct sunlight can actually harm it. If you’ve got a spot near a window with filtered light, that’s perfect. Just make sure the soil stays moist but not waterlogged.
Native Habitat
The Norfolk Island Pine hails from Norfolk Island, a small island located in the Pacific Ocean between Australia and New Zealand. The tropical climate there provides the ideal conditions for these trees to thrive.
Back on its home island, it enjoys temperatures above 35°F year-round. The moist, yet well-draining soil filled with organic material helps it grow tall and strong.
It’s pretty cool how these trees have adapted to grow in different environments around the world, including as cozy indoor houseplants.
How do you think your Norfolk Island Pine would fare in the wild? 🏝️ Share your thoughts in the comments!
Ideal Indoor Conditions

Caring for a Norfolk Island Pine indoors requires attention to light, temperature, and humidity. These key elements help your plant thrive and stay healthy.
Light Requirements
Norfolk Island Pines love bright, indirect light. Imagine placing your pine next to a window with sheer curtains; the light filters through gently, giving your plant exactly what it needs. Too much direct sunlight can cause the needles to scorch and turn brown.
Do you have a spot in your home with dappled sunlight? 🏡 That’s perfect! If your light source isn’t strong, consider using a grow light to supplement.
Moving the plant around to find its light sweet spot is totally fine. Your pine will thank you for the effort with lush, green growth.
Temperature Preferences
Keeping your Norfolk Island Pine in a cozy environment is crucial. These tropical plants flourish in temperatures between 65°F to 75°F. Too hot or too cold can stress the plant, so aim for the sweet spot.
Avoid placing your pine near drafts, heaters, or AC units. Those sudden temperature shifts aren’t a tropical plant’s friend.
Imagine your favorite snug sweater weather; that’s what we’re aiming for. Do you ever feel a chill by the window in winter? Your pine might too! Move it a bit away from cold glass during chilly months to keep it comfortable.
Humidity Considerations
Norfolk Island Pines thrive in medium to high humidity levels. Aim for 50% to 70% humidity. Dry air can lead to brown needle tips and leaf drop.
Using a humidity tray or a room humidifier can be a game-changer 🌬️. Misting your pine daily is another great option.
Just think of it as giving your plant a gentle shower every morning. Do you already have other plants that love moisture? Grouping them together can create a mini rainforest effect, boosting humidity for all.
Don’t forget to check the soil moisture too. Keep it consistently moist but not soggy. Your Norfolk Island Pine enjoys a good drink, just like us! 💧 Too much water, though, can lead to root rot, so balance is key.
Watering and Feeding

Keeping your Norfolk Island Pine healthy involves a proper watering schedule and just the right amount of fertilizer. Here’s how you can make sure your plant thrives.
Watering Schedule
Your Norfolk Island Pine needs regular watering to stay healthy. I like to water mine whenever the top 25% of the soil feels dry. You can stick your finger in the soil to check. 🌱
Water until you see liquid coming out of the drainage holes. Don’t let the plant sit in water, though! Always empty the saucer to prevent root rot.
In the winter, the air can get really dry. Misting your plant daily or using a humidity tray can help keep its needles from turning brown and crispy.
Fertilizing Tips
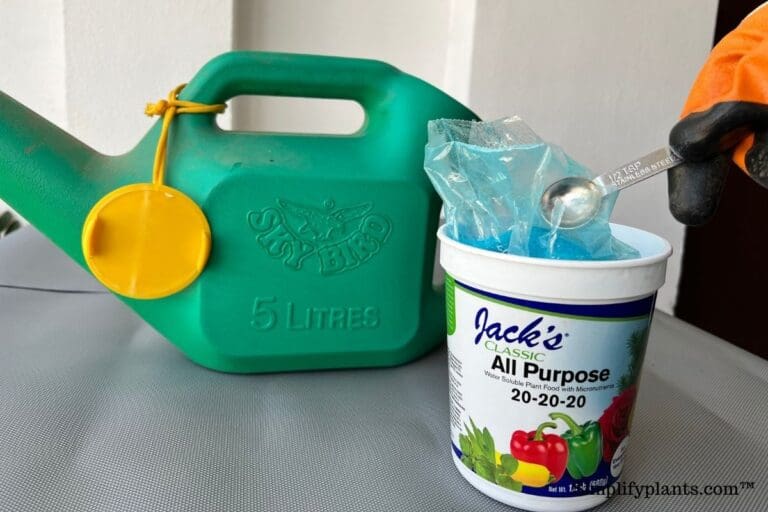
Pines need nutrients, too! Use a balanced liquid fertilizer every 6-8 weeks during the growing season. I prefer a 10-10-10 fertilizer for my Norfolk Pine. It makes a noticeable difference.
Dissolve the fertilizer in water as per the label’s instruction and then water the plant as usual. Don’t overfeed! Too much fertilizer can actually hurt your plant.
During the winter months, your Norfolk Pine goes dormant. No need to fertilize during this time. Let your plant rest.
Got any tips or questions about Norfolk Island Pines? Drop a comment below! 🌟
Potting and Soil

To keep your Norfolk Island Pine happy and healthy, focusing on the right soil mix and timely repotting is key. 🌱
Suitable Soil Mix
The best soil for a Norfolk Island Pine is well-draining and rich in organic content. I use a mix of potting soil, sand, and peat moss. This helps the water drain properly and keeps the soil from getting waterlogged.
I also make sure to test the pH of my soil. Norfolk Island Pines love slightly acidic soil with a pH between 5.5 and 6.5. If you’re not sure how to test the pH, you can find soil test kits at garden stores or online.
Another tip: make sure the soil has a good mix of textures. The blend of particles should make up a crumbly soil that feels light and airy. This keeps the roots healthy and happy. 🌿
Repotting Guidelines
I usually repot my Norfolk Island Pine every two to four years. They grow slowly, so it’s not something I do often. You might notice the roots peeking out of the drainage holes—that’s a sign it’s time for a new pot.
When you do repot, choose a container that’s one size larger than the current one. Be gentle with the roots; they can be quite fragile. Make sure the new pot has adequate drainage holes.
I fill the bottom with a layer of the same well-draining soil mix. Once the tree is in its new home, I fill in around the edges and press the soil down gently. After repotting, I water it thoroughly to help it settle in.
What about you? 🌳 Have you repotted your Norfolk Island Pine? Share your experiences in the comments! 😊
Pruning and Maintenance

Taking care of your Norfolk Island Pine involves regular pruning and cleaning to keep it healthy and looking its best. Let’s dive into how to prune effectively and the best ways to keep your plant clean.
Pruning Techniques
When it comes to pruning your Norfolk Island Pine, less is more. Start by looking at the tree closely. Which branches look dead or damaged? Which ones are crossing or rubbing against each other? These are the ones to remove.
Use sharp, clean scissors or pruning shears. Cut at an angle just above the base of the branch. This helps the tree heal faster and looks better. Remember, the goal is to keep your Pine looking natural and balanced.
One tip: never cut the top of your Norfolk Pine. 🤚 This can affect its growth and shape. Stick to trimming the sides and lower branches.
Cleaning and Dusting
Keeping your Norfolk Island Pine clean is just as important as pruning. Dust can build up on the needles, blocking light and hindering growth.
To clean, I use a soft cloth or a feather duster. Gently wipe or dust the needles every couple of weeks. Not only does this keep it looking fresh, but it also helps the plant stay healthy by allowing more light to reach it.
For a deeper clean, you can lightly mist the plant with water. If it’s indoors, consider using a humidity tray to keep the air around it moist. Dry air from heaters or ACs can dry out the plant. Mist the needles regularly, it’s like a mini spa day for your green friend! 🌿
Pest Management

Keeping my Norfolk Island Pine healthy means managing pests effectively. Here’s what I’ve learned about spotting common pests and how to prevent them.
Common Pests
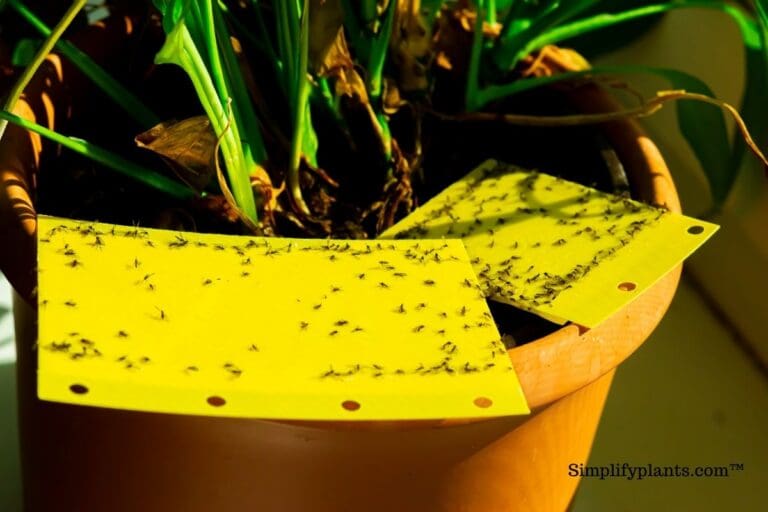
There are a few pests that I need to watch out for. Scale insects are tiny, oval-shaped creatures that stick to the needles and branches. They feed on the sap, causing yellow or brown spots. Plus, they leave behind a sticky substance called honeydew. Yuck! 😣
Another pest is the spider mite. These are even tinier and can be hard to see without a magnifying glass. They create webs and cause the needles to turn yellow and drop off. If my plant is looking a little sad and webby, spider mites could be the problem.
Mealybugs are also a threat. They look like small, white cotton balls and cluster in hard-to-reach places. They sap the plant’s nutrients, leading to stunted growth and yellowing.
Pest Prevention Strategies
Preventing pests is easier than getting rid of them. Here’s what I do:
- Inspect Regularly: I give my Norfolk Pine a good look-over every week. Catching problems early makes them easier to deal with.
- Cleanliness: I wipe the leaves and branches with a damp cloth. This helps remove dust and potential pest eggs.
- Air Circulation: I make sure the room has good air flow. Pests love stagnant air, so I keep it fresh!
- Natural Predators: Sometimes, I introduce natural predators like ladybugs. They eat the bad bugs and keep things balanced.
- Neem Oil: I use a neem oil spray if I see any pests. It’s a natural pesticide and safe for indoor use.
What about you? Do you have any pest tips to share? Let’s chat in the comments below! 🌱🪴
Disease Prevention

Preventing diseases in your Norfolk Island Pine is crucial to keep it healthy and thriving.
Knowing the common diseases and how to control them can help you maintain a beautiful plant at home.
Common Diseases
Root Rot: This happens when the plant is over-watered, causing its roots to drown and rot.
It’s usually noticeable when the plant starts to wilt or its needles turn yellow or brown.
Needle Blight: Fungi cause this, leading to dark spots on the needles which eventually fall off. The affected areas may spread if not treated promptly.
Spider Mites: These tiny pests often create webbing around the plant and suck its sap, leaving it weak and discolored. Dry conditions can make the problem worse.
Disease Control Measures
Avoid Over-Watering: Keep the soil moist, not soggy.
Use well-draining soil and containers with drainage holes to prevent waterlogged roots.
Proper Air Circulation: Place your plant in an area with good airflow to reduce fungal growth.
Avoid cramped spaces where humidity can build up.
Regular Inspections: Check your plant weekly for signs of pests like spider mites or any unusual spots on the needles. Early detection is key.
Neem Oil: Use neem oil spray as a natural remedy to control fungi and pests. It’s safe and effective.
Propagation Methods
Propagating a Norfolk Island Pine can be a fun and rewarding process.
First, you’ll need a healthy parent plant, some sharp pruners or scissors, rooting hormone powder or gel, and small pots with drainage holes.
Start by cutting a section of the branch about 6-8 inches long.
Make sure the cut is clean and done at a 45-degree angle.
Next, dip the cut end into the rooting hormone. This step helps the cutting grow roots faster. 🌱
Then, plant the cutting in a well-draining potting soil.
Use a pencil or chopstick to make a hole in the soil, and then place the cutting into the hole.
Cover the pot with a plastic bag or use a propagation dome to keep the humidity high. This can help the cuttings to thrive.
You might want to mist the plant daily with a spray bottle to keep the soil moist, but not waterlogged.
You may also use a terrarium or a plastic bag with a rubber band to create a mini greenhouse effect. This keeps the environment warm and moist, perfect for growth.
Wondering how long it takes? It usually takes a few weeks to see roots developing. Be patient! 🕰️
Troubleshooting
Taking care of a Norfolk Island Pine indoors can come with its own challenges.
Let’s look at some common issues like yellowing needles, drooping branches, and stunted growth, and how to fix them.
Yellowing Needles
Yellowing needles can be a sign of several problems.
First, make sure your plant is getting bright, indirect light. Too much direct sunlight can scorch the needles, while too little light can make them turn yellow.
Check if you’re overwatering or underwatering your plant.
Norfolk Island Pines like their soil to be consistently moist but not soggy. If you let the soil dry out completely, the needles may yellow and drop.
Also, consider the humidity.
Norfolk Island Pines need 50% to 70% humidity. If your home is dry, especially in winter, try using a humidifier or place a tray of water near the plant. 🌿
Drooping Branches
Drooping branches usually mean that something’s off with the watering or the light.
If the branches are drooping, your plant might be underwatered. Water thoroughly, letting excess water drain out the bottom of the pot.
Check the light situation.
Norfolk Island Pines need bright, indirect light. If they’re in a dim spot, consider moving them to a brighter area. Just avoid direct, harsh sunlight.
Lastly, don’t forget about the temperature.
These plants prefer temperatures above 35°F (around 2°C). Keep them away from cold drafts and sudden temperature changes. ❄️
Stunted Growth
Notice your plant isn’t growing? It might be due to improper light, watering, or nutrient issues.
Make sure your Norfolk Island Pine is in well-draining soil and receives bright, indirect light.
Overwatering can cause root rot, leading to stunted growth.
Keep the soil moist but not soggy. If you see signs of root rot (brown, mushy roots), you may need to trim affected roots and repot the plant.
Consider using a balanced, water-soluble fertilizer every few months. This can help provide the nutrients your Norfolk Island Pine needs to thrive. 🌱
FAQs
How much light does my Norfolk Island Pine need?
Your Norfolk Island Pine loves bright, indirect light.
A spot near a window that lets in plenty of light but not direct sunlight is ideal. Too much direct sunlight can cause the needles to brown.
How often should I water it?
I water my Norfolk Pine once every two weeks.
The soil should be kept moist but not soggy. Overwatering can lead to root rot, so it’s important to let the soil dry out a bit between waterings.
Do I need to mist the plant?
Yes, misting is helpful! These plants enjoy high humidity.
I mist mine daily to keep it happy. If you don’t have time for daily misting, consider using a humidifier.
What kind of soil should I use?
Use well-draining soil. A mix designed for cactus and succulents works well.
It should have high organic content and good drainage to prevent water from pooling at the roots.
Can it survive in low light?
Yes, they can tolerate low light conditions.
This makes them perfect for apartments or homes where natural light is limited. Just be sure to rotate the plant occasionally so all sides get some light.
How tall will it grow indoors?
Indoors, your Norfolk Pine will usually reach about 8 to 10 feet.
It grows slower inside than outside, so it won’t take over your room too quickly!
What temperature is best?
They prefer a comfortable range of 65° to 85°F.
Keep them away from drafts and sudden temperature changes which can stress them out.
Can I take my Norfolk Pine outside in summer?
Absolutely! During the summer, you can place your plant outside in a shaded area.
Just make sure to bring it back inside before temperatures drop below 35°F.
Conclusion
Caring for a Norfolk Island Pine is easier than you might think! 🌿
These beautiful trees thrive indoors with a bit of love and attention.
Remember to give your plant bright, indirect light. It’s crucial to keep it happy.
Keep the soil moist but not waterlogged. Overwatering can lead to problems.
A little misting goes a long way! It helps keep the humidity up, which the tree loves. 🌧️
Ensure the temperature stays above 35°F. These plants dislike the cold.
With proper care, your tree can grow up to 6-8 feet indoors and live for decades. How amazing is that? 🌳
Have you tried growing a Norfolk Island Pine? Share your tips and questions in the comments! I’d love to hear from you. 😊
Note: Some images in the articles are sourced from Reddit and Other Platforms For Reference Purpose.