Monstera Adansonii Care Guide
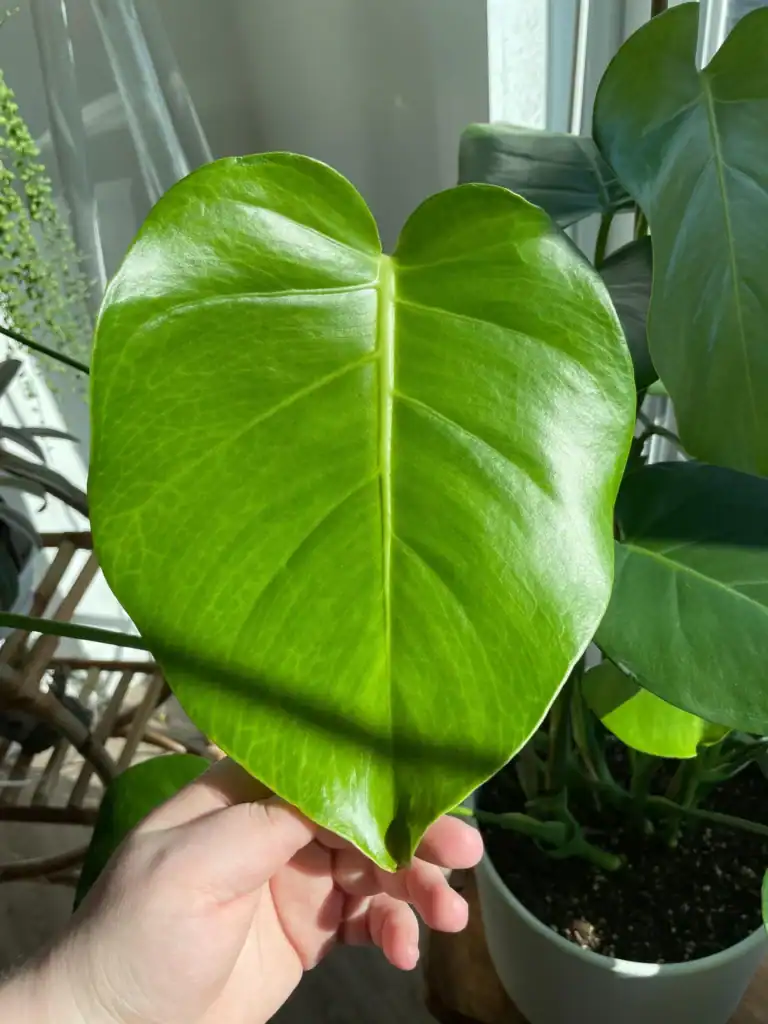
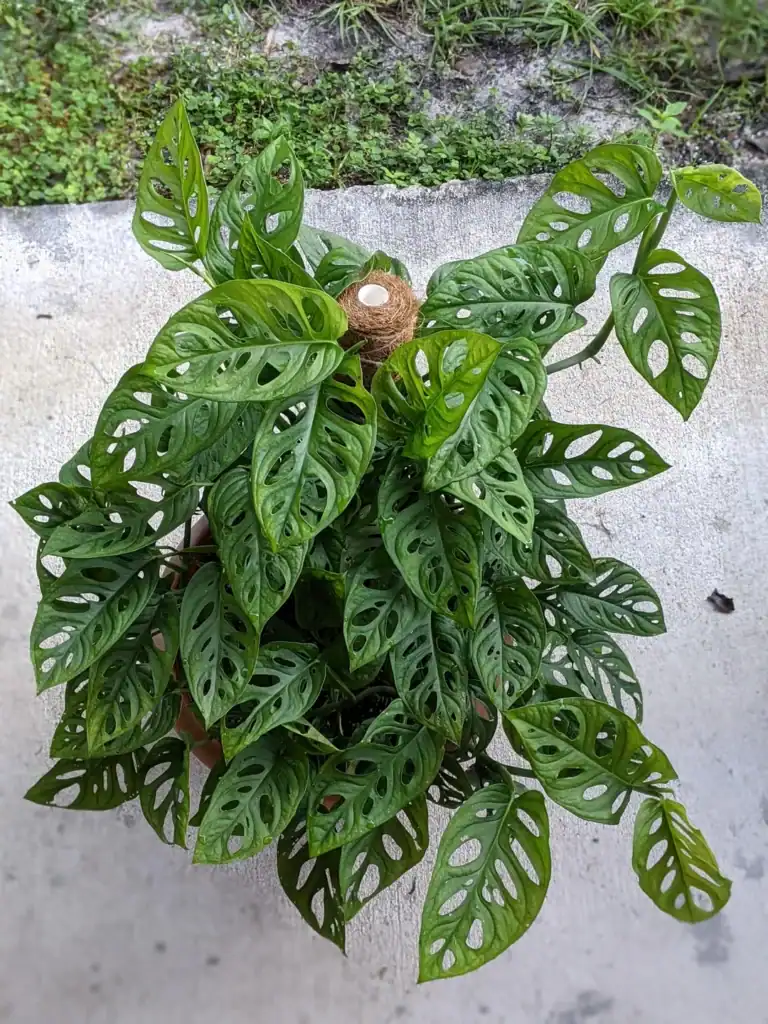
The Monstera adansonii—aka the Swiss cheese plant—has honestly become one of my top houseplants. Those wild, holey leaves and the chill attitude? Hard not to love.
If you’ve just welcomed one into your home, or you’re still debating, you’re probably wondering how to keep those iconic leaves looking sharp.
This trailing beauty does best with bright, indirect light, steady moisture, and a touch of humidity—get those right and it’s almost like the plant is on autopilot.
Honestly, Monstera adansonii care isn’t as tricky as some folks make it sound. Whether you’re wrestling with watering, yellow leaves, or just curious about propagation, tiny tweaks can change everything.
In this guide, I’ll break down everything from light and soil to common headaches—and even a few rare varieties you might want to track down. My hope is that you’ll end up with a happy, healthy plant showing off those wild Swiss cheese holes.
Please note: Simplify Plants is reader-supported. As an Amazon Associate, I earn from qualifying purchases made by our readers with no extra cost added to you all! Some links in the post are affiliate links and I get a commission from purchases made through links in the post.
Light Requirements
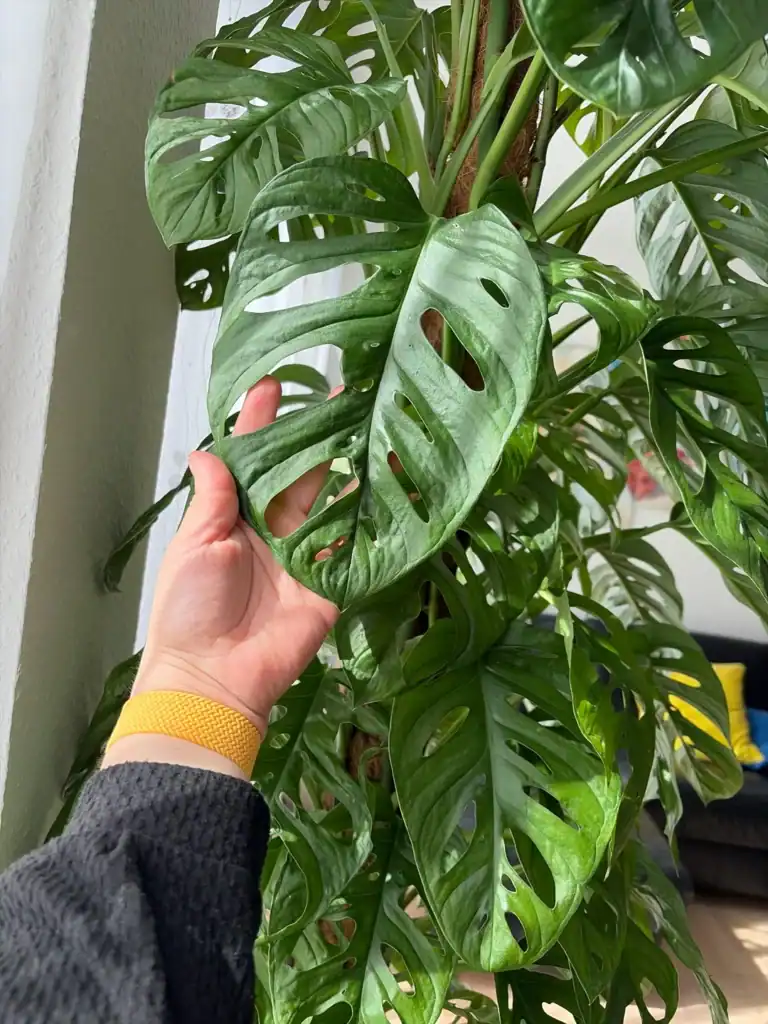
Monstera adansonii really likes bright, indirect light. It keeps those fenestrated leaves looking their best and helps the plant grow strong.
Too much direct sun or not enough light? You’ll see it pretty quickly in the leaves.
Ideal Lighting Conditions
I usually park my Monstera adansonii near an east or north window—just enough brightness, but never those harsh, direct rays. Bright indirect light means the room’s well-lit, but the sun isn’t blasting the leaves.
If you only have south or west windows, a sheer curtain or just backing the plant away from the glass does wonders. Direct sun will scorch those delicate leaves, especially in the afternoon.
Quick Tip: Try holding your hand between the light and your plant—if you see a soft, blurry shadow, you’re probably in the sweet spot.
Lower light is okay, but it’ll slow growth and new leaves might not get as many holes. I’ve noticed mine gets a bit leggy and honestly kind of sad if I forget it in a dark corner for too long.
Signs of Too Much or Too Little Light
Brown, crispy patches or bleached yellow spots? That’s leaf burn from too much sun. If I spot this, I move my plant to a gentler spot right away.
On the flip side, stems stretching out and long spaces between leaves usually mean not enough light. Sometimes, new leaves will have fewer holes, or none at all.
Quick Tip: Pale, washed-out leaves? Probably needs more light. Dark brown burns? That’s sun damage.
The newest growth tells you everything. Healthy leaves in good light are deep green and full of fenestrations.
Soil and Potting Mix

Monstera adansonii likes a chunky, well-draining potting mix that holds a bit of moisture but never stays soggy. The right mix keeps roots happy and rot-free, plus it gives the plant the airflow it wants.
Choosing the Right Potting Mix
I usually start with an aroid mix or just make my own instead of going straight out of the bag with regular potting soil. Standard peat-heavy mixes are just too dense and wet for these guys.
A solid pre-made aroid mix is great if you want the easy route—look for ones with bark, perlite, and other chunky bits for fast drainage.
Or, just grab a peat-based potting mix and mix in your own amendments. I try for about 40% chunky stuff like bark or perlite.
Quick Tip: Squeeze a handful of damp mix—it should clump loosely but fall apart when you poke it. That’s what you want.
If water puddles in the pot after watering, your mix is too heavy. Drainage is everything for monstera adansonii.
Best Soil Recipes and Amendments
My usual blend is 40% potting mix, 30% orchid bark, 20% perlite, and 10% coconut coir. It drains fast but keeps just enough moisture for the roots.
Perlite—the little white foam balls—adds air pockets and keeps things from getting compacted. I never skip it.
Coconut coir is a solid swap for peat moss and stays fluffy longer. It holds moisture, but not too much.
If you’re using a store-bought mix, just toss in some extra perlite and bark chips. Mix everything before potting up.
Quick Tip: A small scoop of worm castings or compost (about 5-10% of the mix) adds gentle, slow-release nutrients.
Watering and Humidity Needs
Getting the right balance of moist soil and good humidity makes all the difference for Monstera adansonii. Here’s how I handle watering and humidity to keep mine happy.
Watering Schedule and Techniques
I water when the top 1-2 inches of soil feel dry. For me, that’s usually every 5-7 days in spring and summer, but in winter, it can stretch out to 10-14 days.
How often you water depends a lot on your home’s light, temperature, and the size of the pot. Plants in brighter spots dry out faster.
When I do water, I pour slowly until it drains out the bottom. That way, the whole root ball gets a drink. Always dump out any water sitting in the saucer after 15 minutes—roots hate being soggy.
Quick Tip: Stick your finger into the soil before watering. If it’s damp below the surface, wait a day or two.
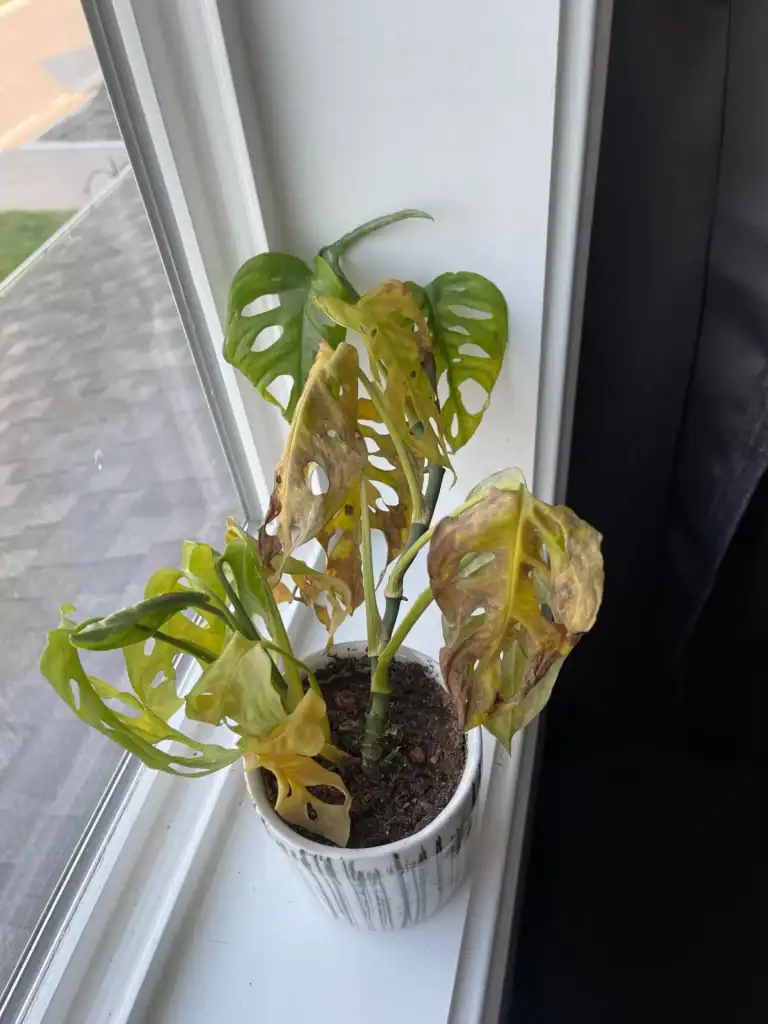
Yellow leaves usually mean I overdid it, while crispy brown edges tell me I waited too long.
Humidity Preferences and Boosting Strategies
These plants come from rainforests, so they really love humidity—ideally 60-80%. Most homes are more like 30-40%, which isn’t perfect but works in a pinch.
I use a pebble tray under my pot—shallow tray, pebbles, water below the pot. As it evaporates, it bumps up humidity right around the leaves.
Grouping plants together helps too, since they all release moisture. Sometimes I keep mine in the bathroom for a little steam boost.
Quick Tip: If you can’t raise humidity, mist the leaves a couple times a week—but skip misting at night since water can sit too long on the foliage.
Brown, crispy leaf tips? That’s usually dry air. A small humidifier nearby is a total game changer if you’re up for it.
Fertilizing and Nutrition

Monstera adansonii does best with regular feeding during the growing season. Here’s how I keep mine fed and happy.
When and How to Fertilize
I feed every 2-4 weeks in spring and summer, when the plant’s putting out new leaves and needs extra nutrients. In fall and winter, I cut back to every couple months or just stop altogether.
I always dilute liquid fertilizer to half strength. Full strength is just too much—roots can get burned. Water the soil a bit before fertilizing so you don’t shock the plant.
Quick Tip: Brown leaf tips or white crust on the soil? Could be over-fertilizing—flush the soil with water and back off on feeding.
Recommended Fertilizers and Application Tips
I like a balanced liquid fertilizer with equal NPK numbers—something like 20-20-20 or 10-10-10. It supports leaf growth without going overboard on any one nutrient.
Slow-release fertilizer is another good option. Just sprinkle it on the soil every few months and water like usual. It breaks down slowly and feeds the plant over time.
For organic feeding, sometimes I’ll use diluted worm castings tea or fish emulsion. They’re gentle and add some good microbes to the mix.
Quick Tip: Always check that the soil is moist before fertilizing—never feed a bone-dry plant or you’ll risk root burn.
Repotting and Supporting Growth
Monstera adansonii needs a bigger pot every year or two, plus something to climb as it gets bigger. Timing the repot and adding support can keep your plant looking its best.
When to Repot Monstera Adansonii
I repot when I see roots poking out the drainage holes or circling the top of the soil. It usually happens every 1-2 years, and I try to do it in spring or early summer.
If the soil dries out fast or water runs right through, your plant probably needs more space. Pick a pot just 1-2 inches bigger than the old one.
Use a chunky, well-draining mix with perlite or bark. I fill the new pot about a third full, then gently loosen the root ball before placing the plant inside.
Quick tip: Water your plant a day before repotting—it makes the root ball way easier to handle.
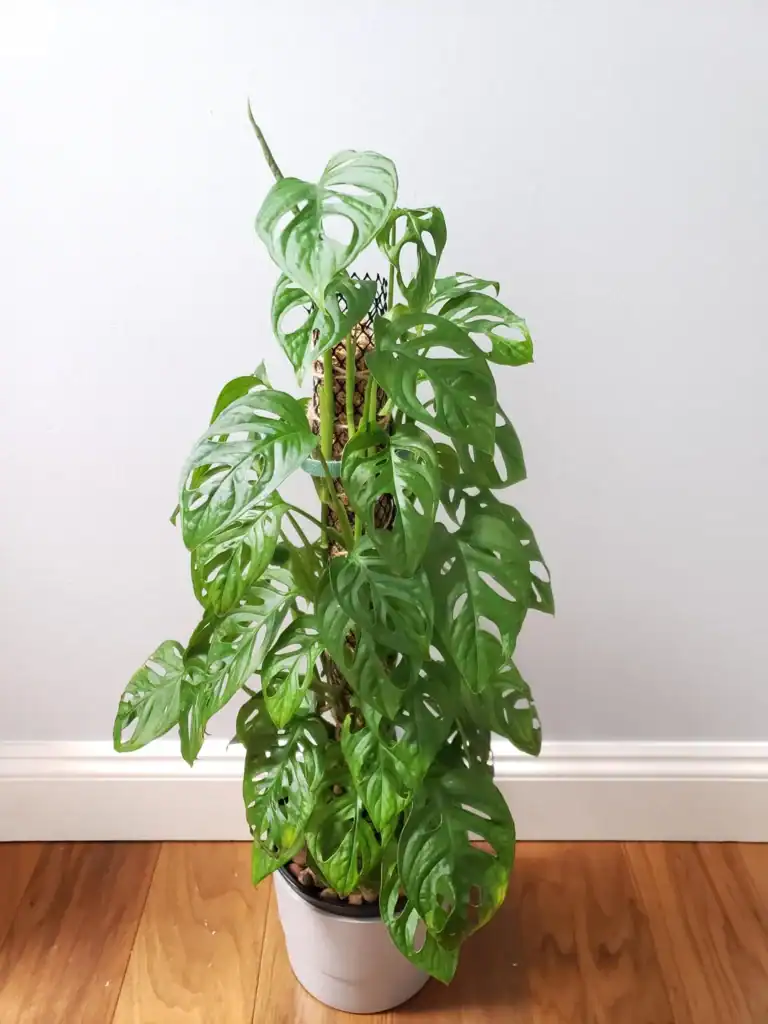
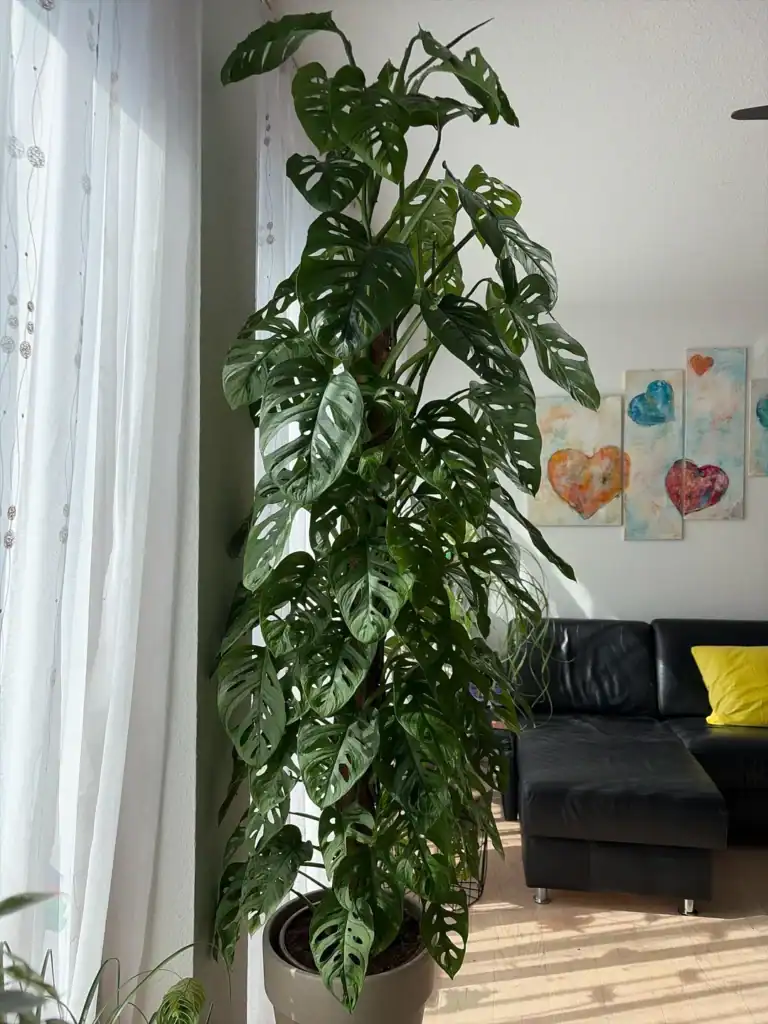
Using Moss Poles and Supporting Vines
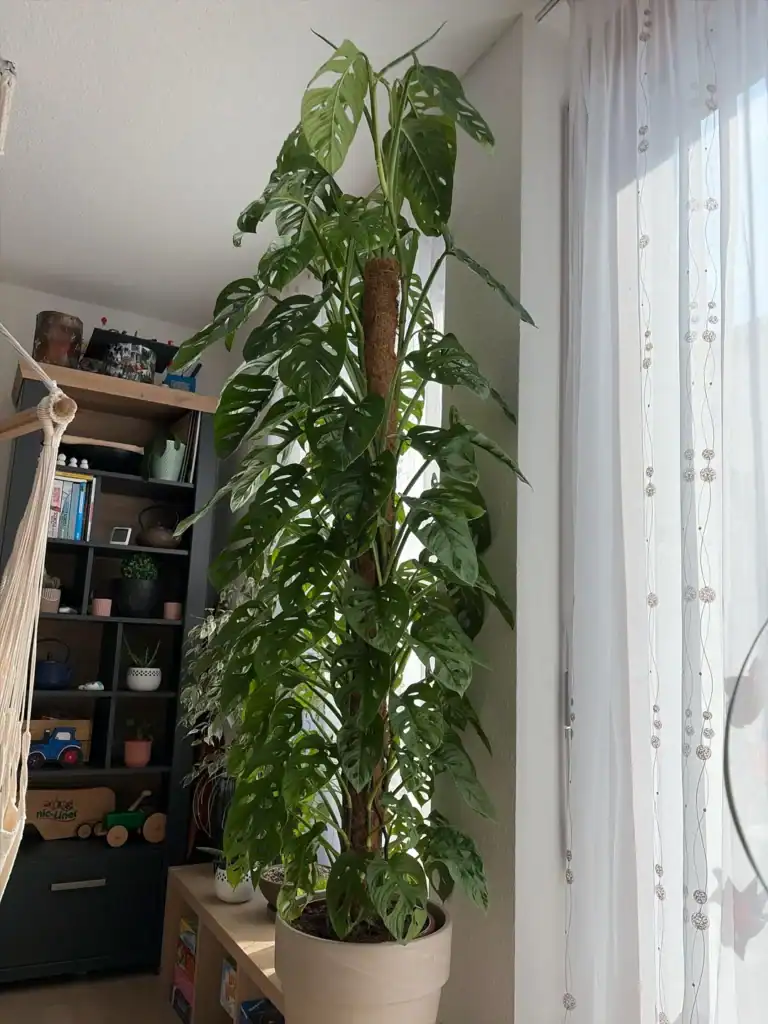
A moss pole helps your Monstera adansonii climb and encourages those dramatic, holey leaves. I add the pole during repotting to avoid messing with roots later.
Push the pole deep into the soil, close to the center. Gently tie or wrap the vines with soft ties or twine—don’t go too tight, just enough to guide the plant.
Keep the moss pole moist by misting it now and then. The aerial roots will grab on over time, which helps the plant get stronger and puts out bigger leaves.
Quick tip: A coco coir-wrapped pole works just as well as sphagnum moss and usually costs less.
Dealing with Transplant Shock
Some drooping or yellowing after a repot is pretty normal—transplant shock just happens. I expect my plant to look a little off for about a week.
Keep it in bright, indirect light and hold off on fertilizer for at least a month. Water when the top inch of soil is dry, but don’t overdo it.
If leaves keep yellowing after a couple weeks, check for root rot or pests. Most bounce back in two or three weeks once the roots settle in.
Quick tip: Try not to move or rotate your plant for the first week after repotting—it helps it adjust faster.
Propagation Methods
Monstera adansonii is honestly one of the easiest houseplants to propagate. I’ve had the best luck with stem cuttings in both water and soil. Air layering is fun if you want to keep the main plant untouched, though it does take more patience.
How to Propagate by Stem Cuttings
I always pick a healthy stem with at least two nodes and a couple leaves. Nodes are those little bumps on the stem where roots will sprout, so don’t skip them.
Use clean, sharp scissors or pruners and cut just below a node at a 45-degree angle. Sometimes I dip the cut end in rooting hormone—honestly, not required, but it can help things along.
Quick Tip: Make sure every cutting has at least one node. No node, no roots—simple as that.
Pop the cutting in water or straight into moist potting mix. If you go with water, change it every few days to keep things fresh. Roots usually show up in about two or three weeks.
Once roots are about two inches long, I move water-propagated cuttings to soil. Keep the soil evenly moist for the first week or so while the plant settles in.
Propagation by Air Layering
Air layering is a neat way to make a new plant while it’s still attached to the parent. There’s less stress on both this way, honestly. I usually pick a healthy stem section with at least one node.
You can either make a small upward cut about halfway through the stem, or remove a thin ring of bark around the node—both seem to work. Then, I wrap that area with moist sphagnum moss and cover it with plastic wrap to keep the moisture in.
Quick Tip: I just use twist ties or string at both ends to hold the moss bundle together. It doesn’t have to look fancy, just tight enough.
Every week or so, I check if the moss is still damp. Roots tend to show up in four to six weeks, give or take. When I spot strong roots through the plastic, I snip below the new root ball and pot it up in fresh soil.
Growing from Seed or in Water
Growing Monstera adansonii from seed is possible, but honestly, it’s pretty rare. The seeds are hard to find and they lose viability fast. If you do get your hands on fresh seeds, pop them in a well-draining mix and keep things warm and humid.
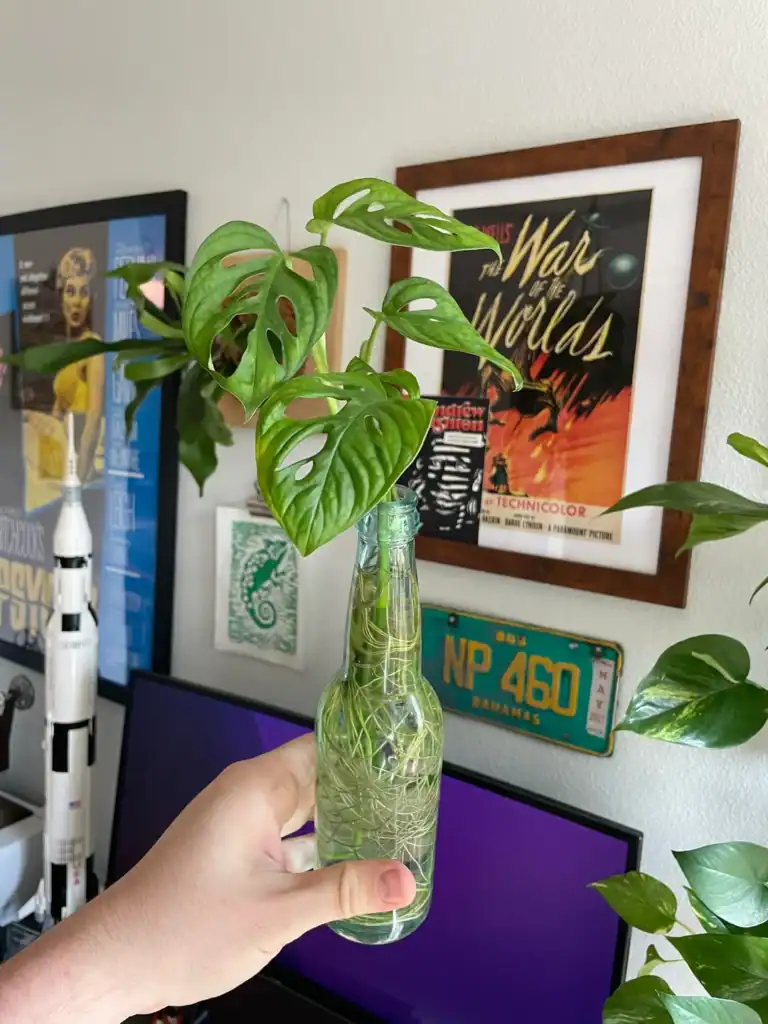
Water propagation is my favorite, probably because I love watching the roots grow. I stick cuttings in a clear glass jar filled with room-temp water, making sure at least one node is under the waterline.
Quick Tip: Keep the water level steady and swap it out if it gets cloudy. Stagnant water is a no-go.
I set the jar in bright, indirect light and just wait. The cutting will keep growing leaves even in water, but I always move it to soil when the roots look strong enough. It just does better long-term that way.
Common Problems and Solutions
Monstera adansonii plants are pretty tough, but they’re not invincible. Problems like pests, watering mistakes, and leaf damage pop up sometimes. Here’s how I handle the most common issues.
Pest Management: Spider Mites, Mealybugs, and More
Spider mites are tiny, but you’ll notice their fine webbing and yellow stippling on leaves. I always check under the leaves—that’s their favorite hiding spot. If I see them, I spray the plant with water to knock them off, then treat with insecticidal soap or neem oil every 5-7 days until they’re gone.
Mealybugs look like little white cotton balls at the joints and along stems. They suck the sap and weaken the plant over time. I just use a cotton swab dipped in rubbing alcohol to get rid of them, making sure to poke into the crevices.
Quick Tip: Give your plant a once-over every week during spring and summer. That’s when pests really show up.
Scale insects and aphids aren’t as common, but they do show up. I treat them like mealybugs—manual removal and a neem oil spray. Wiping the leaves down with a damp cloth every month helps keep things under control.
Dealing with Root Rot and Overwatering
Root rot is a pain. It happens when the soil stays wet too long and the roots start to rot. The leaves turn yellow and mushy, and the plant just kind of stalls. I check the roots—healthy ones are white or tan, but rotten ones are brown, black, and smell awful.
If I catch it early, I pull the plant out, snip off all the mushy roots with clean scissors, and replant in fresh, well-draining soil. Always use a pot with drainage holes—seriously, it matters.
Quick Tip: Let the top 1-2 inches of soil dry out before watering again. That’s the best way to avoid root rot in the first place.
Overwatering is usually the culprit here. I only water when the soil feels dry, not just because it’s “watering day.” In winter, I back off even more since the plant isn’t really growing.
Foliage Issues: Yellowing, Drooping, and Burn
Yellow leaves? It’s usually too much water or not enough light. I always check the soil first—if it’s soggy, I hold off on watering. If not, I try moving the plant closer to a window.
Drooping leaves are a sign it’s thirsty or maybe the air is just too dry. When the soil’s dry, a good soak perks it right up. If it’s still droopy, I’ll mist the plant or run a humidifier nearby.
Leaf burn shows up as brown, crispy edges or bleached spots. That’s a sign of too much direct sun. I move mine to a spot with bright, indirect light and it usually does the trick.
Quick Tip: Rotate your plant every few weeks so it grows evenly. Otherwise, one side gets all the love and the other gets leggy.
Powdery mildew is another thing to watch for, especially if the air is stale and humidity’s high. It looks like white powder on the leaves. I just wipe it off with a damp cloth and space my plants out more, or sometimes I use a little fan for airflow.
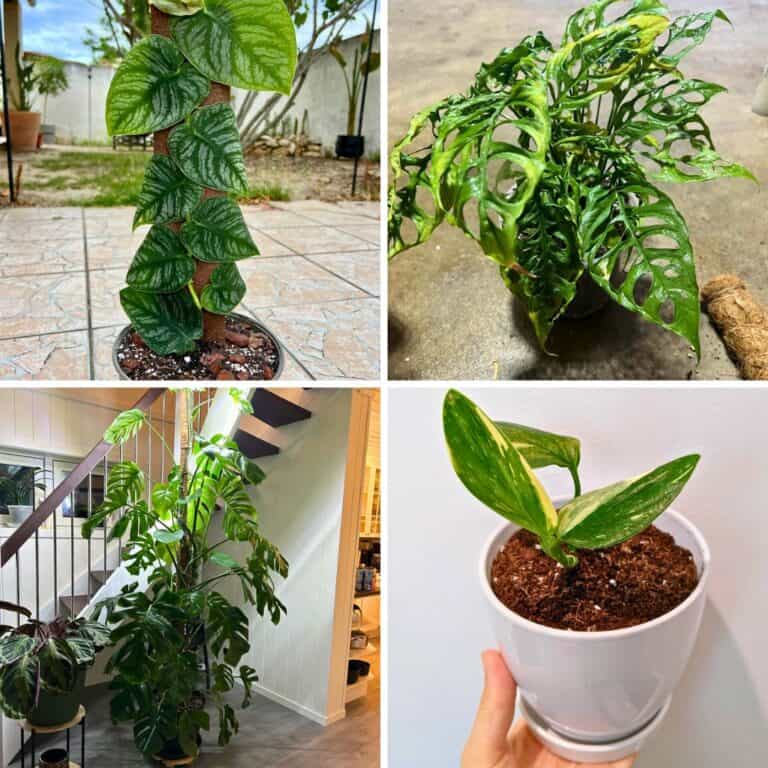
Unique Varieties and Rare Types
The regular Monstera adansonii is already a looker, but there are some rare varieties that are just wild. They’re harder to find and usually pricier, but wow, they’re worth it if you’re a collector.
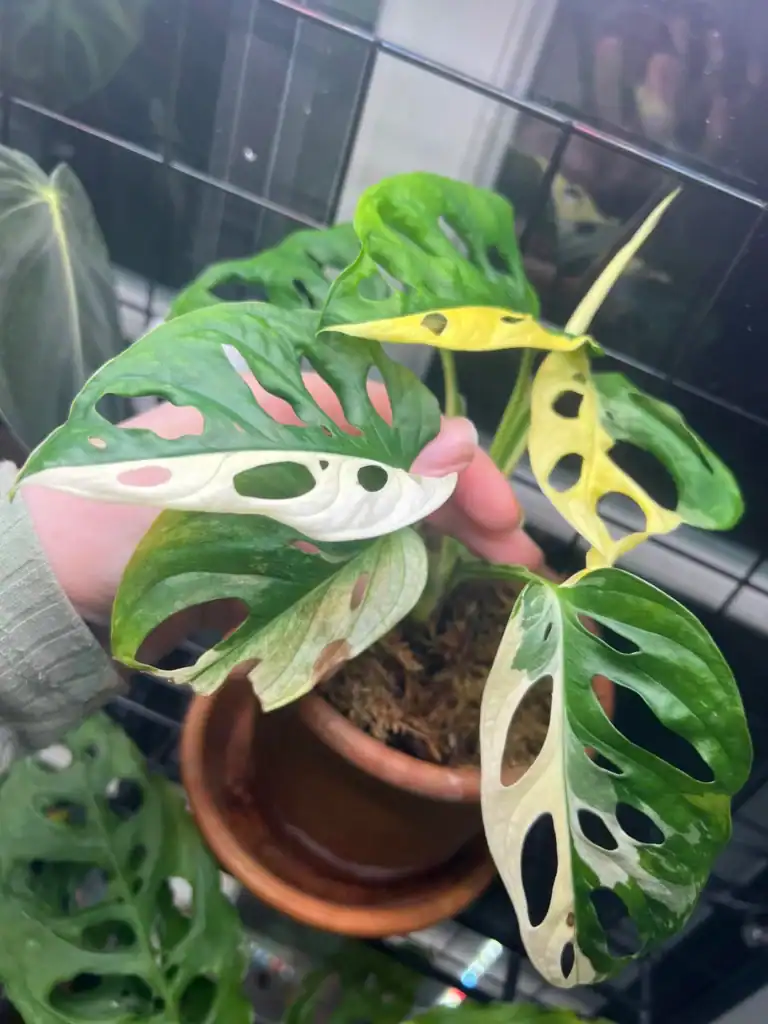
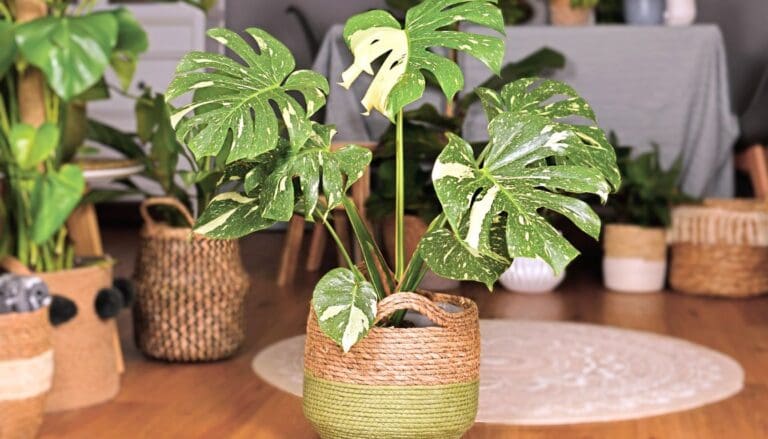
Monstera adansonii variegata is probably the most wanted. It’s got these gorgeous white or cream patches mixed in with the green. No two leaves look the same since the variegation is totally random.
Some leaves have just a few speckles, while others have big white sections. I’ve seen some where half the leaf is white—though, honestly, too much variegation slows the plant down since it can’t make as much food.
Monstera adansonii laniata is cool too. The leaves are longer and narrower, and the holes are more stretched out. It’s not as rare as the variegated ones but still a little tricky to find compared to the standard type.
Tracking down a variegated monstera or a monstera albo adansonii takes patience. Lots of sellers online, but prices can get a bit ridiculous. And, yeah, watch out for fakes—some people try to pass off painted leaves as the real deal.
Quick Tip: Real variegation is in the leaf tissue itself, not just painted on. If it rubs off, it’s not legit.
These rare types need the same basic care as the regular ones. They just take longer to grow and need bright, indirect light to keep their patterns. If you give them too little light, the fancy leaves can turn back to plain green.
Frequently Asked Questions
People always ask about watering, light, feeding, temperature, repotting, and pest control for Monstera adansonii. These are the basics for keeping your plant happy and healthy.
What’s the best way to water my Swiss cheese plant for optimal growth?
I water my Monstera adansonii when the top 1-2 inches of soil feel dry. I just stick my finger in to check.
When it’s time, I give it a good soak so water runs out the bottom. I always dump the drainage tray after about 15 minutes—roots hate sitting in water.
Quick Tip: Water less often in winter. The plant’s not growing much and the soil stays wet longer.
Too much water means yellow leaves and root rot. Not enough, and you’ll see brown, crispy edges. I end up watering every 5-7 days in summer, and maybe every 10-14 days during winter.
Can you share some tips on the right lighting conditions for a healthy Monstera Adansonii?
Bright, indirect light is the sweet spot. I keep mine near an east or north-facing window—plenty of light, but no harsh sun.
Direct sun burns the leaves, leaving brown spots. Not enough light, and you get slow growth, smaller leaves, and big gaps between them.
Quick Tip: Rotate your plant every so often so all sides get light. Otherwise, it gets lopsided.
If you’ve only got bright windows, a sheer curtain helps diffuse the light. Or just move the plant a few feet back from the window.
I’m curious how often I should fertilize my plant; what do you recommend?
I feed my Monstera adansonii once a month in spring and summer, when it’s actually growing. I use a balanced liquid fertilizer at half strength—never full strength, that’s just asking for trouble.
Skip the fertilizer in fall and winter. Too much can build up salts in the soil and burn the roots.
Quick Tip: Every couple months, flush the soil with plain water to wash out any salty buildup.
If you see brown tips or a white crust on top of the soil, that’s a sign of overfertilizing. Stop feeding and water deeply to rinse it out.
Could you tell me the ideal temperature and humidity range for my indoor Monstera?
My Monstera adansonii is happiest between 65-85°F. I keep it away from cold drafts, AC vents, and heaters—none of those are good news.
Anything below 50°F is risky. I notice mine grows best when my house is around 70-75°F.
Quick Tip: Try to keep humidity at 60% or higher. Humidifier, pebble tray, or clustering plants together all help.
Low humidity leads to brown edges and slow growth. I’ll mist it now and then, but honestly, a humidifier is the way to go if you want steady results.
What are the signs that my Monstera Adansonii needs repotting, and how do I do it?
If roots are poking out of the drainage holes, it’s time to repot. I also do it if water just runs straight through or if growth slows down for no good reason.
Pick a pot that’s 1-2 inches bigger than the old one, with drainage holes. I use a mix with perlite or orchid bark for better drainage.
Quick Tip: Repot in spring or early summer. The plant bounces back faster then.
Gently loosen the root ball, set it in the new pot at the same depth, and fill in with fresh soil. Water well after repotting to help it settle in.
How do I identify and treat common pests or diseases affecting Monstera Adansonii?
Spider mites leave behind tiny webs and those annoying yellow specks on the leaves. I usually spray them off with water, then wipe the leaves with a neem oil solution once a week—takes a little patience, but it works.
Mealybugs? They show up as weird white cottony clumps, usually hiding out on stems or tucked into leaf joints. I just grab a cotton swab, dip it in rubbing alcohol, and dab them away.
Quick Tip: Every week or so, take a close look under the leaves and along the stems. You’d be surprised where bugs like to hide.
Root rot is a whole different headache—overwatering is usually the culprit, and you’ll notice yellowing leaves or roots that feel mushy and look black. Snip off any damaged roots with clean scissors and move your plant to some fresh, dry soil.
Scale insects are sneaky; they look like little brown bumps stuck on stems or leaves. I scrape them off gently and follow up with a bit of insecticidal soap.
Note: Some images in the articles are sourced from Reddit and Other Platforms For Reference Purpose.