How To Make Pothos Fuller?
Pothos plants are famous for their long, trailing vines, but let’s be honest—sometimes those vines just look a bit too sparse.
If you’ve noticed yours getting leggy with big gaps between leaves, you’re definitely not alone.
The trick to making your pothos fuller is a mix of proper pruning, decent lighting, and some clever propagation to fill in those bare spots.
I used to assume my pothos would just naturally get thick and bushy on its own. Turns out, these plants really do need a bit of a nudge from us to look their best.
If you don’t trim and care for them regularly, they put all their energy into getting longer, not fuller. It’s a bit of a letdown when you expect a jungle and get stringy vines instead.
The nice thing is, making your pothos lush and bushy isn’t actually that hard. A few tweaks to your routine can make a huge difference.
I’ll walk you through everything from how pothos actually grow to the best pruning cuts for branching, plus a few creative ways to arrange the vines for that full, leafy look.

Please note: Simplify Plants is reader-supported. As an Amazon Associate, I earn from qualifying purchases made by our readers with no extra cost added to you all! Some links in the post are affiliate links and I get a commission from purchases made through links in the post.
Understanding Pothos Growth Patterns
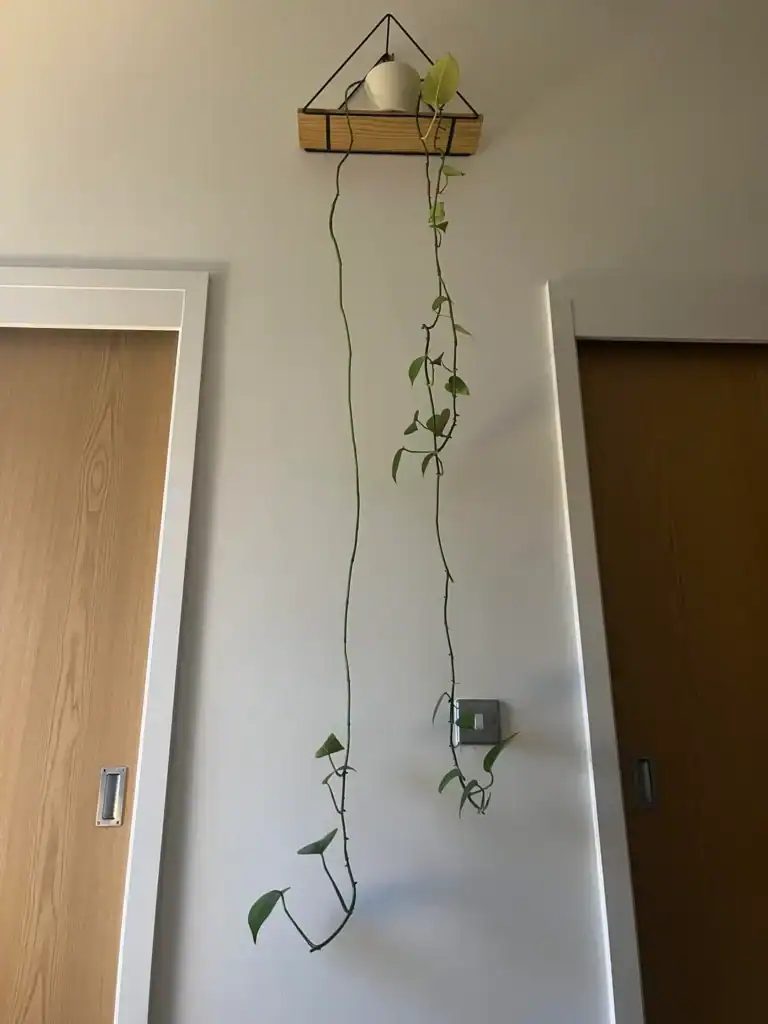
Pothos naturally grow as climbing vines that stretch outward more than they fill in, so it’s no surprise they often look a bit sparse. Light, pruning, and how you support the plant all play a part in how full or leggy your pothos ends up.
Natural Growth Habits
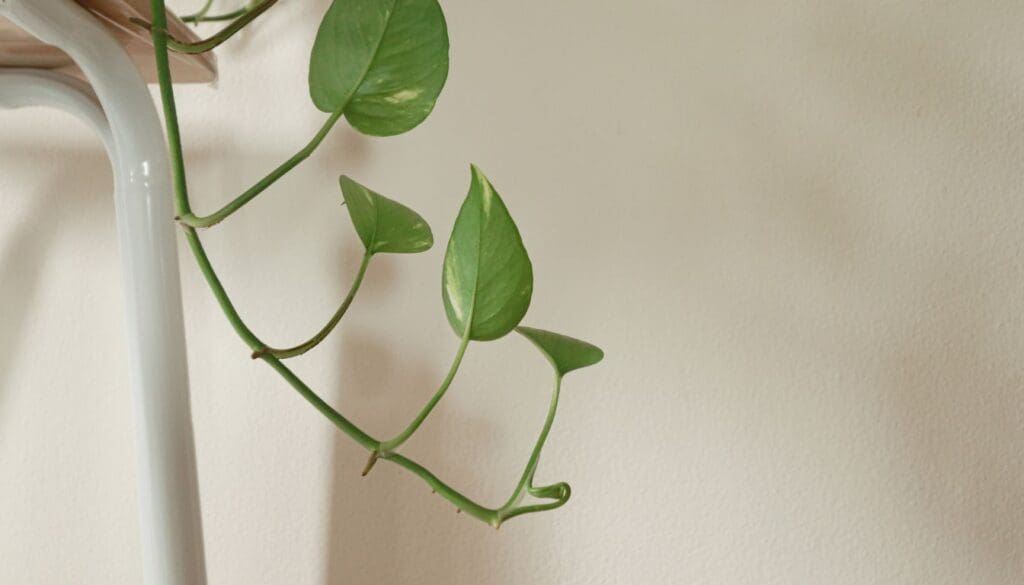
In the wild, pothos are climbers. They grow up trees in tropical forests, sending out long vines with leaves spaced along the stems.
Each vine usually puts out one or two main stems from the soil, and those just keep getting longer if you let them. New leaves pop up at the growing tip, while the older parts of the vine stay mostly bare.
That’s why your pothos can look stringy when left alone. It’s not really aiming to be bushy—it’s trying to climb and spread out to grab more light.
Every node on the stem could sprout roots or new growth, but honestly, it usually won’t unless you give it a reason. The plant saves its energy for those long vines instead of filling in the gaps.
Factors That Affect Fullness
Light is the biggest game-changer for fullness. In bright, indirect light, pothos leaves grow closer together. When the light is low, leaves spread out and the plant just looks thin.
Training the vines matters too. If I let the vines trail down, the plant puts energy into the tips. But if I loop vines back into the pot or let them climb, I often see more balanced growth.
Pot size plays a role. A slightly rootbound pothos will often send up more shoots, which naturally makes it look fuller. Too much space in the pot? Fewer stems, sparser look.
Nutrients matter, but not as much as light. A well-fed pothos during the growing season will put out more and bigger leaves. I usually use a balanced fertilizer every month or so in spring and summer.
Quick Tip: Rotate your pot every week so all sides get their fair share of light and the plant grows evenly instead of leaning in one direction.
Common Reasons for Leggy Growth
Not enough light is the main reason pothos get leggy. When they’re stretching toward a faraway window, they just grow longer stems and the gaps between leaves get huge.
If your pothos is more than six feet from a window, it’s probably going to get leggy. It’s just reaching for something it can’t quite get.
Never pruning is another culprit. If you don’t cut stems back, the plant just keeps extending those same few vines. All the growth hormones go to the tips, so nothing branches out lower down.
Old vines lose lower leaves as they age, leaving you with bare stems at the base and all the leaves at the ends. It’s just what happens over time.
Low humidity can make older sections of vine drop leaves, too. Pothos are pretty tough about dry air, but really low humidity speeds up leaf drop on the oldest growth.
Essential Care For Bushy Pothos
Getting your pothos to really fill out comes down to four things: the right light, proper watering, good soil, and feeding it when it needs a boost.
Light Requirements

Pothos love bright, indirect light. Placing them near an east or north-facing window seems to work best for me. They’ll survive in low light, but they’ll grow slower and get leggy instead of full.
Direct sun can scorch the leaves, so I avoid south-facing windows unless there’s a sheer curtain. If the leaves start turning pale or yellow, that’s probably too much sun. If they’re dark green but spaced far apart, they need more light.
Better lighting means leaves grow closer together along the vine, which is what we’re after. Try rotating your pothos every week or two so all sides get a turn in the light.
Quick Tip: If your home is on the dim side, a grow light about a foot away for 10-12 hours a day works wonders.
Optimal Watering Practices
I water my pothos when the top couple inches of soil feel dry. Just stick your finger in to check. For me, that’s usually every 7-10 days, but it depends on the season and your home’s humidity.
Overwatering leads to root rot—that’s when leaves get yellow and mushy. Underwatering causes droopy leaves with brown edges.
When watering, soak the soil until water drains from the bottom, then empty the saucer after 15 minutes so roots don’t sit in water. I always use room temperature water.
In winter, I water less since growth slows down. In summer, the plant usually needs more frequent drinks. Humidity above 40% keeps the leaves plump, but pothos are pretty adaptable to average household air.
Ideal Soil Mix
Pothos do best in well-draining soil that holds a bit of moisture but doesn’t stay soggy. I like mixing regular potting soil with perlite or orchid bark—about two parts soil to one part perlite.
Good drainage keeps roots healthy and lets them breathe. You can buy pre-made aroid mixes that work great for pothos. Just avoid anything heavy or clay-like.
Make sure your pot has drainage holes. No holes means water gets trapped and your plant suffers. Learned that one the hard way.
Quick Tip: Toss in a handful of worm castings for a slow-release nutrient boost.
Fertilizing For Fuller Leaves

I feed my pothos with a balanced liquid fertilizer, diluted to half strength, about once a month in spring and summer. Look for something with an N-P-K ratio like 10-10-10 or 20-20-20.
When fall rolls around, I stop fertilizing since growth slows down. Too much fertilizer can cause salt buildup, which burns roots and browns leaf tips.
If you prefer organic, worm castings or compost tea are great. They release nutrients slowly and are hard to overdo. Fish emulsion works too, but honestly, it smells pretty strong indoors.
If your pothos is growing slowly, has small new leaves, or looks pale, it might need a feed. But don’t fertilize if it’s struggling from other issues like overwatering or low light—fix those first.
Pruning Techniques To Encourage Fuller Growth
Cutting back your pothos in the right spots tells the plant to grow new stems from just below the cut. The tools you use and timing actually make a difference in how fast you see bushier growth.
How To Prune Pothos Effectively
I always snip just above a node—the little brown bump where leaves attach. This signals the plant where to push out new growth.
Make your cut about a quarter inch above the node, at a slight angle. That helps water run off instead of pooling on the cut. I use this trick on any vine that’s gotten too long and scraggly.
Quick Tip: Trim back at least two or three vines at once and you’ll see a difference in fullness within a few weeks.
The plant usually sends out two or more new shoots from below each cut. Sometimes it happens fast, other times you have to wait a bit. Healthy vines with leaves nearby bounce back quicker than bare stems, in my experience.
Don’t worry about cutting back up to a third of the plant—pothos are tough. I start with the longest vines and then tidy up any others that need it.
Best Tools For Pruning

Sharp scissors or pruning shears are a must for clean cuts. Dull blades just crush stems and can cause problems.
I keep a small pair of bypass pruners just for my houseplants. They cost maybe ten bucks and last ages. Always clean your tools with rubbing alcohol between plants to avoid spreading anything nasty.
Quick Tip: Wipe your blade with an alcohol pad after every few cuts if you’re working on multiple vines.
Good household scissors can work if they’re sharp. If they tear paper instead of cutting cleanly, sharpen them or grab another pair. Kitchen shears are usually too big for these skinny stems.
Timing Your Pruning Sessions
Spring and early summer give you the fastest regrowth. That’s when the plant naturally wants to push out new leaves.
I usually do my pruning between March and July. The extra daylight and warmth help new shoots develop quickly. You can prune in fall or winter too, but growth is slower then.
Quick Tip: Prune right after watering when the stems are firm and full of moisture.
Look for signs of active growth, like new leaves unfurling, before you prune. That means the plant has energy to bounce back. I avoid heavy pruning in winter when my pothos is basically just chilling.
Propagation For A Lush Look

Honestly, propagating pothos cuttings and planting them back in the same pot is the best way I’ve found to get a super full plant.
The process is pretty simple: snip healthy stems, root them in water or soil, and then tuck the new plants back around the base.
Taking Cuttings Successfully
I look for healthy stems with at least four or five leaves when I’m ready to take cuttings. Each cutting needs a node—the little brown bump where roots grow.
I use clean scissors or shears to cut about a quarter inch below a node. The node has to stay on the cutting, or roots won’t form. I always remove the bottom couple of leaves so they don’t rot in water or soil.
Quick Tip: Take a bunch of cuttings at once (I usually do five to eight) so you’ll have plenty of new growth to fill out your pot.
Spring or summer is the best time to take cuttings since the plant is growing actively. Fall works too, but rooting takes longer when it’s cooler.
Rooting In Water vs. Soil
I like rooting in water because you can actually see the roots develop. I pop the cuttings in a glass or jar with enough water to cover the nodes and change the water every week or so.
Roots usually show up in a week or two. I wait until they’re a couple inches long before moving them to soil—seems to give them a better shot at surviving the transplant.
Rooting directly in soil works too and skips the transplant shock, but you can’t see what’s happening underground. I just stick cuttings into moist potting mix and keep it damp (not soggy) for a few weeks.
Quick Tip: A little rooting hormone on soil cuttings can speed things up, though pothos usually root just fine without it.
Replanting For Fuller Pots
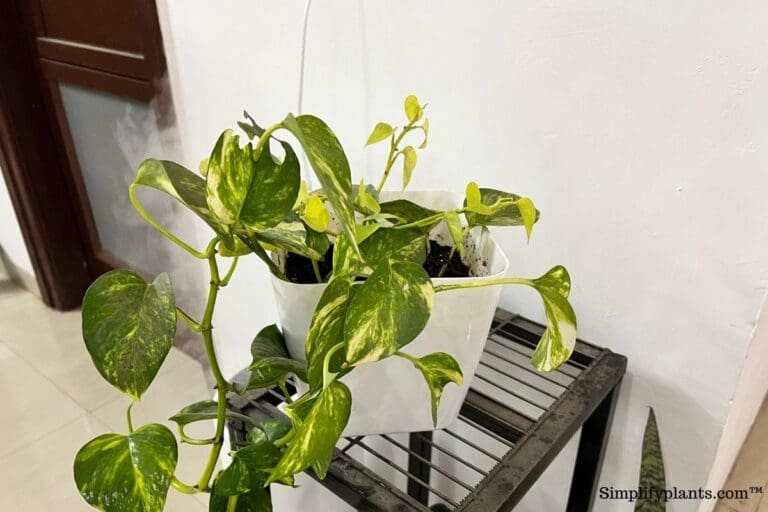
Once my cuttings have strong roots, I tuck them back into the original pot, usually around the edges. I’ll add about 3-5 rooted cuttings per 6-inch pot—just enough to make the pot look fuller right away.
I stick with the same potting mix as the mother plant. Making small holes with my finger, I settle each cutting in and gently press the soil around them, then give everything a good soak.
The new cuttings might droop for a few days as they settle in. I keep the soil just slightly moist and steer clear of direct sunlight for now.
After a week or two, they usually perk up and start putting out new growth—always a relief.
Quick Tip: Try planting cuttings at different angles—some pointing outward, some upright. It gives the arrangement a more natural, layered look as they fill in.
Training And Arranging Vines For Bushiness
If you want your pothos to look extra full, train those long vines back toward the soil instead of just letting them hang. Supports help too, spreading the plant out for a bushier effect.
Guiding Vines Back Into The Pot
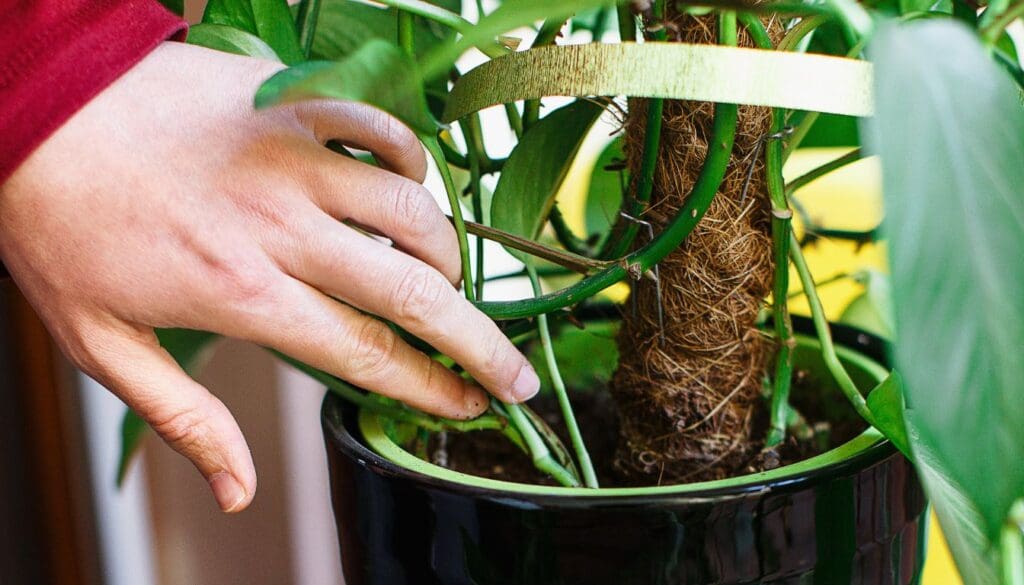
I like to grab the longest vines and coil them back onto the soil surface. This tricks the plant—wherever the vine touches moist dirt, it’ll start to root and create new growth points.
Just lay the vine on top of the soil, and soon enough, those nodes will root and send up new shoots. I use little stones or u-shaped wire pins to keep the vines in place, spacing them every few inches so the stem doesn’t lift before it roots.
Quick Tip: Don’t bury the vines—just let the nodes touch the soil surface. That way the stem can breathe but still root.
Once those nodes take off, you’ll get new shoots from all over, not just the tips. Each rooted section kind of becomes its own mini plant, but it’s still connected to the mother plant. Bare spots fill in, and suddenly the pot looks packed with leaves.
Using Supports Or Trellises
A moss pole or small trellis is great for training vines upward and outward, so the foliage spreads out instead of drooping all to one side. I wrap the vines loosely around the support, and aerial roots will eventually latch on—especially if you keep the pole a little damp.
Sometimes I use a circular wire hoop stuck into the pot and weave the vines through it. The leaves end up facing out in every direction, which makes the plant look round and full.
Quick Tip: Use soft plant ties or jute string to secure vines—never thin wire, since it can cut into the stems as they grow.
Supports work best if you start before the vines get too long and tangled. I move things around every few weeks as new growth appears. The plant will follow whatever structure you set up.
Addressing Common Problems That Hinder Fullness
Pests, disease, or just plain neglect can turn a lush pothos into a sad, stringy mess. Here’s how I catch problems early and fix them before things get out of hand.
Pest Issues And Control
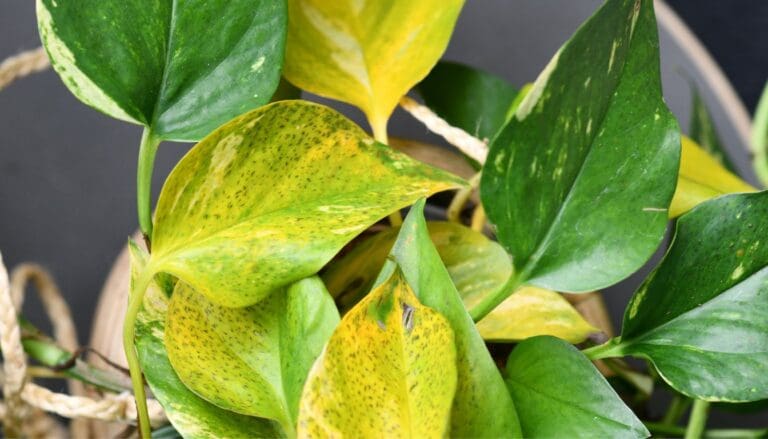
Spider mites, mealybugs, and scale insects are all too happy to move in on pothos. They suck sap, which weakens the plant and leads to yellowing or dropping leaves.
I check under the leaves every week for tiny webs, white cottony bits, or brown bumps. Catching pests early is so much easier than dealing with a full-blown infestation.
My first move is a spray bottle with water and a few drops of dish soap. I spray the whole plant, paying extra attention to leaf undersides, and then wipe each leaf down with a damp cloth. I repeat this every three days for about two weeks.
Quick Tip: If you spot pests, isolate the plant right away so they don’t spread to your other houseplants.
When soap and water aren’t enough, neem oil usually does the trick. I mix a teaspoon of neem oil with a quart of water and a drop of dish soap, then spray the plant in the evening (since neem oil can burn leaves in sunlight).
Disease Prevention
Root rot is the biggest pothos killer. It creeps in when soil stays soggy, turning roots brown and mushy.
I always double-check that my pots have drainage holes. Water should run out the bottom, not pool in a saucer.
If leaves are yellow and soft even when the soil is moist, it’s usually root rot. I’ll pull the plant out and check the roots—healthy ones are white or tan and firm.
I snip off any brown, slimy roots with clean scissors, then repot in fresh, dry mix. After that, I water less and let the top couple inches of soil dry out before watering again.
Quick Tip: In humid climates or during winter, pothos needs way less water than in summer. Don’t let the soil stay wet for long stretches.
Reviving Sparse Or Scraggly Plants
Long, leggy vines with big gaps between leaves are usually from not enough light. The plant stretches toward whatever light it can find, leaving bare stems behind.
I move my pothos closer to a window or pop a grow light nearby. Bright, indirect light makes the plant grow more compact, with leaves packed closer together.
Prune back those bare stems to about six inches above the soil. That encourages new growth from the lower nodes. And hey, you can root those cuttings for more plants.
Quick Tip: Feed with diluted liquid fertilizer monthly in spring and summer. It really helps new growth after a good pruning.
If your pothos is rootbound—meaning roots are circling the pot and poking out of the drainage holes—it’s time to repot. No amount of pruning will help if the roots can’t spread out. Move up just one or two inches in pot size and use fresh soil.
Long-Term Maintenance Tips

Keeping pothos bushy is all about adjusting care as the seasons change, refreshing the soil now and then, and keeping an eye out for new growth.
Seasonal Care Adjustments
In fall and winter, I cut back on watering since my pothos grows slower. Cooler temps and less light mean it just doesn’t need as much.
In spring and summer, I water more often and fertilize every 4-6 weeks. Growth really picks up as the days get longer, so the plant uses more water and nutrients.
When winter comes, I move my pothos closer to the windows. With less daylight, it needs all the sun it can get.
Quick Tip: If you’re in a warm climate and the plant never really slows down, stick to your usual routine—but always check the soil first.
Refreshing And Repotting
I repot my pothos every year or two, usually when roots start circling the pot or poking out the drainage holes. That’s my cue.
I pick a new pot just 1-2 inches wider than the old one—going too big makes the soil stay wet and can cause root rot.
Fresh potting mix gives the plant a nutrient boost and better drainage. Sometimes I’ll mix in a little perlite for extra airflow.
Quick Tip: Spring is the best time to repot. The plant bounces back faster when it’s actively growing.
Monitoring And Encouraging New Growth
I check my pothos every week for new leaves unfurling at the vine tips. If I don’t see any fresh growth for a month or two during the growing season, something’s off.
Pale or tiny new leaves usually mean it needs more light or a bit of fertilizer. I’ll move it closer to a window or add some diluted liquid feed.
Pinching back leggy vines helps the plant branch out instead of just getting longer. I snip right above a node, and usually new shoots appear in a few weeks.
Quick Tip: Try counting new leaves each month during the growing season—it’s a fun way to catch problems early.
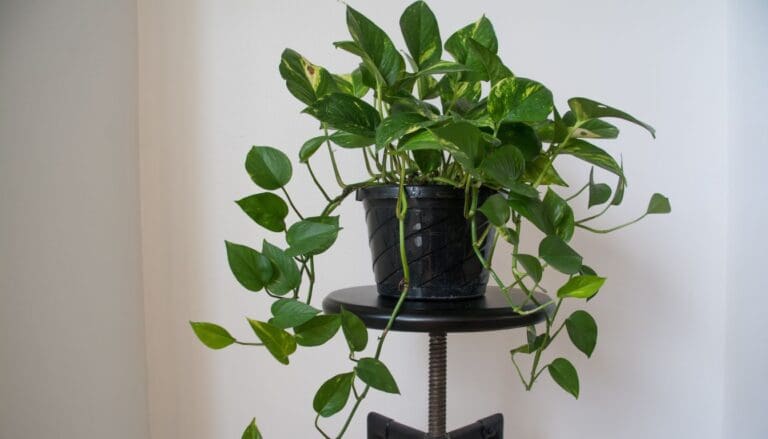
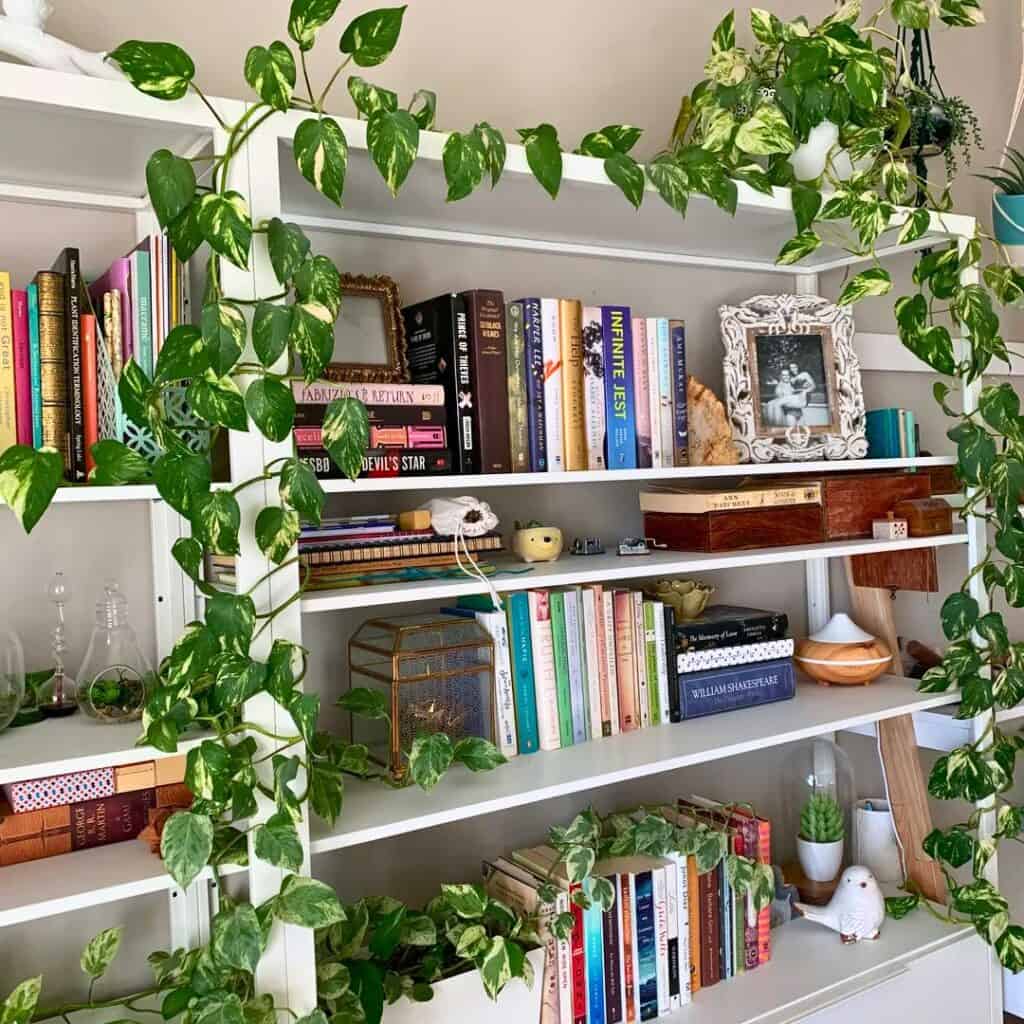
Decorating With Full, Bushy Pothos

I love using full pothos plants to fill empty corners or liven up rooms that feel a bit bare. A bushy pothos on a shelf or side table instantly makes the space feel cozier.
Hanging planters are perfect for showing off all that fullness. The vines cascade down, creating a green waterfall that always catches the eye. I hang mine near windows for the best light.
Here are my favorite spots for displaying bushy pothos:
- High shelves where vines can trail down
- Bathroom counters or shelves (they love humidity)
- Kitchen windowsills or cabinet tops
- Plant stands in corners that need filling
- Macrame hangers near entryways
Sometimes I train my bushier pothos to climb up moss poles or trellises. It gives them a totally different look and saves space on shelves.
Quick Tip: Rotate your pothos every few weeks so all sides get light and stay equally bushy.
I like grouping a few pothos together at different heights for a mini indoor jungle vibe. Mixing trailing and climbing ones keeps things interesting, but I make sure each plant has room to show off its fullness.
Plain walls look way better with a shelf lined with pothos. I keep them spaced about a foot apart so each plant can spread. White or wood shelves really make the green pop.
Frequently Asked Questions
Getting a fuller pothos is all about knowing when to prune, which fertilizer to use, and where to put the plant for the best light. Avoiding things like erratic trimming or poor placement can make a huge difference in how bushy your pothos gets.
What are the best tips for encouraging bushier growth in my pothos plant?
I usually start by pinching or cutting back the longest vines. When you trim a stem, the plant responds by sending out new growth from the nodes below the cut—so you end up with more stems, not just one long vine.
Rotate your pothos every few weeks so each side gets light. Otherwise, you’ll end up with a plant that’s full on one side and bare on the other.
Quick Tip: Always cut just above a node (where a leaf meets the stem) to get two new stems from that spot.
Keep your pothos in bright, indirect light and water when the top inch of soil is dry. Healthy roots mean bushier growth up top.
Can you suggest how often I should trim my pothos to promote a fuller appearance?
I trim my pothos every 4-6 weeks during the growing season (spring and summer). That gives the plant time to push out new shoots after each cut. In fall and winter, I cut back to every 8-10 weeks since growth slows down.
Honestly, I watch the plant more than the calendar. If I see long, bare stems with leaves only at the tips, it’s time for a trim.
Quick Tip: Never trim off more than about a quarter of the plant at once. It needs enough leaves to keep making energy.
Frequent small trims work better than one big chop—your pothos stays full instead of looking sparse for weeks after a drastic cut.
What type of fertilizer should I use for a healthier, bushier pothos?
I go for a balanced liquid fertilizer, like a 10-10-10 or 20-20-20. Nitrogen is key for leaf growth, which is what you want for a bushier plant.
I dilute it to half strength and use it once a month in spring and summer. When fall hits, I skip fertilizing since the plant isn’t growing much.
Quick Tip: Too much fertilizer leads to brown leaf tips and salt buildup, so less really is more with pothos.
If you prefer, a slow-release granular fertilizer works too. Just sprinkle it on the soil every three months during the growing season and you’re set.
How can I properly space my pothos cuttings to ensure they grow in full and lush?
I usually plant about 3 to 5 cuttings in the same pot, just to get that instant, full look. Spacing them roughly 2-3 inches apart gives their roots some breathing room and helps keep things from becoming a tangled mess too quickly.
I like to arrange the cuttings around the edge of the pot instead of crowding them all in the middle. It just seems to fill out the pot from every angle as the vines start to grow outward.
Quick Tip: Make sure every cutting has at least 2 or 3 nodes below the soil. That’s where the roots are actually going to pop out.
I always wait until the roots are at least 2 inches long before moving cuttings from water into soil. Shorter roots seem to handle the change better, honestly—they settle in and take off faster than long, stringy ones.
Is there a specific lighting condition that helps pothos plants become bushier?
Bright, indirect light makes my pothos way bushier. If you can find a spot near an east-facing window, or maybe a few feet back from a south or west window, that’s usually perfect. The leaves seem to multiply without getting scorched.
Low light just leads to stretched-out, leggy vines as the plant tries to chase whatever light it can find. Those big gaps between the leaves? Not a look I’m after.
Quick Tip: Notice your pothos leaning hard toward the window? That’s a sign it’s craving more even light—try rotating the pot or moving it somewhere brighter.
Direct sun, though, is a no-go. Leaves can burn and, honestly, the plant just seems stressed and sluggish. Pothos can survive in low light, sure, but if you want that bushy, lush vibe, you really need to give it enough brightness.
What common mistakes should I avoid to prevent my pothos from becoming leggy?
I never skip pruning sessions. If you let your pothos go wild, it just gets long and viney—definitely not the full look most people want.
Without those regular trims, you’ll probably end up with a couple of stringy stems instead of a nice, bushy plant. It really makes a difference.
Placing pothos too far from windows is another thing I’ve noticed people do a lot. When there’s not enough light, the plant starts stretching awkwardly between leaves, almost like it’s begging for a sunny spot.
Quick Tip: Keep an eye on your watering routine—too much or too little water stresses the plant out and you’ll see it in the growth. It gets patchy and just looks sad.
I try not to leave my pothos in the same position for months on end. Give it a little turn now and then so it grows evenly all around.
And honestly, don’t be afraid to snip off a few cuttings and pop them back into the pot. It’s a simple way to fill in empty spots and make things look a bit more lush.
Note: Some images in the articles are sourced from Reddit and Other Platforms For Reference Purpose.