7 Essential Tips for Repotting Your Succulents!
I’ve always found succulents to be the coolest plants.
Have you ever tried repotting them? It might sound easy, but doing it right makes all the difference.
Without the right technique, your succulents might struggle more than they need to.
Repotting helps them thrive, giving them fresh soil and extra space to grow. 🌵
Let’s make sure your succulents stay happy and healthy. Do you have a favorite succulent you’re eager to repot? Share your thoughts in the comments! 😊

Please note: Simplify Plants is reader-supported. As an Amazon Associate, I earn from qualifying purchases made by our readers with no extra cost added to you all! Some links in the post are affiliate links and I get a commission from purchases made through links in the post.
1) Choose the Right Pot Size
When it’s time to repot my succulents, choosing the right pot size is super important. 😊
I always make sure the new pot is just a bit bigger than the plant’s current pot. If the pot is too large, the soil might not dry out fast enough, and that could harm the succulent.
I remember when I used to pick the biggest pot I could find. I thought more space was better. Big mistake! My succulents didn’t like it. They started to look sad and droopy. A snug pot actually keeps them happy and healthy!
Make sure there’s at least one drainage hole at the bottom of the pot. This helps extra water escape and prevents root rot.
Did you know that succulents don’t mind being a little crowded? In fact, they thrive when their roots fill up the pot some. It’s like a cozy home for them! So, think twice before giving them too much space to spread out.
Feel free to share your pot size stories or tips in the comments! It’s always fun to hear what works for others. Plus, we can exchange some handy advice! 🌵✨
2) Use Well-Draining Soil Mix
When it comes to succulents, well-draining soil is a game-changer.
Have you ever had a succulent turn mushy? That’s the soil’s fault, not yours! 🌱
I found out the hard way that regular garden soil holds too much water. Instead of happy plants, I ended up with soggy messes. Poor succulents, right?
Grab a special cactus or succulent mix the next time you repot. These mixes usually contain sand, perlite, or pumice to help water flow through quickly. 🏜️
Making your own mix is also an option. I sometimes mix regular potting soil with sand and perlite. It’s a little messy, but fun. You can play around with different ratios till it’s just right.
Test your soil by watering it and watching how fast the water drains. If it sits on top, time to adjust your mix! The right soil mix means your plants get the air they need while avoiding waterlogged roots.
Do you have any favorite soil brands or recipes for your succulents? Share them below! Let’s help each other keep our green friends thriving. 💬
3) Water Sparingly After Repotting

Alright, so you’ve just repotted your succulent. Feeling excited? 😊
Before you grab that watering can, hold on! New soil doesn’t mean your plant needs a gulp of water immediately.
I often hear, “Isn’t more water better?” Nope! Succulents are like camels. They store water in their leaves.
After repotting, they prefer a little dry spell. Let the roots settle into their new home first.
Think of it as letting them relax after moving into a new house. Waiting a week or so before their first drink is usually a good move. It gives them time to adjust without the threat of overwatering, which is a common cause of trouble for these plants.
Ever notice how plants in the wild grow in rough conditions? Succulents thrive that way too. Don’t worry if the soil looks dry.
Don’t give in too soon! When it’s time to water, make sure it’s a light sprinkle or a gentle soak, not a deluge.
When I first started growing succulents, I was tempted to pamper them with water. Learning to hold back and observe was key.
Do you overwater your succulents? Share your experiences in the comments! Let’s help each other keep these beauties thriving. 🌵✨
4) Provide Adequate Sunlight

When I think about keeping my succulents happy, sunlight is at the top of the list! 🌞
Succulents love bright spots in the house. I try to find a sunny windowsill where they can soak up the rays. Do you have a favorite sunbathed place in your home?
A south or east-facing window is perfect because it offers lots of direct sunshine. If you notice your succulent looking a bit stretched out or “leggy,” it might be craving more light.
I like to rotate my pots regularly to ensure all sides get their fair share of sunlight.
Sometimes our homes don’t have enough natural light, and that’s okay! I’ve found that grow lights can be a lifesaver. They mimic the sun and keep my plants thriving even in darker parts of the house. Have you tried using grow lights?
Too much sun can be harmful, though. If leaves start to look scorched or get brown patches, it might be getting too many rays.
I solve that by moving them just slightly out of direct sunlight or using a sheer curtain to filter the light.
I’m curious, where do you place your succulents to make sure they get enough sun? Feel free to drop your tips and tricks in the comments. I’d love to hear how you keep your green buddies shining bright! 🌿💬
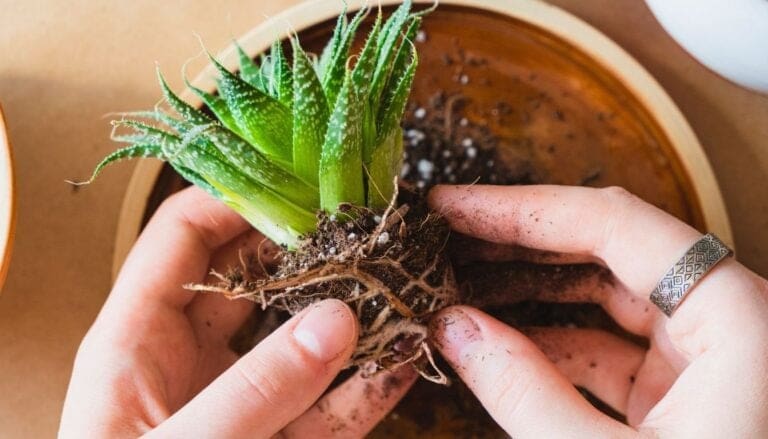
5) Gently Remove Old Soil

When it’s time to repot your succulent, you have to take off the old soil.
I like to start by taking my plant out of its pot. You can do this by holding the base and gently pulling it out. If it feels stuck, give the pot a little tap on the sides. It usually helps! 😊
Once the plant is out, I use my fingers to carefully loosen and shake off the old soil. Be gentle! Succulents have fragile roots, and we don’t want to damage them.
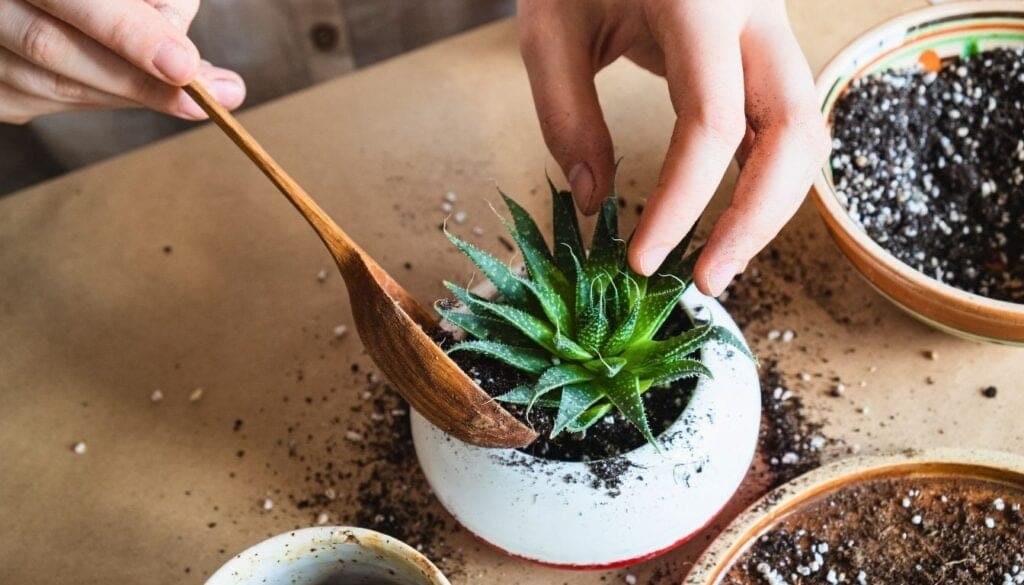
Are there any stubborn clumps? A toothpick or a little stick can help break them apart without harming the roots.
How about those pesky soil bits that refuse to let go? I often give the roots a gentle wiggle and a little shake. Sometimes I even talk to them like, “Come on, buddy, let’s get you clean!” It’s surprising how a bit of encouragement can make the process more fun. 🌿
If you’re worried about dirt flying everywhere, it’s a good idea to do this over some newspaper or outdoors.
After removing the old soil, you’ll often find healthier roots ready for fresh, nutrient-rich potting mix.
How do you handle stubborn soil? Share in the comments! I’d love to hear your tips and tricks. Let’s make sure our succulents are happy and thriving together! 🌵✨
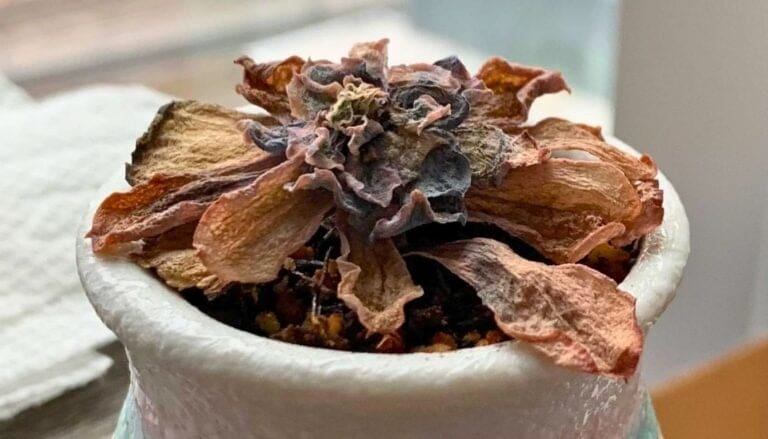
6) Remove Dead or Dying Leaves

When I’m repotting my succulents, I always make it a point to remove any dead or dying leaves.
These leaves can become a breeding ground for pests or diseases. Plus, let’s face it, they aren’t doing any favors for your plant’s looks! 🪴
Sometimes I find leaves that look a bit wrinkled or brown. I just pinch them off gently. This makes room for new leaves to grow.
Have you ever noticed how much fresher your succulent looks after a little tidy up?
If you’re wondering which leaves need to go, focus on those at the bottom of the plant. Old leaves naturally die off as new ones grow. I just remove them to help my succulents flourish.
Don’t be scared to get in there! Your plant will thank you for the extra attention. It’s amazing how just a little leaf-tidying can make such a difference.
Have you tried this before? Give it a shot and see how it transforms your succulents. Share your experiences and pics of your thriving plants in the comments! 🌵😊
7) Inspect for Pests
When I’m repotting my succulents, I always make sure to inspect for pests.
Creepy crawlies can hide in the soil or on the leaves, causing trouble for our little plants. 🕵️♀️
Have you ever spotted tiny bugs on your succulents?
One trick is to look at the undersides of leaves. Pests often hang out there, avoiding the sun. Spider mites and aphids are common offenders. I sometimes use a magnifying glass to spot these tiny invaders. 🔍
If I find any pests, I gently remove them. A cotton swab dipped in alcohol works wonders for this.
Don’t let the bugs crash the party—our succulents deserve to be bug-free!
Before placing my plant in new soil, I also check the roots. Healthy roots should be firm and white. If I see any brown or mushy areas, I trim them away.
Healthy plants start with healthy roots! 🌿
Another tip is using a natural insecticide. Sometimes I make a spray using water and a drop of dish soap. This helps keep my plants pest-free without harsh chemicals. Have you tried this method?
I always keep an eye on my succulents, even after repotting. Spotting a pest problem early makes it easier to handle.
Let’s keep our plants happy and thriving! 😊
Choosing the Right Pot

When picking a pot for your succulents, two things are super important: the pot’s drainage and its material. Each plays a big role in keeping your plants happy and healthy.
Let’s look at what makes these aspects critical and how they impact your green friends! 🌵
Importance of Drainage
Drainage is essential for succulents. Why? Because too much water can lead to soggy roots, which can end in disaster for our little friends.
So always look for pots with drainage holes. That way, excess water can escape, letting the soil dry out properly.
If you’ve fallen in love with a pot that doesn’t have drainage holes, don’t worry. You can add holes with a drill or use it as a decorative outer pot. Just place a smaller pot with holes inside. Double potting can be both practical and stylish!
Think of drainage like the superhero cape for your succulents. It swoops in and saves the day, letting your plants breathe easy. 🌟
How do you ensure your pots have good drainage?
Material Considerations
The material of the pot can also impact your succulent’s well-being.
Terracotta and ceramic are popular choices because they’re breathable. Terracotta absorbs excess moisture and keeps the environment right for your plants. Perfect for those of us who tend to overwater! 😉
Plastic pots, meanwhile, are lightweight and affordable. Plus, they come in all sorts of colors and sizes! But, they don’t absorb water. This can mean wetter soil, so be careful not to overdo the watering if you choose plastic.
Which pot material is your favorite? Do you go for the classic look of terracotta or the vibrant splash of plastic? Let me know in the comments below! 🪴
Preparing Your Succulent for Repotting
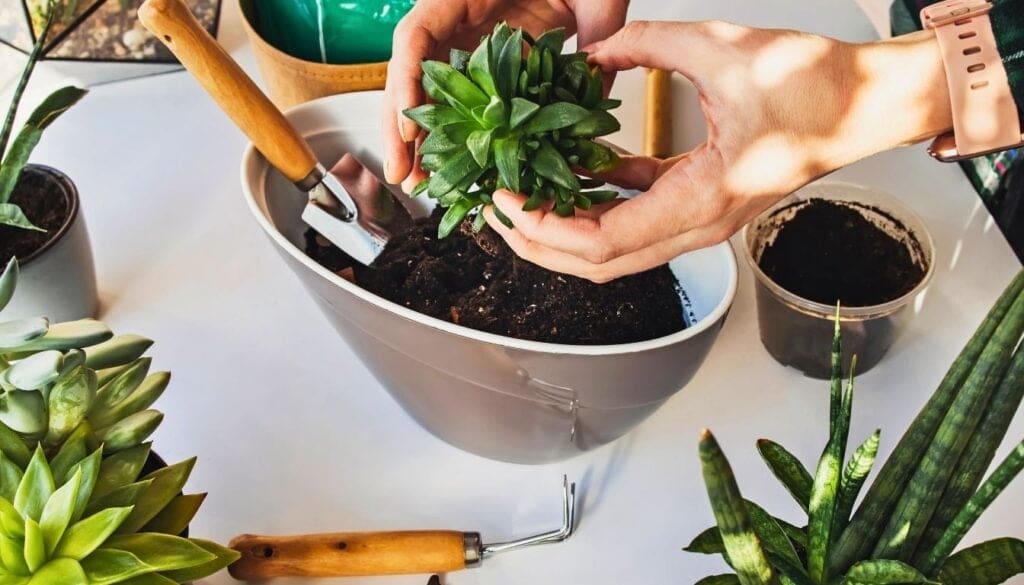
Getting your succulent ready for a new pot is an exciting step! You need to carefully remove it from the old pot and have a close look at the roots and soil. This helps a lot in making sure your plant stays happy and healthy. 🌱
Removing the Old Pot
I like to start by gently squeezing the sides of the pot if it’s plastic. This loosens the soil and makes it easier to take out the succulent.
If the pot is ceramic or clay, I’ll tilt it and tap the sides softly. Patience is key here—no need to rush and risk damaging those precious roots! 😊
Once the soil feels loose, I carefully hold the base of the plant and pull it out slowly.
Sometimes I use a tool, like a small spade or even a butter knife, to help ease the plant out if it’s being stubborn.
It’s like removing a cake from a mold—with care and love! 🍰
Inspecting Roots and Soil
Once the plant is free, it’s time to say “hello” to the roots! I usually shake off any loose soil and check for any roots that look brown or squishy. Those might need a little trim with clean scissors.
Healthy roots should look white or light-colored and firm.
Sometimes, I find an old clump of dry soil at the base of the roots. That needs to be removed to help the plant settle into fresh new soil.
Don’t be afraid to give the roots some space to breathe! Fresh starts are the best for both you and your plant. 🌿
Do you have any tips or tricks you’ve found helpful when repotting? I’d love to hear them! 💬 Drop them in the comments below.
Post-Repotting Care

After repotting your succulents, they’ll need some extra attention to help them settle in. Let’s chat about watering and sunlight so your plants stay happy. 🌵
Watering Guidelines
Once you’ve repotted your succulents, it’s super tempting to water them right away. Resist that urge! I always wait about a week before giving them a good drink. This makes sure any roots damaged during repotting have time to heal.
When it’s time to water, make sure to soak the soil well.
Think of it like a big gulp of water after a long hike.
Then, let the soil dry out completely before the next watering. This helps keep root rot at bay.
Do your succulents prefer morning coffee or afternoon tea?
I usually water mine in the morning to let them soak in all that moisture during the day.
💧 Quick tip: Remember to use a pot with drainage holes. Nobody likes soggy socks, and neither do succulents.
Sunlight Requirements
Sunlight is like the VIP pass for your succulents. After repotting, I keep my succulents in indirect light for a few days. This prevents sunburn while they adjust to their new home.
Once they’re settled, they’ll be ready for their sunny spotlight.
Aim for about 6 hours of sunshine each day.
Are your windows buddies with Mr. Sun?
Consider moving your succulents around to find their favorite sunny spot.
Just like us, some plants enjoy morning sun, while others bask in the afternoon rays. ☀️
Don’t forget to rotate your plants occasionally. Keeps them from leaning like a Tower of Pisa!
How do your succulents like their sunbathing sessions? Would love to hear your thoughts! 🌞
Got any tips or stories about post-repotting care? Share them with me in the comments!
Frequently Asked Questions
You’re about to level up your plant parenting skills! 🌵 Here’s the scoop on soil selection, timing, and what to do post-repotting. Let’s dig into these questions together.
How do I select the right soil when repotting my succulents?
I always go for a well-draining soil mix. Succulents hate soggy feet, so I mix coarse sand or perlite with potting soil to keep them happy.
You can find specialty succulent soil at most garden centers, and it’s totally worth it!
What are the best practices for repotting succulent cuttings?
Gently place the cuttings on top of the soil and wait until they grow roots. Once the roots form, plant them in well-draining soil.
I usually let the cut end dry for a day or two before planting. It helps prevent rot, which is a total buzzkill. 😅
When is the ideal time to repot succulents, and are there times to avoid?
I find that the best time to repot succulents is during the spring or early summer when they’re actively growing.
I steer clear of repotting in winter because they’re often dormant and wouldn’t appreciate the unexpected lift and shift.
How can I repot a succulent that has grown too tall for its current pot?
For those with “head in the clouds” succulents, I handle them by trimming and replanting face up in a sturdier pot.
It’s as simple as chopping off the top and re-rooting it. This method can even give you more plants. Win-win!
What should I do with my succulents immediately after repotting them?
Once I’ve moved them to their new home, I resist the urge to water right away. It’s like a little vacation for the roots.
I give them about a week to settle in first—root relaxation is key here.
Is it necessary to repot succulents I’ve just purchased, and why?
I always repot new succulents because they’ve likely been cooped up in the wrong soil.
Swapping to the right mix does wonders for them, and it lets me check the roots.
Have you ever found a surprise when repotting store-bought succulents? Share with me below! 😊
Note: Some images in the articles are sourced from Reddit and Other Platforms For Reference Purpose.