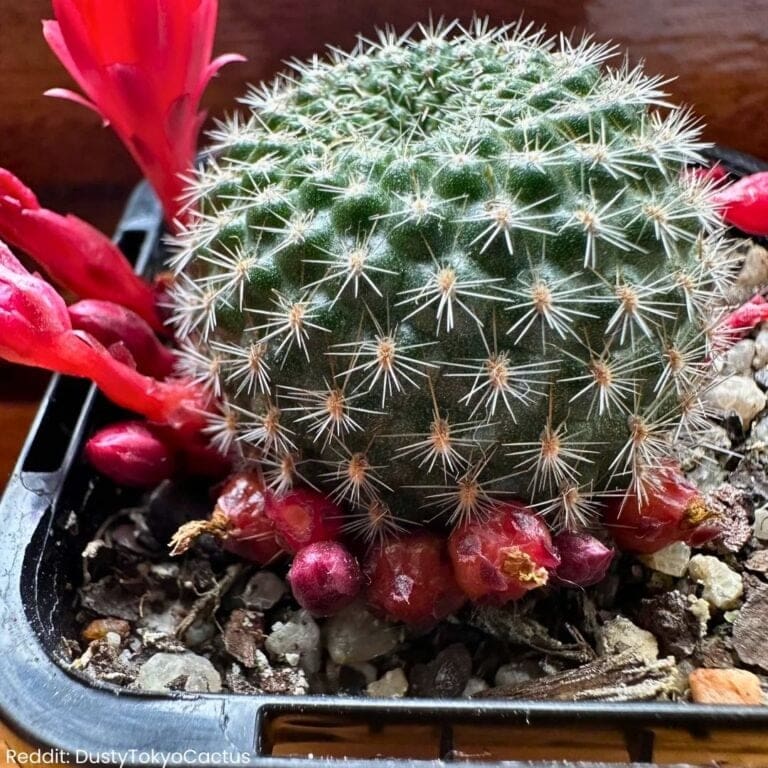
Bishops Cap Cactus Care
I absolutely love taking care of my Bishop’s Cap Cactus! It’s a unique plant that’s easy to care for and makes a lovely addition to any collection.
Have you ever wondered how to keep it healthy and thriving?
Simply give it plenty of sunlight and water sparingly for a happy cactus. 🌵
If you’re into unusual plants, this cactus is a real showstopper. Its shape and little tufts of white give it the look of a bishop’s cap, don’t you think?
Curious about how often to water this beauty?
Think of it like brushing your teeth—once a week should do the trick, but only when the soil is completely dry. 💧
I recommend the Bishop’s Cap for anyone interested in easy houseplants. It’s been a joy to watch mine grow!
Have you thought about adding one to your collection?
With the right care, it can become a standout piece in your home garden. 🏡

Please note: Simplify Plants is reader-supported. As an Amazon Associate, I earn from qualifying purchases made by our readers with no extra cost added to you all! Some links in the post are affiliate links and I get a commission from purchases made through links in the post.
Getting to Know the Bishop’s Cap Cactus
The Bishop’s Cap Cactus is a unique and stunning plant that I truly enjoy. Its striking appearance and easygoing nature have made it a favorite among cactus enthusiasts. Plus, its unusual shape always draws in curious eyes.
Origin and Characteristics
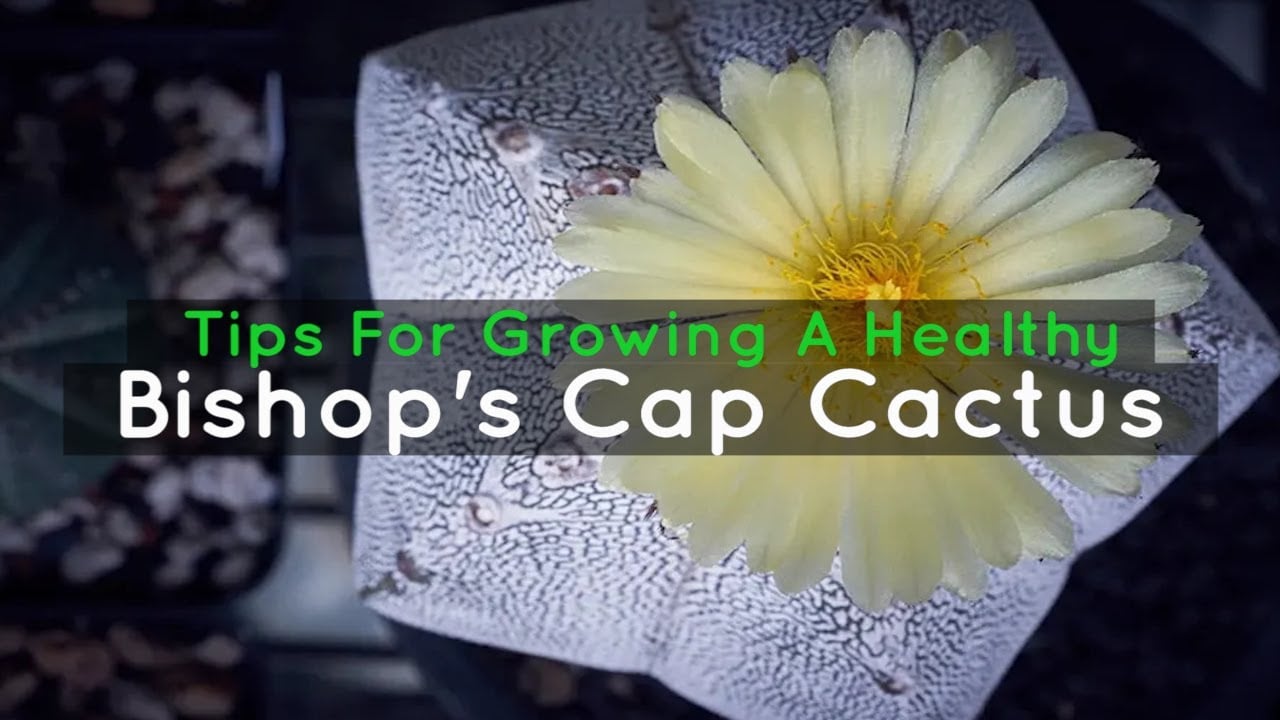
The Bishop’s Cap Cactus, scientifically known as Astrophytum myriostigma, originates from the desert regions of Mexico. It thrives in dry, sandy conditions, which makes it a great fit for many home environments.
This cactus is famous for its star-shaped body, which usually has four or five ribs.
A fun feature of this cactus is its lack of spines. Instead, it has tiny white dots that cover the plant, giving it a frosted appearance. 🌵
Visually, it’s quite the showstopper.
If you’re looking for a spine-free cactus, this is definitely the one!
It can grow up to 3 feet tall, but it usually stays much smaller indoors.
Growth Habits
In terms of growth, this cactus is pretty laid-back. It enjoys bright light, but not too much direct sunlight.
I usually keep mine on a sunny windowsill where it gets dappled sun.
Watering is straightforward—let the soil dry out between waterings.
Overwatering is a common mistake, so I make sure to be cautious.
The Bishop’s Cap blooms with small yellow flowers when it feels cozy and happy. This usually happens in the spring and summer. 🌼
It’s always a pleasant surprise when those flowers pop up.
Does your plant have a favorite spot where it just shines?
Got any Bishop’s Caps in your care? They’re quite the conversation starters with their unique look and easy maintenance. 😊
Optimal Growing Conditions
To keep your Bishop’s Cap cactus happy, make sure it gets enough sunlight, the right temperature, and good drainage.
Let’s dig into these optimal growing conditions together! 🌵
Light Requirements
Bishop’s Cap cacti love sunshine! Ideally, these spiky beauties should bask in bright, indirect light. A south-facing window is perfect.
Too much direct sunlight can scorch them.
If you’re a bit worried about too much sun, try using sheer curtains.
Ever thought of moving them outside? If you do, make sure they sit in a shaded area at first to help them adjust. A sunburned cactus is no fun! 😅
Key tip: Keep an eye out for pale or stretched-out growth. This means they’re light-hungry and might need more sun!
Ideal Temperature
My cactus and I enjoy warm weather. Bishop’s Cap thrives in temperatures between 70°F to 90°F (21°C to 32°C).
They’re not fans of the cold, so when winter rolls around, try to keep them at a minimum of 50°F (10°C).
Pro tip: Avoid placing them near cold drafts or air conditioning vents. Their sunny disposition comes from a cozy spot.
Is your cactus shivering? Time to relocate!
Humidity Preferences
Cacti are desert dwellers, so they don’t need high humidity. They like it dry.
Keep them away from humid spots like kitchens or bathrooms.
A cool mist from a humidifier? Not for these guys! 😜
Let them hang out with their desert-loving pals. Dry air means a happy cactus.
If you notice the air is too moist around your plant, improve ventilation or use a dehumidifier.
Trust me, they’ll appreciate the effort.
Soil Mix and Drainage
The right soil mix is like a comfy bed for your cactus. Use a mix specially made for cacti and succulents.
Good drainage is super important!
Think of adding some perlite or pumice to boost airflow.
It’s like giving them breathable sneakers. 👟
Waterlogged soil can cause root rot, so ensure pots have drainage holes.
Quick check: Water should freely drain; otherwise, it’s time to change the soil. A well-drained cactus is a happy cactus! 🌵
Who’s ready to give their cactus a flourishing home? Share your cactus tales with me! Curious minds want to know! 😊
Watering Schedule and Techniques

Let’s talk about getting the watering just right for the bishop’s cap cactus!
These plants don’t like too much water, but they don’t want to be left high and dry either. It’s like finding the sweet spot in Goldilocks’ porridge adventure. 🌵💧
Determining When to Water
I use the “finger test” to figure out when my cactus needs a drink.
I gently stick my finger about one inch into the soil. If it feels dry, it’s time to water! If it’s still damp, I wait a little longer.
Getting the hang of this test helps me avoid overwatering, which is a common problem.
Remember, the bishop’s cap cactus prefers its soil to dry out completely between waterings.
During winter, I water even less since the cactus is in its dormant stage.
Another tip: I keep an eye on the weather.
Hot, sunny spells might mean my cactus needs more frequent watering. In the cooler months, I ease up on the watering.
Does your cactus make you play detective too? 🕵️♂️
Watering Methods
When it’s time to water, I always go for bottom watering.
This method allows the soil to soak up water slowly from the pot’s drainage holes.
I fill a dish with water and let the pot sit in it for about 30 minutes. This ensures even moisture.
Alternatively, when top watering, I pour water directly on the soil until it starts to drain from the bottom.
It’s important not to splash water on the cactus body to avoid rot.
Pay attention to the pot type too; terracotta pots are great as they let the soil breathe.
How do you water your cacti? 🌞💦
Feeding and Fertilization

When it comes to fertilizing a Bishop’s Cap cactus, finding the right balance is key. Using the right type of fertilizer and knowing how often to apply it can make all the difference in growth. 🌵
Type of Fertilizer
I’ve found that cacti and succulent fertilizers are ideal for Bishop’s Cap.
These blends usually have a balanced nutrient formula that’s perfect for these desert plants.
You might see numbers like 10-10-10 or 5-10-5 on the packaging. Know what those mean?
They refer to the ratio of nitrogen, phosphorus, and potassium—nutrients essential for growth.
Sometimes, folks ask me if they can just use their garden fertilizer.
I say, “Be careful!” Garden fertilizers often have too much nitrogen which isn’t great for cacti.
If you’re like me and enjoy a little DIY, you can even make a homemade mix with diluted liquid fertilizers designed for indoor plants.
It’s as important to read the label as it is to water your cactus properly.
Look for something slow-release so the cactus can absorb nutrients at its own sweet pace.
Fertilization Frequency
Now, about how often to feed this beauty—with cacti like Bishop’s Cap, less is definitely more!
I usually fertilize during the growing season, from early spring to late summer.
Ever wonder why this period? It’s because that’s when the cactus is most active and ready to soak up nutrients. 🌞
I stick to a schedule of once every 4 to 6 weeks.
Sounds simple, right? It is!
Just make sure not to overdo it; too much fertilizer can harm the roots.
In fall and winter, I give the fertilizing a rest. The cactus naturally slows down then, much like how we feel about snoozing on chilly mornings.
Curious if there’s a sign for when to fertilize?
Some folks notice their cacti looking a bit pale or growing slower, which can be a cue. And of course, a good calendar reminder never hurts to keep on track! 😊
Pruning and Maintenance

Taking care of a bishop’s cap cactus isn’t just about watering and sunlight. Pruning and maintenance play a vital role in keeping this cactus healthy and beautiful.
Regular checks and careful cuts help ensure growth that stays strong and lush. Let’s dig into how to keep your cactus in tip-top shape!
Routine Upkeep
Routine upkeep is key to keeping my bishop’s cap cactus thriving.
I start by checking the cactus regularly for any signs of damage or disease, like dark spots or mushy areas.
Sometimes the soil might get a little dry or too soggy.
I make sure the soil drainage is perfect, not holding too much water.
A little cleanup now and then keeps everything looking neat. Dust can gather on the surface, so a gentle brush does the trick to keep the cactus clean.
The cactus might not need lots of attention, but regular upkeep keeps it healthy and happy! 🌵🙂
Pruning Techniques
Pruning might sound scary, but it’s key for keeping my cactus healthy and in great shape.
When a section looks a bit off, I gently trim away any dead or unhealthy parts with clean, sharp tools.
I focus on removing only what’s necessary so that the cactus can direct its energy toward new growth.
Too many cuts can stress it out.
Do you know a bruised cactus still looks cool? 🤔
Don’t worry about little dents or scratches; that’s just character!
Still, the cactus can stand tall and proud when pruned correctly.
Propagation Methods

If you want more of these charming bishop’s cap cactuses, there are a couple of easy ways to do it.
I’ll cover the steps you need to take to grow new plants through seeds and offsets.
Ready to get your hands dirty? Let’s dive in! 🌵
Seed Germination
Propagating bishop’s cap cactus using seeds is an enjoyable task.
I start by collecting mature seeds from a healthy cactus. It’s crucial to use fresh seeds to increase the germination success.
I plant the seeds in a pot filled with well-draining soil, keeping them barely covered with soil.
It’s like tucking the seeds into bed without too many blankets. 😀
Once planted, I mist the soil lightly and place it in a warm spot with indirect sunlight.
The key here is keeping the soil moist but not drenched! Too much water could suffocate the tiny seeds.
In a few weeks, you’ll see little sprouts peeking out, ready to become full-grown cacti!
Keeping the seedlings safe from harsh sunlight and extreme temperatures helps them thrive.
Offset Planting
Growing a new bishop’s cap cactus from offsets is another method I often use.
Offsets are like baby cacti that sprout from the parent plant.
It’s like a cactus family reunion right there in your pot!
To begin, I gently remove an offset from the base of the parent plant, making sure it’s healthy and not damaged.
Allowing the offset to dry for a few days helps prevent rot—but not too long, just until a callus forms.
Next, I plant the offset in a small pot with sandy, well-draining soil.
It’s like giving it its small bed with all the comfort it needs.
Watering should be limited initially. After a few weeks, as roots establish, increase watering slowly.
Watching these little offsets grow into new plants is truly satisfying.
Careful attention ensures they develop into mature cacti, ready to brighten any space!
Pest and Disease Management

Every gardener knows that keeping plants healthy involves guarding against pests and diseases. The Bishop’s Cap Cactus is no exception! 😅
Let’s look at some friendly tips on dealing with common pests and keeping diseases at bay.
Common Pests
Insects like mealybugs and spider mites can cause trouble for our little cactus friends. ⛔
You know those sneaky little bugs that look like tiny cotton balls? Yep, that’s mealybugs! They love to hide in the crevices of the cactus.
To give them the boot, I usually dab them with a cotton swab soaked in alcohol.
Spider mites, on the other hand, might need a bit of soap solution to wash away.
Have you ever tried blasting them away with a water spray? Super satisfying!
Keeping the cactus away from other infected plants is like a social distancing tip for plants.
Trust me, you’ll want to avoid the drama. 🪴
Disease Prevention
Root rot is the pesky villain in our cactus story. It’s most often caused by overwatering.
I’m super careful with my watering schedule, ensuring the soil dries out completely between waterings.
Do you ever use your finger to test the soil? I find it super helpful!
Providing good air circulation is also key.
I make sure my cactus has enough space to breathe, like giving it a spot where it can catch some air.
Fungus infections can sometimes crop up, so I keep an eye out for any signs and remove affected areas immediately.
A little love and attention go a long way in keeping these beauties healthy! 🌵💕
Potting and Repotting
Caring for a Bishop’s Cap cactus involves knowing when to give it a new home and choosing the right pot.
Let’s explore why this matters and how to do it best. 🌵
When to Repot
I usually repot my Bishop’s Cap cactus in the spring, right before new growth starts. This gives the cactus a fresh start with room to expand.
The plant doesn’t often need repotting, about every 2-3 years is enough. Why rush, right? 😉
Repotting too often can stress the cactus, so it’s good to wait until roots start peeking out from the drainage holes.
When shifting to a new pot, I make sure the soil is dry. This reduces the risk of root damage during the transition.
Be gentle while handling your cactus—no one wants to get poked!
Also, if you notice the soil becoming old and compacted, it’s time for new, fresh mix.
Choosing the Right Pot
Choosing the right pot for your Bishop’s Cap is as important as choosing the right snack for a movie night! 🍿
I always go for a pot with drainage holes. This prevents water from sitting in the bottom and keeps the roots happy and healthy.
For material, terra cotta pots are my favorite. They allow moisture to evaporate, helping avoid overwatering—perfect for cacti!
The size also matters! A pot slightly larger than the root ball is ideal. Too big, and the soil may stay wet too long.
Remember, while your cactus doesn’t need a sprawling mansion, a cozy home can foster better growth.
If you notice the roots crowding, it’s time for an upgrade! Have you checked your cactus’s pot recently? 😉
Winter Care Tips
Keeping a bishop’s cap cactus happy during winter is easier than you might think! 🌵
Who knew a little cactus could spark so much joy? Just remember a few key points, and you’ll be set.
First, let’s chat about sunlight. Even in winter, the cactus needs light.
Placing it near a sunny window is ideal. I’ve found south-facing windows work best. Don’t have one? Grow lights are a fantastic backup.
Watering needs change big time.
Water sparingly, allowing the soil to dry out completely.
I like to check with my finger. If it feels dry, it’s time for a drink. Too much water, and you might end up with a soggy cactus. Yikes!
Temperatures, my friend, are crucial.
Keep the room between 55-70°F (13-21°C).
I always avoid placing my cactus near cold drafts or direct heat sources. Neither extreme is a friend to the bishop’s cap.
Here’s a quick checklist:
- Light: Bright, indirect
- Water: Sparingly
- Temperature: 55-70°F
Ready for a challenge?
Try not to touch it too much during its rest period. This lets the cactus recharge for a vibrant spring.
So, tell me, how does your winter care routine look? Drop your thoughts in the comments! 😊
Troubleshooting Common Issues
Oops, is your bishop’s cap cactus looking a bit off? 😟 Don’t worry, I’ve got you covered. Let’s tackle some common problems together!
Wrinkled or Soft Skin?
This might mean your cactus is thirsty. 🌵💧 Check the soil. If it’s dry, give it a good soak!
Yellow or Pale Spots?
Yikes, too much sun! Try moving it to a spot with less direct sunlight. Your cactus likes it bright but not too intense. ☀️
Rotten Roots or Base?
Uh-oh! Overwatering can cause this.
Get your cactus out of the wet soil and remove the damaged roots. Let it dry before replanting in fresh, well-draining soil.
No Flowers?
Sometimes, patience is key. Spring is the best time for blooms.
Make sure your cactus is getting enough light and not too much fertilizer. 🌼
Pests?
Tiny bugs bugging your cactus? 🚫🐛 Use a mild soap solution to gently wash them away. Be careful not to hurt the skin.
Weird Growth?
Growth looking funky or uneven? 🤔 Light might be uneven. Turn the pot a bit every now and then to balance things out.
Got more questions or tips of your own? Share them with me! Let’s keep those cacti happy and healthy together. 😊🌵
Frequently Asked Questions
When caring for a Bishop’s Cap cactus, it’s crucial to understand proper watering, lighting, soil, propagation, blooming, and fertilizing. 🌵
Let’s dive into this, and I’ll share some easy tips with you.
How often should I water my Bishop’s Cap cactus?
I water mine sparingly. Overwatering is a big no-no!
I usually let the soil dry out completely between waterings. In the summer, I check it every couple of weeks. In winter, once a month is enough.
Remember, too much water can harm your cactus.
What are the ideal light conditions for growing an Astrophytum myriostigma?
Bright light is key!
I keep mine in a spot with lots of sunlight but not direct scorching rays. A south-facing window works wonders for my cactus. If it starts looking a bit pale, I move it to a slightly shadier spot to avoid sunburn.
Can you explain the best soil mixture for Astrophytum species?
I mix cactus soil with some pumice or sand for good drainage. This keeps the roots happy and healthy. 🪴
The right soil mix helps prevent root rot, which is a common problem for cacti. Have you tried finding the perfect blend?
What steps are involved in propagating a Bishop’s Cap cactus?
Propagation can be fun!
I cut a healthy part of the cactus and let it dry for a few days. Then, I plant it in slightly moist cactus mix. Before I know it, new roots are forming!
Have you tried it before? It’s a great way to share plants with friends. 🌱
How can I encourage my Bishop’s Cap cactus to bloom?
Blooms need patience!
I keep mine in bright light and reduce water in winter. Using a cactus-specific fertilizer in spring boosts its energy.
When my cactus blooms, it feels like a personal victory. Have you seen those beautiful flowers yet?
What should I know about fertilizing Bishop’s Cap cactus?
I use a diluted cactus fertilizer during the growing season, about once a month. It gives my plant a nice nutrition boost without overloading it.
Just remember, feeding in winter isn’t necessary. Do you have a favorite plant food?
Note: Some images in the articles are sourced from Reddit and Other Platforms For Reference Purpose.