Alocasia Not Growing New Leaves: 11 Common Causes and Simple Solutions
If your Alocasia seems frozen in time, it’s probably reacting to stress—maybe from light, water, nutrients, or the usual suspects like pests.
Here’s the thing: almost every growth problem I’ve run into comes down to a handful of familiar issues, and once you spot them, you can usually fix things pretty easily.
I’ve watched these plants sit motionless for weeks, only to throw out a stunning new leaf after a tiny tweak.
Let’s dig into what’s holding your Alocasia back and how you can nudge it forward again.
We’ll hit all the big topics—lighting, watering, soil, bugs, and root health. I’ll also share how to tell if your plant’s just resting or if there’s something actually wrong.
Ready to figure out why your Alocasia’s on pause? Let’s see what it needs to get those new leaves rolling again.
Please note: Simplify Plants is reader-supported. As an Amazon Associate, I earn from qualifying purchases made by our readers with no extra cost added to you all! Some links in the post are affiliate links and I get a commission from purchases made through links in the post.
Understanding Alocasia Growth Patterns
Alocasia plants have a rhythm—they grow, rest, and repeat, all based on their natural cycle and whatever’s going on in your home. Knowing what’s normal makes it way easier to spot when something’s off.
Natural Growth Cycle of Alocasia
Alocasias are at their happiest in spring and summer, especially when temps hover between 65-85°F. That’s when mine seem to crank out new leaves like clockwork.
Once fall hits, things start slowing down. Winter’s basically nap time for most Alocasias—they stop making new leaves and just chill. It looks dramatic, but it’s totally normal.
Dormancy can last a few weeks or stretch into months, depending on how warm and bright your space is. If you keep things toasty and well-lit, you might only see a slight slowdown, or your plant could skip dormancy altogether.
Quick Tip: Don’t freak out if your Alocasia stops growing around November—it’s just on a seasonal break.
Signs of Healthy Versus Stunted Growth
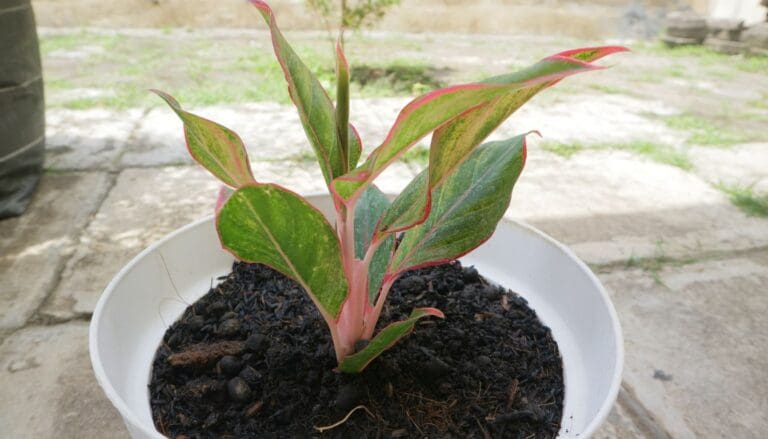
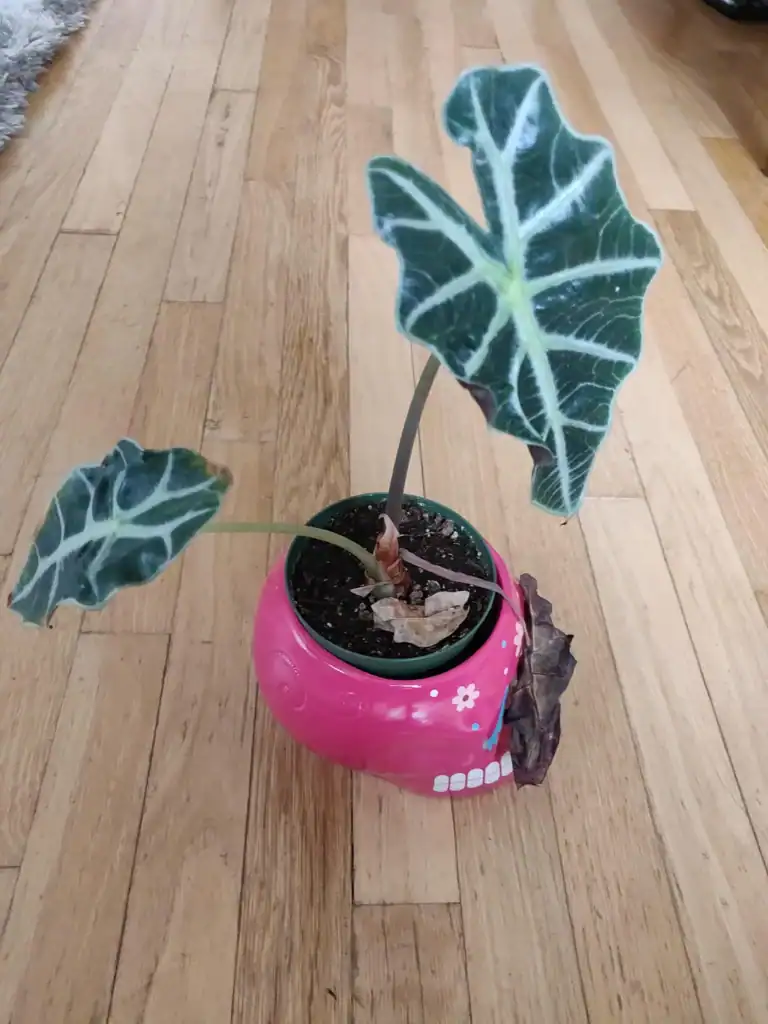
A thriving Alocasia puts out firm, smooth leaves with no crispy edges or weird holes. New leaves should look lively and stand tall once they open.
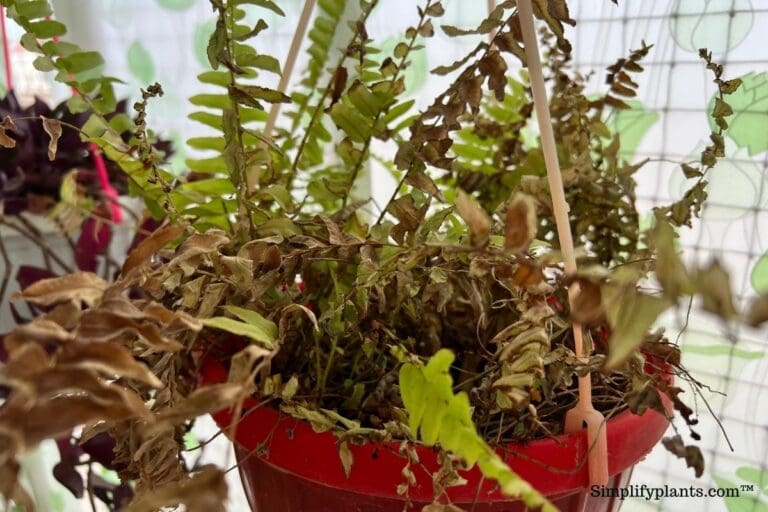
If growth is stunted, you’ll see smaller leaves, or they’ll get stuck halfway open. I’ve had leaves freeze mid-unfurl, usually when humidity or watering isn’t quite right.
Yellow or brown patches on new leaves? That’s often a sign of missing nutrients or maybe a pest problem. Stems should feel sturdy, never squishy. Healthy plants usually keep their old leaves while adding new ones, though losing one old leaf per new leaf isn’t unusual.
If leaves droop all the time, even after watering, something’s up with the roots or the temperature.
How Often Alocasia Should Grow New Leaves
When things are good, you’ll see a new leaf every 4-6 weeks during the growing season. Bigger, well-established plants sometimes go even faster.
Smaller or younger plants are slower—they might only give you a new leaf every 6-8 weeks. The pot size, light, and how often you feed all play a part.
My Alocasias in bright, indirect light with consistent care are definitely the quickest. If the light’s not great, you’ll wait longer, but steady growth is still possible if everything else lines up.
Common Causes Alocasia Is Not Growing New Leaves
When my Alocasia stops making new leaves, it’s almost always about light, water, nutrients, or just the plant’s natural cycle.
Insufficient Light Exposure

Alocasias really need bright, indirect light to keep growing. If I let mine languish in a dark corner, it just sits there—no new leaves, nothing.
Sure, it’ll survive in low light, but don’t expect any action. I’ve found the sweet spot is near an east or west-facing window. South-facing works too, but I always use a sheer curtain to soften the sun.
If the stems get stretched out or the plant leans hard toward the window, that’s a big red flag for not enough light. Direct sun is a no-go—it fries the leaves.
Quick Tip: Move your Alocasia closer to a window, or grab a grow light if you’re short on natural light.
Improper Watering Practices
Too much or too little water? Either one will stall your Alocasia. Overwatering is a classic mistake—it rots the roots, and then the plant can’t take up anything at all. Underwatering stresses it out and halts growth.
I always check the top 1-2 inches of soil before watering. If it’s dry, I go ahead and water. If it’s still damp, I wait.
Overwatering is the bigger killer for me. Alocasias need oxygen around their roots, and soggy soil just suffocates them. Drainage holes are non-negotiable. If water pools at the bottom, trouble’s coming.
Quick Tip: Just stick your finger in the soil—if the top inch or two is dry, it’s time to water.
Lack of Nutrients
Alocasias are pretty hungry while they’re growing. Without enough nutrients, they just don’t have what they need to make new leaves.
I use a balanced liquid fertilizer at half strength every 2-4 weeks through spring and summer. Once fall hits, I back off or stop feeding altogether.
If I’ve skipped fertilizer for a while and the leaves are pale or growth is stalled, I know it’s time to feed. Fresh potting soil helps for a bit, but nutrients run out after a few months.
Quick Tip: Feed monthly during the growing season with diluted fertilizer.
Dormant Periods
When fall and winter roll around, Alocasias naturally slow down or stop growing. It’s not a crisis—it’s just what they do.
During dormancy, the plant’s taking a break and saving energy. Sometimes they even drop leaves and look a little sad, but it’s just a rest phase.
I water less and skip fertilizer while mine are dormant. They don’t need much when they’re not actively growing. Cooler temps and shorter days usually trigger this.
Once spring comes back and the days get longer, growth usually picks up again. Patience is key.
Quick Tip: Let your Alocasia rest in winter—it’ll perk up again in spring.
Lighting Issues and Solutions

Alocasias love bright, indirect light if you want steady new leaves. Too little and they crawl, too much direct sun and you’ll see crispy damage.
Optimal Light Conditions for Alocasia
In my experience, 6-8 hours of bright, indirect light is the sweet spot. East-facing windows are great, or you can go a few feet back from a sunny south or west window. If you can read a book comfortably there, your plant will probably be happy.
Direct sun is harsh—leaves burn fast and get brown patches. If you’ve only got sunny windows, a sheer curtain will save your plant. Or just move it back a few feet.
Quick Tip: Give your Alocasia a quarter turn every week or two so it grows evenly.
North-facing windows can work if you’re in a bright area, but sometimes it’s just not enough. I usually keep an eye on my plant for a couple of weeks and adjust if it seems unhappy.
Identifying and Correcting Low Light Problems
Low light is probably the most common reason Alocasias stop making new leaves. The plant just sits, and older leaves might get darker as it tries to soak up more light.
Stems can get leggy or lean toward the window. If new growth hasn’t shown up for over a month, I always check the lighting first.
To fix it, I move the plant closer to a window or into a brighter spot. If that’s not possible, a grow light works wonders. I use a full-spectrum LED about a foot above the plant for 10-12 hours a day.
Quick Tip: There are free light meter apps for your phone—Alocasias like 400-800 foot-candles.
Watering Mistakes to Avoid

Watering is where things go wrong fast—too much and the roots drown, too little and the plant just gives up on new leaves.
Overwatering and Root Rot
I can’t count how many Alocasias I’ve seen suffer because someone watered on autopilot. If the soil stays wet all the time, roots can’t breathe and start to rot. They turn brown and mushy in no time.
Once root rot sets in, your Alocasia’s too busy trying to survive to make new leaves.
Quick Tip: Poke your finger two inches into the soil—if it’s damp, wait before watering again.
Look out for yellowing leaves, a funky smell, or a pot that feels heavy days after watering. Those are all warning signs. Drainage holes are a must, and I always use a chunky, well-draining mix with perlite or bark.
When it’s cold, Alocasias need even less water.
Underwatering and Dehydration
If you let your Alocasia dry out completely, it’ll stop growing too. The plant shifts into survival mode and puts new leaves on hold.
Leaves will droop, curl at the edges, or get crispy brown tips. Stems might feel soft instead of sturdy.
Quick Tip: Water thoroughly until it drains out the bottom, then wait for the top 1-2 inches to dry before watering again.
In summer, I check every few days since the soil dries out faster. The pot feels lighter when it’s time to water. Don’t just sprinkle the top—give it a good soak so all the roots get moisture.
Nutrient Deficiencies and Soil Quality

Alocasias need the right food and soil if you want them to keep growing. Bad soil or skipped fertilizer can bring things to a halt.
Choosing the Right Fertilizer
I stick with a balanced liquid fertilizer—something like 20-20-20 or 10-10-10—during the growing season. Alocasias are surprisingly hungry, so I feed every 2-3 weeks when things are warm and bright.
Nitrogen’s the star for big leaves, phosphorus helps roots, and potassium keeps the whole plant strong.
Quick Tip: Always dilute fertilizer to half strength—full strength can burn the roots.
No feeding in fall or winter when the plant’s dormant. If you see yellow leaves with green veins, it’s probably an iron issue, so I’ll switch to something with micronutrients.
Brown tips or edges? That’s usually a sign of too much fertilizer or salt buildup.
Improving Soil Mix for Growth
I like to mix my own soil—equal parts potting soil, perlite, and orchid bark. That makes a chunky, airy mix that drains fast, which Alocasias love. Regular potting soil is just too dense.
Roots need air as much as water. If the soil’s compacted, growth stops cold. I’ll toss in some worm castings for a natural nutrient boost.
Quick Tip: Repot every 1-2 years to refresh the soil and keep nutrients up.
If the soil stays wet for days or smells off, it’s time for a change. I check by poking my finger deep in—if it’s muddy or sour, the soil’s gone bad. Fresh mix brings back the drainage and air your plant needs.
Environmental Factors Affecting Growth

Alocasias are kind of picky about their environment. Even little changes in temperature or humidity can stall new growth.
Temperature Fluctuations
From what I’ve seen, Alocasias want stable temps between 65°F and 80°F to keep growing. If things dip below 60°F, they’ll slow down or just stop.
Cold drafts from windows or ACs can shock them. Even a short spell below 55°F can damage roots and stop new leaves for weeks.
Too much heat isn’t great either. Over 85°F, the plant goes into survival mode and forgets about making new leaves. I always keep mine away from heaters and radiators.
Quick Tip: Keep your plant at least three feet from any drafty window or heat source.
Sudden temperature swings mess with the plant’s internal clock. If day and night temps jump more than 10°F, leaf growth can stall. I just use a cheap thermometer nearby to keep tabs.
Humidity Requirements
Alocasias really thrive when humidity sits between 60% and 80%. Most homes? They hover around 30% to 50%, which just isn’t quite enough for those fresh leaves to show up.
When humidity drops, the plant closes its stomata and just… stops growing. Usually, I spot brown edges on the leaves first, then growth grinds to a halt. A humidifier nearby usually sorts things out fast.
Quick Tip: Try grouping your plants to create a mini humid zone, or set your Alocasia on a pebble tray with water underneath.
I use a cheap hygrometer to keep tabs on humidity. If it dips below 50%, I’ll mist the leaves in the morning or run a humidifier for a few hours. Honestly, a bathroom with a window is perfect—shower steam does wonders.
Pest and Disease Concerns

Bugs and infections can totally mess with your Alocasia’s ability to push out new leaves. Spider mites, mealybugs, and fungal issues all drain energy that should be going to growth.
Common Pests That Affect Alocasia
First thing I check for? Spider mites. They’re tiny, make fine webbing under leaves, and suck out the plant’s juices. If your Alocasia’s fighting pests, don’t expect any new leaves.
Mealybugs look like little cotton balls on stems and leaves. They’re sneaky—often hiding in leaf joints where I might miss them if I’m not paying attention.
Scale insects show up as brown or tan bumps on stems. They hardly move, so sometimes I’ll think they’re just part of the plant.
Quick Tip: Dabbing leaves with rubbing alcohol on a cotton swab zaps pests on contact.
I treat infestations with neem oil or insecticidal soap every 5-7 days. It usually takes a few rounds to really break the pest cycle. Don’t forget to keep your Alocasia away from other plants while you’re treating it.
Detecting and Treating Diseases
Root rot is the main disease I see in Alocasias. It happens if the soil stays soggy, and you’ll find mushy brown roots if you check. No healthy roots, no new leaves—simple as that.
Yellow leaves with brown spots? That’s often a fungal infection. I snip off affected leaves with clean scissors to keep it from spreading.
Bacterial leaf spot is another headache. It causes water-soaked patches that turn black, and it spreads fast if the air’s too humid and stagnant.
Quick Tip: Always sterilize your tools before pruning—don’t give bacteria or fungi a free ride.
For fungal issues, I cut back on watering and boost airflow. Sometimes I’ll use a fungicide if things look rough. If it’s root rot, I trim away the dead roots and repot in fresh soil.
Problems with Repotting and Root Health
Alocasias can stall if they’re stuck in a cramped pot or if repotting stresses their roots. Either way, it messes with their ability to soak up water and nutrients.
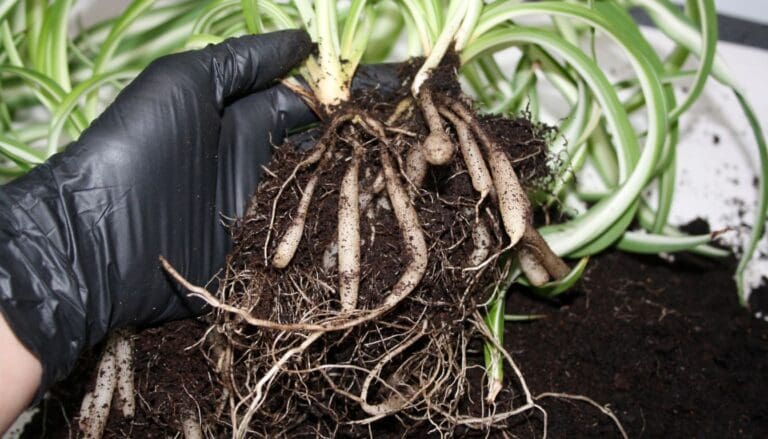
Signs of Being Root Bound
If roots run out of space, they start circling the pot. Sometimes I spot roots poking out the drainage holes or coiling on the soil surface.
Pull the plant out and take a look. If the roots form a tight, dense mass that holds the shape of the pot, it’s definitely root bound.
Soil dries out way faster when roots take over. I’ll water, and the plant’s thirsty again in a day or two.
Growth slows or just stops. There’s barely any soil left, so it can’t get enough nutrients.
Quick Tip: Check for root binding every spring—just lift the plant and peek at the drainage holes.
How Repotting Can Impact Leaf Growth
Repotting, even when done right, gives your Alocasia a bit of a shock. They need time to settle in and get those roots established before new leaves show up.
Most of mine pause for 2-4 weeks after repotting. That’s pretty normal, honestly.
If I damage roots during repotting, it’s worse. Broken roots can’t take up water, so leaf growth comes to a standstill.
Dense, soggy soil can suffocate the roots. Alocasias want loose, airy soil so their roots can breathe and avoid sitting in water.
Going up more than one pot size? That’s a recipe for trouble—too much wet soil around the roots can mean rot.
Quick Tip: Only bump up 1-2 inches in pot size and use a chunky aroid mix to help your Alocasia recover faster.
Improper Pruning and Leaf Care

Cutting the wrong leaves or skipping cleaning can really slow your Alocasia down. I’ve seen plants stall out because their remaining leaves can’t photosynthesize well.
When and How to Prune Alocasia
I only prune when a leaf is totally yellow or brown. Cutting off healthy leaves just robs the plant of its energy source. Wait until the whole leaf is dead before removing it.
Use sharp, clean scissors or pruners—wipe them with rubbing alcohol before each cut. That way, you don’t spread anything nasty.
Cut close to the base, but don’t nick the main stem. If you’re nervous, leave about half an inch of the petiole. The stub dries up on its own.
Quick Tip: Don’t cut more than one or two leaves at a time, even if they’re dead—the plant still needs some foliage for new growth.
Cleaning and Maintaining Leaves
Dust blocks light and messes with photosynthesis. I wipe my Alocasia leaves every couple of weeks using a damp microfiber cloth. Support the leaf underneath as you clean.
Skip the leaf shine sprays—they clog pores and do more harm than good. Just plain water is all you need.
While you’re at it, check the undersides. That’s where pests like to hide. If you see any, wipe them off right away with a soapy cloth.
Quick Tip: Clean leaves in the morning so they dry out before night—wet leaves in cool air can invite fungus.
Fixing Growth Issues: Easy Step-by-Step Solutions
First, check soil moisture with your finger. Stick it about two inches deep. If it feels bone dry or really soggy, you’ve found your first clue.
If the soil’s dry, give your Alocasia a good soak until water drains out the bottom. Let it drain fully before putting it back. Quick Tip: Only water when the top inch feels dry—don’t stick to a strict schedule.
If it’s waterlogged, you’ll need to repot. Use fresh, well-draining mix and make sure the new pot has drainage holes. Trim off any mushy roots as you go.
Move your plant closer to a window if it’s in a dark spot. Alocasias love bright, indirect light. Near an east or north-facing window usually works well.
Double-check the temperature. These plants hate cold drafts and anything below 60°F. Keep them away from vents, drafty windows, or cold floors.
Quick Tip: If the leaves feel cold in the morning, move your plant somewhere warmer.
Feed with a balanced liquid fertilizer at half strength once a month in spring and summer. No need to fertilize in fall or winter—growth slows naturally then.
Check for bugs on leaf undersides or along stems. Wipe them off with a damp cloth or use insecticidal soap if needed.
Preventing Future Problems with Alocasia Leaf Growth
Honestly, prevention is way easier than scrambling for a fix. Once your Alocasia’s back on track, you want to keep it that way.
Quick Tip: Always check the top two inches of soil before watering—just stick your finger in to feel.
Consistency matters more than perfection. I aim for a regular watering schedule, but I let the soil guide me. In winter, my Alocasia barely needs water compared to summer.
Light is non-negotiable for me. Bright, indirect light keeps leaves coming without burns. If the plant starts leaning, I give it a quarter turn every week or so.
Quick Tip: Wipe leaves with a damp cloth monthly to help them soak up more light.
Humidity really does make or break things, especially in a dry climate. I keep mine above 60% with a humidifier or pebble tray. If humidity drops, you’ll see crispy edges and slow growth.
Feed your Alocasia in spring and summer. I stick with a balanced liquid fertilizer at half strength, once a month. Just skip it in fall and winter—no need when growth slows.
Watch for pests like spider mites and scale. Catching them early is way less stressful than dealing with an infestation. A quick weekly check under the leaves is all it takes.
Frequently Asked Questions

If your Alocasia stops putting out new leaves, you’re definitely not alone. Most of the time, it comes down to light, water, nutrients, pests, or just the environment in general.
Why is my Alocasia plant not sprouting any new leaves?
Your Alocasia could just be dormant, especially in fall and winter. Many types slow down or stop growing when it gets cooler or there’s less light.
Plants also pause after repotting or sudden changes. Give it a few weeks to settle in before panicking.
Check if the roots have enough space. If it’s rootbound, the plant will focus on survival, not new leaves.
Quick Tip: Feel the soil and look for signs of growth at the base before assuming there’s a problem.
Could inadequate lighting be affecting the growth of my Alocasia?
Poor light is a top reason for slow growth. Alocasias want bright, indirect light for at least 6-8 hours a day to make new leaves.
North-facing windows often don’t cut it. I’d move the plant near an east or west-facing window for gentle sun.
Direct sun burns leaves, but too little light makes the plant conserve energy. You’ll see smaller leaves and slower growth in dim spots.
Quick Tip: If your plant’s leaning hard toward the window, it’s begging for more light.
How often should I water my Alocasia to promote new leaf development?
I water when the top 1-2 inches of soil feel dry. In summer, that’s every 5-7 days; in winter, more like 10-14 days.
Overwatering leads to root rot, which shuts down growth and can kill the plant. The soil should be slightly moist—not soggy.
Underwatering also stunts growth. If the leaves droop or get crispy edges, it’s probably too dry.
Quick Tip: Stick your finger in the soil—if it’s still damp underneath, wait a day or two before watering.
Are there any nutrient deficiencies that might stop my Alocasia from growing?
If older leaves turn yellow and there’s no new growth, it could be a nitrogen deficiency. Alocasias are hungry during spring and summer.
I feed with a balanced liquid fertilizer at half strength every 2-4 weeks in the warm months. Don’t bother fertilizing in fall or winter.
Micronutrients like magnesium and iron matter too. Old, tired soil that hasn’t been refreshed in over a year can cause issues.
Quick Tip: Always fertilize after watering to avoid burning the roots.
Could pests or diseases be the reason behind my Alocasia’s stunted growth?
Spider mites, aphids, and mealybugs suck nutrients and halt new leaf production. Always check under leaves and at the base for bugs or webbing.
Fungal and bacterial infections often start in wet soil and attack the roots. If you catch a whiff of rot or see mushy stems and sudden yellowing leaves, it’s time to act.
Root rot is the big one—brown, mushy roots instead of firm, white ones mean too much moisture.
Quick Tip: If you spot pests, isolate your Alocasia so they don’t spread to your other plants.
What are some tips for creating the ideal growing environment for Alocasia plants?
I usually keep my Alocasia somewhere between 65 and 80°F, and I try hard to keep the humidity above 60%. These plants are so picky—dry air from heaters or AC just doesn’t cut it for them.
I like to put a humidifier nearby, though sometimes I just set the pot on a tray with pebbles and water. As the water evaporates, it bumps up the humidity around the plant without soaking the soil.
For soil, I swear by a well-draining mix with plenty of perlite or some orchid bark tossed in. Dense, heavy soil just spells trouble—roots need air, not a swamp.
Definitely avoid cold drafts from windows, or blasts of hot air from vents. Alocasias really hate sudden temperature swings—it’s like they just freeze up and refuse to grow.
Quick Tip: Try grouping your Alocasia with a few other tropical plants. It’s a simple way to make a little humid oasis right in your living room.
Note: Some images in the articles are sourced from Reddit and Other Platforms For Reference Purpose.