7 Tips To Grow Snake Plant From Leaf
I love adding new plants to my home, and snake plants are one of my favorites. They’re easy to care for and look great in any room.
Learning how to grow a snake plant from a leaf can save money and help grow my collection faster.
When I first tried leaf propagation, I found it’s a simple way to get more plants without buying new ones. There are a few tips that make the process easy and increase my chances of success.
Please note: Simplify Plants is reader-supported. As an Amazon Associate, I earn from qualifying purchases made by our readers with no extra cost added to you all! Some links in the post are affiliate links and I get a commission from purchases made through links in the post.
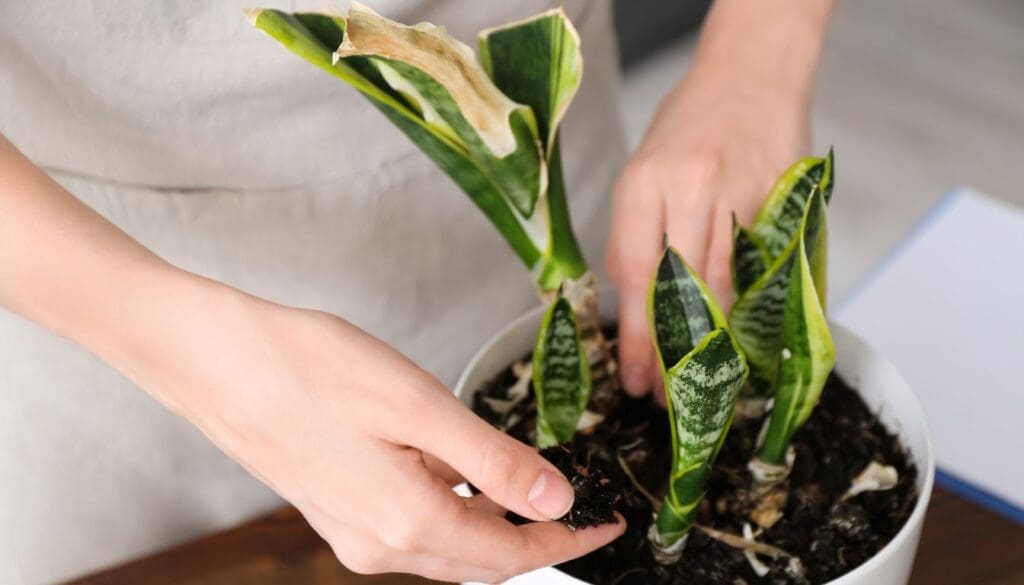
1) Choose a healthy leaf
When I start growing a snake plant from a leaf, I always pick a healthy, mature leaf. Young or damaged leaves just don’t root as well.
I look for leaves that are firm, green, and free from brown spots or tears. Picking the right leaf is important.
A strong, unbroken leaf gives the new plant the best chance to grow. If there are any signs of disease, I avoid using those leaves.
I check the base of the leaf for firmness. If it feels soft or mushy, I don’t use it.
A fresh, thick leaf usually works best for me. I use clean scissors or a sharp knife to cut the leaf close to the soil.
This helps keep the rest of the plant healthy. I make sure the cut leaf is fresh and free of pests.
If I notice any tiny bugs or sticky spots, I pick a different leaf. Healthy leaves mean better roots and a stronger start for my new snake plants!
2) Cut the leaf into 3-4 inch sections
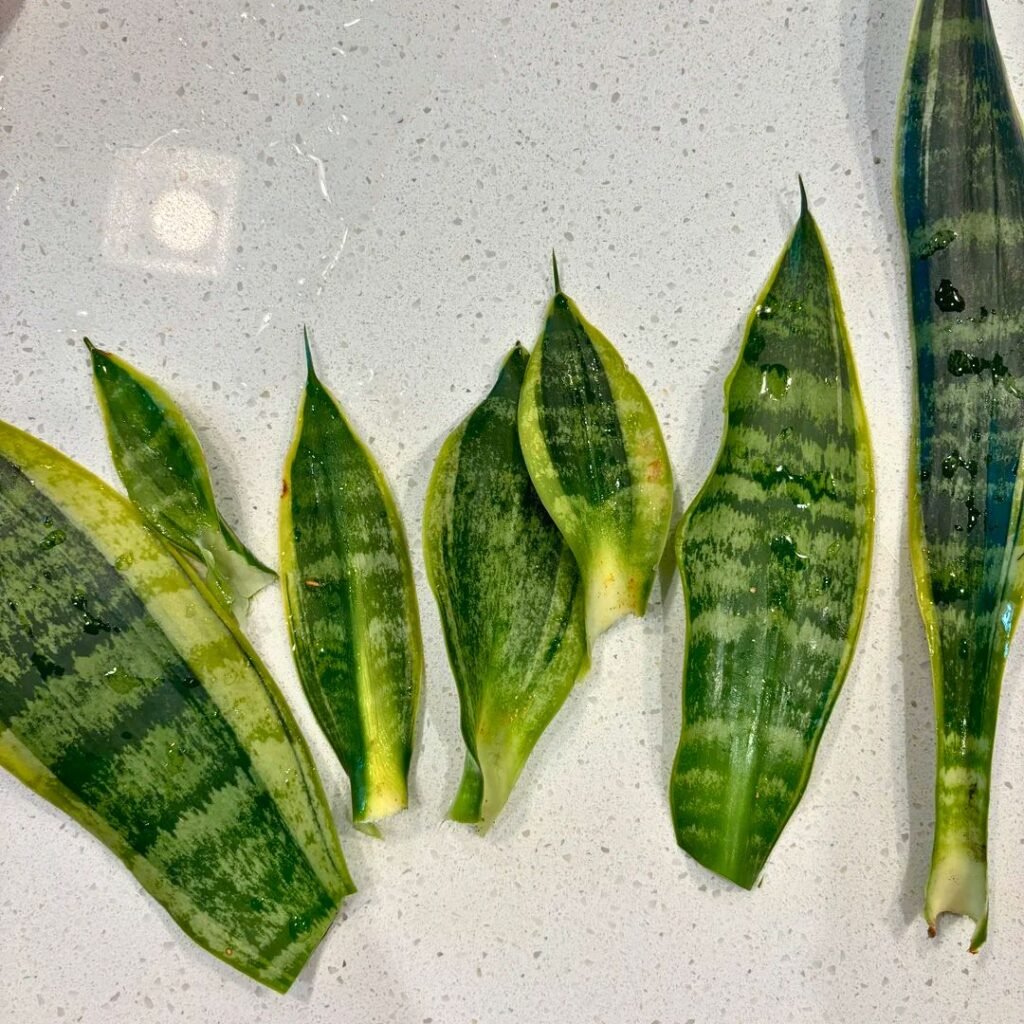
When I want to grow a new snake plant, I start by cutting a healthy leaf from the parent plant. Using clean, sharp scissors, I slice the leaf into sections that are each about 3 to 4 inches long.
This size works well for rooting. I make sure each section is cut straight across.
Sharp, clean cuts help prevent rot and disease. If the sections are too big or too small, they might not root as easily.
To keep things organized, I always remember which end was the bottom and which was the top. The bottom part of the leaf section is the one that needs to go into the soil or water.
Labeling the bottom side with a small dot or line helps a lot. It’s easy to get confused once the leaf is cut into pieces!
After I’ve made the cuts, I let the leaf sections dry in the air for 1-2 days. This lets the cut ends form a callus and keeps them from rotting when I plant them later.
Patience here is key. Skipping the drying step can lead to problems, so I make sure not to rush this part of the process.
3) Let the cuttings callous for 1-2 days
After cutting my snake plant leaf, I always let the cut ends dry out. This is called letting the cuttings “callous.”
It’s a simple step, but it’s very important. I put the leaf cuttings in a dry, shady place and leave them alone for one to two days.
I don’t water them or put them in soil yet. The edges will start to look a bit dry or slightly hard.
This drying process helps protect the cuttings from rot and disease. If I plant them too soon, they may rot before they start to grow roots.
I look for the cut ends to form a thin, dry layer. Sometimes, the edge turns a lighter color.
If I’m not sure it’s ready, I wait a little longer. It’s better to wait too long than not long enough.
Once the ends feel dry to the touch, I know my cuttings are ready to plant.
4) Use well-draining soil mix

When I grow snake plants from leaf cuttings, I always use well-draining soil. Snake plants hate sitting in water.
Wet, heavy soil can make the leaves rot. I choose a mix made for succulents or cacti.
These soils let water flow through easily. If I only have regular potting soil, I add some sand or perlite.
This helps the soil drain better. Good drainage keeps the roots healthy.
I’ve noticed that when I use the right soil, my cuttings root faster and look stronger.
Water can escape quickly, so the bottom of the pot doesn’t get soggy. I also make sure the pot has holes at the bottom.
When I water my snake plant, extra water needs somewhere to go. If it gets trapped, the roots won’t get enough air.
To prepare my mix, I use two parts of regular soil, one part sand, and one part perlite. I stir it well for an even blend.
The soil ends up light and fluffy. I don’t pack the soil tightly around the leaf cutting.
Instead, I gently press it so the air can move through the mix. This gives the cutting the best chance to grow strong roots.
5) Plant the cuttings upright
When I plant my snake plant leaf cuttings, I always make sure to stand them upright in the soil. The bottom end of the cutting is where new roots will grow.
I make a small hole in the soil and gently press the cutting in, keeping the cut end at the bottom. If the cuttings are placed upside down, they won’t root well.
I like to leave about one-third of the leaf above the soil. This keeps the cutting steady and gives it room to grow.
If the cuttings are too deep, they may rot. I space my cuttings an inch or two apart so they have enough air and space.
This also helps prevent mold or fungus from growing. Once they are planted, I press the soil gently around each leaf.
I try not to pack the soil too hard, as snake plant roots need air and light moisture to grow best. After planting, I water lightly and place the pot somewhere bright but out of direct sunlight.
Rooting takes time, so I watch for new growth at the base. I check the soil every few days to make sure it stays just a little bit damp but not wet.
6) Water sparingly after planting
After I plant my snake plant leaf cuttings, I give them only a little water. It’s important not to soak the soil.
Too much water can make the leaves rot before they root. I wait until the top inch of soil feels dry before adding more water.
I check with my finger by gently pressing into the soil. If it feels moist, I hold off on watering.
I use a small cup or spray bottle to add water around the leaf base. I never flood the pot.
Snake plants like to be on the dry side, especially when they are just starting. The first few weeks are when rot is most likely to happen.
By watering less, I give my cuttings the best chance to grow roots. I always make sure the container has good drainage holes.
Bright, indirect light helps the soil dry out between waterings. I keep my new snake plant away from direct hot sun and from dark corners to avoid overwatering problems.

7) Place in indirect sunlight
I always make sure my snake plant leaf cuttings get indirect sunlight. Direct sun can be too strong and may cause leaf burn.
Placing the cuttings in soft, filtered light helps them stay healthy while they root. I like to put my pot near a bright window, but not right on the windowsill.
A north or east-facing window works well for me. If the light feels too bright, I move the pot a few feet away from the window.
Indirect sunlight encourages steady growth. My leaves look greener and start to grow roots faster in gentle light.
I check each day to make sure the sun isn’t too harsh, especially during summer. If I notice yellow or brown spots on my cuttings, I move them to a less sunny spot right away.
Using a sheer curtain can also help filter the sunlight. It’s a simple way to protect my plants and keep them thriving.
I always avoid dark corners, though. My experience is that too little light slows down root growth.
Finding the right spot with gentle, bright light makes a big difference for my snake plants.
Understanding Snake Plant Propagation
Growing new snake plants from leaf cuttings is a fun and simple way to get more plants. Knowing the right methods can make a big difference in the success of your propagation.
How Leaf Cuttings Promote New Growth
When I cut a healthy snake plant leaf and set it in water or soil, roots start to form from the cut edge. Over a few weeks, these roots dig in deeper, helping the plant soak up water and nutrients.
New shoots—pups—pop up at the base of the cutting. Sometimes nothing happens for a while, so patience is key.
I keep the cutting somewhere warm and bright, but not in direct sun, since that seems to help. Using clean, sharp scissors and picking mature, healthy leaves has made things easier for me.
Usually, I let the cut edge dry out for a day before putting it in water or soil to head off rot. It’s a pretty simple way to watch my plants multiply, and honestly, it’s kind of fun.
Common Mistakes to Avoid
There are a few mistakes that can ruin snake plant leaf cuttings. Using a dirty tool is a big one—it can introduce diseases, so I always grab a clean blade before making a cut.
If the cut end stays wet too long, it’ll rot. I learned to let the cut edge dry for at least 24 hours.
Planting the cutting upside down is another easy way to mess things up, so I double-check the direction. I also never overwater.
Snake plants like soil that dries out between waterings. If I spot mold or the leaf turning mushy, it’s usually a sign I need to back off on watering.
Caring for Young Snake Plants
I try to give my young snake plants what they need so they can grow strong roots and healthy leaves. Getting them off to a good start makes a big difference.
Watering and Light Requirements
Snake plants don’t like soggy soil. I only water when the top inch of soil feels dry.
If I can’t tell, I’ll just stick my finger in the soil to check. Overwatering can cause root rot, so it’s better to let the soil dry out a bit before watering again.
I keep my snake plants in bright, indirect light. Direct sun can scorch their young leaves, but not enough light makes them look sad and grow slow.
A window with filtered sunlight works for me. If the leaves start looking pale or floppy, I figure they need more light.
Key tips:
- Use pots with drainage holes.
- Don’t let water sit in trays.
- Yellow leaves usually mean too much water.
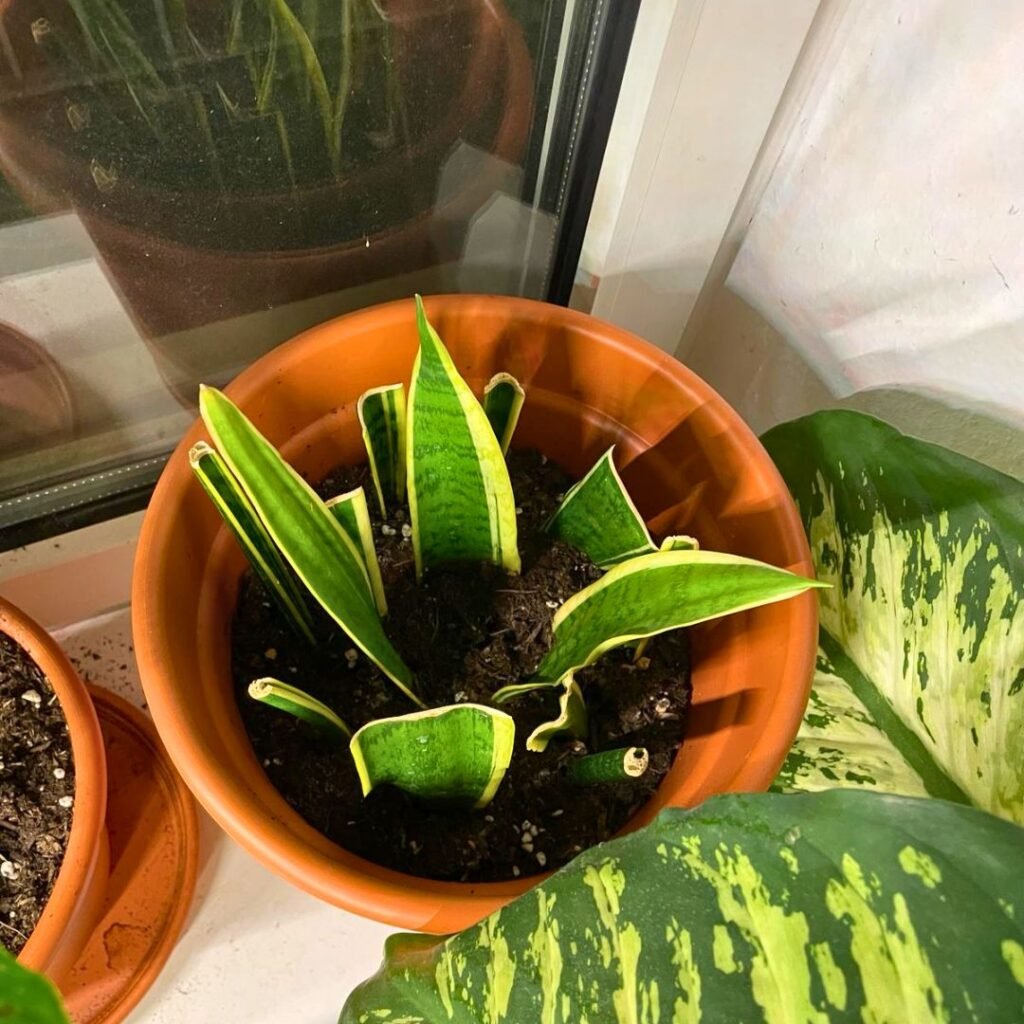
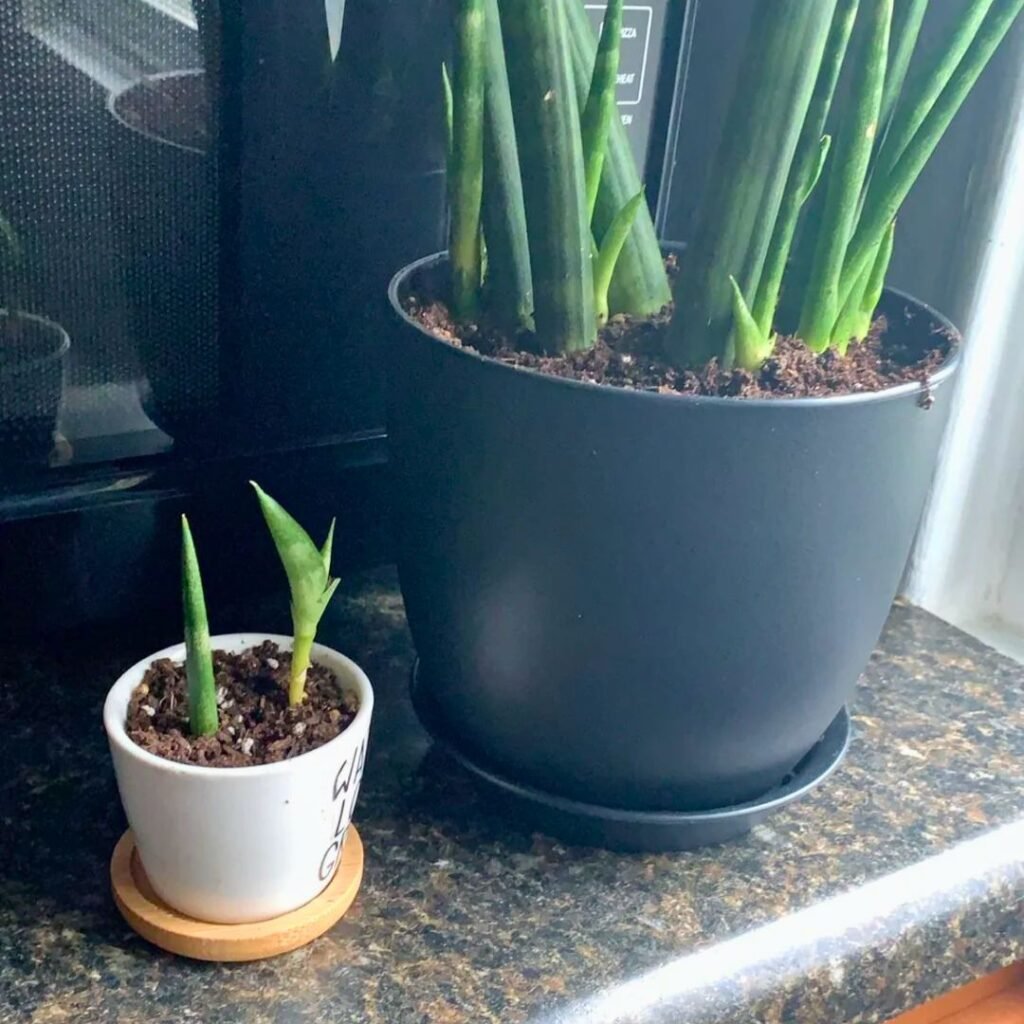
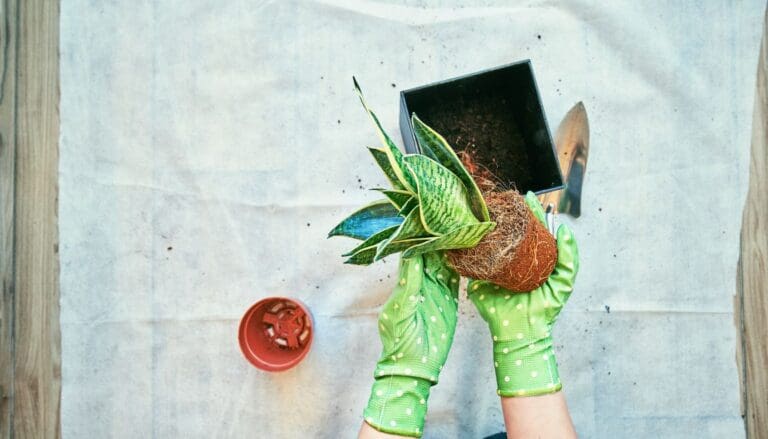
Transitioning to Soil
When the roots are about two inches long in water, I move the cuttings to soil. I use a well-draining potting mix with sand or perlite—snake plants really don’t like soggy roots.
I make a small hole, pop the rooted cutting in, and gently firm the soil around it. At first, I water just enough to keep things barely damp, not wet.
The pot goes somewhere warm with good airflow. For the first few weeks, I check the soil often so it doesn’t dry out, but I’m careful not to overdo it.
Once the roots settle in, the plant starts pushing out new leaves. It’s a nice little sign things are working.
Frequently Asked Questions
I want to make growing new snake plants as easy as possible. Here are a few answers about starting cuttings, care, and helping roots form.
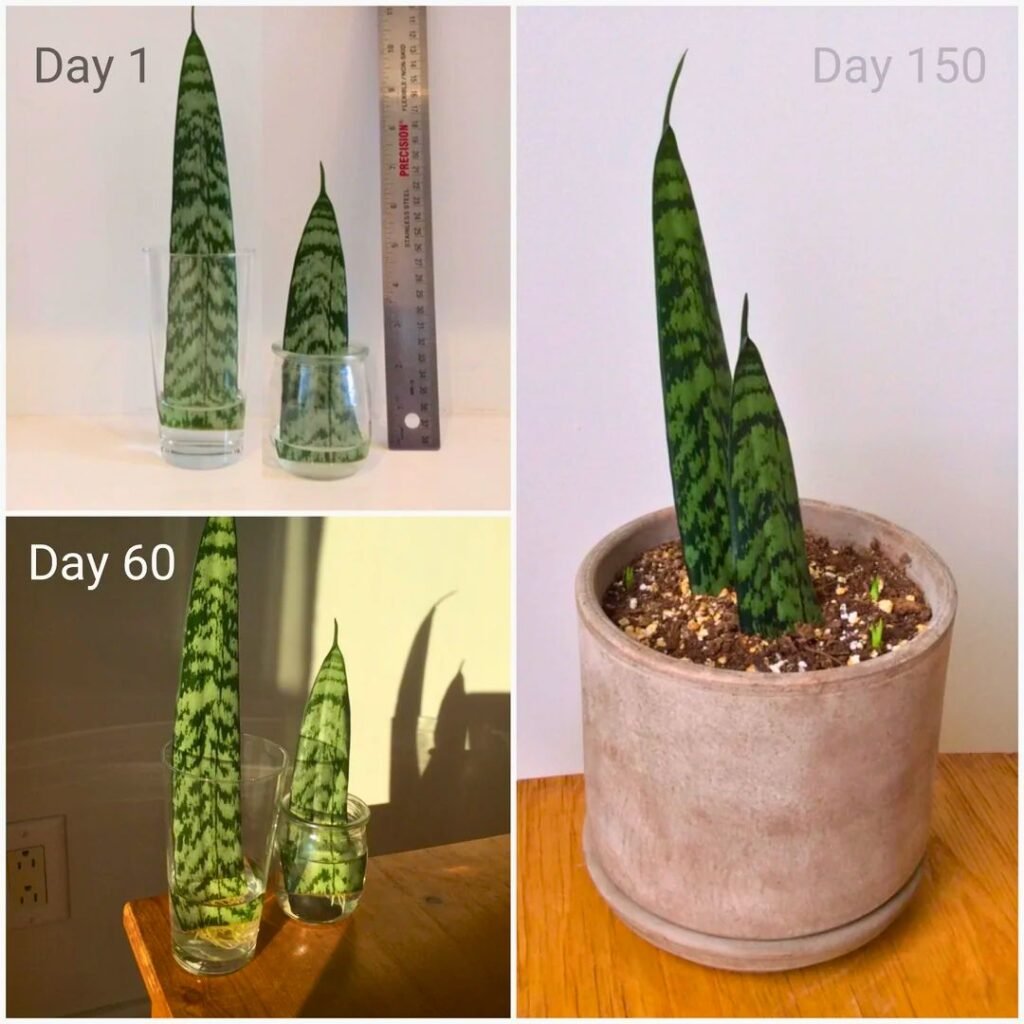
How do you start rooting a snake plant cutting in water?
I pick a healthy leaf and cut it into sections. The lower ends go in a glass of clean water—just the bottom part touches the water.
I change the water every few days to keep it fresh.
What are the steps to propagate a snake plant leaf in soil?
After cutting, I let the ends dry for a day or two. This helps stop rot.
Then I plant the calloused cuttings upright in a pot with well-draining soil. I water lightly and put the pot somewhere warm and bright.
How long should snake plant cuttings be left in water for propagation?
Usually, I leave snake plant cuttings in water for 3 to 6 weeks. I wait until I see healthy white roots about an inch long before moving them to soil.
What conditions help snake plant roots grow best after propagating?
Warm temperatures and bright, indirect light seem to help roots grow faster. I keep the soil just slightly damp—never soggy—so the roots don’t rot.
Is propagating my snake plant in water or soil more effective?
Both work. I like water because it’s easy to watch the roots grow, but soil works well too, and sometimes there’s less chance of rot.
What care is necessary after transferring a rooted snake plant cutting from water to soil?
After moving cuttings to soil, I water lightly and steer clear of full sun at first. It just seems safer for those fresh roots.
I always check that the pot drains well—you really don’t want soggy roots. Usually, I wait until the top inch of soil dries out before I water again.
Note: Some images in the articles are sourced from Reddit and Other Platforms For Reference Purpose.

Do you use a rooting hormone?
Yes, We do!