6 Easy Ways to Take Aesthetic Houseplant Photos in Summer
I really enjoy snapping photos of my houseplants, especially when the summer sun is shining.
There’s just something about those bright rays and fresh green leaves that makes everything look extra lively.
Getting great plant photos isn’t hard if I remember a couple of simple tricks.
When I post my favorite photos online, I want them to look clean and inviting. With a bit of thought, I can get beautiful shots that actually stand out.
Please note: Simplify Plants is reader-supported. As an Amazon Associate, I earn from qualifying purchases made by our readers with no extra cost added to you all! Some links in the post are affiliate links and I get a commission from purchases made through links in the post.
1) Capture golden hour light around sunset for warm tones

I always keep an eye out for the golden hour—that dreamy time just before sunset when the sunlight turns soft and golden. The sun hangs low, and everything gets this gentle, warm glow.
My plant photos always seem to get a cozy vibe at this time. The leaves look healthier, and the whole scene feels more welcoming.
I like to scoot my plants near west-facing windows to catch as much of that warm light as possible. Sometimes I’ll move a little plant onto the table, just to get the light hitting the leaves from the side.
Shadows get longer and softer during golden hour, which adds depth without being harsh. I notice the colors—reds, greens, even the browns—show up richer, and I barely need to mess with editing or filters.
Midday sun can be pretty intense and makes leaves look kinda washed out. Golden hour, on the other hand, just makes everything feel calm.
I’ll usually snap a few test shots from different angles. Sometimes, letting the sun shine through the leaves from the back really shows off their veins and shapes.
Timing is everything, so I’ll set a reminder on my phone. The golden hour doesn’t last long, so I try to be ready.
If I miss it, oh well—there’s always tomorrow. The right light is worth waiting for.
2) Use a shallow depth of field to blur background

Honestly, using a shallow depth of field is one of my favorite tricks. I keep the plant in sharp focus, but the background turns soft and blurry. It’s like the plant gets to be the star, and the clutter just fades away.
If I’m on my phone, I’ll switch to “portrait mode.” With a camera, I’ll use a wide aperture—f/1.8 or f/2.8 if I can. That lets in more light and gives me that creamy blur.
I get pretty close to the plant, too. The closer I am, the more the background melts away. Works for leaves, flowers, or even the whole pot.
A messy background? No problem. Shallow depth of field makes it almost disappear.
Sometimes, in summer, the sunlight adds a warm glow to the blur. It’s wild how even a boring window or table can turn into a nice backdrop.
I mess around with different angles and heights. It’s fun to see how a tiny change makes the whole photo feel different.
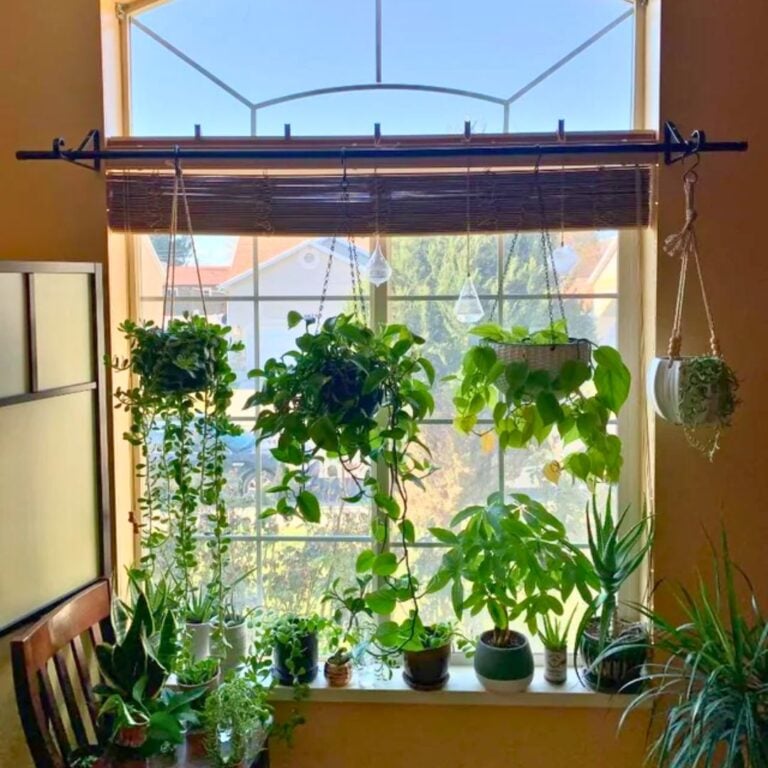
3) Arrange plants near windows with diffused sunlight

I’ve noticed my best plant photos come from setting pots right by a window with soft, diffused sunlight. Direct sun? It’s usually too harsh and makes shadows look sharp.
A sheer curtain or even a thin white sheet over the window spreads the sun out and gives the whole scene a gentle, even glow. The colors just look more real that way.
Early morning or late afternoon light works well, too. The sun’s not as strong and everything looks softer—perfect for close-ups.
If I have to shoot in the middle of the day, I’ll just move my plants back from the window a bit. That way, I still get all the brightness, but none of that harsh glare.
Diffused sunlight really brings out the green in my plants and highlights the leaf details. My photos look more inviting, honestly.
Sometimes I’ll grab a white poster board to bounce light back onto the darker side of the plant. It brightens up the shadows and makes the whole picture look a bit more put together.
Arranging plants in this light is easy, and it really makes a difference. With diffused sunlight, every shot feels calm and fresh.
4) Incorporate natural props like wooden tables or rattan baskets

I’m a big fan of natural props for houseplant photos. A wooden table or a rattan basket adds texture but doesn’t steal the show.
Placing a plant on a wooden table brings out the green in the leaves. If the table’s got some visible wood grain, even better—it just feels cozy and summery.
Rattan baskets are great as planters or just in the background. Sometimes I’ll pop a plant inside or set a couple of baskets nearby. It makes the photo feel more relaxed and homey.
I try to avoid props that are too shiny or bright, so the plant stays the focus. Sometimes I’ll play around, moving things like books or a water pitcher on a wooden tray next to the plant.
Soft, natural props add layers and make the shot feel lived-in. Mixing different textures usually gives me my favorite photos.
5) Shoot from low angles to emphasize plant height

If I want my houseplants to look tall and a bit dramatic, I’ll shoot from a low angle. Even small plants look impressive this way.
I get down low, sometimes right on the floor, and hold my camera just below the pot. Looking up at the plant makes the stems and leaves stretch toward the ceiling, which just makes everything feel bigger.
Shooting from below also lets me catch the underside of leaves or flowers—stuff I’d usually miss. The background often shows more of the room or some window light, which gives the picture a summery vibe.
I’ll try a few different angles, sometimes straight up, sometimes just a little tilt. Even a small change can totally change the look.
Low angles give me unique shots that stand out. It’s a simple way to make houseplants look like the stars of summer.
6) Experiment with close-up shots of leaves and textures

I can’t get enough of close-up shots of my houseplants. Zooming in on the leaves lets me see all the little details I’d usually miss. The lines, colors, and shapes are all different.
Textures really pop when I get closer. I see the spikes on a cactus or the soft fuzz on a begonia leaf—stuff that’s easy to overlook from far away.
Lighting matters a lot for close-ups. I try to use natural sunlight. Sometimes I’ll move the plant right up to the window just to get the best light, which makes the textures crisp.
I’ll change up the angle—sometimes shooting straight down, other times from the side. It’s fun to see how different the leaf looks from each spot.
Backgrounds count here, too. I make sure there’s nothing messy behind the plant. A plain wall or simple tabletop works best, so the details really stand out.
It’s pretty cool to catch little things like water drops or the veins in a leaf. These shots always make my plants feel a bit more special.
The Impact of Natural Light on Aesthetic Houseplant Photography
Natural light honestly makes or breaks my houseplant photos. The angle, strength, and timing of the sun can turn a plant shot from dull to vibrant.
How Summer Sunlight Enhances Plant Colors
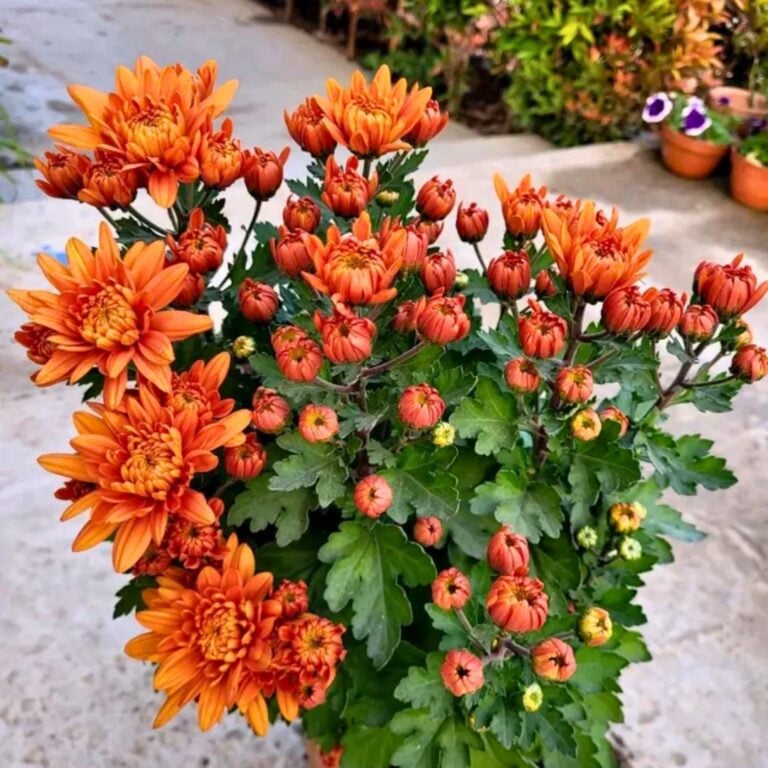
Summer’s steady sunlight makes plant leaves look bold and lively. When I take photos in natural light, the greens are deeper, and any variegated patterns just pop.
Direct sunlight brings out tiny details like leaf texture and even that little shimmer of moisture. I usually stick to mornings or late afternoons for soft light and the best colors.
Tips for bright colors:
- Put plants near a window with lots of light.
- Wipe the leaves to get rid of dust and let them shine.
- Skip artificial lights if you can.
When sunlight hits just right, the colors look fresh and true. That’s when my photos feel most inviting.
Avoiding Harsh Shadows for Balanced Photos
Too much sunlight can mess things up—harsh shadows, faded spots. I avoid midday shoots; the sun’s just too direct and makes shadows too dark.
I’ll use a thin curtain or move the plant back from the window to soften the light. It gives me even lighting and keeps the photo balanced.
How I avoid harsh shadows:
- Hang up a white sheet or curtain to filter sunlight.
- Shoot on bright, cloudy days for softer light.
- Move the plant until the light looks right.
When I watch out for shadows, my photos look clearer, and the details stand out. Balanced light really lets my houseplants shine.
Styling and Background Tips for Summertime Plant Photos

Getting my houseplant photos to stand out is all about using natural light and picking the right background. How I set up the plants changes everything.
Choosing Complementary Backdrops
A good background keeps the focus on the plant. I go for plain walls, soft linens, or wooden surfaces to avoid distractions. Sometimes I’ll use a background that feels summery—maybe a pale blue or soft yellow fabric.
Light backgrounds make green leaves pop, while dark ones feel more dramatic. Busy patterns? I skip those so the plant doesn’t get lost.
If there’s clutter behind my plant, I’ll move it or toss a blanket up as a quick backdrop. Simple is best.
| Backdrop Style | Plant Types That Work Best |
|---|---|
| Light-colored wall | Fiddle leaf fig, pothos |
| Wood surface | Succulents, cacti |
| Linens/Fabrics | Ferns, calatheas |
Arranging Houseplants for Visual Appeal
I group plants by height and leaf shape—tall ones in the back, smaller in front. That way, every plant gets its moment.
Props are nice, but I keep it minimal. A small pot or a woven basket is plenty. Too many props just distract from the plants.
Placing plants near a window or wherever the light’s best makes leaves look fresh. I’ll sometimes mist the leaves to catch the summer light and add a little sparkle.
For single plant shots, I center the pot and leave some space around it. It just looks cleaner that way.
Frequently Asked Questions
Honestly, summer’s just the best for snapping houseplant photos. The light is bright, plants are thriving, and everything just feels more alive. I usually stick with simple backgrounds, lots of natural light, and a bit of creative styling to make the photos pop.
What are some simple tips for photographing indoor plants to enhance their aesthetic in the summer?
I’m a big fan of golden hour light—that soft, warm glow you get right before sunset. It just makes everything look magical.
I’ll often move plants close to a window, pulling the curtains to diffuse the sunlight a bit. Shooting with a shallow depth of field really helps blur out distractions so the plant can take center stage.
How can I decorate my living room with houseplants in a way that’s photogenic?
I like arranging plants on wooden tables or rattan baskets; it just feels inviting and natural. Mixing different sizes together keeps things interesting.
It’s important to leave enough space for light to reach each plant, otherwise photos can look a bit dull. Plus, the plants appreciate it too.
Which beginner-friendly indoor plants are also easy to photograph?
Snake plants, pothos, and peace lilies are my go-tos. They’re easy to care for, and their big, bold leaves make for great photos.
Spider plants are fun as well—their striped leaves and little trailing babies always add something extra to a shot.
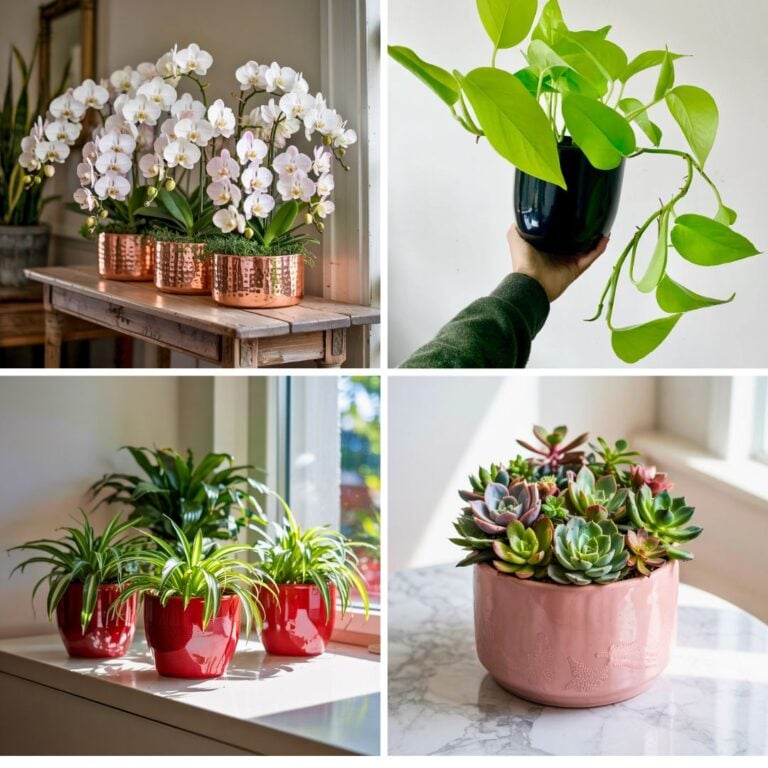
Can you suggest ways to style small houseplants for stunning summer photos?
I’ll often line up small plants in matching pots on a windowsill or a shelf. It’s simple, but it works.
Sometimes I throw in a ceramic cup or a mini basket as a prop, just to make the scene feel a bit cozier. Shooting from a low angle can make even the tiniest plant look impressive.
What are the top houseplant options that thrive in low light and look great in photos?
I really like zz plants, snake plants, and cast iron plants for those darker rooms. Their bold leaves hold up well in photos, even when the sun isn’t shining.
Heartleaf philodendrons are another favorite—lots of green with very little fuss, and they brighten up a shadowy corner nicely.
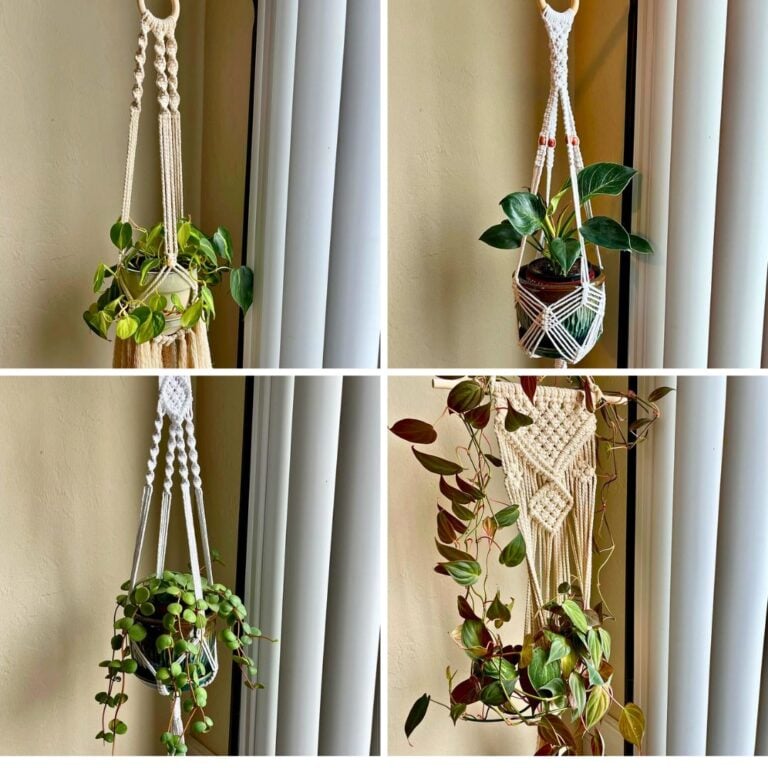
How can I creatively include plants in bedroom decor for vibrant summer photography?
I love hanging up macrame plant holders near the window—honestly, it brings in some nice height and a bit of texture. Sometimes I’ll put a monstera or pothos right on the bedside table, which just feels fresh, you know?
Colorful pots or woven baskets? Absolutely. They add that pop of style to any shot, and honestly, it just makes the whole space feel a bit more alive.
Recommended Garden Supplies
| Product Image | Our Recommended Gardening Supplies | Check Offers! |
|---|---|---|
Top Top
Top
Top
Top
Top
Top
Top
Top | rePotme Houseplant and Tropical Classic Potting Soil Mix | Check Offer On Amazon |
 Top
Top
Top
Top
Top
Top
Top
Top | Espoma Organic Indoor Plant Food | Check Offer On Amazon |
 Top
Top
Top
Top
Top
Top
Top
Top | GooingTop LED Grow Light 6000K Full Spectrum Clip Plant Growing Lamp | Check Offer On Amazon |
 Top
Top
Top
Top
Top
Top
Top
Top | Soil Moisture Meter | Check Offer On Amazon |
 Top
Top
Top
Top
Top
Top
Top
Top | Govee Hygrometer Thermometer, Bluetooth Enabled! | Check Offer On Amazon |
 Top
Top | LEVOIT Humidifiers for Large Room(Best For Plants) | Check Offer On Amazon |
 Top
Top
Top
Top
Top
Top
Top
Top | Upgraded DIY Automatic Drip Irrigation Kit, 15 Potted Houseplants Support | Check Offer On Amazon |
 Top
Top
Top
Top
Top
Top
Top
Top | Stainless Steel Heavy Duty Gardening Tool Set | Check Offer On Amazon |
 Top
Top
Top
Top
Top
Top
Top
Top | Bonide Insecticidal Soap | Check Offer On Amazon |
 Top
Top
Top
Top
Top
Top
Top
Top | Bonide 32 oz Spray Neem Oil for Organic Gardening | Check Offer On Amazon |
 Top
Top
Top
Top
Top
Top
Top
Top | Garden Safe Fungicide | Check Offer On Amazon |