5 No-Fail DIY Self-Watering Systems Using Bottles
Honestly, keeping plants watered can be a real challenge—especially when life gets busy or I’m out of town. DIY self-watering systems with bottles have been a total game changer for me.
With just a few bottles and some simple steps, I can keep my plants happy and healthy without constantly worrying. These setups are budget-friendly and eco-conscious, so I don’t have to splurge on fancy gadgets.
Please note: Simplify Plants is reader-supported. As an Amazon Associate, I earn from qualifying purchases made by our readers with no extra cost added to you all! Some links in the post are affiliate links and I get a commission from purchases made through links in the post.
1) Bottle Drip Irrigation Setup
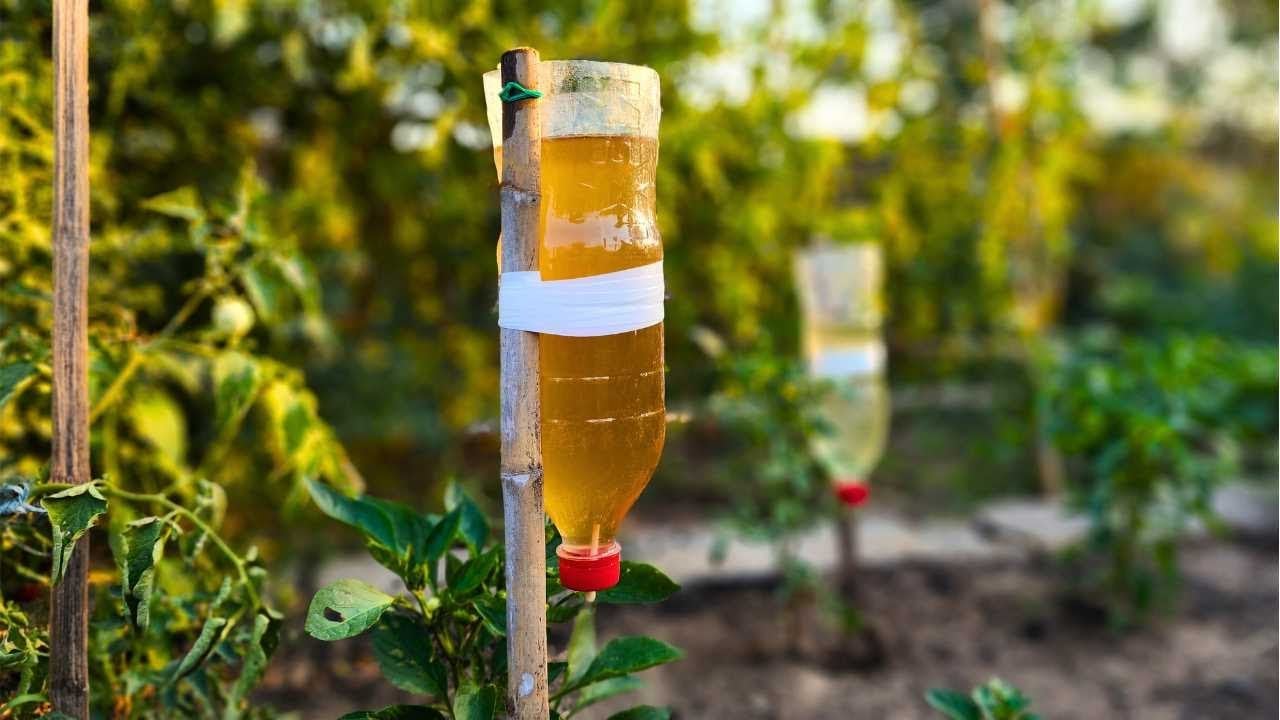
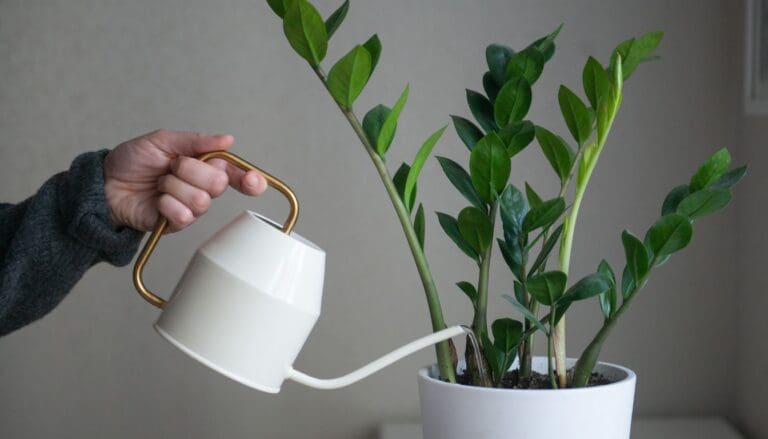
When I need to water my plants while I’m away, I go for a bottle drip irrigation system. It’s just a regular plastic bottle that gives plants a slow, steady drink.
I grab a clean bottle—small for little plants, bigger for big pots. I poke a few tiny holes in the cap with a needle or pin. Getting those holes just right is important; they control how fast the water comes out.
Then I fill the bottle with water, screw the cap back on tight, and flip it upside down. I push the neck into the soil near my plant’s base, making sure it’s steady so it won’t tip over.
Water drips out slowly, right to the roots where it matters. I like that this is so easy and uses stuff I already have at home. Works best for smaller pots, but I’ve used it outside too.
If the water pours out too fast, I know the holes are too big. No water at all? I’ll make them a bit larger.
No fancy parts needed. It’s a clever way to recycle bottles and keep my plants thriving, even if I’m not around for a few days.
2) Capillary Wick Method
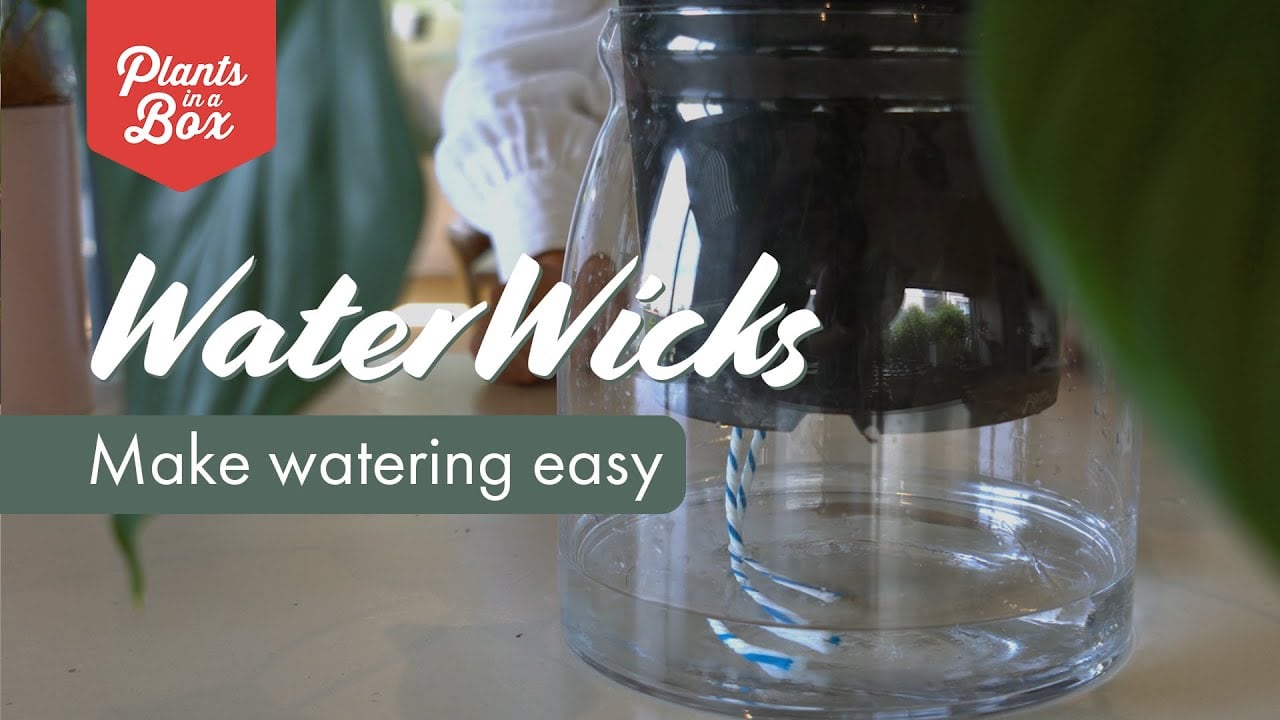
The capillary wick method is another favorite of mine—super simple and cheap. All it takes is a bottle, some cotton string or yarn, and water.
I fill a bottle with water and set it next to my plant. Then I cut a piece of cotton string, making sure it’s long enough to reach from the bottom of the bottle to about two inches into the soil.
One end of the string goes into the soil, near the roots. The other end sits in the water inside the bottle.
The string acts as a wick, slowly pulling water from the bottle to the plant’s roots. This keeps my plants nicely moist, especially if I’m gone for a weekend.
Before I leave, I make sure the string is wet all the way through. Any small or medium bottle works, and it’s great for houseplants, herbs, and even little veggie pots.
For bigger pots, I sometimes use more than one wick. It’s a lifesaver for forgetful folks or frequent travelers.
I just top up the water when needed, and my plants stay happy. It really takes the stress out of watering.
3) Upside-Down Bottle Planter
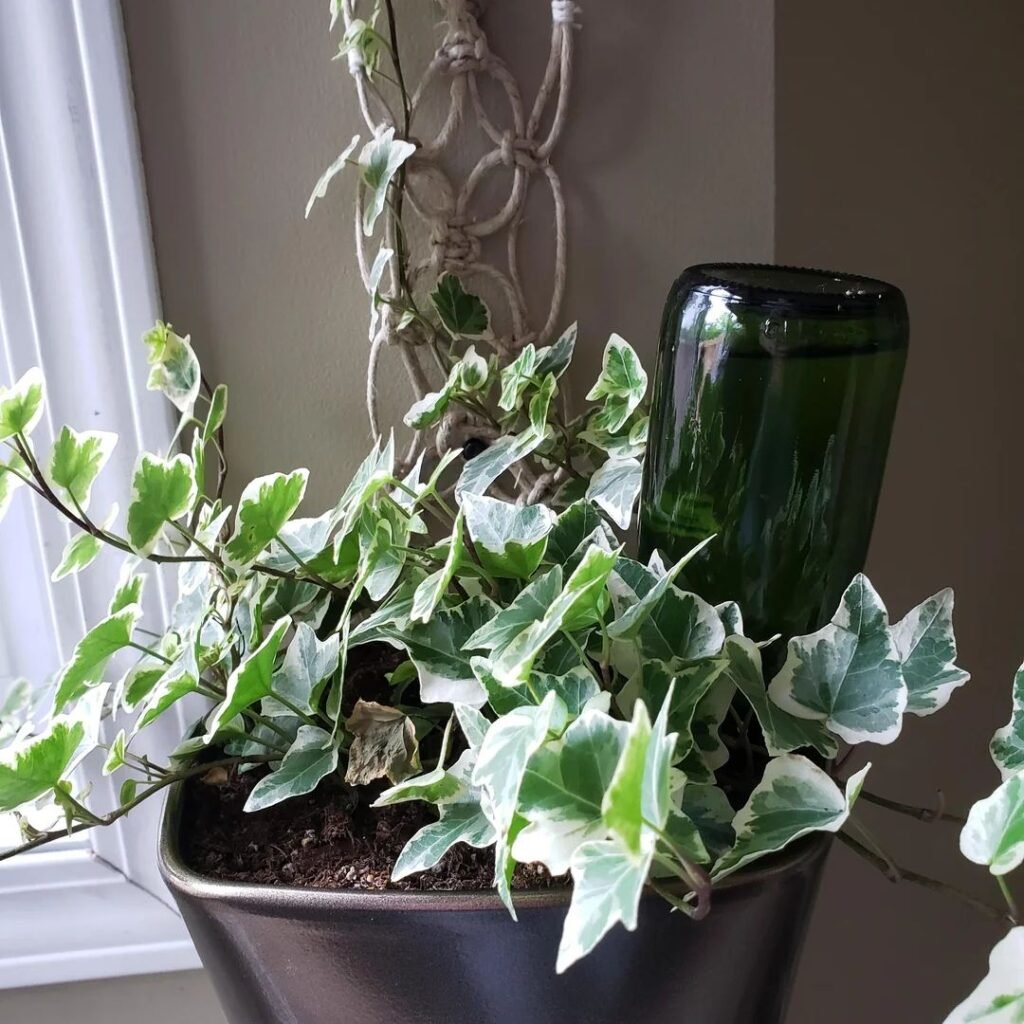
The upside-down bottle planter is a trick I use all the time. It’s fast, easy, and works for a bunch of different plants.
I clean a plastic bottle, peel off the label, and poke a small hole in the cap. After filling it with water, I flip it upside down.
Then I push the neck into the soil, right by my plant. The water drips out slowly, keeping the soil moist for days.
If the bottle is deep enough in the dirt, it stays stable. When it runs out, I just refill it.
It’s handy because I can see how much water is left at a glance. For more plants, I just add more bottles.
No special equipment needed, just a bottle and a couple of minutes. My plants always look better when I use this method.
4) Self-Watering Herb Garden
Fresh herbs are awesome, but watering them daily? Not my favorite. So I use a DIY bottle system that makes life way easier.
I grab a clean water or soda bottle, poke a small hole in the cap, and fill it with water. Then I turn it upside down and stick the neck into the soil by my herbs.
Water drips out slowly, keeping the soil damp. This is especially perfect for windowsill herb gardens—my basil, mint, and parsley love it.
I check the soil sometimes, just to make sure it’s not getting too soggy. For bigger pots, I’ll use a bigger bottle or even two.
Now I can leave for a weekend and not stress about my herbs drying out. Plus, reusing bottles is good for the environment and my wallet.
Whenever friends visit, they’re always curious how my herbs look so lush. I tell them it’s mostly thanks to this simple watering trick.
5) Gravity Feed System
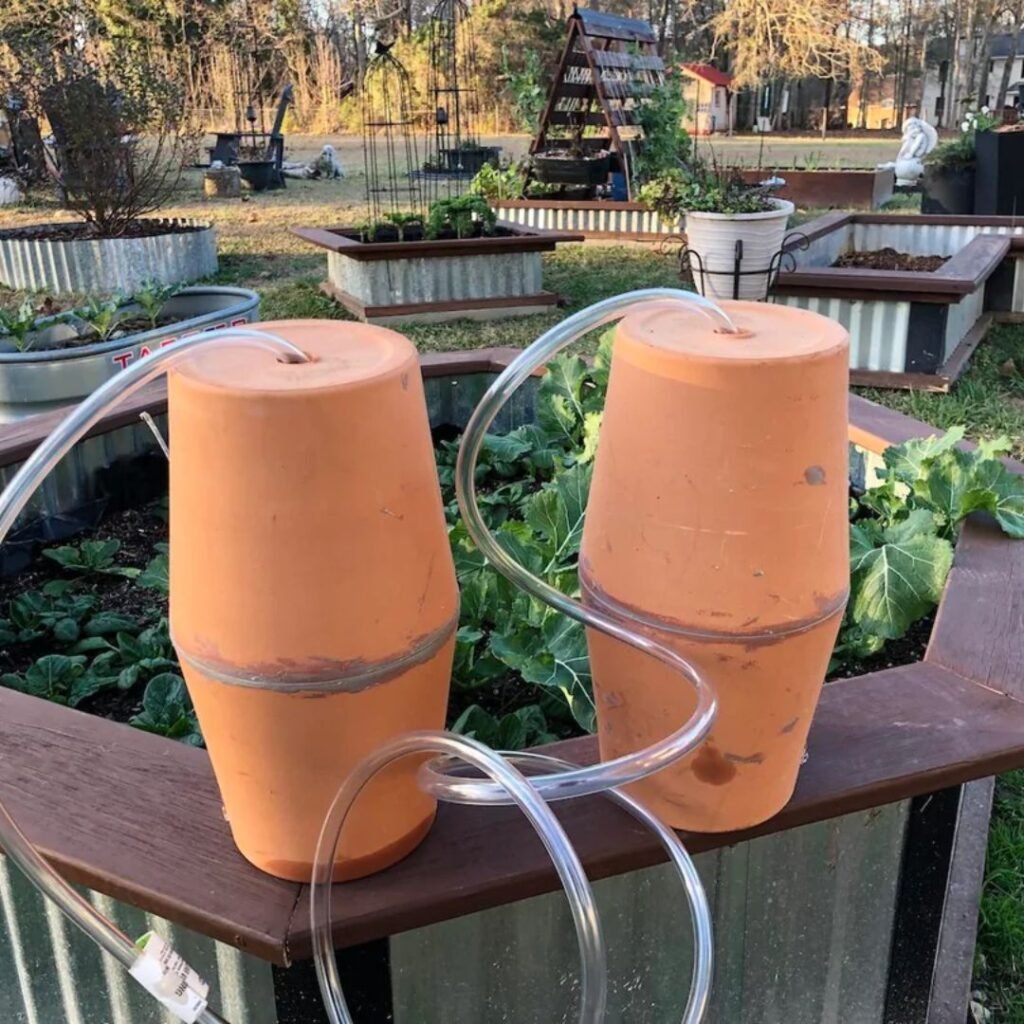
The Gravity Feed System is awesome when I have a bunch of plants to water. No power needed, no complicated parts.
I get a big plastic bottle or jug—like a milk jug or a 2-liter soda bottle. I fill it with water and attach a piece of thin tubing to the opening.
Then I place the bottle on something raised, like an upside-down pot or a box. The higher it is, the faster the water drips (thanks, gravity).
I run the tubing to each plant pot, making sure it reaches where it needs to. To slow the flow, I use a clamp, clothespin, or twist tie to pinch the tubing.
I check that water drips out slow and steady. If it’s too fast, I tighten the clamp or raise the tubing’s end.
This setup is easy to refill and move. I just keep an eye on the water level every few days. If I want to water more pots, I add more tubing.
It’s a real time-saver, and I can see exactly how much water my plants are getting. Simple, cheap, and I don’t need to buy anything special.
How Self-Watering Systems With Bottles Work
Using bottle self-watering systems lets me keep my plants healthy even when I’m busy or not at home. These setups deliver water slowly to the roots, keeping the soil evenly moist and avoiding overwatering or letting things get bone-dry.
Capillary Action Explained
Capillary action is the magic behind these systems. When I stick a bottle of water upside down in the soil, water seeps out slowly because it moves through tiny gaps or along a wick.
Water molecules cling together and pull themselves along surfaces—like a thread or soil particles. My plants take what they need, when they need it.
It’s the same way a paper towel soaks up a spill. The soil draws water from the bottle, but doesn’t let it all out at once.
I’ve found this keeps the roots at just the right moisture, even if I forget to water for a day or two.
Benefits of Bottle-Based Irrigation
There are some real perks to using bottles for self-watering. Here’s what I’ve noticed:
- Saves time: I’m not running around with a watering can every day.
- Reduces waste: Old plastic bottles get a second life.
- Even moisture: My plants get a steady drink, so no more dry spells or waterlogged roots.
- Simple setup: No confusing gadgets, just a bottle and some water.
It’s honestly a smart, easy way to care for both my indoor and outdoor plants. My plants look happier, and I don’t have to guess if they’re thirsty.
Tips for Success With DIY Self-Watering Setups
I want my DIY self-watering systems to actually work and last. Picking the right bottle size and dodging common mistakes makes a big difference.
Choosing the Right Bottle Size
Bottle size really matters. If the bottle’s too small, it empties fast and my plants might dry out. For small pots, I use a 500 mL (about 16 oz) bottle.
For bigger pots or thirstier plants, I grab a 1 or 2-liter bottle. Succulents? They need less, so smaller bottles are fine.
Big indoor plants or tomatoes get the larger bottles. I make sure the bottle isn’t so heavy it tips over and squishes my plant.
If I’m not sure, I start with a medium-sized bottle and see how long it lasts. Better to adjust than risk a thirsty plant.
Common Mistakes to Avoid
There are a few slip-ups I try to avoid so my setup actually works:
- Clogged holes – Tiny holes can get blocked by soil. I use a nail or pushpin and check the flow before I stick it in the dirt.
- Bad placement – If the bottle isn’t deep enough, water might spill or miss the roots. I make sure it’s close to the root zone.
- Unstable bottle – If it falls over, it can break stems or spill everywhere. I push it in firmly and sometimes use rocks for backup.
Quick Check
| Mistake | What to Do |
|---|---|
| Holes too small | Make sure water drips slowly but steadily |
| Wrong bottle size | Match bottle to plant’s needs |
| Unsecured bottle | Push it deep, brace if needed |
Paying attention to these little things helps keep my plants hydrated and healthy, with way less effort.
Frequently Asked Questions
I use these bottle systems for plants inside and outside. Old bottles make it easy to water less often and keep the soil from drying out.
How can I create a self-watering system for my plants using old water bottles?
I poke small holes in a clean bottle cap, fill the bottle with water, and push it upside down into the soil next to my plants. The water drips out slowly, keeping things just right.
What’s a simple way to set up a 2-liter bottle as a watering system for my garden?
I cut off the bottom of a 2-liter bottle and poke a few tiny holes in the cap. After filling it with water, I stick it cap-first into the ground by a plant. The water goes right to the roots—super simple.
Can I use a DIY drip water bottle system to water my plants while I’m on vacation?
Absolutely, I’ve set up drip bottles before heading out for a few days. Depending on how big the bottle is and what kind of soil I’m working with, they can keep plants happy for several days.
It’s a relief knowing my plants are getting a slow, steady water supply while I’m away. Honestly, it’s way less stressful than asking a neighbor.
Is it possible to make a slow-release watering system with plastic bottles for my indoor plants?
Yeah, I usually stick a cotton wick or string through the bottle cap and fill it up with water. The wick just sits in the soil, pulling water as the plant needs it.
It’s simple, but it works surprisingly well. My indoor plants seem to appreciate the steady moisture, and I don’t have to worry about overwatering.
What steps are involved in making an upside-down bottle water system for my plants?
First, I cut off the bottom of a bottle and poke a few holes in the cap. Then I fill it with water, flip it upside down, and bury the neck right in the soil.
The water drips out slowly, getting right to the roots. It’s a bit DIY, but honestly, it does the trick.
How do I construct a self-watering system for outdoor plants with recycled materials?
Honestly, I just grab some old plastic bottles and poke a few small holes near the bottom. Then I tuck them in right next to my outdoor plants or herbs—couldn’t be simpler, really.
If I’m dealing with a larger patch, I’ll scatter a handful of bottles around to make sure everything gets a drink. It’s not fancy, but it works surprisingly well.
Note: Some images in the articles are sourced from Reddit and Other Platforms For Reference Purpose.