11 Tips To Grow Lavender In Pots
I just love how lavender brings this calm color and gentle scent to any spot. Growing it in pots?
Honestly, it’s the easiest way to enjoy lavender, even if you’re short on garden space.
You can grow healthy, fragrant lavender right on your porch, balcony, or windowsill with just a few simple steps. It’s not complicated, but a little know-how makes a big difference.
With the right pot, soil, and a bit of care, lavender really can thrive in small spaces.
I’ll share practical tips to help you pick out the best container, manage watering, and keep your plants looking full and vibrant all year.
Please note: Simplify Plants is reader-supported. As an Amazon Associate, I earn from qualifying purchases made by our readers with no extra cost added to you all! Some links in the post are affiliate links and I get a commission from purchases made through links in the post.
1) Choose a pot with good drainage holes
I always start by grabbing a pot with plenty of drainage holes. Lavender really hates sitting in water—soggy roots can spell disaster.
Good drainage keeps the soil from getting too wet and helps the plant stay healthy. I usually test pots before planting—just pour in a little water and see if it drains quickly.
If water pools at the bottom, that one’s out. Terracotta or clay pots are my favorites since they let moisture escape through the sides.
Plastic pots hold water longer, so I only use them if I’m really careful about watering. I also make sure the pot is at least 12 inches wide—lavender roots need space to stretch out.
A cramped pot just makes the plant struggle. Sometimes I toss in a layer of small stones or gravel at the bottom to help water flow out faster.
When I set my pot outside, I place it on a pot stand or bricks so the holes don’t get blocked. Good airflow under the pot helps with drainage too.
Choosing the right pot might seem like a small thing, but honestly, it makes a big difference. Healthy roots start with proper drainage, and that’s the first step to strong, fragrant lavender.
2) Use a sandy, well-draining potting mix

I always make sure my lavender has light, airy soil that drains well. Heavy or compact soil holds too much water, which is pretty much a recipe for root rot.
Lavender likes dry feet, so I never let water sit in the pot for long. I use a mix of potting soil, coarse sand, and perlite to keep things loose and let extra water flow out.
When I first tried this, my plants looked healthier right away. If I’m stuck with regular potting soil, I just mix in about one-third sand or small gravel.
It’s a small tweak, but it makes a big difference in drainage. Good drainage helps prevent root problems and keeps lavender happy, even when it rains a lot.
I always check for drainage holes at the bottom of the pot. Without them, water can build up and damage the roots.
Sometimes I add a thin layer of pebbles at the base to help water move through faster. Choosing the right mix might seem minor, but it’s honestly one of the most important steps.
When the soil drains well, lavender can grow strong roots and give you more blooms. It’s a simple change that keeps my plants thriving all season.
3) Place the pot in full sunlight for at least 6 hours daily
I always make sure my lavender pots get at least 6 hours of direct sunlight every day. Lavender just loves the sun, and without enough light, the plants get weak and don’t bloom much.
I like to set my pots on a south-facing patio or windowsill where the sun hangs around the longest. It really keeps the plants strong and their color bright.
If I notice the stems stretching or leaning, it usually means they need more sunlight. I’ll move the pot to a sunnier spot right away to help it bounce back.
Cloudy days don’t worry me too much—a few here and there won’t hurt. But I do try to make sure they get plenty of light over the week.
When I’m growing lavender indoors, I keep it near the brightest window I’ve got. If sunlight is limited, I’ll use a grow light for a few hours as a backup.
Consistent sunlight also helps prevent excess moisture in the soil by keeping it dry between waterings. Lavender really doesn’t handle soggy soil well.
Every few weeks, I give the pot a gentle turn so all sides get some sun. It helps keep the growth even and stops one side from leaning out.
By giving my lavender the light it craves, I get stronger stems, more buds, and that classic scent wafting through the air. It’s a small thing, but wow, does it help.
4) Water lavender sparingly, allowing soil to dry between waterings

I’ve learned the hard way that lavender doesn’t like wet feet. If I water too often, the roots start to rot and the plant goes downhill fast.
To keep my plants healthy, I let the top few inches of soil dry out before watering again. I always check the soil with my finger before adding water.
If it feels dry, I give the plant a slow, gentle drink until water drains out the bottom. Then I make sure there’s no leftover water sitting in the saucer.
Lavender likes its roots to breathe, so I use pots with drainage holes and a light, well-draining soil mix. This helps extra moisture escape and keeps the roots from getting soggy.
In hot weather, I might water a bit more often, but I still wait until the soil dries. During cooler months, I water less since the plant doesn’t need as much.
Honestly, less is more when it comes to watering lavender. It’s better to underwater a little than to overwater.
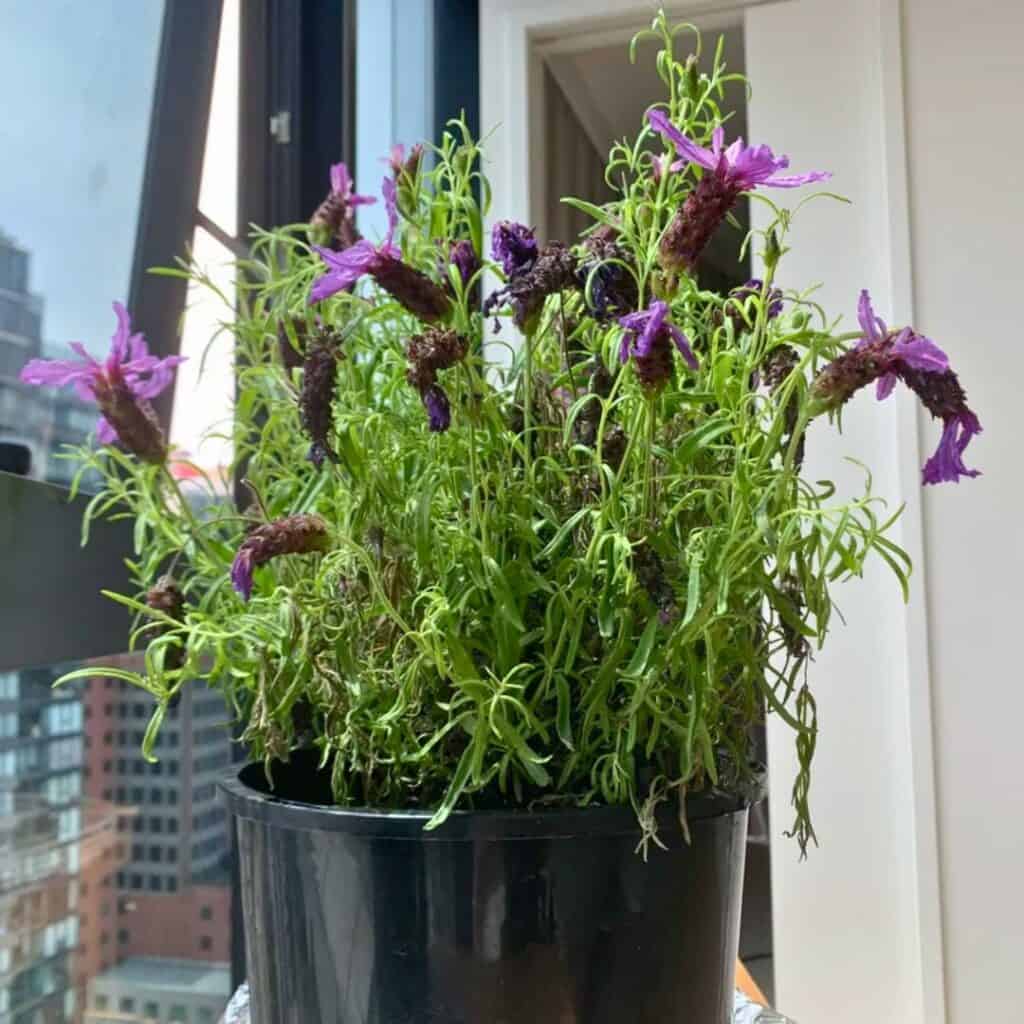
5) Prune lavender after flowering to encourage bushy growth

I always prune my lavender right after it finishes flowering. It keeps the plant neat and full, not thin or woody.
I use clean, sharp scissors or pruning shears to trim about one-third of the plant’s growth. I’m careful not to cut into the old, brown wood—once you do, it doesn’t really grow back.
After pruning, I spot new shoots popping up near the base, which helps the plant grow thicker and healthier. Regular trimming also improves airflow and reduces the risk of disease.
I like to shape the plant into a soft mound while I prune. It keeps things balanced and encourages even growth all around.
If I forget to prune right after flowering, I’ll still give it a light trim before winter. That keeps the stems from getting too long or floppy.
By keeping up with pruning, my lavender stays compact, strong, and full of blooms every year.
6) Avoid over-fertilizing; use a balanced, slow-release fertilizer once in spring

I’ve come to realize that lavender doesn’t need much fertilizer. Too much can actually make it grow more leaves and fewer flowers, which isn’t what I want.
Now, I just feed my lavender once in spring with a balanced, slow-release fertilizer. That’s enough to give it a boost as it wakes up from winter.
I always check the label to make sure the fertilizer isn’t high in nitrogen. High-nitrogen fertilizers push leaf growth, which isn’t ideal for lavender.
A balanced mix like 10-10-10 works best for me. After feeding, I water lightly to help the fertilizer soak in.
I skip extra feedings in summer—lavender likes lean soil. Less is better when it comes to feeding this tough little plant.
By keeping my fertilizing simple and limited, my lavender stays compact, blooms well, and smells stronger. It’s an easy habit that really pays off.
7) Ensure good air circulation around the pot to prevent mold
I always make sure my lavender pots have plenty of space between them. When pots are too close, air can’t move and moisture builds up, which can lead to mold or mildew.
A few extra inches of space makes a world of difference. I avoid pushing pots against walls or fences—good airflow helps the leaves and soil dry out after watering or rain.
If the air feels still or damp, I’ll move the pots to a spot with a gentle breeze or better ventilation. When I prune, I remove any crowded or dead stems to keep the plant open.
Trimming regularly not only helps with airflow but also keeps the plant strong. If I’m growing lavender indoors, I’ll open a window or use a small fan nearby.
Even a little air movement helps stop mold from forming on the soil or leaves. Consistent airflow keeps the plant fresh and prevents musty smells.
I check the soil surface often. If it looks damp for too long, I know the air might not be circulating well enough.
Drying between waterings and giving the pot space to breathe keeps my lavender happy and mold-free.
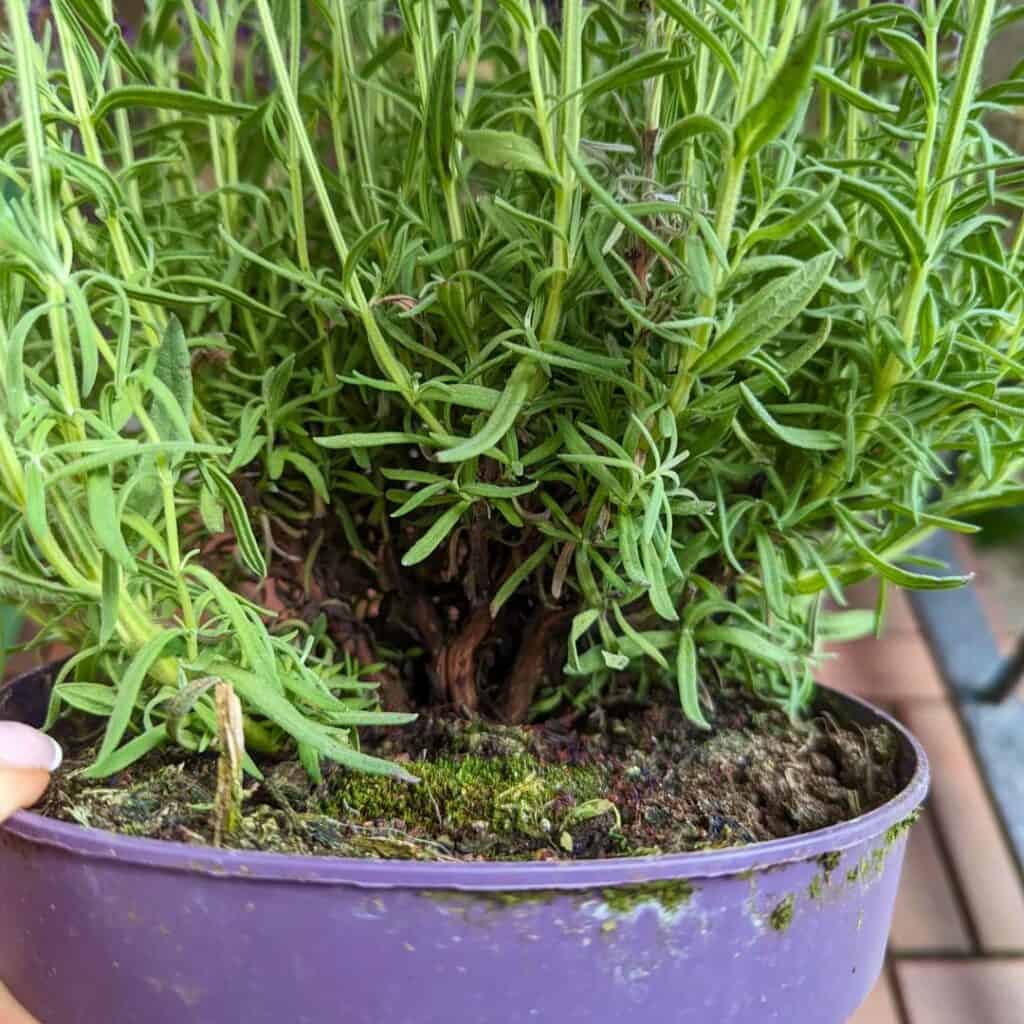
8) Repot lavender every 2-3 years to refresh soil

I always repot my lavender every 2 to 3 years to keep it healthy and growing strong. Over time, potting soil just loses nutrients and gets compacted, which isn’t great for roots.
Fresh soil gives the plant more room and better drainage. When I repot, I gently pull the plant out and shake off some of the old soil.
I check the roots and trim any that look weak or tangled. Healthy roots should look firm and white.
I choose a pot that’s just one size bigger than the old one. A pot that’s too big can hold too much water, and lavender isn’t a fan of that.
Good drainage is key, so I always make sure there are holes at the bottom. I fill the pot with a mix of well-draining soil, usually sandy or gritty.
I set the lavender so the base sits just above the soil line, then press the soil gently around it. After repotting, I water lightly to help the roots settle.
I avoid heavy watering for the next week so the roots can adjust. Too much water right after repotting can cause root rot.
I like to repot in early spring before new growth starts. It helps the plant recover faster and take advantage of the growing season.
Repotting also gives me a chance to check for pests or root problems. If I spot anything weird, I remove it before putting the plant back in fresh soil.
By refreshing the soil and giving the roots space, my lavender stays vibrant and keeps blooming year after year. A little care every few years really does make a big difference.
9) Add a layer of gravel at the bottom of the pot for extra drainage
I like to start with a thin layer of gravel at the bottom of my pot before adding soil. It really helps water move through, instead of just pooling around the roots.
Lavender hates soggy roots—root rot is a real risk if the drainage is bad. The gravel gives water a place to go, so the soil stays lighter and drier.
I usually grab some pea gravel or small stones since they’re easy to find and fit well in most pots. You don’t need much; just about an inch for most containers.
When I water my lavender, I’ve noticed that excess water drains out faster with gravel underneath. That makes it a lot easier to keep the soil on the dry side, which lavender really prefers.
If I’m reusing an old pot, I always check that the drainage holes aren’t blocked before adding gravel. Even the best gravel layer won’t help if water can’t escape.
Honestly, this is one of those little steps that keeps my plants healthier and helps them put on stronger growth. It’s a quick fix but makes a surprisingly big difference for lavender.
10) Use a clay or terracotta pot to help soil dry faster
I always go for clay or terracotta pots when I’m growing lavender. These pots let air move through the sides, which really helps the soil dry out faster.
Lavender just doesn’t want to sit in wet soil, so this makes a noticeable difference. I’ve found that plastic pots hold moisture longer, and that’s just asking for root rot.
Clay and terracotta pots breathe naturally, keeping the roots healthier. The extra airflow also helps keep mold away and stops the soil from staying soggy.
They also stay cooler in the sun, which is a nice bonus on hot days. And honestly, I just like the way they look—simple, earthy, and they match lavender’s soft green and purple.
Since clay pots dry out quicker, I check the soil more often. When the top inch feels dry, it’s time to water again.
If I’m using a big pot, I always make sure there’s a drainage hole at the bottom. Good drainage is still key, even with clay. Sometimes I’ll toss in a bit of gravel or small stones to help water flow out.
From what I’ve seen, lavender grows stronger in these pots. The roots spread out nicely and the plant just looks fuller. It’s a simple switch, but it really makes lavender care easier and more rewarding.
11) Protect pots from heavy rain to avoid waterlogging
I always try to keep my lavender pots out of heavy rain. Too much water can drown the roots and cause them to rot.
Lavender likes things dry, so keeping it from sitting in water is pretty important. When I know a storm’s coming, I’ll move my pots under a covered porch or into a shed.
That way, the soil doesn’t get soaked through. If I can’t move them, I’ll nudge them near a wall or use a little cover to block direct rain.
I also double-check that each pot has good drainage holes. Water should run out easily after watering or rain. If water pools at the bottom, I might add a gravel layer or switch to a pot with better drainage.
Sometimes I’ll tilt the pots just a bit so water can run off instead of sitting on top. It’s a simple trick that helps prevent soggy soil.
After a big rain, I always feel the soil before watering again. If it’s still damp, I just wait until it dries out.
Lavender really does best when its roots can breathe. By keeping my pots dry and well-drained, I help my lavender stay healthy—even during those rainy spells.
Choosing the Right Pot and Soil
I’ve learned lavender grows best when its roots stay dry and get plenty of air. The right pot and soil really make a difference in how healthy and fragrant your plant turns out.
Best Pot Materials for Lavender
I always look for pots that drain water quickly. Lavender hates wet feet, so I stick with terracotta or unglazed clay pots—they let moisture escape right through the sides.
These pots also keep the soil a bit cooler on hot days. Plastic pots, on the other hand, hold water longer and can lead to root rot.
If I do use plastic, I make sure it has several drainage holes at the bottom. Sometimes I’ll add a layer of small gravel or stones to help drainage even more.
Size matters too. I go for a pot that’s 12–16 inches wide so the roots have room to spread. Too small and it dries out too fast; too big and the soil can stay damp for ages.
Soil Mixes for Optimal Drainage
I never use regular garden soil for lavender—it just holds way too much water. Instead, I mix up my own well-draining blend.
Here’s my go-to mix:
| Ingredient | Purpose |
|---|---|
| 1 part potting soil | Base for nutrients |
| 1 part coarse sand or perlite | Improves drainage |
| 1 part small gravel or pumice | Keeps soil airy |
Sometimes I’ll toss in a bit of lime to make the soil slightly alkaline—lavender likes that.
Before planting, I check that the soil feels light and crumbly, not sticky or packed. When I water, it should run out in seconds, not minutes. If it does, that’s when I know my lavender’s got the perfect home.
Caring for Potted Lavender
I keep my lavender happy by giving it just the right amount of water, a little food, and the occasional trim. Each step helps the plant stay strong and bloom better in its pot.
Watering Techniques
I only water my lavender when the top inch of soil is dry. Lavender hates soggy roots, so I always use pots with drainage holes.
Standing water is a quick way to root rot. During hot months, I check the soil more often. In cooler seasons, I cut back since the plant just doesn’t need as much.
Consistency matters more than frequency. I use a simple rule: deep and infrequent watering. That way, the roots grow deeper and stronger.
I pour water slowly until it drains from the bottom, then let the soil dry out before watering again. Mixing in coarse sand or small gravel helps with drainage, too.
| Tip | Benefit |
|---|---|
| Water deeply, not daily | Encourages strong roots |
| Check soil before watering | Prevents overwatering |
| Use pots with drainage holes | Avoids root rot |
Fertilizing Tips
I don’t overfeed my lavender—too much fertilizer just means more leaves and fewer flowers. I use a low-nitrogen, slow-release fertilizer once in early spring when new growth appears.
If the plant looks a bit pale or weak, I’ll add a light dose of liquid fertilizer every 4–6 weeks during the growing season. I always dilute it to half strength so I don’t burn the roots.
Organic options like compost tea or fish emulsion are gentle and help the soil, too. I stop fertilizing in late summer so the plant can rest up before winter.
Pruning for Healthy Growth
I prune my lavender twice a year to keep it neat and full. First in early spring—I take off dead or woody stems. Then again after flowering, trimming back about a third of the plant.
I never cut into the old, woody parts since they don’t regrow. I focus on green, flexible stems to encourage new shoots.
Regular pruning keeps the plant compact and stops it from getting leggy. It also improves airflow, which helps prevent mildew and pests.
After trimming, I clear away debris around the base to keep things tidy and reduce disease risk. A little trimming really goes a long way for happy lavender.
Frequently Asked Questions
I’ve found that growing lavender in pots takes the right container, soil, sunlight, and watering routine. Paying attention to these details keeps plants healthy and smelling great all season.
What type of pot is best for growing lavender indoors?
I use a clay or terracotta pot because it lets air move through the soil and stops extra moisture from building up. Just make sure it has drainage holes at the bottom, so water doesn’t sit around the roots.
How often should I water potted lavender plants?
I water only when the top inch of soil feels dry. Too much water can cause root rot, so I let the soil dry out between waterings.
Do I need special soil for lavender in containers?
Yep, I use a sandy, well-draining potting mix. Mixing in a little perlite or coarse sand helps keep the roots from staying wet too long.
How much sunlight does lavender need to thrive in pots?
Lavender loves the sun. I keep my pots where they get at least 6 hours of direct sunlight every day. Without enough light, the plant gets weak and doesn’t bloom much.
Can I grow lavender in pots outside and what are the best conditions?
Absolutely! I put my outdoor pots in a sunny, sheltered spot. Good airflow and well-draining soil help prevent mold and mildew, especially after it rains.
What are some common pests to watch out for when growing lavender in pots?
I mostly keep an eye out for aphids and whiteflies—they have a habit of showing up on the tender new shoots.
Honestly, a quick spray with water or a bit of insecticidal soap tends to sort them out.
Note: Some images in the articles are sourced from Reddit and Other Platforms For Reference Purpose.