11 Tips For Orchid Plant Care (+Get More Blooms)
I love how orchids can brighten any space with their wild shapes and colors. They might look delicate, but honestly, with a little attention, they’ll surprise you by thriving for years.
Learning how to care for orchids helps them grow strong, bloom longer, and stay healthy.
In this article, I’ll walk you through some easy ways to keep orchids happy—things like giving them the right light and keeping their roots healthy.
Sometimes, it’s just a few tweaks with watering, humidity, or air flow that end up making all the difference.
Please note: Simplify Plants is reader-supported. As an Amazon Associate, I earn from qualifying purchases made by our readers with no extra cost added to you all! Some links in the post are affiliate links and I get a commission from purchases made through links in the post.
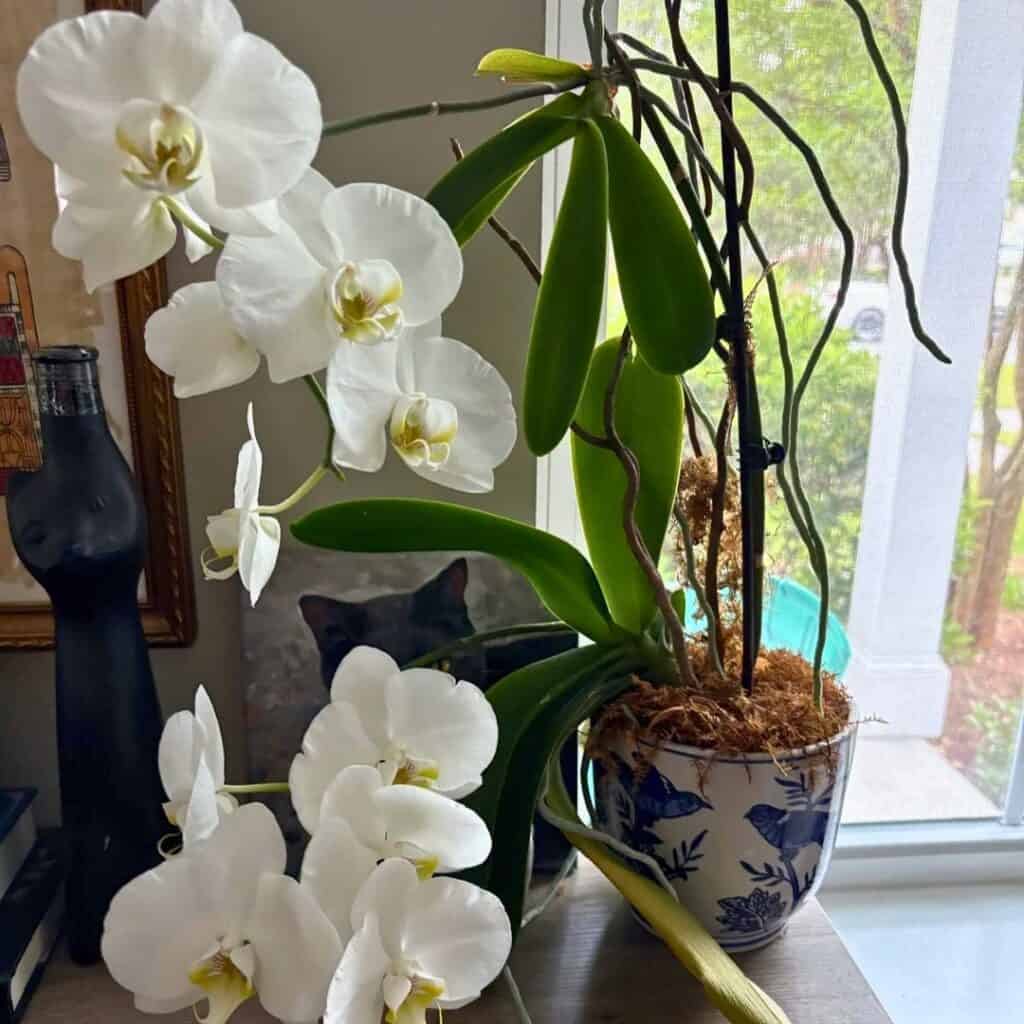
1) Place orchids in bright, indirect sunlight
I always make sure my orchids get bright, indirect sunlight, never direct sun. Too much sun just burns their leaves—yellow or brown spots are never a good sign.
Filtered light seems to help them grow strong and healthy, with way less stress. I like to put my orchids near a north- or east-facing window for that gentle morning light.
If all I’ve got is a sunny window, I’ll hang up a sheer curtain to soften things up. When the leaves turn dark green, it’s usually a clue they’re not getting enough light.
Medium green leaves are my sweet spot—that’s when I know the light is just right. If I spot yellowish leaves, I’ll scoot the plant a bit farther from the window.
In winter, I sometimes pull out a grow light and leave it on for about 12 to 14 hours a day. It’s not fancy, but it helps my orchids keep growing even when the days are gloomy.
I try to pay attention to how the light shifts with the seasons. The sun’s angle changes, so I move my orchids around as needed.
A little attention to light really does go a long way in keeping those blooms coming.
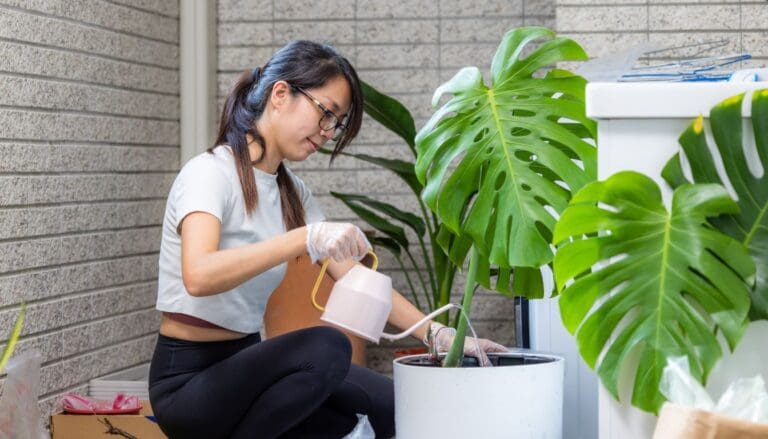
2) Water orchids once a week with lukewarm water
I usually water my orchids once a week—that seems to keep them happy. The roots get a chance to dry out, which is key for avoiding rot.
Lukewarm water is my go-to. Cold water can shock the roots, and hot water’s just a no-go. Lukewarm feels gentle, and the plant seems to absorb it better.
Before I water, I poke my finger in the potting mix. If it’s still damp, I wait a day or two. Overwatering is one of the most common mistakes with orchids.
When I do water, I let it run right through the drainage holes. That way, any built-up fertilizer salts get flushed out. I never let my orchid sit in standing water—root rot is a pain to fix.
If I’m using tap water, I usually let it sit out overnight so the chlorine can evaporate. Sometimes I’ll use rainwater or filtered water if I’m feeling fancy.
In the warmer months, my orchids might need a bit more water. When it gets cooler, I scale back and watch how fast the potting mix dries.
Sticking to a simple routine and using lukewarm water has kept my orchids looking bright and healthy. Consistent, gentle watering really does make a difference.
3) Use a well-draining orchid potting mix
I always make sure my orchids have a well-draining potting mix. Regular soil just holds too much water—roots hate being soggy.
I’m a fan of mixes with bark, perlite, and sphagnum moss. Water runs through easily, but there’s still enough moisture for the roots. Airflow is everything for orchids.
When I water, I like how the mix drains quickly. Good drainage keeps fungus and root rot away, which are two headaches I try to avoid.
Once a year, I check the mix. Bark and moss break down over time, so I’ll swap it out when it starts holding too much water.
The right pot matters too. I go for pots with holes or slits—they let water out and air in.
A well-draining mix might seem like a small thing, but honestly, it’s made a huge difference for me. My orchids are just stronger and bloomier when their roots can breathe.
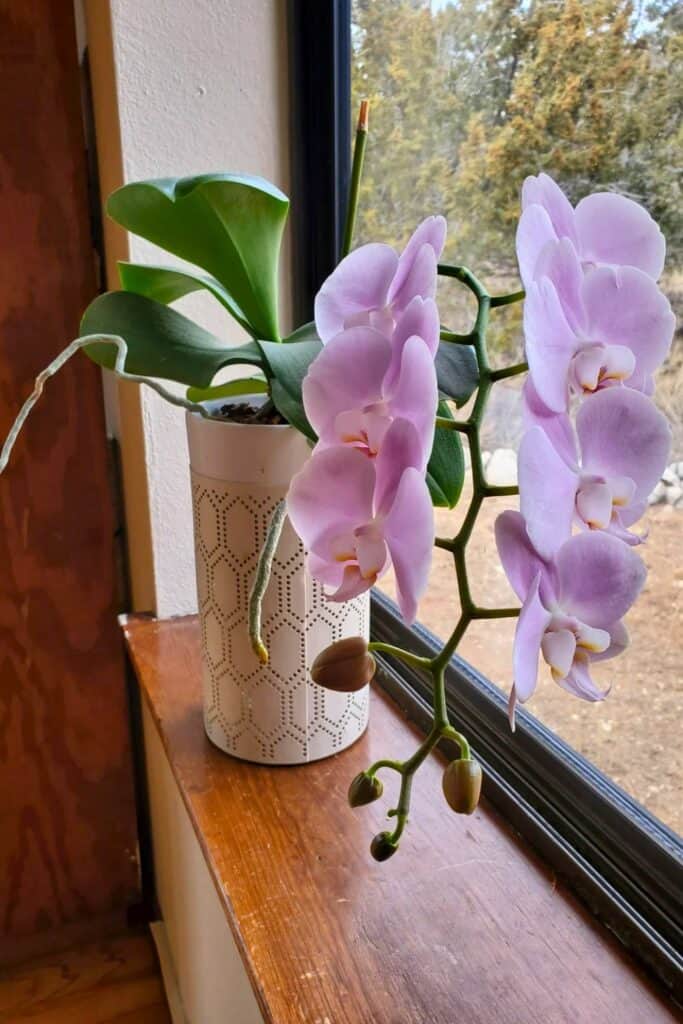
4) Maintain humidity around 50-70%
I’ve noticed that orchids love humidity, but there’s a sweet spot. Around 50-70% seems perfect—enough to keep leaves from drying out but not so much that things get soggy.
When my house feels dry, I’ll set up a small humidifier near my orchids. It does the trick without making the whole area damp. I use a digital hygrometer to keep an eye on things.
Sometimes, I group my orchids together so they can share moisture. Plants are team players, after all.
If I don’t have a humidifier, I’ll put the pots on a tray with pebbles and water. The water evaporates and gently boosts humidity, but I make sure the pots never sit right in the water.
I’ll mist the leaves in the morning if things feel dry. Just a light mist, and never late in the day—leaves need to dry out before night.
Winter’s the trickiest. Indoor heating can dry out the air fast, so I watch for wrinkled leaves or dry roots and adjust the humidity as needed.
Keeping humidity in that 50% to 70% range has given me stronger roots and fuller blooms. It’s a small habit, but it really pays off.
5) Fertilize orchids with 20-20-20 balanced fertilizer every 2 weeks

I like to feed my orchids a 20-20-20 balanced fertilizer because it covers all the bases—nitrogen, phosphorus, potassium. These nutrients really help with roots, leaves, and blooms.
I always mix the fertilizer with water, following the label. Too much fertilizer can burn the roots, so I keep it weak. Orchids like a gentle touch.
I go for every two weeks when the plant’s actively growing. During their rest periods, I slow down to once a month or just stop. Less is more sometimes.
Before I fertilize, I water the orchid first. That way, the roots don’t get burned and the nutrients soak in evenly. Never fertilize a dry orchid—that’s just asking for trouble.
If I see white crust on the pot or leaves, I flush the pot with water to clear out extra salts. Clean potting mix keeps everything healthy.
I like liquid fertilizer because it’s easy and works fast. Occasionally, I’ll switch to a bloom booster with extra phosphorus if I want more flowers.
This routine keeps my orchids green and lively. Consistent, careful feeding really does help them shine.
6) Repot orchids every 1-2 years after blooming
I try to repot my orchids every 1 to 2 years, usually right after they finish blooming. It keeps the roots healthy and gives them room to stretch out.
Old potting mix breaks down and holds too much moisture, which is never good for roots. When I repot, I gently take the orchid out and shake off the old mix.
I check the roots and snip off any that look brown or mushy. Healthy roots should be firm and green or white.
I pick a new pot that’s just a bit bigger—orchids like things snug. I fill it with fresh orchid bark or a special orchid mix that drains fast.
After repotting, I water lightly and put the plant in bright, indirect light. I skip fertilizer for a few weeks so the roots can settle in.
Repotting might sound intimidating, but you get the hang of it. My orchids always seem to bounce back with better growth and longer blooms when I keep up with it.
7) Avoid letting orchid roots sit in water
I’ve learned that orchid roots need air just as much as they need water. If they sit in water too long, they suffocate and rot.
I always make sure my orchid pots have good drainage holes so extra water can escape. After watering, I check that there’s no water left in the saucer.
Standing water suffocates roots and turns them soft or brown. I like to water my orchids in the sink and let them drain for a few minutes before putting them back.
Letting the pot dry out a bit between waterings helps keep the plant healthy. If I ever notice a musty smell or dark, slimy roots, I know I’ve overdone it.
Then I’ll trim the bad roots and repot the orchid in fresh mix. Proper airflow and drainage are the real secret to thriving orchids.
By steering clear of soggy roots, my orchids grow vibrant leaves and beautiful blooms.
8) Use bark or sphagnum moss as orchid media

I always go for bark or sphagnum moss when I repot my orchids. Both let the roots breathe, and orchids just don’t like soggy soil.
Bark is great for orchids that want more airflow. It dries out faster, so the roots never stay wet too long. Plus, it’s easy to find and simple to use.
Sphagnum moss holds more moisture, so I use it when my home feels dry or if I’m busy and can’t water often. It keeps the roots damp but not drowned.
I never pack moss too tightly—air still needs to get through. Sometimes, I mix bark and moss to balance moisture and airflow, especially when the weather’s unpredictable.
I swap out the media every year or two since bark and moss break down over time. Fresh media keeps roots happy and gives the plant space to grow.
No matter which I use, I always make sure the pot has good drainage holes. That tiny detail makes a world of difference for healthy, happy orchids.
9) Trim dead or yellow leaves promptly
I make it a habit to pull off dead or yellow leaves as soon as I spot them. They’re not doing the plant any favors and honestly, they just invite pests and mold.
Keeping my orchid tidy like this really helps it stay healthy and look fresh. When I trim, I always grab clean, sharp scissors or pruning shears.
I snip the leaf close to the base but try not to nick the healthy part. That careful trimming means the orchid isn’t wasting energy on leaves that are already on their way out.
I also check for yellowing leaves pretty regularly. Sometimes a leaf goes yellow just because it’s old, not because something’s wrong.
Still, I’ll remove it once it’s fully yellow to keep things neat and encourage new growth. After I trim, I make sure the cut area stays dry—moisture on a fresh cut is just asking for rot.
If I need to, I’ll dab the spot with a dry paper towel. Over time, I’ve noticed that regular trimming keeps my orchid looking stronger and happier.
10) Mist orchids daily to increase humidity
I mist my orchids every day—it’s a quick thing, but orchids really do love humidity. Misting helps them stay healthy and the leaves look so much better for it.
I use a clean spray bottle with room-temperature water, and just give the leaves and roots a gentle mist in the morning. That way, they have time to dry before evening rolls around.
I try not to soak the flowers or let water pool on them, since that can cause spots or mold. When the air in my place feels dry, especially in winter, I’ll mist a bit more often.
If the leaves look dull or kind of wrinkled, that’s usually a sign they need more moisture. Consistent misting really keeps the leaves firm and the roots happy.
I like to keep the humidity around 40–60%. A little hygrometer makes it easy to check.
If misting isn’t cutting it, I’ll put a shallow tray of water near the plants to bump the humidity up. Daily misting creates a gentle, humid environment—kind of like what orchids get in nature—and it keeps them comfortable and growing without much fuss.
11) Provide good air circulation around the plant
I always try to give my orchids fresh air every day. Good air movement keeps the leaves dry and helps prevent mold and rot.
When there’s a gentle breeze around the plant, it just seems happier and stronger. I usually place my orchids near a window where there’s a bit of air movement but no cold drafts.
If the room feels stuffy, I’ll crack a window or use a small fan on a low setting. But I avoid blowing air right at the orchids—too much wind dries out the leaves and flowers way too fast.
Instead, I point the fan at a wall or ceiling so the air just moves softly around the room. When I group a few orchids together, I leave a few inches of space between them.
That way, air can move between the plants and moisture doesn’t get trapped. In really humid spots, a small oscillating fan works wonders to keep things fresh.
It also helps cut down on pests like fungus gnats that love still, damp air. I check the leaves to make sure they’re not staying wet for too long, and if I notice moisture lingering, I boost the airflow right away.
Honestly, keeping the air moving is one of the simplest ways I’ve found to keep my orchids happy.
Understanding Orchid Growth Cycles

I’ve noticed orchids have clear growth patterns that shift with the seasons and their rest periods. Figuring out when they’re growing or resting helps me tweak watering, light, and feeding so my plants stay healthy all year.
Seasonal Changes and Their Impact
Orchids react a lot to changes in temperature, light, and humidity. When days get longer and warmer, I see new roots and leaves popping up.
That’s the active growth phase, so I water more and use a balanced fertilizer every couple of weeks.
When it gets cooler, growth slows down. I cut back on watering and don’t feed as much—too much moisture now can cause root rot.
I usually move my orchids closer to a bright window to help make up for the weaker sunlight. Different types of orchids react differently to the seasons, though, so it helps to keep track.
| Orchid Type | Growth Season | Rest Season |
|---|---|---|
| Phalaenopsis | Spring–Summer | Late Fall–Winter |
| Cattleya | Spring–Fall | Winter |
| Dendrobium | Summer | Winter |
By tracking these patterns, I can give each orchid the care it needs, when it needs it.
Recognizing Dormancy Periods
During dormancy, orchids rest and store up energy for their next round of blooms. I don’t see many new leaves or roots, and sometimes a leaf or two yellows a bit.
That’s totally normal—not a sign things are going wrong. I water less, only when the potting mix feels dry, and I stop fertilizing until I see new growth.
A slightly cooler spot during dormancy helps them reset. Some orchids, like Dendrobiums and Oncidiums, really need this rest to bloom again.
If I keep watering or feeding too much during dormancy, they might just skip flowering altogether. I watch for tiny new buds or roots to know when it’s time to go back to regular care.
Common Orchid Plant Care Challenges
I’ve found orchids run into trouble mostly when pests, diseases, or leaf problems are ignored. Keeping my plants clean, well-lit, and watered right usually prevents most issues.
Dealing With Pests and Diseases
I check my orchids often for tiny insects like aphids, mealybugs, or spider mites. They love hiding under leaves and around flower stems.
When I spot them, I wipe the leaves with a soft cloth dipped in mild soapy water or use an insecticidal soap made for orchids. Fungal infections usually show up if there’s too much moisture or not enough airflow.
I make sure the pot drains well and never let water sit around the roots. If I see black or mushy spots, I trim off the damaged parts with clean scissors and let the plant dry out before watering again.
To avoid spreading disease, I always sterilize my tools and don’t share pots or water between plants. A quick wipe with rubbing alcohol does the trick.
| Common Problem | Likely Cause | Simple Fix |
|---|---|---|
| Sticky leaves | Aphids or scale | Wipe with soapy water |
| Black spots | Fungal infection | Improve airflow, trim damage |
| Webbing | Spider mites | Rinse leaves, increase humidity |
Troubleshooting Leaf Discoloration
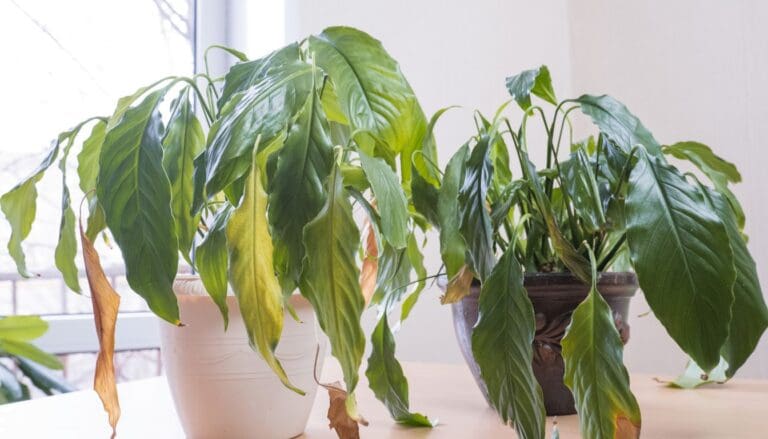
When my orchid’s leaves change color, I treat it as a clue. Yellow leaves usually mean too much sun or just old age.
I move the plant to bright, indirect light and pull off old leaves once they’re dry. Dark green leaves can mean not enough light, so I’ll shift the orchid closer to a window with filtered light.
If I see brown tips or edges, I check my watering routine. Sometimes overfeeding or using hard water can cause salt to build up and burn the leaves.
I flush the pot with clean water about once a month to clear out extra minerals. Purple or red leaves usually mean too much direct sun, so I move the plant a little further from the window.
By paying attention to leaf color, I can tweak light, water, or nutrients and keep my orchids in good shape.
Frequently Asked Questions
I keep my orchids healthy by giving them the right light, water, humidity, and care. I’m always on the lookout for pests or disease, and I repot when needed to keep the roots happy.
How often should I water my orchids?
I water about once a week with lukewarm water, letting it drain completely so the roots don’t sit in moisture. If the air is dry, I’ll check the roots more often to make sure they’re not drying out.
What’s the best way to ensure proper humidity for my orchids?
I try to keep humidity around 50–70%. A humidity tray or room humidifier helps a lot, and misting the leaves lightly gives them a boost when things feel too dry.
What type of light do orchids need to thrive?
I keep my orchids in bright, indirect sunlight. Direct sun can burn the leaves, so I set them near a window with filtered light. If the leaves turn dark green, I move the plant to a brighter spot.
When and how should I repot my orchid?
I repot every 1–2 years or when the potting mix starts breaking down. I use a well-draining orchid mix and gently remove any old roots before putting the plant in a clean pot.
How can I tell if my orchid is healthy?
A healthy orchid has firm green leaves, strong roots, and steady growth. When things are going well, I see new leaves or flower spikes pop up regularly, and the roots look plump and silver-green after watering.
What are the common signs of pests or disease in orchids?
I usually keep an eye out for sticky leaves, yellow spots, or maybe even some webbing—those are dead giveaways for pests like aphids or spider mites. Soft, black roots or leaves that just seem to wilt out of nowhere? That’s often a sign of disease, or maybe I’ve gone a bit overboard with the watering.
When I spot these issues, I’ll snip off any damaged parts and try to treat the plant as soon as I can. It’s always better to catch things early, right?
Note: Some images in the articles are sourced from Reddit and Other Platforms For Reference Purpose.