11 Pro Tips To Grow Roses From Cuttings Like A Garden Expert
I’ve always loved the idea of turning one rose bush into many. Watching new plants grow from simple cuttings is just so rewarding—and hey, it fills your garden with color, too.
You really can grow strong, healthy roses from cuttings with a few smart techniques and a bit of patience. It’s not as intimidating as it sounds, I promise.
In this guide, I’ll share practical tips that make rose propagation easier and more successful. You’ll pick up advice on choosing the best stems, prepping them, and creating a good environment for growth.
Each step helps your cuttings take root and thrive. Let’s dig in.
Please note: Simplify Plants is reader-supported. As an Amazon Associate, I earn from qualifying purchases made by our readers with no extra cost added to you all! Some links in the post are affiliate links and I get a commission from purchases made through links in the post.
1) Choose healthy, disease-free parent plants
When I start growing roses from cuttings, I always look for strong, healthy parent plants. The quality of the cutting really depends on the plant it comes from, so I never bother with cuttings from weak or sick roses.
A healthy plant gives the best chance for new growth. I check the leaves first—they should be green, firm, and free from spots or yellowing.
Any sign of mold, mildew, or pests? That plant’s out. I also give the stems a look for cracks or weird discoloration.
I avoid plants that have been recently treated with chemicals. These can mess with the cutting’s ability to root.
Instead, I pick roses that have been growing naturally and look vigorous. Choosing the right parent plant saves time later.
Before cutting, I clean my tools to avoid spreading disease. Sharp, sanitized pruners make a clean cut—a tiny thing that really helps both the parent and the new cutting.
By focusing on disease-free, thriving roses, I set myself up for success. Healthy parent plants lead to healthy new roses, and that’s always my goal.
2) Take cuttings in the morning for best hydration

I always take my rose cuttings early in the morning when the plants are full of moisture. Morning air is cooler and the stems hold more water, which helps the cuttings stay fresh longer.
This small timing choice makes a big difference in how well they root later. When the sun gets higher, the plant starts losing water through its leaves.
By then, the stems dry out faster. Cutting before this happens keeps the plant tissue firm and hydrated, giving the new roots a stronger start.
I bring a clean pair of garden shears and a small container of water. As soon as I cut a stem, it goes right into the water.
This step prevents air from sneaking into the stem, which could block water flow inside the cutting. I’ve noticed that morning cuttings stay green and healthy for hours, while midday ones wilt quickly.
The difference is pretty obvious. Healthy, hydrated cuttings root more easily since they have the energy to form new growth.
If I can’t take cuttings in the morning, I’ll try to do it on a cool, cloudy day instead. Still, early morning remains the best time to get the strongest and most hydrated cuttings.
3) Cut 6-8 Inches Below a Leaf Node
When I take a cutting, I always measure about 6 to 8 inches below a leaf node before making my cut. The leaf node is that little bump where leaves or buds grow.
This spot matters because it’s where new roots will form once the cutting is planted. I use clean, sharp pruning shears to make a smooth cut.
A clean cut helps prevent damage and reduces the risk of disease. I try not to crush the stem, since that just slows things down.
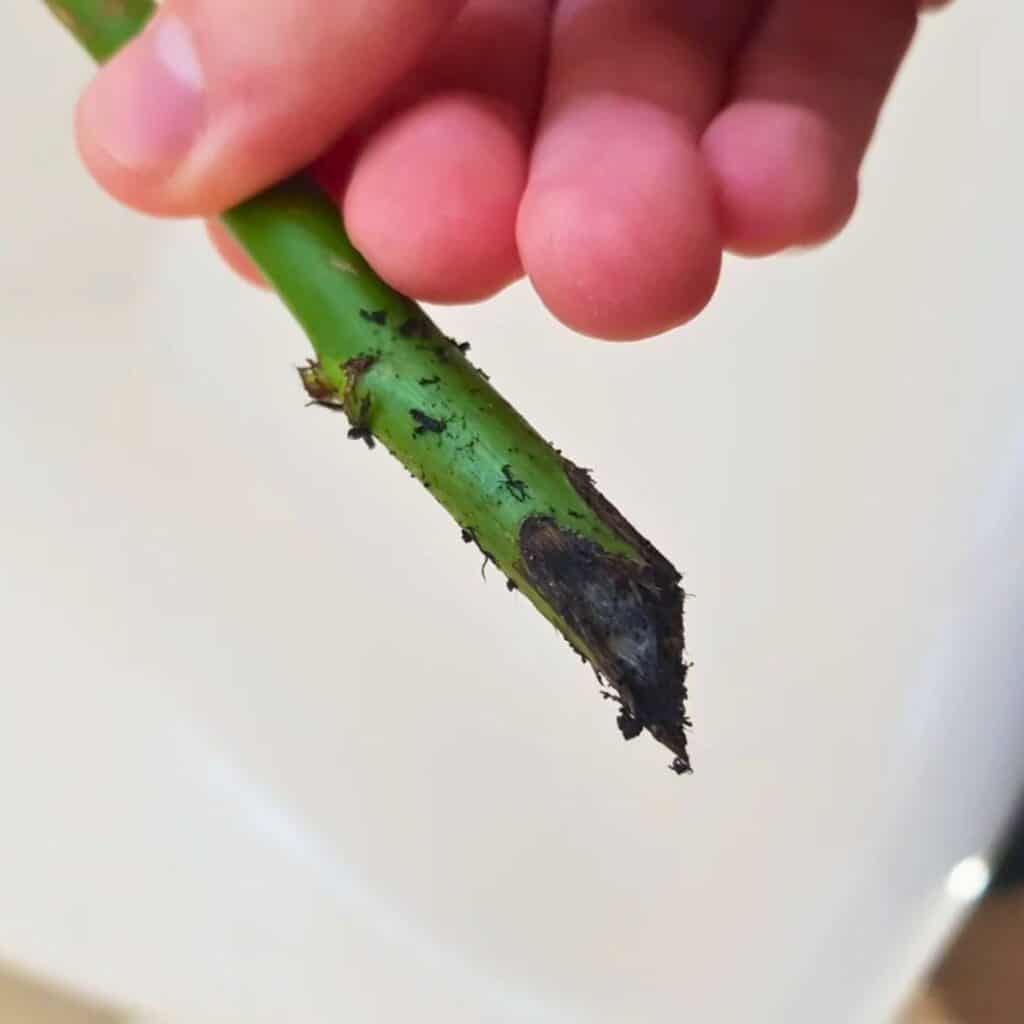
I like to cut at a slight angle instead of straight across. It gives the stem a bit more surface area to drink up water and nutrients.
It also helps me remember which end goes into the soil. After cutting, I remove any leaves or flowers from the lower half of the stem.
This keeps the cutting from losing too much moisture and helps it focus on growing roots. If the stem looks dry, I dip the cut end in rooting hormone powder before planting.
Not required, but honestly, I’ve found it helps roots form faster and stronger. I always keep the cuttings moist and shaded until I’m ready to plant them.
Direct sunlight can dry them out way too quickly. A damp paper towel or a plastic bag does the trick.
Taking time to make a careful, clean cut below a leaf node really gives my rose cuttings the best start. It’s a small detail, but it matters.
4) Remove lower leaves to prevent rot
I always remove the lower leaves from my rose cuttings before planting them. This keeps the stem clean and dry where it’ll sit in the soil.
Wet leaves buried in soil often start to rot, which can spread disease to the cutting. I usually keep only the top two or three leaves.
These leaves help the cutting make food through photosynthesis, but too many can cause it to lose moisture too fast. By trimming the rest, I give the cutting a better chance to focus on growing new roots.
When I remove leaves, I use clean, sharp scissors or pruning shears. I cut gently to avoid tearing the stem—smooth cuts heal faster and lower the risk of infection.
I also make sure no leaf nodes are buried under the soil. If they stay covered and damp, they can rot and weaken the cutting.
After trimming, I sometimes let the cutting dry for a few minutes before planting. This helps seal the cut edges and reduces the chance of fungus forming.
By removing the lower leaves carefully, I keep my rose cuttings clean, healthy, and ready to root. It’s a simple habit, but it really helps.
5) Dip cut end in rooting hormone powder
I always dip the cut end of each rose cutting in rooting hormone powder before planting. It’s a quick step, but it helps the stem grow roots faster and more evenly.
I make sure the cut end is just a little moist so the powder sticks. If it’s too wet, the powder clumps and falls off.
I gently tap off any extra powder before planting. Rooting hormone powder contains growth hormones that encourage root cells to form.
It doesn’t guarantee success, but it definitely improves the odds, especially if you’re new to this. I’ve noticed my cuttings root more often when I use it.
I always use a clean container for dipping, not the main jar. That way I don’t accidentally contaminate the whole thing.
After dipping, I plant the cutting right away so the powder stays on the stem. I press the soil gently around it and water lightly to settle the soil—without washing off the hormone.
Using rooting hormone powder is a small step that makes a big difference in rose propagation. It’s easy, quick, and helps me grow healthy roses from simple cuttings.
6) Use a well-draining potting mix
I always make sure my rose cuttings grow in a well-draining potting mix. Good drainage keeps the roots healthy and prevents them from sitting in water.
When the soil stays too wet, the cuttings can rot before they even start growing. I like to mix equal parts of perlite, coarse sand, and peat moss.
This blend holds just enough moisture while letting extra water flow out easily. It also gives the roots space to breathe and spread.
If I don’t have those materials, I’ll grab a high-quality commercial potting mix labeled for flowers or cuttings. I avoid heavy garden soil because it can pack down and trap water.
Before planting, I moisten the mix so it’s damp but not soggy. A light, airy texture makes it easier for the new roots to grow strong.
I always check the bottom of the pot for drainage holes. Without them, even the best mix can’t help much.
I place a small tray underneath to catch any extra water. When I water my cuttings, I pour slowly and stop as soon as I see water draining out.
Consistent moisture is key, but too much water can undo all your effort. Using a well-draining mix may seem simple, but it makes a big difference.
My rose cuttings root faster, and the plants look stronger once they start growing.
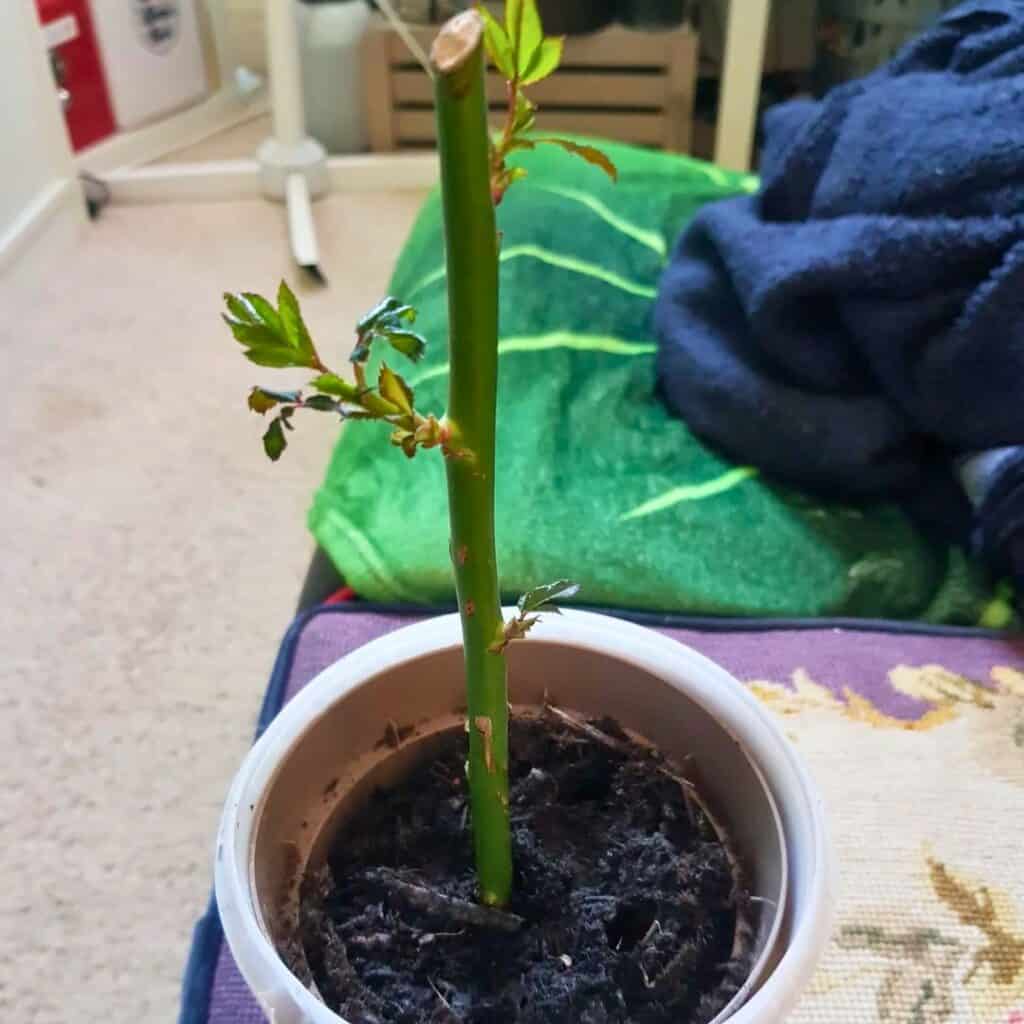
7) Plant cuttings at a 45-degree angle
I always plant my rose cuttings at a 45-degree angle to help them root faster and grow stronger. This angle gives the cutting more contact with the soil, which helps it absorb water and nutrients better.
A slanted position also improves air circulation around the stem. This reduces the chance of rot and keeps the cutting healthier as it starts to grow.
When I plant, I make a small hole with a stick or pencil so I don’t damage the stem. Then I place the cutting in the hole at the 45-degree angle and gently press the soil around it.
I make sure about half of the cutting is below the soil and the other half is above. This balance helps the buried part focus on root growth while the top part can start forming leaves.
If the soil is heavy or clay-like, I mix in some sand or compost to keep it loose. Loose soil helps roots spread easily and prevents water from pooling around the stem.
After planting, I water the cutting well but avoid soaking it. The soil should stay moist but not soggy.
Too much water can cause the cutting to rot instead of root. I also place the cuttings in a bright but shaded spot.
Direct sunlight can dry them out before roots form, so filtered light works best during the early stages. Planting at a 45-degree angle may seem like a small detail, but it really does help.
I’ve noticed that my cuttings root more evenly and grow sturdier stems when I use this method. It’s a simple tweak that helps the plant get a strong start and makes future growth easier to manage.
8) Keep soil consistently moist but not soggy
I always make sure the soil around my rose cuttings stays evenly moist. This helps the roots grow strong and healthy.
If the soil dries out, the cuttings can wilt and struggle to recover. I check the soil by touching it with my finger.
If the top inch feels dry, I water lightly. Too much water can drown the roots, so I avoid soaking the soil.
I like using a spray bottle or a watering can with a gentle spout. This gives me better control and keeps the soil from washing away.
Gentle watering keeps the cuttings stable and protected. If I’m growing cuttings indoors, I cover the container with a clear plastic bag to hold in moisture.
I make sure there’s some airflow so the soil doesn’t get soggy or moldy. When growing outdoors, I water early in the morning.
This gives the soil time to absorb moisture before the heat of the day. Consistent moisture supports steady root growth and helps new plants adjust to their environment.
I also use a light mulch layer around the cuttings. It helps the soil stay damp longer and prevents quick drying.
Mulch keeps moisture levels balanced without making the soil too wet. By paying attention to moisture every day, I can spot problems early.
If the soil looks muddy or smells bad, I let it dry slightly before watering again. This simple habit keeps my rose cuttings healthy and growing strong.
9) Cover cuttings with a plastic bag to maintain humidity
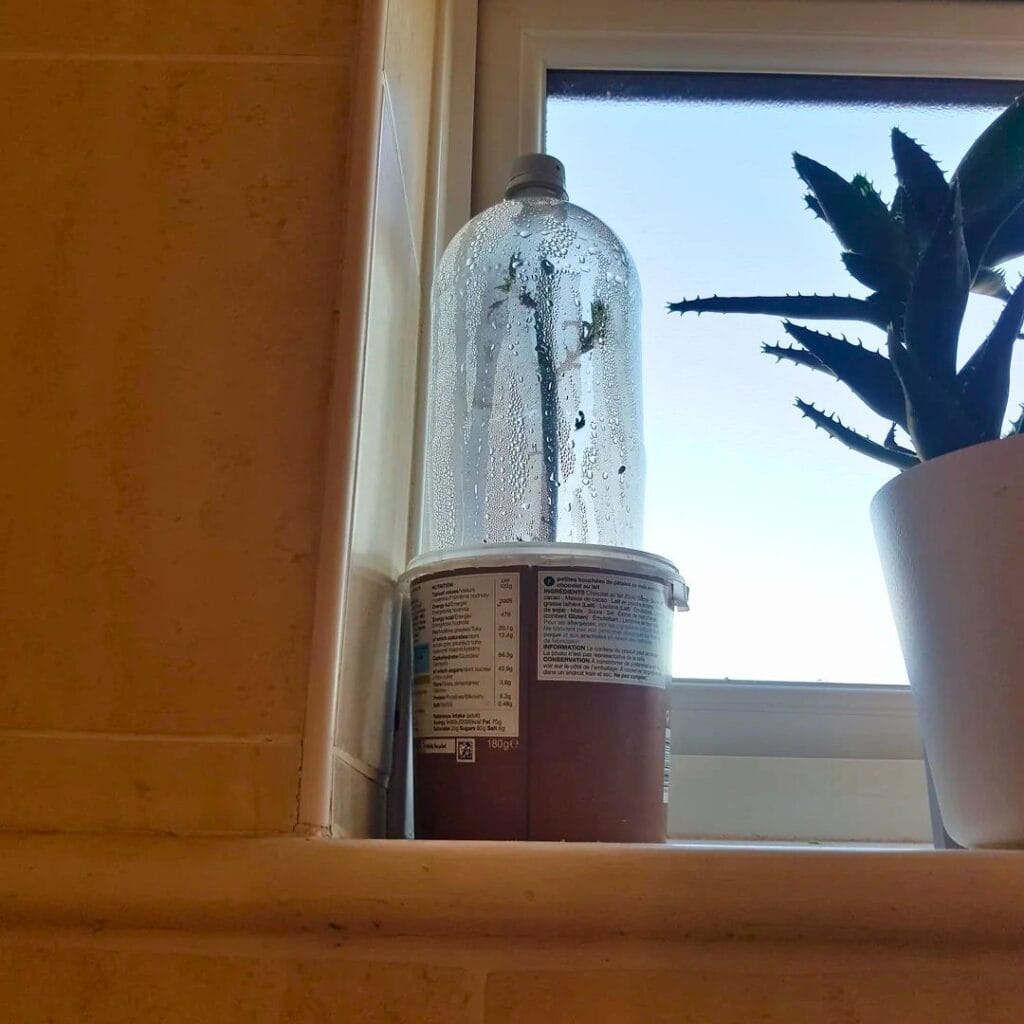
I always cover my rose cuttings with a plastic bag—keeps the air nice and moist around them. This way, the cuttings stay hydrated while they work on growing new roots.
Without enough humidity, the stems can dry out before they even get a chance to root. I like using a clear plastic bag so sunlight can still get through to the leaves.
One thing I watch out for: I make sure the bag doesn’t touch the leaves. Trapped moisture right on the leaves is just asking for rot. Sometimes I’ll prop the bag up with little sticks or wire hoops—whatever’s handy.
I gently seal the bag around the pot to create a mini greenhouse effect. It traps moisture and warmth, which is exactly what the cuttings need.
Every few days, I peek inside to check if it’s still slightly damp. If there’s too much condensation, I’ll open the bag for a bit to let some air out.
Good air circulation is important—it helps keep mold away. Once the cutting starts pushing out new leaves, I remove the bag for short periods so it can get used to normal air again.
Keeping the humidity steady really makes a difference. It’s such a simple thing, but honestly, it gives the plants a better shot at rooting strong and healthy.
10) Place cuttings in bright, indirect sunlight
I always try to give my rose cuttings bright, indirect sunlight instead of blasting them with direct rays. Too much sun will dry them out before roots can even form.
Gentle light gives them the energy they need without stressing them out. I usually keep my cuttings near a south-facing window with filtered light.
A sheer curtain does the trick to soften the sunlight. This setup keeps the leaves nice and green while the roots start to do their thing.
If I’m rooting cuttings outside, I look for a shaded spot that still gets some daylight. I avoid that harsh afternoon sun, especially when it’s hot out.
Morning light is perfect—it’s bright but not too intense. I check the light daily to make sure it’s not too weak or, on the flip side, too strong.
If the leaves start looking pale, I move the cuttings closer to the light. If they look a bit scorched, I shift them into more shade.
Consistent, gentle light makes a big difference. I’ve noticed the new growth just looks healthier and more vibrant when I get this part right.
When natural light isn’t cutting it, I’ll use a grow light for a few hours each day. I keep it close but not too close, so they get enough brightness without overheating.
Giving cuttings the right amount of light really helps them build up energy for root growth. It’s simple, but it can totally change how well they take root and grow into healthy rose plants.
11) Avoid direct sun to prevent leaf scorch

I always keep my rose cuttings out of direct sunlight during those first few weeks. Strong sun can dry out the leaves and cause leaf scorch—never good for rooting.
Instead, I stick with bright, indirect light. A shaded porch, a greenhouse corner, or a window with a sheer curtain all work well.
If it’s really hot, I move the cuttings somewhere cooler in the afternoon. Too much heat just stresses young stems and dries out the soil way too fast.
I check the leaves every day. If I spot any yellowing or crispy edges, I know they’re getting too much sun and I adjust their spot right away.
Once the roots have developed and the plant looks stronger, I slowly introduce it to more sunlight. Gradual exposure helps the leaves adapt without burning.
This little bit of extra care keeps my cuttings healthy and gives them a better shot at growing into strong, blooming rose plants.
Understanding Rose Cutting Propagation
I spend a lot of time thinking about how cuttings actually grow roots—and what can get in the way. Knowing the details helps me raise healthy new rose plants with fewer losses.
How Rose Cuttings Develop Roots
When I stick a cutting in soil or water, it first seals off the cut end to protect itself. Then, tiny root cells start forming near the bottom node.
These cells eventually grow into roots that can absorb water and nutrients. I try to keep the cutting moist but not soaked.
Too much water and the stem might rot; too little and root growth just stops. I like to keep the temperature around 70°F (21°C)—warmth really helps root formation.
A simple setup works best for me:
- Clean pruning shears to cut a 6-inch stem below a leaf node
- Rooting hormone to speed up root growth
- Loose, well-draining soil or a mix of perlite and peat
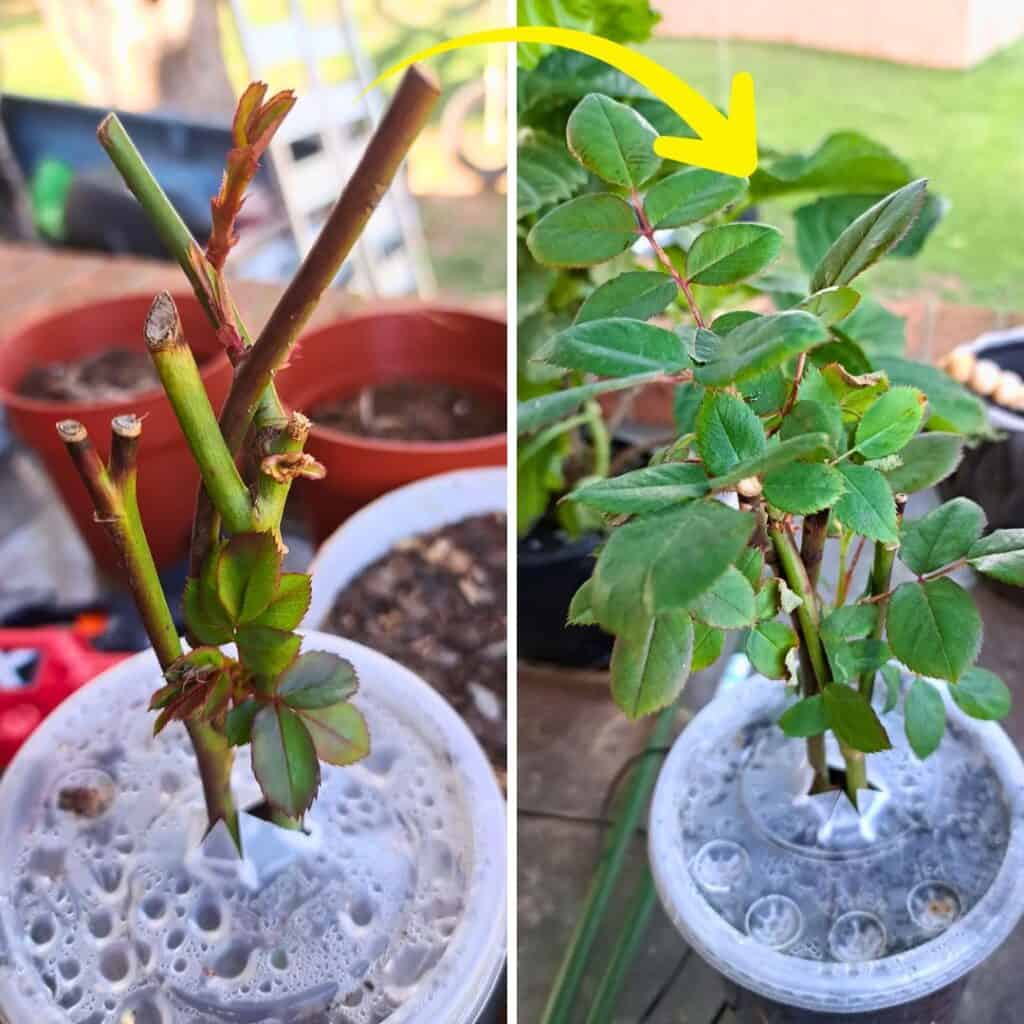
Within a few weeks, I look for new leaf buds or a little resistance when I gently tug the stem. Those are good signs roots are forming.
Common Challenges When Growing Roses from Cuttings
Even with all the care in the world, some cuttings just don’t make it. The most common issues I see are rotting, drying out, and fungal growth.
I try to avoid these by using sterile tools and containers. Humidity is another thing I watch closely.
If the air’s too dry, leaves wilt. Too damp, and mold shows up. I’ll use a plastic cover or humidity dome to keep things balanced.
Weak light is another problem. Cuttings need bright, indirect sunlight to stay healthy. Direct sun can scorch them, but too little light just slows everything down.
To keep track of what works, I use a little table:
| Problem | Likely Cause | Simple Fix |
|---|---|---|
| Rotting stem | Too much water | Improve drainage |
| Wilting leaves | Low humidity | Use a cover or mist daily |
| No roots forming | Cold soil | Move to a warmer spot |
Tweaking these factors helps most of my cuttings turn into strong, rooted plants.
Caring for Young Rose Plants
I do my best to keep young rose plants happy by giving them steady moisture, balanced nutrients, and gentle sunlight with a bit of fresh air. Building strong roots comes first—before I even think about moving them outside.
Best Practices for Watering and Feeding
I water my young roses when the top inch of soil feels dry. Consistent moisture helps roots grow deep and strong, but soggy soil is just asking for rot.
I use a small watering can or a gentle spray so I don’t wash away the soil around the stems. Morning watering is my go-to—it lets the leaves dry before night, which helps prevent mildew.
If it’s hot out, I check them twice a day just in case. For feeding, I wait until I see new leaves.
Then I use a diluted liquid fertilizer made for roses—about half the normal strength. Feeding every two weeks keeps growth steady without burning the roots.
If I notice pale leaves or slow growth, that usually means they need a bit more food. This simple routine keeps my roses healthy and ready for their next step outside.
Transitioning Cuttings to Outdoor Conditions
I move my young roses outdoors gradually so they can get used to sunlight, wind, and temperature swings. This process, called hardening off, usually takes about a week.
I start by putting them in a shaded spot for a few hours each day. Then I slowly increase their time outside and give them more sun.
Once the plants stay firm and upright in full sun, I plant them in the garden. This way, they adapt smoothly and keep growing strong.
Frequently Asked Questions
I pay a lot of attention to timing, plant health, soil quality, and watering habits to help my rose cuttings thrive. Getting these details right makes a big difference.
What’s the best time of year to start growing roses from cuttings?
I’ve had the best luck taking cuttings in late spring or early summer. The weather’s warm and the plants are actively growing, so the cuttings root faster.
How do I choose the right rose cuttings for propagation?
I always go for healthy, disease-free stems from a strong parent plant. Green and firm is what I look for—not woody or soft.
Can you share some tips on how to prepare the cuttings for planting?
I cut each stem 6–8 inches below a leaf node and remove the lower leaves to prevent rot. Then I dip the cut end in rooting hormone powder to help new roots form.
What type of soil should I use for rooting rose cuttings?
I use loose, well-draining soil—equal parts sand, perlite, and peat moss. This mix keeps the moisture even and stops the cuttings from getting too wet.
How often should I water rose cuttings to ensure they grow?
I keep the soil consistently moist but not soggy. I check the top inch of soil every day and water lightly when it starts to dry out.
What are the signs that my rose cuttings have successfully rooted?
Honestly, I usually look for new leaf growth—that’s a big giveaway.
Sometimes, if I carefully tug on the stem and feel a bit of resistance, that’s another good sign.
Once I notice those things, I’ll start giving the cuttings a bit more light and ease up on the humidity.
Note: Some images in the articles are sourced from Reddit and Other Platforms For Reference Purpose.