11 Care Tips For Rattlesnake Plant (Calathea lancifolia)
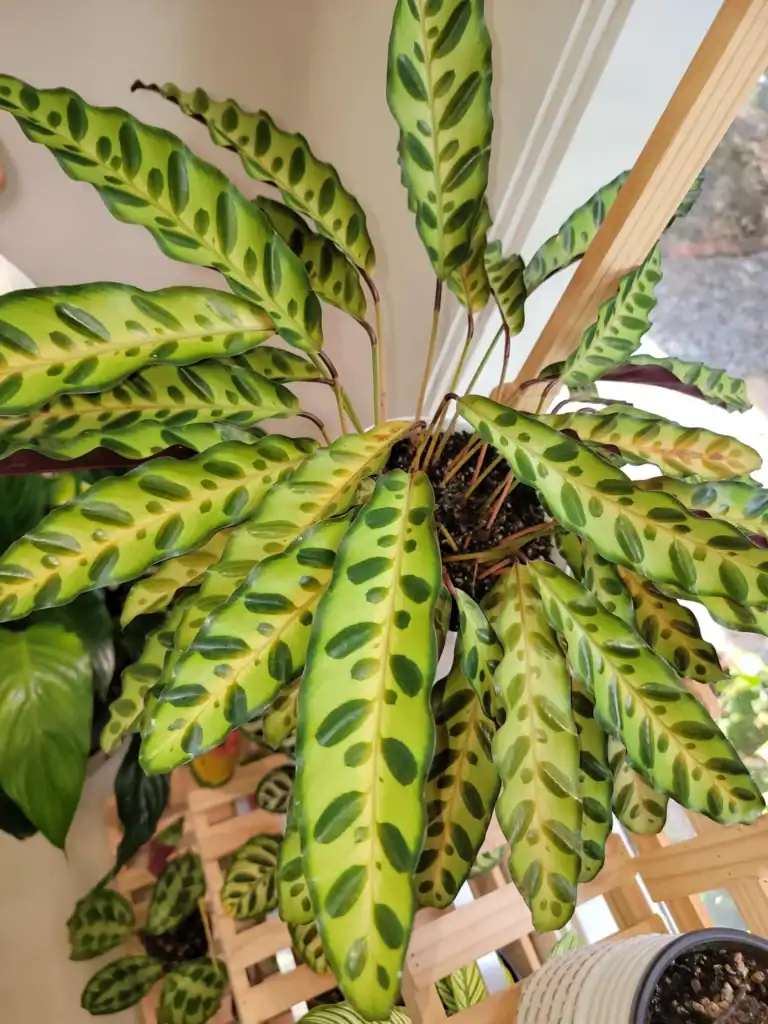
The Rattlesnake Plant gets its name from the wild patterns on its leaves—honestly, they really do look like rattlesnake skin.
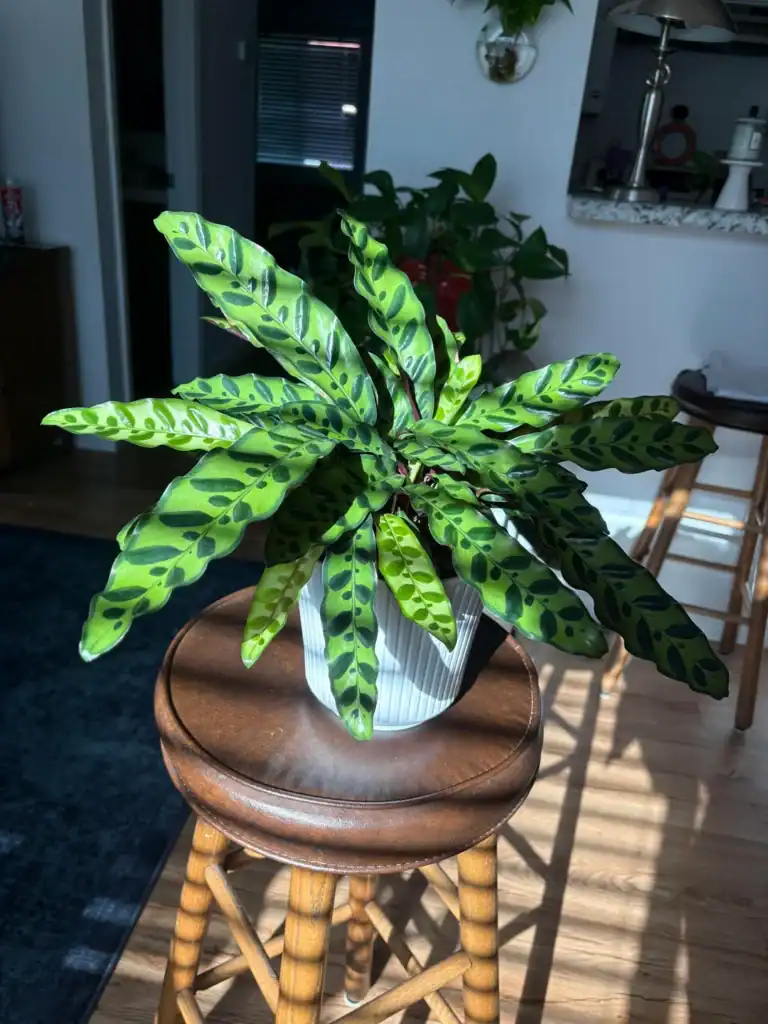
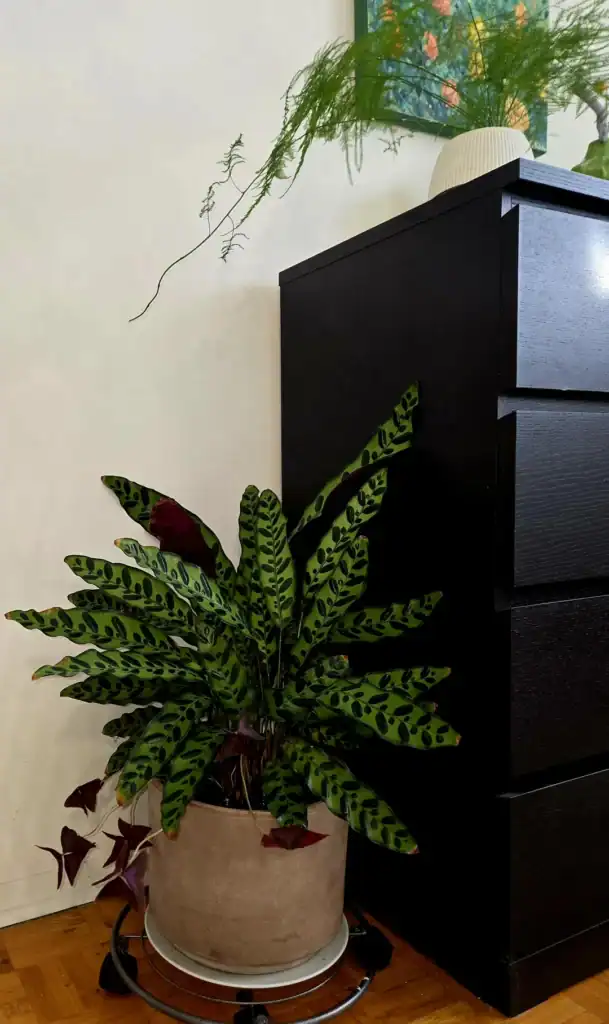
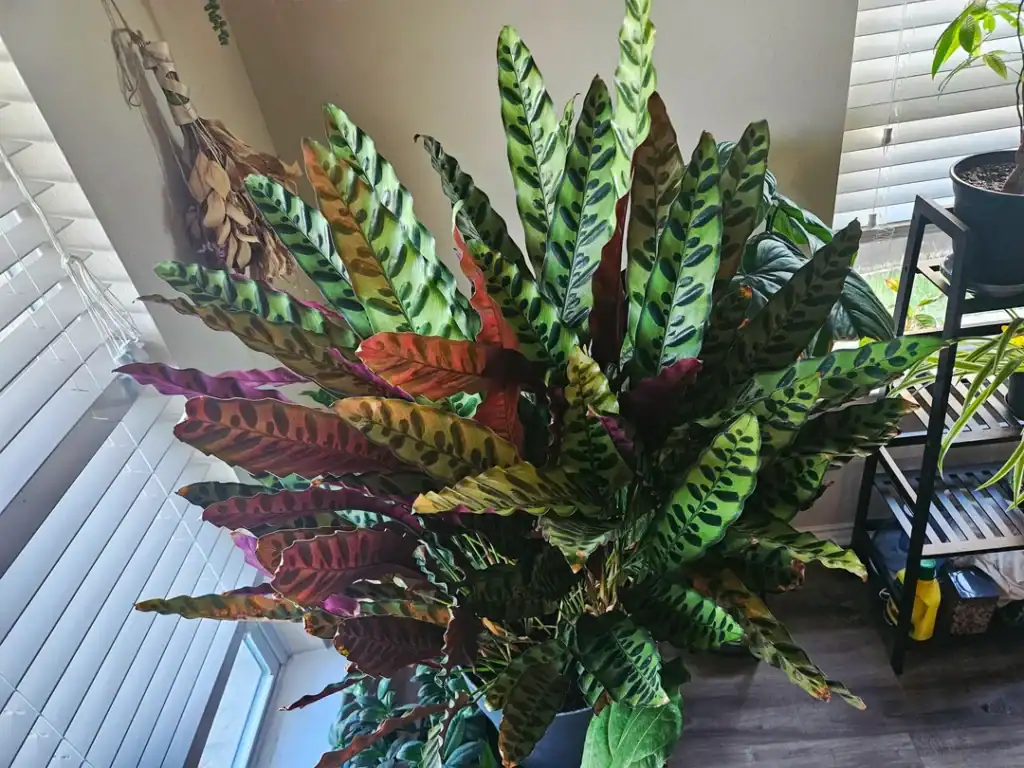
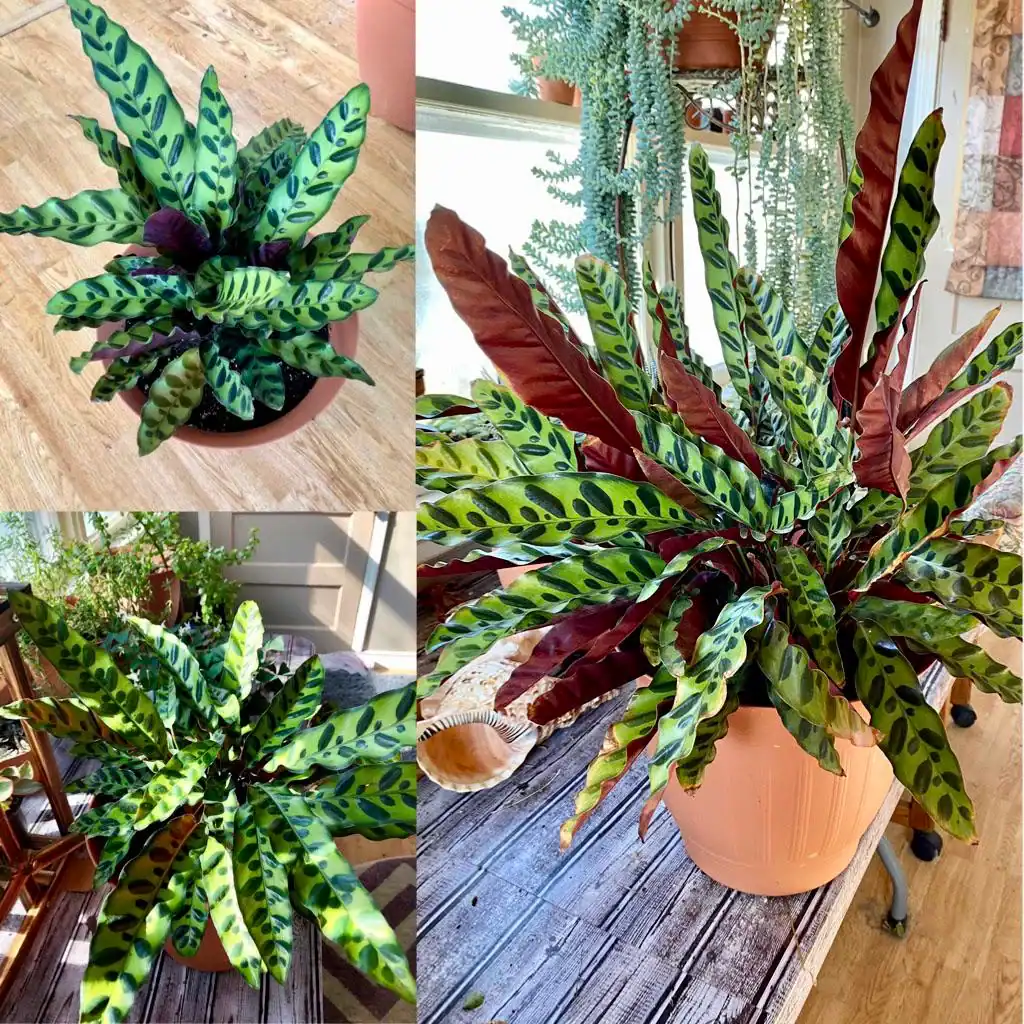
This tropical beauty is part of the Calathea family and stands out with long, wavy leaves marked by dark green spots on top and a deep purple shade underneath.
I’ve put together 11 practical care tips to help you keep your Rattlesnake Plant healthy and thriving all year.
From nailing the right light and water routine to keeping up with humidity, these tips should cover the basics. I’ll walk you through watering, lighting, soil, and a few maintenance tricks so your plant can really show off those gorgeous leaves.
If you’re new to Calatheas or just picked up your first Rattlesnake Plant, knowing what it likes will make a huge difference.
The best part? With a few simple habits, you can create the perfect home for this stunning houseplant.
Please note: Simplify Plants is reader-supported. As an Amazon Associate, I earn from qualifying purchases made by our readers with no extra cost added to you all! Some links in the post are affiliate links and I get a commission from purchases made through links in the post.
1) Provide bright, indirect light away from direct sun
I always keep my rattlesnake plant near a window where it gets plenty of light but never those harsh sunbeams. These plants come from the floor of Brazilian rainforests, where taller trees filter the sunlight.
Direct sun will bleach and burn those incredible patterned leaves, so it’s a no-go. An east-facing window is usually perfect because it gives gentle morning light. North-facing windows are solid too, though the plant might slow down in winter.
If you’re stuck with south or west windows, just move the plant back a few feet or hang a sheer curtain.
Quick Tip: If you notice the leaves curling or getting brown, crispy edges, it’s probably getting too much direct light.
Low light won’t kill your rattlesnake plant right away, but the leaves lose their bold patterns and the plant starts to look leggy. I’ve found that bright, filtered light keeps those dark green markings vivid and the purple undersides rich.
2) Keep soil consistently moist but not soggy
I water my rattlesnake plant when the top inch of soil feels dry. That usually means once a week, but honestly, I just check the soil instead of following a strict schedule.
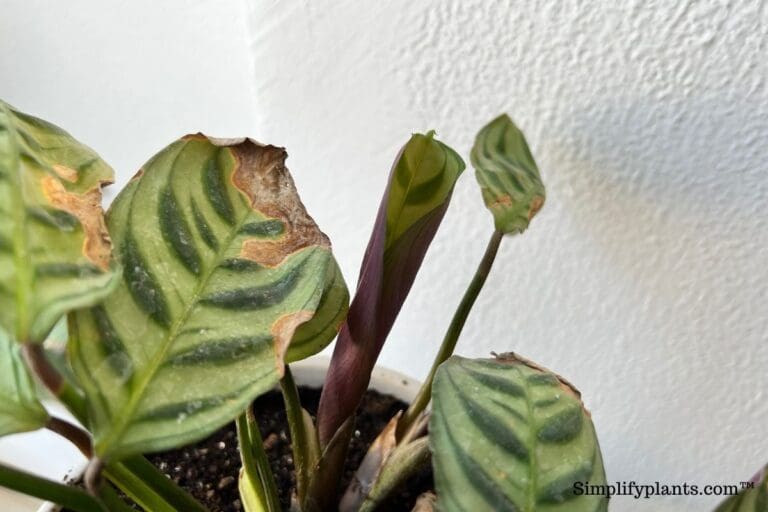
There’s a sweet spot between moist and wet. If the soil stays soggy, roots can rot. If it dries out completely, you’ll see curling leaves and crispy edges.
I like to water thoroughly until a bit drains from the bottom, then I empty the saucer so the plant isn’t stuck in water. In winter, I cut back since the plant chills out and doesn’t need as much.
Quick Tip: Stick your finger about an inch into the soil—if it feels damp, wait another day or two before watering. The leaves will tell you when something’s off. Yellowing leaves often mean too much water, while brown, crispy edges mean it dried out too much between drinks.
3) Use room temperature, distilled or rainwater for watering
I always let my tap water sit out overnight before using it on my Rattlesnake Plant. Tap water usually has chlorine, fluoride, and other stuff that can build up and cause brown tips.
Distilled or rainwater works best since it’s free of harsh chemicals. If you collect rainwater, just make sure it’s clean and not full of random debris.
Cold water can shock the roots, so I bring my water to room temperature first. I mean, would you want an ice-cold shower? Neither does your plant.
Quick Tip: Fill a watering can the night before and let it sit so the water warms and chlorine can evaporate. If you’re still seeing crispy brown edges despite good watering, your tap water might be the culprit. Switching to filtered or distilled water usually helps within a few weeks.
4) Maintain humidity levels above 60% using a humidifier or pebble tray
Rattlesnake plants come from tropical forests where the air is always moist. When my home drops below 60% humidity, I start seeing brown, crispy edges on the leaves.
I keep a small humidifier near my plant in winter when indoor heating dries everything out. It runs a few hours a day and honestly, it helps a lot. If you don’t want a humidifier, a pebble tray is a good hack.
To make one, I fill a shallow dish with stones and add water until it’s just below the top of the pebbles, then set the pot on top. As the water evaporates, it creates moisture around the leaves.
Quick Tip: Group your tropical plants together—they’ll create a mini humid zone and share moisture. Check the leaves every week or so. If brown tips are spreading, the air’s too dry and you’ll want to bump up the humidity fast.
5) Fertilize monthly during spring and summer with balanced liquid fertilizer

I feed my rattlesnake plant once a month during spring and summer, when it’s actually growing. That’s when it needs extra nutrients to pump out those stunning new leaves.
I always use a balanced liquid fertilizer diluted to half strength. Full-strength stuff can burn the roots and cause brown tips—definitely not what you want on a pretty plant like this.
Once fall and winter hit, I stop fertilizing. The plant’s resting and doesn’t need the extra food.
Quick Tip: Mix your diluted fertilizer into the watering can and apply it to damp soil, never dry roots.
With calatheas, less is more. If I see brown edges even with decent watering, I cut back on fertilizer. These plants are sensitive to salt buildup from too much feeding.
6) Prune yellow or brown leaves promptly to encourage new growth
I always snip off damaged leaves as soon as I see them. Yellow or brown leaves won’t turn green again, and they just drain energy the plant could use elsewhere.
Grab clean scissors or pruning shears and cut the leaf stem close to the base. Don’t yank or tear, since that can hurt the healthy parts.
Quick Tip: Wipe your blade with rubbing alcohol between cuts to avoid spreading anything nasty. If only the tip is crispy, I trim just that bit at an angle to keep the leaf looking natural. If the whole leaf is rough, I take it off completely.
Regular pruning keeps my Rattlesnake Plant looking sharp and helps it focus on new leaves instead of trying to fix old damage.
7) Use well-draining potting mix rich in organic matter
I always mix peat moss, perlite, and compost when potting my rattlesnake plants. This combo drains fast but holds just enough moisture to keep the roots happy without drowning them.
Heavy soil is a nightmare here. If water hangs around too long, roots can rot before you even notice anything’s wrong.
I go for a mix that feels light and crumbly. When I water, I want it to soak in quickly and drain out the bottom within seconds.
Quick Tip: Add a handful of orchid bark for extra drainage and airflow around the roots.
Organic matter like compost feeds the plant slowly over time and keeps the soil loose, so roots can spread and breathe.
8) Avoid cold drafts and sudden temperature changes below 60°F
I always keep my rattlesnake plant away from drafty windows and air conditioning vents. These plants hate sudden temperature swings, and anything below 60°F can stress them out fast.
Cold air can damage the leaves and slow down growth. I’ve seen brown edges and curling leaves after a cold draft from a door or window.
Quick Tip: Move your plant at least three feet from exterior doors, windows that get opened a lot, and AC units in summer. If you live somewhere with cold winters, check for sneaky drafts around window frames. I put my hand near the pot to feel for cold air. Room temperature between 65-75°F is best, and I try to keep it steady.
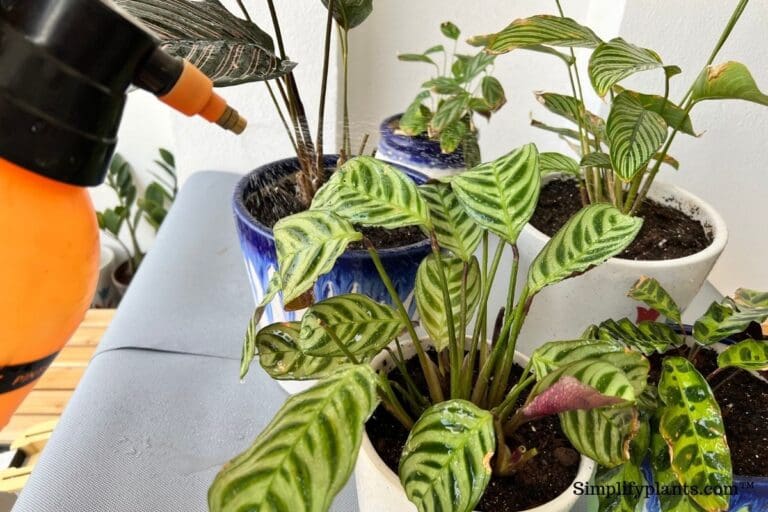
9) Wipe leaves gently with a damp cloth to remove dust
Dust builds up on rattlesnake plant leaves and blocks light from reaching the surface. When leaves can’t absorb enough light, the plant struggles to make food. Every few weeks, I grab a soft, damp cloth and gently wipe each leaf from base to tip.
This simple task actually makes a difference in how your plant looks and grows. Clean leaves show off those dark green patterns way better than dusty ones. Plus, it’s a good time to check for pests or brown spots you might have missed.
Quick Tip: Use room-temperature water and wring out the cloth so it’s just barely damp, not wet. I skip leaf shine products—they can clog the pores. Plain water does the trick. Just be gentle since rattlesnake plant leaves can tear if you’re too rough.
10) Repot every 1-2 years in spring to refresh soil and check roots
I repot my rattlesnake plant every spring or every other spring. That’s when I refresh the soil and check if the roots look healthy or cramped.
Spring is the best time because the plant is gearing up for new growth and handles the stress better. When I take the plant out, I check the roots—if they’re circling the edges or poking out drainage holes, it’s time for a bigger pot.
If the roots look fine, I just swap out the old soil for fresh mix and put it back in the same pot.
Quick tip: Only go up one pot size (about 2 inches wider) to avoid overwatering issues. I always use a well-draining mix. The fresh soil gives new nutrients and better drainage, which keeps roots happy and prevents rot.
11) Place near a north or east-facing window for optimal light
I always recommend putting your rattlesnake plant near a north or east-facing window. Those spots give you that perfect, indirect light—no scorching, just happy growth.
South and west windows can be too intense, especially in summer. The harsh rays can fade the dark green patterns or even burn the foliage. If a south or west window is all you’ve got, just pull the plant back a few feet.
Quick Tip: If the leaves start curling or the colors look washed out, your plant’s getting too much direct sun. North-facing windows work great year-round since the light stays gentle. East-facing windows give a nice morning glow that’s bright but not overwhelming. I’ve had mine thrive in both spots—no drama at all.
Frequently Asked Questions
Rattlesnake Plants need bright but filtered light, regular watering with the right water, high humidity, well-draining soil, monthly feeding during the growing season, and protection from the usual houseplant pests.
What’s the ideal lighting for keeping my Rattlesnake Plant healthy?
I always put my Rattlesnake Plant in bright, indirect light—plenty of brightness, but never direct sun on the leaves. Direct sunlight will fade those gorgeous patterns and can scorch the foliage.
A spot near an east-facing window works great, or a few feet back from a south or west window. North-facing windows can work too, but growth might slow down a bit. If the leaves start losing their stripes or the colors look faded, that’s your plant telling you it’s getting too much light.
Quick Tip: Rotate your plant every week or two so all sides get equal light and it grows evenly.
How often should I water my Rattlesnake Plant to maintain its vibrant patterns?
I usually water my Rattlesnake Plant when the top inch of soil feels dry—honestly, that’s every 4-7 days for me, but it really depends on the season. The goal is to keep the soil moist, but not soggy or swampy.
I stick with room temperature distilled water, rainwater, or filtered water. Tap water just has too many chemicals like fluoride and chlorine, and I’ve seen those cause brown tips. Cold water isn’t great either—roots don’t like surprises, so I let it sit out and warm up.
In winter, I back off on watering since the plant slows down. If I see yellowing leaves, that’s usually a sign I’ve gone overboard, while crispy brown edges make me think I’m underwatering or the air’s too dry.
Quick Tip: Poke your finger into the soil up to your first knuckle—if it’s dry there, it’s probably time to water.
Are there any specific humidity requirements for a thriving Rattlesnake Plant?
My Rattlesnake Plant seems happiest when humidity stays above 60%. It’s a bit fussy—low humidity leads to those dreaded crispy brown edges and droopy leaves.
I usually run a humidifier nearby, especially when the heat’s on in winter and the air feels bone-dry. A pebble tray under the pot helps too, as long as the pot’s not actually sitting in the water.
Grouping plants together can boost the humidity a little—sort of a team effort. I’m not a fan of misting since it doesn’t last and wet leaves can attract fungus if I’m not careful.
Quick Tip: If you spot crispy brown edges, crank up the humidity before things get worse.
What type of soil mixture is best suited for the growth of a Rattlesnake Plant?
I go for a well-draining potting mix that holds a bit of moisture but never gets soggy. My usual blend is two parts peat moss or coco coir, one part perlite, and one part regular potting soil.
Perlite keeps things light and lets the roots breathe, which is important since Rattlesnake Plants really hate wet feet. You could grab a bag of African violet or aroid mix too—those work pretty well.
I never skip drainage holes in the pot. Without them, water just sits at the bottom and, well, root rot is almost guaranteed.
Quick Tip: If water just sits on the surface or takes forever to soak in, your soil’s too dense—add more perlite and you’ll be good.
Can you share some tips on fertilizing a Rattlesnake Plant for optimal growth?
I feed mine once a month in spring and summer with a balanced liquid fertilizer, but I always dilute it to half strength. The plant actually needs those nutrients when it’s actively growing.
Once fall hits, I stop fertilizing. Growth slows down, and leftover fertilizer just sits there and turns into salty deposits—those white crusts on the soil or pot rim are a dead giveaway.
Too much fertilizer can burn the roots and cause brown tips, just like bad water does. I always make sure to water the plant first before feeding, just to be safe.
Quick Tip: Go for a balanced fertilizer like 10-10-10 or 20-20-20, and honestly, it’s better to underfeed than overdo it with houseplants.
What are the common pests that affect Rattlesnake Plants, and how can I prevent them?
Spider mites are honestly the worst pest I run into with my Rattlesnake Plant, especially when the humidity takes a dive. You’ll notice fine webbing underneath the leaves, and sometimes those annoying yellow dots start popping up on the foliage.
Fungus gnats tend to appear whenever I get a little too enthusiastic with watering and the soil stays soggy for days. I’ve also had to keep an eye out for mealybugs—they look like tiny white cotton balls hiding in the leaf crevices.
Every week or so, I just flip the leaves and check along the stems, hoping not to find any unwanted guests. Wiping the leaves down with a damp cloth every couple of weeks makes it easier to spot issues and keeps things looking fresh.
Quick Tip: If you catch pests early, wiping the leaves with soapy water or neem oil usually does the trick before things get out of hand.
Note: Some images in the articles are sourced from Reddit and Other Platforms For Reference Purpose.