11 Care Tips For Burro’s-Tail (+Common Problems & Solution)
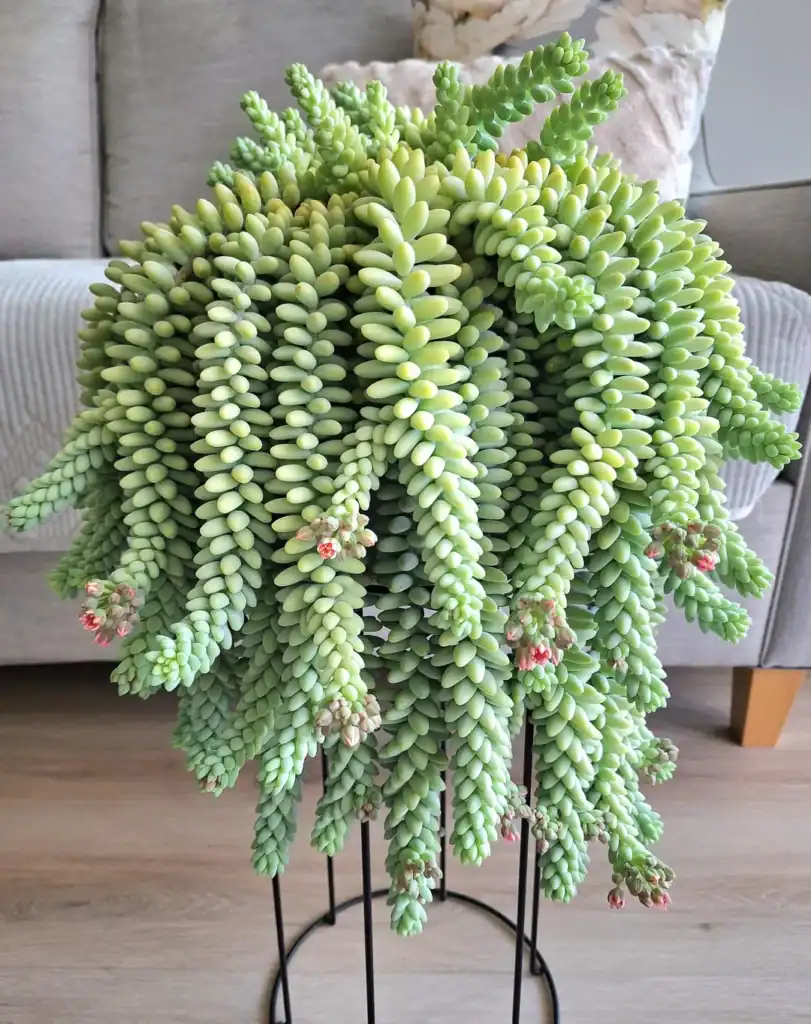
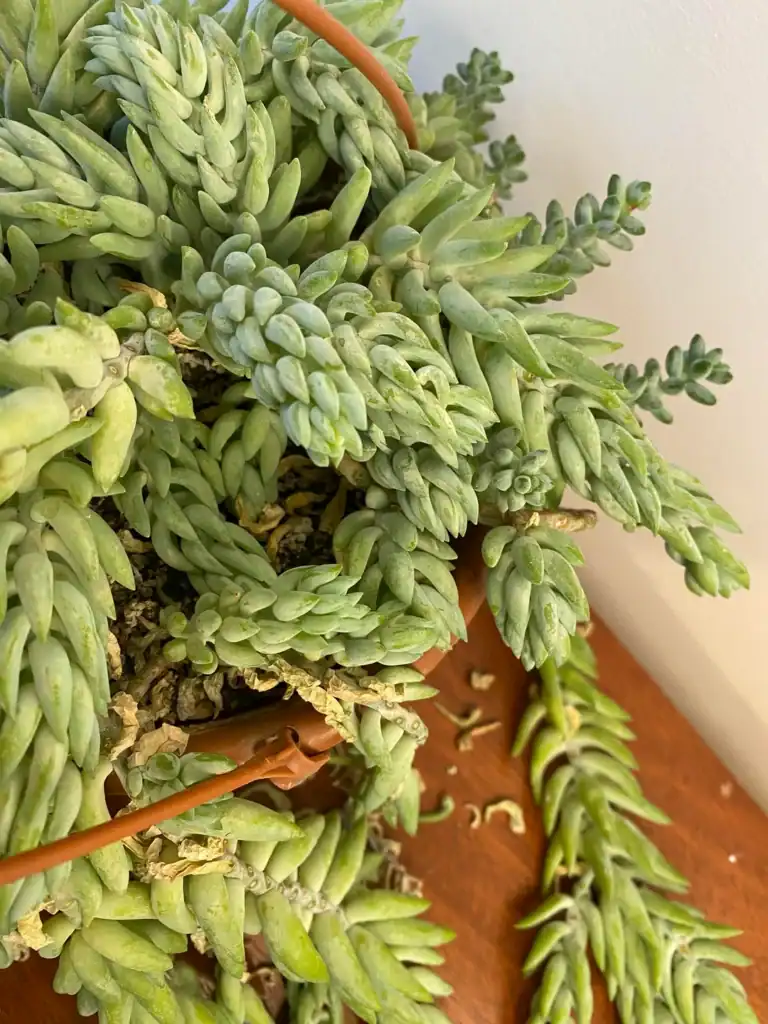
Burro’s-tail is one of those succulents that just looks stunning trailing from a hanging basket or shelf. The thick, beaded leaves are gorgeous but honestly, they’re pretty fragile—so learning how to handle this plant really matters.
This guide covers the essential care tips you need to keep your burro’s-tail thriving, plus solutions to the most common problems that can pop up. I’ll walk you through watering, light, soil, and how to deal with issues like root rot or pests.
You’ll also learn when to repot and how to support those long stems so they don’t snap off. Let’s get into it.
Please note: Simplify Plants is reader-supported. As an Amazon Associate, I earn from qualifying purchases made by our readers with no extra cost added to you all! Some links in the post are affiliate links and I get a commission from purchases made through links in the post.
1) Provide bright, indirect sunlight to prevent leaf burn
I always put my burro’s-tail near a window where it gets loads of light but not those harsh sunbeams. This plant craves brightness, but direct afternoon sun can scorch those plump leaves and leave them brown or even bleached out.
East or west-facing windows usually work best for me. If you’ve only got a south-facing spot, just pull the plant back from the glass a bit or hang up a sheer curtain to soften the light.
Keep an eye out for unhappy signs. If the leaves start looking stretched out or pale, it needs more light. Brown or crispy patches? That’s a sign of too much sun.
Quick Tip: Rotate your burro’s-tail every couple weeks so each side gets its turn in the light and it doesn’t lean or grow lopsided.
2) Water sparingly, allowing soil to dry out between watering
Burro’s tail is a succulent, so it stores water in those fat leaves. I only water mine when the soil feels totally dry an inch or two down—otherwise, the roots just sit in dampness and start to rot.
I always poke my finger into the soil first. If it’s even a little damp, I wait a few more days. In winter, I cut back even more since the plant is basically napping and doesn’t need much water at all.
Quick Tip: When you do water, soak the soil until water runs out the bottom, then ignore it until it’s bone dry again.
Overwatering shows up as mushy, see-through leaves that fall off with barely a touch. If that happens, I’ve definitely overdone it. In summer, the plant dries out faster, so I check more often—but still, no watering unless it’s dry.
3) Use well-draining cactus or succulent soil mix
I always stick with cactus or succulent soil for my burro’s tail—regular potting soil just holds too much water. Since these plants store water in their leaves, they need soil that dries out fast between waterings.
Standard mixes keep things soggy around the roots, which is a recipe for root rot. That’ll kill your plant faster than anything else, honestly.
Quick Tip: Mix three parts cactus soil with one part perlite or coarse sand for even better drainage.
If you water and the soil drains out the bottom in seconds, you’re good. If it sits on top or soaks in slowly, it’s time to tweak your mix.
In humid places, I add extra perlite. The idea is to mimic the dry, rocky places these succulents come from—so don’t be afraid to go gritty.
4) Avoid overwatering to prevent root rot
Burro’s tail keeps water in its leaves, so it just doesn’t need to be watered like your other houseplants. Too much water is the fastest way to kill this succulent, I’ve learned that the hard way.
I only water when the soil is completely dry. I stick my finger in about two inches deep—if it’s even a bit damp, I wait.
Quick Tip: Water even less in winter—maybe once every three to four weeks instead of every two.
Root rot usually shows up as mushy, blackened stems near the soil line. You might see leaves falling off or looking wrinkled. If you catch it early, cut away the bad parts and repot in dry soil.
Good drainage is everything. I always use a pot with holes and a gritty soil mix that doesn’t hold onto moisture.
5) Fertilize monthly during growing season with balanced succulent fertilizer
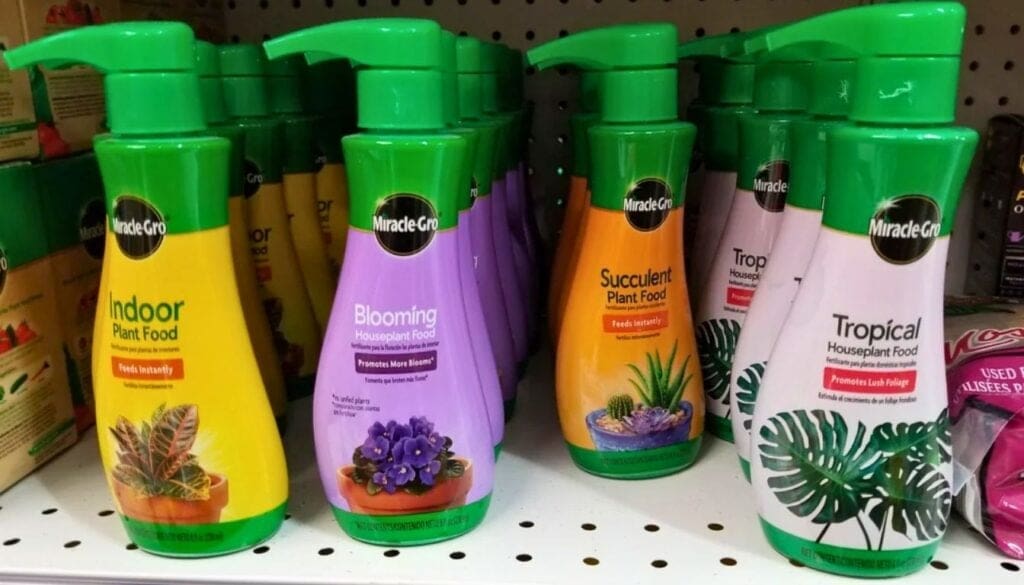
I feed my burro’s tail once a month from spring through summer, when it’s actually growing. In fall and winter, I just skip the fertilizer—no need when the plant’s dormant.
For fertilizer, I go with a balanced succulent formula, but I always dilute it to half strength. Full strength can burn the roots and make those fat leaves shrivel or drop.
Quick Tip: Always mix the fertilizer weaker than the instructions say—better to underfeed than overdo it with succulents.
If you notice leggy stems or pale, stretched leaves, you might be overfeeding. Mushy yellow leaves can mean fertilizer is building up in the soil.
I like to water lightly before fertilizing so the nutrients spread evenly instead of pooling in one spot.
6) Place in a room with temperatures between 65-80°F (18-27°C)
I keep my burro’s tail in a room that stays between 65-80°F. That seems to be the sweet spot—any colder, and the plant slows down and might get damaged.
Cold drafts from windows or AC vents are trouble, so I move mine away from those in winter.
Quick Tip: If you’re in a cold climate, keep your plant away from single-pane windows at night.
Heat above 85°F isn’t a big deal if you’re watering right. My plant handles warm days just fine as long as I don’t let the soil go bone dry for too long.
Sudden temperature swings are what really mess things up. I avoid putting my burro’s tail near heaters or doors that open a lot.
7) Trim dead or shriveled stems to encourage healthy growth
I check for stems that look dried out or mushy and snip them off with clean scissors. Dead growth just drains the plant’s energy, so it’s better to remove it.
Trimming also helps stop rot from spreading if a stem got too wet. I cut right above the healthy part and always sanitize my tools first—just a quick wipe with rubbing alcohol.
Quick Tip: Save healthy stems you trim off—you can stick them in dry soil and start new plants pretty easily.
The plant perks up after a trim, especially in spring and summer. In winter, I only remove stuff that’s truly dead since it heals slower.
8) Watch for mealybugs and treat with neem oil or insecticidal soap
Mealybugs love hiding between the thick leaves of burro’s tail—they look like tiny white cotton spots. I check every few weeks by gently lifting the stems and peeking where the leaves meet.
These pests suck out the sap and leave a sticky mess. If I catch them early, it’s not too hard to get rid of them.
Quick Tip: Dip a cotton swab in rubbing alcohol and dab any mealybugs you see for a quick fix.
If things get worse, I mix up neem oil or insecticidal soap with water and spray the plant, making sure to get into all those crevices. I repeat every week for a few weeks to make sure I catch any new hatchlings.
Good air flow helps prevent mealybugs in the first place. I keep my burro’s tail somewhere with decent air movement.
9) Avoid high humidity environments to reduce fungal issues
Burro’s tail is a desert plant, so it doesn’t want much moisture in the air. Regular household humidity is fine, but high humidity can cause rot and fungal problems since the leaves already hold so much water.
If you live somewhere humid, make sure air can move around your plant. A little fan nearby works wonders. Definitely don’t mist your burro’s tail like a tropical plant.
Quick Tip: Try to keep humidity below 50%, and never let water sit on the leaves for long.
Mushy stems or dark spots on leaves are warning signs that things are too damp. In humid climates, water less often and double-check your soil drains quickly.
Bathrooms and kitchens trap a lot of steam, so I avoid those rooms for this succulent. Dry, well-ventilated spaces are just better.
10) Repot every 2-3 years in fresh soil to refresh nutrients
I repot my burro’s tail every couple of years to give it fresh soil. Over time, the potting mix breaks down and loses nutrients.
Spring is the best time to repot since the plant is actively growing. I gently take the plant out, shake off old soil, and try not to knock off too many leaves (but it happens).
I use a cactus or succulent mix that drains well, and the new pot is only a little bigger than the old one—burro’s tail likes things a bit snug.
After repotting, I wait about a week before watering so any damaged roots can heal up and avoid rot.
Quick Tip: Lay down newspaper or repot outside—those leaves fall off if you look at them wrong, and it gets messy fast.
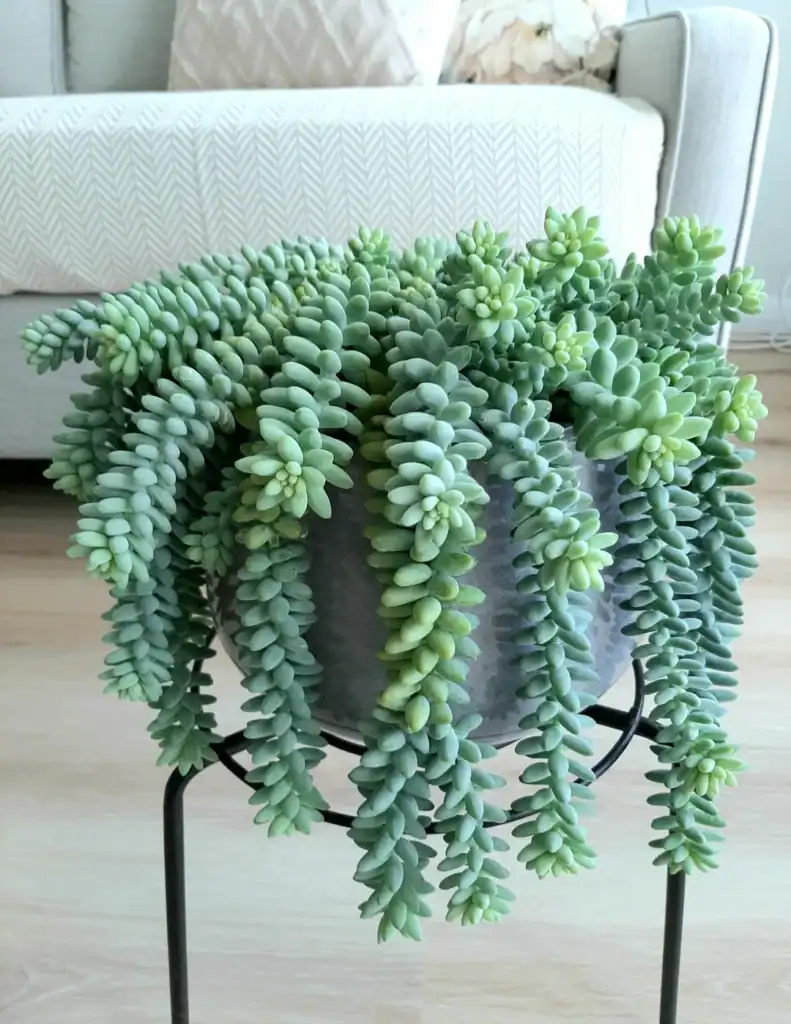
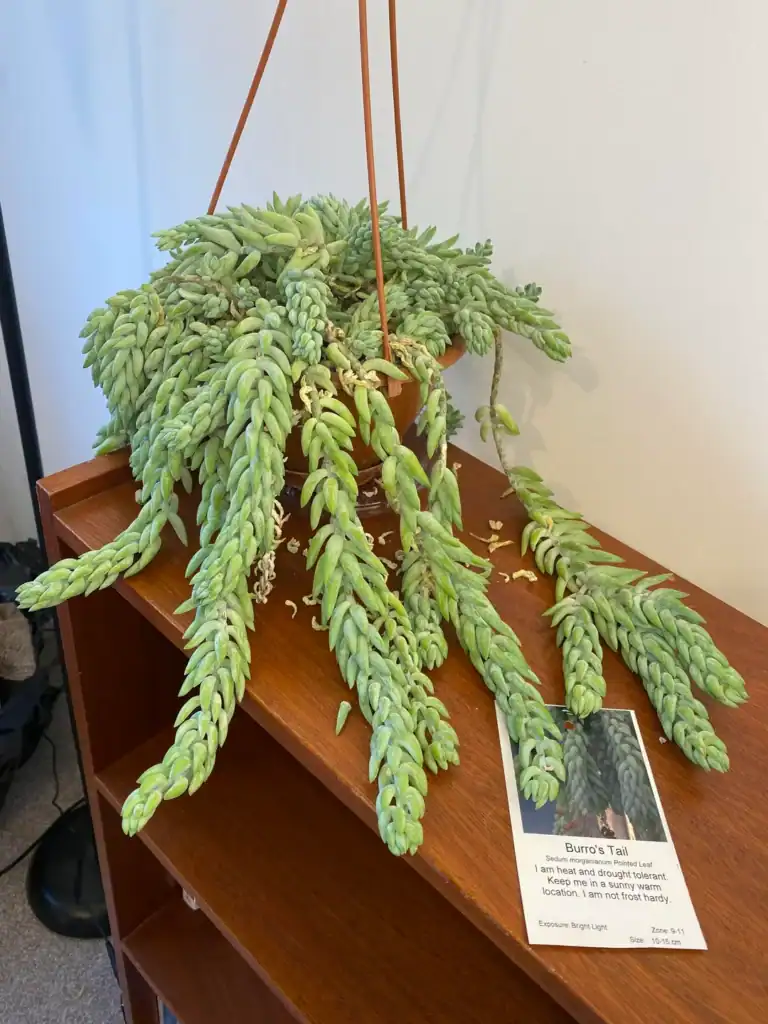
11) Support trailing stems with stakes or hangers to prevent breakage

Burro’s tail stems get heavy as they grow, and honestly, they’re pretty easy to snap if you don’t support them. One stem can hold hundreds of leaves, so the weight adds up.
I like using sturdy hangers or wall hooks to keep the plant up high and let the stems trail naturally. If you keep yours on a shelf, try moving it higher or adding a little support under the longer stems.
Quick Tip: Check your hanger’s weight limit—these succulents are heavier than they look, trust me.
Stems that bend too sharply or rest on hard edges usually break right at the bend. I sometimes use soft fabric strips or foam under the stems if they’re touching anything solid. Saves a lot of heartbreak.
Common Problems & Troubleshooting
Burro’s-tail can run into a few issues, but most are easy to fix once you know what to look for.
Shriveled or wrinkled leaves usually mean your plant needs water. The leaves should feel plump and firm. If they look deflated, give it a good drink and check the soil more often.
Falling leaves happen for a couple reasons. Sometimes it’s just from bumping the plant since the leaves detach easily. Other times, overwatering makes the stem weak and leaves drop off. If leaves fall when you barely touch them, check for rot at the base.
Stretching and pale color means the plant isn’t getting enough light. Burro’s-tail needs bright light to keep its compact shape and blue-green color. Move it closer to a window or add a grow light.
Brown or mushy stems point to root rot from too much water. Cut away the damaged parts with clean scissors. Let the healthy sections dry for a day, then replant in fresh, dry soil.
Quick Tip: I always keep a few healthy leaves nearby in case something goes wrong—they root easily as backup plants.
Pests like mealybugs can hide between the leaves. Look for white fuzzy spots. Spray them off with water or dab them with rubbing alcohol on a cotton swab.
If growth stops completely, your plant might be rootbound. Check if roots are coming out of the drainage holes. Time to move up a pot size.
Frequently Asked Questions
Burro’s Tail owners are always curious about sunlight, watering, and why on earth the leaves drop so easily. Nailing the soil, catching pests early, and picking up a few propagation tricks can seriously change the game for these quirky trailing succulents.
How can I tell if my Burro’s Tail is getting enough sunlight?
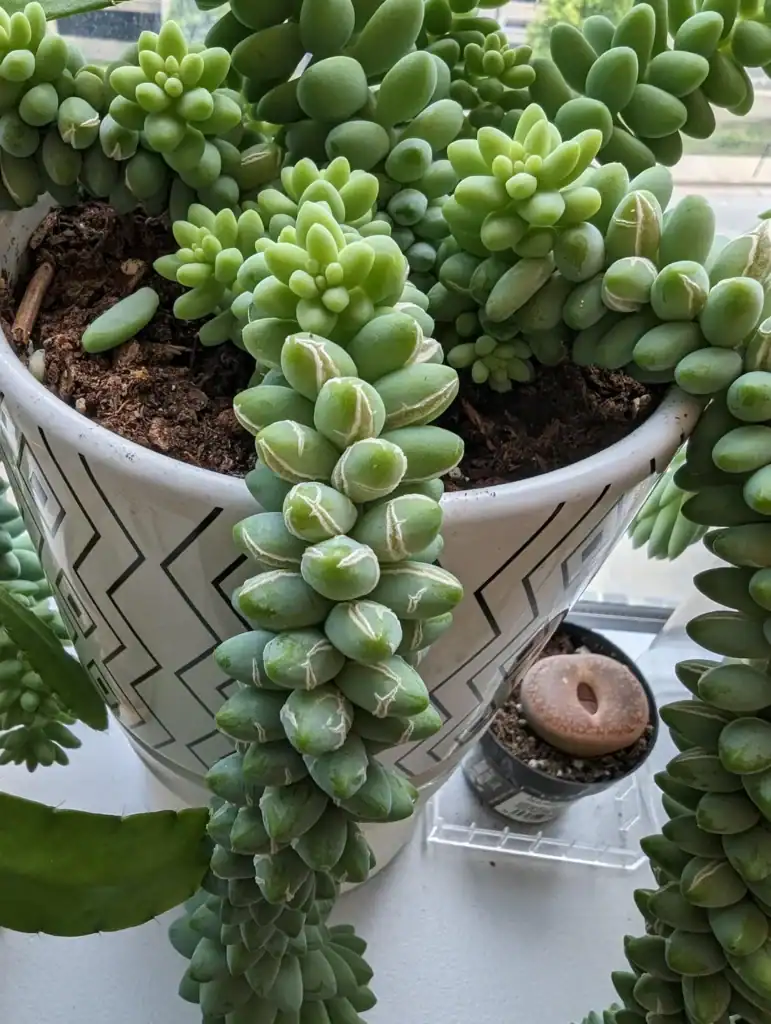
I usually check the spacing between the leaves right away. If my Burro’s Tail is happy, the leaves are plump and packed tightly along the stems.
But if it starts stretching out, leaving big gaps between leaves, that’s my cue it wants more sun. The color is another giveaway—healthy plants are blue-green or gray-green, but too much direct sun can burn the tips brown or pink. That’s when I scoot it back from the window a little.
Quick Tip: A spot with bright, indirect light for 4-6 hours a day keeps things compact.
South or east-facing windows usually do the trick. I just keep an eye out for weird stretching or color shifts, then shuffle the plant around if needed.
What’s the best way to water a Burro’s Tail to avoid overwatering?
Honestly, I always poke my finger into the soil first. About an inch deep—if it feels bone-dry, that’s when I water until it drains out the bottom.
Watering on a strict schedule trips people up. Burro’s Tail stores water in those thick leaves, so sometimes it goes weeks without a drink.
Quick Tip: Water every 2-3 weeks in summer, maybe just once a month in winter when it’s not really growing.
I pour water right onto the soil, not over the leaves. That way, the leaves don’t get damaged or mushy from sitting moisture.
Why are the leaves of my Burro’s Tail falling off, and what can I do to prevent it?
Leaves fall off super easily if I bump or move the plant. They’re just loosely attached, so I try not to handle my Burro’s Tail much at all.
Overwatering makes leaves mushy and yellow before they drop, while underwatered ones shrivel up first. I check both the soil and the leaves to figure out what’s going wrong.
Quick Tip: Give your plant a permanent home and avoid touching or moving it unless you really have to.
New plants from the nursery might drop leaves at first—usually from stress. I let them chill for a few weeks and the leaf drop usually slows down.
Can you provide tips for propagating a Burro’s Tail succulent?
Those fallen leaves? They’re actually perfect for propagation. I let them dry out on a paper towel for a couple days so the ends callus, which helps prevent rot.
Once they’re callused, I just lay them on top of dry cactus soil. After about a week, I start misting the soil every few days. Tiny pink roots and baby plants usually pop up in 2-4 weeks.
Quick Tip: Keep propagating leaves in bright, indirect light, and hold off on watering until you see roots.
Stem cuttings work too—just snip off a 2-3 inch piece, let it callus, then plant it. Honestly, that method tends to grow faster than using individual leaves.
What type of soil is ideal for healthy Burro’s Tail growth?
I always go for a cactus or succulent soil mix that drains fast. Regular potting soil just holds too much water and can rot the roots. The right mix should be gritty, not dense or muddy.
Adding extra perlite or coarse sand helps drainage even more. I usually aim for half soil and half drainage material for best results.
Quick Tip: If water sits on top or takes forever to soak in, your mix is definitely too dense.
And don’t forget the pot! I always use one with drainage holes so extra water can escape—no exceptions.
How do I deal with common pests that affect Burro’s Tail plants?
Mealybugs are honestly the main pest I keep an eye out for. These little white, fuzzy bugs like to hide out between the leaves and suck out the plant’s juices.
I usually spot them early if I remember to check the stems where the leaves attach, especially when I’m watering. Sometimes it feels like they just appear out of nowhere, doesn’t it?
I grab a cotton swab dipped in rubbing alcohol to remove any mealybugs I see. If things get out of hand, I’ll spray the whole plant with some diluted neem oil or insecticidal soap.
The trick is really catching them before they’ve spread everywhere. Otherwise, it can quickly turn into a headache.
Quick Tip: Take a few minutes each month to inspect your plant. If you notice pests, it’s best to move the plant away from your other ones right away.
Spider mites show up too, especially when it’s hot and dry. I’ll notice fine webbing between the leaves and these tiny moving dots—pretty annoying.
A strong spray of water usually knocks them off, and I’ll follow up with neem oil just to be safe. It’s not foolproof, but it helps keep things under control.
Note: Some images in the articles are sourced from Reddit and Other Platforms For Reference Purpose.